Makita 9565PCV - User Manual

Makita 9565PCV Angle Grinder – User Manual, read for free online in PDF format. We hope this helps you resolve any issues you may have. If you have further questions, please contact us through the contact form.


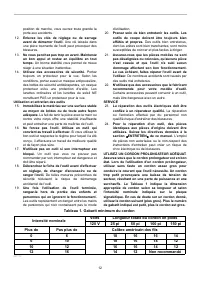
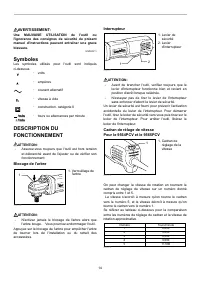
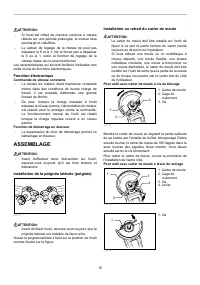
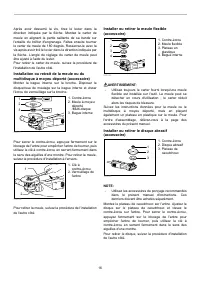
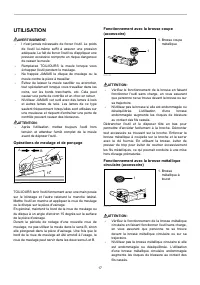
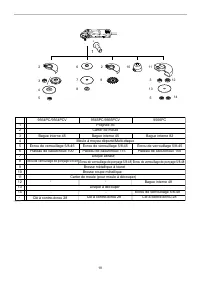


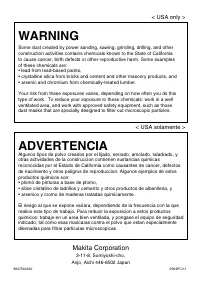
Table of Contents:
- Page 2 – SPECIFICATIONS; GENERAL SAFETY RULES
- Page 3 – SPECIFIC SAFETY RULES
- Page 4 – SAVE THESE INSTRUCTIONS.; Shaft lock
- Page 5 – Electronic function; Constant speed control; Soft start feature; ASSEMBLY; Installing or removing wheel guard; For tool with locking screw type wheel guard
- Page 6 – For tool with clamp lever type wheel guard; Installing or removing flex wheel (accessory)
- Page 7 – OPERATION; Grinding and sanding operation
- Page 8 – MAINTENANCE
- Page 10 – MAKITA LIMITED ONE YEAR WARRANTY
- Page 11 – FRANÇAIS; SPÉCIFICATIONS; Zone de travail
- Page 14 – Symboles; Interrupteur
- Page 15 – Fonction électronique; Commande de vitesse constante; ASSEMBLAGE; Installation de la poignée latérale (poignée); Pour outil avec carter de meule à vis de blocage
- Page 17 – UTILISATION; Opérations de meulage et de ponçage
- Page 20 – GARANTIE LIMITÉE D’UN AN MAKITA
- Page 21 – ESPAÑOL; ESPECIFICACIONES; Área de trabajo
- Page 23 – Sostenga la herramienta con firmeza.
- Page 24 – Símbolos; Bloqueo del eje
- Page 25 – Función electrónica; Control de velocidad constante; ENSAMBLE; Instalación de la empuñadura lateral (mango)
- Page 27 – OPERACIÓN; Operación de amolado y lijado
- Page 28 – MANTENIMIENTO; ACCESORIOS
- Page 32 – Makita Corporation
1
INSTRUCTION MANUAL
MANUEL D'INSTRUCTION
MANUAL DE INSTRUCCIONES
DOUBLE INSULATION
DOUBLE ISOLATION
DOBLE AISLAMIENTO
WARNING:
For your personal safety, READ and UNDERSTAND before using.
SAVE THESE INSTRUCTIONS FOR FUTURE REFERENCE.
AVERTISSEMENT:
Pour votre propre sécurité, prière de lire attentivement avant l'utilisation.
GARDER CES INSTRUCTIONS POUR RÉFÉRENCE ULTÉRIEURE.
ADVERTENCIA:
Para su seguridad personal, LEA DETENIDAMENTE este manual antes de usar la
herramienta.
GUARDE ESTAS INSTRUCCIONES PARA FUTURA REFERENCIA.
Angle Grinder
Meuleuse d'Angle
Esmeriladora de Disco
9564PC
9564PCV
9565PC
9565PCV
9566PC
008369
"Loading the manual" means you need to wait until the file loads and becomes available for online reading. Some manuals are very large, and the time they take to appear depends on your internet speed.
Summary
2 ENGLISH SPECIFICATIONS Model 9564PC 9564PCV 9565PC 9565PCV 9566PC Wheel diameter 115 mm (4-1/2") 115 mm (4-1/2") 125 mm (5") 125 mm (5") 150 mm (6") Spindle thread 5/8" 5/8" 5/8" 5/8" 5/8" No load speed (RPM) 11,500 /min 2,800 - 11,500 /min 11,500 /min 2,800...
3 16. Do not force tool. Use the correct tool for your application. The correct tool will do the job better and safer at the rate for which it is designed. 17. Do not use tool if switch does not turn it on or off. Any tool that cannot be controlled with the switch is dangerous and must be repaired. ...
4 flange (especially the installing surface) or the lock nut. Damage to these parts could result in wheel breakage. 9. NEVER use tool with wood cutting blades or other sawblades. Such blades when used on a grinder frequently kick and cause loss of control leading to personal injury. 10. Hold the too...