Page 2 - TABLE OF CONTENTS
EN EN This manual may contain images or content different from the model you purchased. This manual is subject to revision by the manufacturer. TABLE OF CONTENTS SAFETY INSTRUCTIONS .................................................... 03 INSTALLATION ....................................................
Page 3 - SAFETY INSTRUCTIONS; READ AND SAVE THESE INSTRUCTIONS; IMPORTANT SAFETY INSTRUCTIONS; WARNING; Children in the Household
03 EN EN SAFETY INSTRUCTIONS READ AND SAVE THESE INSTRUCTIONS The following safety guidelines are intended to prevent unforeseen risks or damage from unsafe or incorrect operation of the appliance.The guidelines are separated into ‘WARNING’ and ‘CAUTION’ as described below. This symbol is displayed ...
Page 4 - Installation
04 EN EN Installation • Do not install the appliance on an uneven or inclined surface. • Do not install the appliance in an area exposed to direct sunlight or near heat-generating equipment. • Do not install the product in a place where combustible gas may leak or industrial oil or metallic particul...
Page 5 - Operation
05 EN EN • This appliance has a polarized plug (one blade is wider than the other). To reduce the risk of electric shock, this plug is intended to fit in a polarized outlet only one way. If the plug does not fit fully in the outlet, reverse the plug. If it still does not fit, contact a qualified ele...
Page 7 - Maintenance
07 EN EN • Do not replace the UV Lamp while it is plugged in. - Skin or eye damage may result from directly viewing the light produced by the lamp in this apparatus. Always disconnect power before relamping or servicing. Replace Lamp With Lamp CUD7GF1B, Manufactured by Seoul Viosys Co., LTD.Replace ...
Page 8 - CAUTION
08 EN EN CAUTION To reduce the risk of minor injury to persons, malfunction, or damage to the product or property when using this product, follow basic precautions, including the following: Installation • Do not tilt the appliance to pull or push it when transporting. • Do not install the appliance ...
Page 10 - INSTALLATION; Parts Instruction; Front
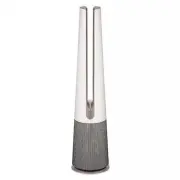
EN EN 10 EN EN INSTALLATION • The appearance or functions of the appliance may differ depending on the model. Parts Instruction Front Rear
Page 12 - Filter System
12 EN EN Filter System Ultra Fine Filter Deodorizing Care filter Minimizes odors from the bathroom, cigarettes, food and other common sources. True HEPA filter Minimizes PM1.0 and cigarette smoke from the air. Filter Handle Use it to remove the filter from the product. Ultra Fine Filter Minimizes la...
Page 13 - NOTE; Accessories
13 EN EN NOTE • A slight odor may be emitted from the new filter at the beginning after purchase. The odor will disappear after a day or so of using the product, so you can use it without worry. • The frequency of cleaning and filter replacement may vary depending on environment and usage time. • Fi...
Page 14 - Unpacking the Appliance; Removing fi lter vinyl
14 EN EN Unpacking the Appliance Remove the fi xing tape, protective vinyl and its fi lter before use. Removing fi lter vinyl 1 Remove the product from the packaging and remove the fi xing tape attached to the product. 2 Grab the cover and gently pull to separate it from the appliances. • The direct...
Page 15 - Removing vane vinyl; Installation Location; Transporting the Appliance
15 EN EN Removing vane vinyl Use the product after removing the vane vinyl. 1 Operating product. 2 Press Mode button and select Diffusion Mode. 3 After vanes come out, grasp the vinyl at the top and remove it slowly in the downward direction. CAUTION • If you do not remove the vane vinyl, be aware t...
Page 16 - OPERATION; Status Display
EN EN 16 EN EN Add-on Display • Up to three icons are displayed • Icons are shown or displayed according to display priority. – Button Lock > Timer > Filter Replacement Notification > UVnano > Wi-Fi Connection • UVnano function is applied only to models applied UVnano. Icon Description D...
Page 17 - Control Panel
17 EN EN EN EN Control Panel Standby On/Off Button Can start or stop operation. Speed Button Allows you to adjust the fan speed of the product. Mode Button Use it to set the operation mode of the product. Auto Fan Button Sets the product’s Fan speed automatically. Rotation Button Sets the rotation o...
Page 18 - Remote Controller
18 EN EN Standby On/Off button Can start or stop operation. Speed button Allows you to adjust the fan speed of the product. Mode button Sets the operation mode. (Wide Mode, Diffusion Mode, Direct Mode) Show Info button Use to set the standby screen. (Air quality, PM10, PM2.5, PM1.0, Temperature, Hum...
Page 21 - Installing the Safe Plate; Getting Started
21 EN EN Installing the Safe Plate 1 Place the product so that the center line of the product aligns with the center line of the plate. 2 Assemble the product completely by pushing it down until a click is heard. • If the product is tilted, reassemble it. • After fi xing the safe plate, tilt the pro...
Page 22 - Using the Mode; Adjusting the Fan Speed; Using Turbo
22 EN EN Using the Mode Sets the operation mode of the air purifier. • Each time the Mode button is pressed during operation, the sequence of Wide Mode – Direct Mode – Diffusion Mode is repeated. NOTE • Wide Mode - In operation mode, you can feel cool and comfortable with clean wind discharged to th...
Page 23 - Using Auto Fan; Using Rotation
23 EN EN NOTE • It rotates at 140° during the initial rotation and starts rotating from the center of the product after position initialization. • When the Rotation button is pressed while the product is rotating, it will set to ‘Stop’. • When the function is changed while using the rotation, the ro...
Page 24 - Using Extra Functions; Setting standby display; Poor
24 EN EN Using Extra Functions Setting standby display Displays air quality, air quality circulation, temperature, humidity and operation information. • Press and hold the Auto Fan button in the control panel. • Press the show Show Info button on the remote controller. • The order of Air Quality – P...
Page 26 - Setting a Sleep Timer; Setting Display Brightness
26 EN EN Setting a Sleep Timer It is set to automatically stop operation after operation for a set period of time. • Press the Sleep Timer button while the appliance is operation. – Each time the sleep timer button is pressed, it repeats in the order of 1~12- Off. • If the sleep schedule is set, the...
Page 27 - Using button lock; Setting the Product sound
27 EN EN Using button lock You can lock the buttons on the control panel to prevent unwanted operation by children or other factors. • Press the Mode button for 3 seconds. • is displayed on the status display. NOTE • The remote controller can be used even when locked. • You can use the LG ThinQ appl...
Page 28 - LG ThinQ Application; LG ThinQ Application Features; Smart Diagnosis; SMART FUNCTIONS
EN EN 28 EN EN LG ThinQ Application The LG ThinQ application allows you to communicate with the appliance using a smartphone. LG ThinQ Application Features Smart Diagnosis If you experience a problem while using the appliance, this smart diagnosis feature will help you diagnose the problem. Settings...
Page 30 - FCC Notice
30 EN EN FCC Notice The following notice covers the transmitter module contained in this product. This equipment has been tested and found to comply with the limits for a Class B digital device, pursuant to Part 15 of the FCC Rules. These limits are designed to provide reasonable protection against ...
Page 32 - MAINTENANCE; Maintaining the Appliance; Alerts on the Status Display
EN EN 32 EN EN MAINTENANCE Maintaining the Appliance Frequency of Cleaning and Filter Replacement Type Cleaning frequency Replacement cycle Filter Ultra Fine Filter If it is contaminated, use a vacuum cleaner or a soft brush to clean it. 1 year NOTE • The operating environment and operation hours ma...
Page 33 - Cleaning the Appliance
33 EN EN EN EN Cleaning the Appliance Cleaning the Exterior of the Product 1 Use a vacuum cleaner to remove dust from the air inlet. 2 Wipe the air outlet and the exterior of the product with a soft cloth. 3 Press the Mode button to select the diffusion mode. When the vane is finished, wipe the fron...
Page 34 - Maintaining the Filter; Cleaning the Filters; Replacing the Filter; Reset filter replacement
34 EN EN Maintaining the Filter Cleaning the Filters 1 Remove the front and rear covers of the product.Grab both sides of the top of the air inlet (cover) from the front of the product and pull gently to separate it. • The direction with the LG logo on the product display is the front of the product...
Page 35 - Storing the Product; Storing the Remote Controller
35 EN EN Storing the Product If the product will not be used for a long period of time, store in a dry, shaded place without moisture. 1 Operate the product for at least 1 hour on a sunny day. • This removes moisture and prevents mold from building up inside the product. 2 Turn off the power and unp...
Page 36 - TROUBLESHOOTING; Before Calling for Service; Symptom
EN EN 36 EN EN TROUBLESHOOTING Before Calling for Service Please check the following before you contact the service center. If the problem persists, contact your local service center. Symptom Cause Remedy It does not operate at all. Is the power cord unplugged from the outlet? • Insert it into the s...
Page 40 - Appliance Specifications
EN EN 40 EN EN The external appearance and dimensions of the product are subject to change without prior notice. Model Name U9C Series Power AC 115V~ 60Hz Exterior dimensions (width x depth x height) 265 mm x 265 mm x 1,120 mm Height Depth Width Appliance Specifications
Page 45 - Memo
Page 47 - MANUAL DEL PROPIETARIO; PURIFICADOR DE AIRE; manual antes de usar.; Por favor mantenga la garantía en un lugar seguro.
Copyright © 2022 - 2023 LG Electronics Inc. Todos los Derechos Reservados www.lg.com MANUAL DEL PROPIETARIO PURIFICADOR DE AIRE Para una utilización segura y fácil del producto, por favor, de leer el manual antes de usar. Por favor mantenga la garantía en un lugar seguro. Este aparato es un aparato ...
Page 48 - ÍNDICE; Uso las funciones extra
ES ES ÍNDICE INSTRUCCIONES DE SEGURIDAD ......................................... 03 INSTALACIÓN ........................................................................... 10 Instrucción de piezas ........................................................ 10 Desempaque del aparato ......................
Page 49 - INSTRUCCIONES DE SEGURIDAD; LEA Y GUARDE ESTAS INSTRUCCIONES; atentamente el texto marcado con este símbolo y siga; INSTRUCCIONES IMPORTANTES DE SEGURIDAD; ADVERTENCIA; descargas eléctricas, lesiones o quemaduras en las personas; Niños en el hogar; que carezcan de experiencia y conocimiento, a menos que una
03 ES ES INSTRUCCIONES DE SEGURIDAD LEA Y GUARDE ESTAS INSTRUCCIONES Las siguientes pautas de seguridad tienen como objetivo prevenir riesgos o daños imprevistos a causa de un funcionamiento imprudente o incorrecto del aparato. Las pautas se dividen en "ADVERTENCIA" y "PRECAUCIÓN" co...
Page 50 - Instalación
04 ES Instalación • No instale el aparato sobre una superficie desnivelada ni inclinada. • No instale el aparato en un área expuesta a la luz solar directa o cerca de equipos que generen calor. • No instale el producto en un lugar donde pudiera haber fugas de gas combustible o donde haya presente ac...
Page 51 - Funcionamiento
05 ES • Este aparato tiene un enchufe polarizado (una clavija es más ancha que la otra). Para reducir el riesgo de descarga eléctrica, este enchufe está diseñado para que quepa en un tomacorriente polarizado de una sola manera. Si el enchufe no cabe por completo en el tomacorriente, invierta el ench...
Page 52 - No coloque productos inflamables en el aparato.
06 ES • No utilice ni guarde fuego, combustibles (éter, benceno, alcohol, drogas, propano, butano, aerosol combustible, insecticida, ambientador, cosméticos, etc.) ni materiales inflamables (velas, lámparas, etc.) cerca del producto. • No coloque el cable de alimentación cerca de alfombras o tapetes...
Page 53 - Mantenimiento; Elimine los elementos del empaquetado (vinilo, poliestireno,
07 ES • Es posible que se produzcan fugas de radiación UVnano dañina si el dispositivo se utiliza de forma no intencionada o si los cables están dañados. La radiación ultravioleta nano, incluso en cantidades muy pequeñas, puede dañar los ojos y la piel. • Tenga cuidado de no dejar que ninguna parte ...
Page 54 - PRECAUCIÓN; No instale el aparato en un vehículo, coche caravana o
08 ES PRECAUCIÓN Para reducir el riesgo de lesiones menores en las personas, mal funcionamiento o daños al producto o a la propiedad cuando se utiliza este producto, siga las precauciones básicas, incluido lo siguiente: Instalación • No incline el aparato para tirar o empujar de él cuando lo transpo...
Page 56 - INSTALACIÓN; Instrucción de piezas; Vista frontal
10 ES ES INSTALACIÓN • El aspecto o funciones del aparato pueden variar dependiendo del modelo. Instrucción de piezas Vista frontal Vista trasera
Page 58 - Sistema de filtro
12 ES Sistema de filtro Filtro ultrafino Filtro de protección desodorizante Minimiza los olores del baño, cigarrillo, alimentos y otras fuentes comunes. Filtro True HEPA Minimiza el PM1.0 y el humo del cigarrillo del aire. Mango del filtro Utilícela para quitar el filtro del producto. Filtro ultrafi...
Page 59 - NOTA; Accesorios
13 ES NOTA • Es posible que al principio se emita un ligero olor por el filtro nuevo luego de la compra. El olor desaparecerá después de un día más o menos de usar el producto, por lo que puede usarlo sin preocupaciones. • La frecuencia de limpieza y reemplazo del filtro puede variar según el entorn...
Page 60 - Desempaque del aparato; Retirar el fi ltro de vinilo
14 ES Desempaque del aparato Retire la cinta de fi jación, el vinilo protector y su fi ltro antes de su uso. Retirar el fi ltro de vinilo 1 Quite el producto del embalaje y retire la cinta de fi jación adhesiva del producto. 2 Agarre la tapa y tire suavemente para separarla de los electrodomésticos....
Page 61 - Retirar el vinilo de la paleta; Requisitos de ubicación de; Requisitos de transporte
15 ES Retirar el vinilo de la paleta Utilice el producto después de quitar el vinilo de la paleta. 1 Producto operativo. 2 Presione el botón Modo y seleccione el modo de difusión. 3 Después de que salgan las paletas, agarre el vinilo por la parte superior y retírelo lentamente hacia abajo. PRECAUCIÓ...
Page 62 - FUNCIONAMIENTO; Pantalla de visualización de estado
16 ES ES Pantalla de add-ons • Se muestran hasta tres iconos • Los iconos se muestran o se muestran según la prioridad de visualización. – Bloqueo de botones > Temporizador > Notificación de reemplazo de filtro > UV nano > Conexión Wi-Fi • La función UVnano se aplica únicamente a los mod...
Page 63 - Panel de Control
17 ES ES ES Panel de Control Botón de Espera encendido / apagado Puede iniciar o detener la operación. Botón de Velocidad Le permite ajustar la intensidad del viento en el producto. Botón de Modo Utilícelo para configurar el modo de operación del producto. Botón de Viento automático Establece automá...
Page 64 - Pulsación prolongada; Mando a distancia
18 ES Botón de Espera encendido / apagado Puede iniciar o detener la operación. Botón de Velocidad Le permite ajustar la intensidad del viento en el producto. Botón de Modo Configura el modo de operación. (Modo ancho(Wide Mode) / Modo difuión(Diffusion Mode) / Modo directo(Direct Mode)) Botón de Mos...
Page 67 - Primeros pasos; Instalación de la placa de
21 ES Primeros pasos Pulse el botón de Espera encendido / apagado para iniciar la operación. NOTA • Al iniciar la operación por primera vez después de instalar el producto, éste funcionará en modo Modo ancho(Wide Mode) y con 5 niveles de velocidad del ventilador. • Si detiene la operación y la reanu...
Page 68 - Uso de Modo; Uso de Turbo
22 ES Uso de Modo Establece el modo de operación del producto. • Cada vez que se pulsa el botón de Modo durante su funcionamiento, se repite la secuencia de limpieza Modo ancho(Wide Mode) / Modo directo(Direct Mode) / Modo difuión(Diffusion Mode) NOTA • Modo ancho(Wide Mode) : En el modo de funciona...
Page 69 - Uso de Viento automático; Uso de Rotación
23 ES NOTA • Gira a 140° durante la rotación inicial y empieza la rotación desde el centro del producto después de la inicialización de la posición. • Cuando se pulsa el botón de Rotación mientras el producto esté en rotación, se ajustará en "Detener". • When the function is changed while us...
Page 70 - Confi guración de pantalla de espera
24 ES Uso las funciones extra Confi guración de pantalla de espera Muestra información sobre la calidad del aire, la circulación de la calidad del aire, la temperature, la humedad y el funcionamiento. • Mantenga pulsado el botón Viento automático en los controle panel. • Pulse el botón de Mostrar in...
Page 72 - Ajuste de brillo de la pantalla
26 ES Configuración de Temporizador de Desconexión Está configurado para detener automáticamente la operación después de la operación durante un período de tiempo establecido. • Presione el botón del Temporizador de Desconexión mientras el aparato está en funcionamiento. – Cada vez que se presiona e...
Page 73 - Uso del botón de bloqueo; Configuraciones de sonido del
27 ES Uso del botón de bloqueo Puede bloquear los botones del panel de control para evitar operaciones no deseadas por niños u otros factores. • Pulse el botón de Modo durante 3 segundos. • se muestra en el pantalla de estado. NOTA • Se puede utilizar el mando a distancia incluso cuando esté bloquea...
Page 74 - Aplicación LG ThinQ; Configuración; FUNCIONES INTELIGENTES
28 ES ES Aplicación LG ThinQ La aplicación LG ThinQ le permite comunicarse con el aparato mediante un teléfono inteligente. Funciones de la aplicación LG ThinQ Smart Diagnosis Si experimenta un problema a utilizar el electrodoméstico, la función de diagnóstico inteligente lo ayudará a diagnosticar e...
Page 75 - Especificaciones módulo LAN
29 ES ES ES NOTA • Para verificar la conexión Wi-Fi, revise que el ícono Wi-Fi f en el panel de control esté encendido. • El aparato admite redes Wi-Fi de 2.4 GHz solamente. Para verificar la frecuencia de red, contáctese con el proveedor de servicio de Internet o consulte el manual del enrutador in...
Page 77 - Uso de LG ThinQ para
31 ES Smart Diagnosis Esta es una función que puede diagnosticar la causa de la falla del producto. NOTA • El servicio puede suspenderse debido a factores externos (como falta de disponibilidad de Wi-Fi, desconexión de Wi-Fi, política de la tienda de aplicaciones, indisponibilidad de aplicaciones, e...
Page 78 - MANTENIMIENTO; Mantenimiento del aparato; Frecuencia de limpieza y; Notificaciones del pantalla de
32 ES ES MANTENIMIENTO Mantenimiento del aparato Frecuencia de limpieza y sustitución del filtro Tipo Frecuencia de limpieza Ciclo de sustitución Filtro Filtro ultrafino Si estuviera contaminado, use una aspiradora o un cepillo suave para limpiarlo. 1 año NOTA • El entorno operativo y los horarios d...
Page 79 - Limpieza del producto
33 ES ES ES Limpieza del producto Limpieza del exterior del producto 1 Utilice una aspiradora para eliminar el polvo de la entrada de aire. 2 Limpie la salida de aire y el exterior del producto con un paño suave. 3 Presione el botón de Modo para seleccionar el modo difuión(Diffusion Mode) del espaci...
Page 80 - Mantenimiento del filtro; Limpieza de los filtros; Sustitución del filtro; Restablecer notificación de
34 ES Mantenimiento del filtro Limpieza de los filtros 1 Retire las tapas delantera y trasera del producto.Agarre ambos lados de la parte superior de la entrada de aire (cubierta) desde la parte frontal del producto y tire suavemente para separarlo. • La dirección con el logotipo de LG en la pantall...
Page 81 - Almacenamiento del producto
35 ES Almacenamiento del producto Si no se utilizará el producto durante un largo período de tiempo, guárdelo en un lugar seco, sombreado y sin humedad. 1 Opere el producto durante al menos 1 hora en un día soleado. • Eso eliminará la humedad y evitará que se forme moho dentro del producto. 2 Apague...
Page 82 - RESOLUCIÓN DE PROBLEMAS; Antes de llamar al servicio; Síntoma
36 ES ES RESOLUCIÓN DE PROBLEMAS Antes de llamar al servicio Compruebe lo siguiente antes de ponerse en contacto con el centro de servicio. Si el problema persiste, comuníquese con su centro de servicio local. Síntoma Causa Solución No funciona en absoluto. ¿El enchufe está desconectado de la toma? ...
Page 86 - Especificaciones del aparato
ES ES 40 ES El aspecto externo y las dimensiones del producto pueden cambiar sin previo aviso. Nombre del modelo U9C Series Suministro eléctrico AC 115V~ 60Hz Dimensiones externas (anchura x profundidad x altura) 265 mm x 265 mm x 1,120 mm Altura Profundidad Anchura Especificaciones del aparato
Page 91 - Memorándum