Page 2 - TABLE OF CONTENTS
TABLE OF CONTENTS This manual may contain images or content different from the model you purchased. This manual is subject to revision by the manufacturer. SAFETY INSTRUCTIONS .............................................................. 3 IMPORTANT SAFETY INSTRUCTIONS ................................
Page 3 - SAFETY INSTRUCTIONS; IMPORTANT SAFETY INSTRUCTIONS
3 EN SAFETY INSTRUCTIONS READ AND SAVE THESE INSTRUCTIONS The following safety guidelines are intended to prevent unforeseen risks or damage from unsafe or incorrect operation of the appliance.The guidelines are separated into ‘WARNING’ and ‘CAUTION’ as described below. This symbol is displayed to i...
Page 4 - Installation
4 EN Installation • Do not install the appliance on an uneven or inclined surface. • Do not install the appliance in an area exposed to direct sunlight or near heat-generating equipment. • Do not install the product in a place where combustible gas may leak or industrial oil or metallic particulates...
Page 5 - Operation
5 EN Operation • If the appliance is immersed in water, stop using it and contact an LG Electronics Customer Information Center. • If there is a gas leakage (isobutane, propane, LNG, etc.), do not touch the product or power plug and ventilate the area immediately. • Do not clean the appliance with b...
Page 7 - Maintenance
7 EN • Do not place obstacles around the air inlet or outlet. • For safe use of the appliance, children or others with reduced mental capabilities need to be closely monitored by a person who is responsible for their safety. • Do not use the product for special purposes such as preserving plants, pr...
Page 8 - INSTALLATION; Parts and Specifications; Front View
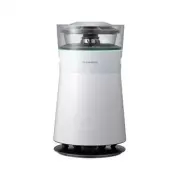
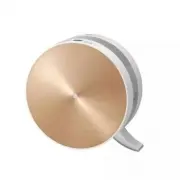
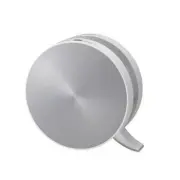
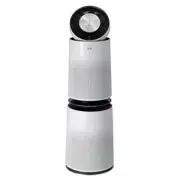
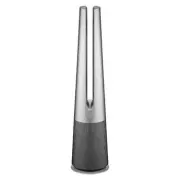
8 EN INSTALLATION • The appearance or components of the appliance may differ depending on the model. Parts and Specifications Front View a Air outlet • Discharges purified air through the filter. b Air quality light • Uses colored light to indicate the overall air quality. c Air inlet • The front an...
Page 9 - Rear View; Specifications
9 EN Rear View a Smart Diagnosis speaker • In the event of a malfunction or failure, you can use the Smart Diagnosis option to check the appliance condition. b PM1.0 (particles with a diameter between 1.0 and 2.5 micrometers) sensor • Detects the concentration of particulates in the air. c Odor (Gas...
Page 10 - Filter System; Unpacking the Appliance; Removing the Filter Packaging
10 EN Filter System a Deodorizing Care filter • Minimizes odors from the bathroom, cigarettes, food and other common sources. b True HEPA filter • Minimizes PM1.0 and cigarette smoke from the air c Ultra-fine filter • Minimizes large particles floating in the air. d Filter handle • Helps when removi...
Page 11 - NOTE; Installation Location; Transportation Requirements; Transporting the Appliance
11 EN 4 Install the filter in the appliance. • Make sure that the handle ( a ) is at the top of the filter. 5 Insert the tabs at the bottom of the cover into the slots in the base of the appliance and close the cover. NOTE • Remove the support and packaging prior to use to prevent product malfunctio...
Page 12 - Control Panel; Control Panel Features; OPERATION
12 EN • The appearance or components of the appliance may differ depending on the model. Control Panel Control Panel Features a Power Button b Speed Button Adjusts the fan speed. • Press and hold the button for 3 seconds to activate the Wi-Fi connection mode. • Wi-Fi function − Before appliance conn...
Page 13 - Status Display Panel
13 EN Status Display Panel a Air Quality Display A Overall air quality (color) B Particulate matter (color) C Concentration of particulates or sleep timer time D Concentration of odor (color) b Fan Speed Display c Icons Icon Description Lights up when it is time to replace the filter. Lights up when...
Page 14 - Getting Started; Turn the Appliance On/Off; Adjusting the Fan Speed; Air Purifier Fan Speed; Displaying Fan Speed
14 EN Getting Started Turn the Appliance On/Off Press the Power button to start the operation. NOTE • If you experience a power outage, when power is restored the appliance starts in the last operating mode set. • After startup, the sensor ready display ( = ) appears for 30 seconds. Adjusting the Fa...
Page 15 - Setting the Sleep Timer; Locking the Control Panel
15 EN Using Extra Functions Setting the Sleep Timer Use this function to set an automatic stop time for the appliance.To use the function, press the Sleep Timer button while the appliance is operating. • Each time you press the button, the time until the appliance automatically shuts off changes in ...
Page 16 - Checking Air Quality; Overview of the Air Quality
16 EN Checking Air Quality The overall air quality is indicated by the color of the air quality light and in the status display panel. Overview of the Air Quality The overall air quality is calculated based on the concentrations of odors and particulates in the air and is categorized into 4 levels d...
Page 17 - Turning Air Quality Light On/Off
17 EN Air Quality Details on the Status Display Panel a Overall Air Quality The overall air quality is indicated by the color of the icon at the top of the status display panel. b Odor Concentration The odor concentration is indicated by the color of the Odor icon on the status display panel. c PM C...
Page 18 - Checking Particulate Levels
18 EN Checking Particulate Levels To check the particulate matter concentration by particulate size, press the Indicator button while the appliance is operating. • Press the button repeatedly to see the PM levels displayed in the following order:PM10 ~ PM2.5 ~ PM1.0 • The concentration for the selec...
Page 19 - SMART FUNCTIONS; LG ThinQ Application; LG ThinQ Application Features; Smart Diagnosis; Before using LG ThinQ
19 EN SMART FUNCTIONS LG ThinQ Application The LG ThinQ application allows you to communicate with the appliance using a smartphone. LG ThinQ Application Features Smart Diagnosis If you experience a problem while using the appliance, this smart diagnosis feature will help you diagnose the problem. S...
Page 20 - FCC Notice
20 EN • The wireless network name (SSID) should be a combination of English letters and numbers. (Do not use special characters.) • Smartphone user interface (UI) may vary depending on the mobile operating system (OS) and the manufacturer. • If the security protocol of the router is set to WEP, the ...
Page 21 - Using LG ThinQ to Diagnose Issues
21 EN FCC RF Radiation Exposure Statement This equipment complies with FCC radiation exposure limits set forth for an uncontrolled environment. This transmitter must not be co- located or operating in conjunction with any other antenna or transmitter.This equipment should be installed and operated w...
Page 23 - Maintaining the Appliance; Scheduled Maintenance; Alerts on the Status Display; WARNING; MAINTENANCE
23 EN Maintaining the Appliance Scheduled Maintenance Component Cleaning Frequency Replacement Frequency Filter Only ultra fine filter Clean filter as needed The whole filter 1 year PM1.0 sensor Every 2 months - NOTE • The operating environment and operation hours may affect the cleaning frequency. ...
Page 24 - Storage; CAUTION; Cleaning the Appliance; Cleaning the Exterior; Cleaning the Particulate Sensor
24 EN Storage If the appliance is not used for a long period of time, store it in a dry location out of direct sunlight. 1 Operate the product for one hour or more on a fine day. • This removes moisture and prevents molds from building up inside the product. 2 Turn off the power and unplug it from t...
Page 25 - Maintaining the Filter; Cleaning the Filter; Disabling the Filter Replacement Alert
25 EN Maintaining the Filter Cleaning the Filter 1 Separate the cover from the appliance. 2 Remove dust from the ultra-fine filter with a vacuum cleaner or soft brush. Replacing the Filter 1 Place a newspaper or cloth on the floor by the appliance. Remove the cover from the appliance and slide the o...
Page 26 - TROUBLESHOOTING; Before Calling for Service
26 EN TROUBLESHOOTING Before Calling for Service Please check the following before you contact the service center. If the problem persists, contact your local service center. Operation Symptoms Possible Causes & Solution The appliance does not operate. The power plug is unplugged from the outlet...
Page 28 - Odor
28 EN Odor Symptoms Possible Causes & Solution A strange odor comes out from the air outlet as well as the filter. Appliance is new. • The odor of activated charcoal is not harmful. This is similar to the odor you may experience in a brand new car. The odor should dissipate after 1-2 weeks of us...
Page 32 - Memo
Page 33 - MANUAL DEL PROPIETARIO; PURIFICADOR DE AIRE; mano para referencia en todo momento.
www.lg.com MANUAL DEL PROPIETARIO Copyright © 2021 LG Electronics Inc. Todos los Derechos Reservados PURIFICADOR DE AIRE Lea este manual del propietario en detalle antes de operar el aparato y manténgalo a mano para referencia en todo momento. AS330DWQ0 SP ESPAÑOL
Page 34 - TABLA DE CONTENIDOS
TABLA DE CONTENIDOS Este manual puede contener imágenes o contenido diferente al modelo que compró. Este manual está sujeto a revisión por parte del fabricante. INSTRUCCIONES DE SEGURIDAD .............................................. 3 INSTRUCCIONES IMPORTANTES DE SEGURIDAD ...........................
Page 35 - INSTRUCCIONES DE SEGURIDAD; INSTRUCCIONES IMPORTANTES DE SEGURIDAD
3 SP INSTRUCCIONES DE SEGURIDAD LEA Y GUARDE ESTAS INSTRUCCIONES Las siguientes pautas de seguridad tienen como objetivo prevenir riesgos o daños imprevistos a causa de un funcionamiento imprudente o incorrecto del aparato. Las pautas se dividen en "ADVERTENCIA" y "PRECAUCIÓN" como s...
Page 36 - Instalación
4 SP Instalación • No instale el aparato sobre una superficie desnivelada ni inclinada. • No instale el aparato en un área expuesta a la luz solar directa o cerca de equipos que generen calor. • No instale el producto en un lugar donde pudiera haber fugas de gas combustible o donde haya presente ace...
Page 37 - Funcionamiento
5 SP Funcionamiento • Si el aparato se sumerge en agua, deje de utilizarlo y comuníquese con el centro de información al cliente de LG Electronics. • Si hay una fuga de gas (isobutano, propano, GNL, etc.), no toque el producto ni el cable de alimentación y ventile el área de inmediato. • No limpie e...
Page 39 - Mantenimiento
7 SP • Para el uso seguro del aparato, una persona responsable de su seguridad debe controlar de cerca a los niños o a otras personas con capacidades mentales reducidas. • No utilice el producto para fines especiales como preservar plantas, instrumentos de precisión, obras de arte, etc. • No enciend...
Page 40 - INSTALACIÓN; Piezas y especificaciones; Vista frontal
8 SP INSTALACIÓN • El aspecto o los componentes del aparato pueden variar según el modelo. Piezas y especificaciones Vista frontal a Salida de aire • Descarga el aire purificado a través del filtro. b Luz de calidad del aire • Utiliza luz de color para indicar la calidad general del aire. c Entrada ...
Page 41 - Vista trasera; Especificaciones
9 SP Vista trasera a Parlante de Smart Diagnosis • En caso de mal funcionamiento o falla, puede utilizar la opción Smart Diagnosis para que lo ayude a resolver el problema del aparato. b Sensor de PM1.0 (partículas con un diámetro entre 1.0 y 2.5 micrómetros) • Detecta la concentración de partículas...
Page 42 - Sistema de filtro; Desempaque del aparato; Retiro del embalaje del filtro
10 SP Sistema de filtro a Filtro de protección desodorizante • Minimiza los olores del baño, cigarrillo, alimentos y otras fuentes comunes. b Filtro True HEPA • Minimiza el PM1.0 y el humo del cigarrillo del aire. c Filtro ultrafino • Minimiza las partículas grandes que flotan en el aire. d Mango de...
Page 43 - NOTA; Requisitos de ubicación de; Ubicación de la instalación; Requisitos de transporte; Transporte del aparato
11 SP 4 Instale el filtro en el aparato • Asegúrese de que el espacio de inserción del mango antes del paréntesis. ( a ) esté en la parte superior del filtro. 5 Inserte las lengüetas en la parte inferior de la cubierta en las ranuras de la base del aparato y cierre la cubierta. NOTA • Retire el sopo...
Page 44 - Panel de Control; Funciones del panel de control; FUNCIONAMIENTO
12 SP • El aspecto o los componentes del aparato pueden variar según el modelo. Panel de Control Funciones del panel de control a Botón de Encendido b Botón de Speed(Velocidad) Ajusta la velocidad del ventilador. • Mantenga presionado el botón durante 3 segundos para activar el modo de conexión Wi-F...
Page 45 - Panel de la pantalla de estado
13 SP Panel de la pantalla de estado a Pantalla de calidad del aire A Calidad general del aire (color) B Material particulado (color) C Concentración de partículas u hora del temporizador de desconexión D Concentración de olores (color) b Muestra la velocidad c Iconos Icono Descripción Se enciende c...
Page 46 - Primeros pasos; Encendido/apagado del aparato; Ajuste de las velocidades; Velocidad del ventilador del; Pantalla de la velocidad del ventilador
14 SP Primeros pasos Encendido/apagado del aparato Presione el botón de Encendido para encender/ apagar el aparato. NOTA • Si experimenta un corte de suministro eléctrico, cuando se restablezca la energía el aparato se encenderá en la última configuración de modo establecida. • Después del arranque,...
Page 47 - Uso las funciones extra; Configuración del temporizador; Bloqueo del panel de control
15 SP Uso las funciones extra Configuración del temporizador de desconexión Utilice esta función para configurar una hora automática de detención para el aparato.Para utilizar la función, presione el botón Sleep Timer(Temporizador de desconexión) mientras el aparato está en funcionamiento. • Cada ve...
Page 48 - Comprobación de la calidad del aire; Generalidades de la calidad del aire
16 SP Comprobación de la calidad del aire La calidad general del aire se indica con el color de la luz de la calidad del aire y el panel de la pantalla de estado. Generalidades de la calidad del aire La calidad general del aire se calcula según las concentraciones de olores y las partículas en el ai...
Page 49 - Detalles de la calidad del aire en; Encendido/apagado de la luz de
17 SP Detalles de la calidad del aire en el panel de la pantalla de estado a Calidad del aire general La calidad general del aire se indica con el color del icono en la parte superior del panel de la pantalla de estado. b Concentración de olor La concentración de olor se indica con el color del icon...
Page 50 - Comprobación de los niveles de
18 SP Comprobación de los niveles de material particulado Para comprobar la concentración de material particulado según el tamaño de las partículas, presione el botón Indicator(Indicador) mientras el aparato está en funcionamiento. • Presione el botón varias veces para ver los niveles de MP que se m...
Page 51 - FUNCIONES INTELIGENTES; Aplicación LG ThinQ; Funciones de la aplicación LG; Antes de usar la aplicación LG
19 SP FUNCIONES INTELIGENTES Aplicación LG ThinQ La aplicación LG ThinQ le permite comunicarse con el aparato mediante un teléfono inteligente. Funciones de la aplicación LG ThinQ Smart Diagnosis Si experimenta un problema a utilizar el electrodoméstico, la función de diagnóstico inteligente lo ayud...
Page 52 - Instalación de la aplicación LG; Aviso de la FCC
20 SP • Si el aparato no puede conectarse debido a problemas con la transmisión de la señal inalámbrica, desenchúfelo y espere alrededor de un minuto previo a intentarlo de nuevo. • Si el cortafuegos de su enrutador inalámbrico está activado, desactívelo o añada una excepción a este. • El nombre de ...
Page 54 - Uso del diagnóstico audible para
22 SP Uso del diagnóstico audible para diagnosticar problemas Siga las instrucciones a continuación para utilizar el método de diagnóstico audible. • Inicie la aplicación LG ThinQ y seleccione la función Smart Diagnosis en el menú. Siga las instrucciones para el diagnóstico audible provistas en la a...
Page 55 - Mantenimiento del aparato; Mantenimiento programado; Alertas en el panel de la pantalla; ADVERTENCIA; MANTENIMIENTO
23 SP Mantenimiento del aparato Mantenimiento programado Componente Frecuencia de limpieza Frecuencia de reemplazo Filtro Solo filtro ultrafino Limpie el filtro según sea necesario Todo el filtro 1 año Sensor de PM1.0 Cada 2 meses - NOTA • El entorno operativo y los horarios de funcionamiento podría...
Page 56 - Almacenamiento; PRECAUCIÓN; Limpieza del aparato; Limpieza del exterior; Limpieza del sensor de material
24 SP Almacenamiento Si el aparato no se utiliza durante un largo período, almacénelo en un lugar seco y alejado de la luz solar. 1 Haga funcionar el producto durante una hora o más un día que presente buen clima. • Esto le quita la humedad y evita que se formen hongos dentro del producto. 2 Apague ...
Page 57 - Mantenimiento del filtro; Limpieza del filtro; Cómo desactivar el aviso de alerta de
25 SP Mantenimiento del filtro Limpieza del filtro 1 Separe la cubierta del aparato. 2 Quite la suciedad del filtro ultrafino con una aspiradora o cepillo suave. Reemplazo del filtro 1 Coloque un periódico o paño en el piso junto al aparato. Extraiga la cubierta del aparato y deslice el filtro usado...
Page 58 - RESOLUCIÓN DE PROBLEMAS; Antes de llamar al servicio
26 SP RESOLUCIÓN DE PROBLEMAS Antes de llamar al servicio Compruebe lo siguiente antes de comunicarse con el centro de servicio. Si el problema persiste, comuníquese con su centro de servicio local. Funcionamiento Síntomas Causas posibles y solución El aparato no funciona. El cable de alimentación e...
Page 60 - Olor
28 SP Olor Síntomas Causas posibles y solución Un olor extraño emana de la salida de aire, así como del filtro. El aparato es nuevo. • El olor del carbón activado no es perjudicial. Es similar al olor que podría experimentar en un auto nuevo. El olor debe disiparse después de 1 a 2 semanas de uso. E...
Page 64 - Memorándum