Page 2 - TABLE OF CONTENTS
TABLE OF CONTENTS This manual may contain images or content different from the model you purchased.This manual is subject to revision by the manufacturer. SAFETY INSTRUCTIONS .........................................................3 IMPORTANT SAFETY INSTRUCTIONS .......................................
Page 3 - SAFETY INSTRUCTIONS; The following safety guidelines are intended to prevent; Children in the Household; This appliance is not intended for use by persons (including
3 SAFETY INSTRUCTIONS EN The following safety guidelines are intended to prevent unforeseen risks or damage from unsafe or incorrect operation of the appliance. The guidelines are separated into ‘WARNING’ and ‘CAUTION’ as described below. This symbol is displayed to indicate matters and operations t...
Page 5 - Operation
5 EN • This appliance must not be installed behind a lockable door, a sliding door or a door with a hinge on the opposite side to that of the appliance, in such a way that a full opening of the appliance door is restricted. • This appliance must be grounded (earthed via the power cord). In the event...
Page 7 - Maintenance
7 EN • If the drain hose or inlet hose is frozen during winter, use it only after thawing. • Keep all washing detergents, softener and bleach away from children. • Do not touch the power plug or the appliance controls with wet hands. • Do not bend the power cable excessively or place a heavy object ...
Page 8 - Technical Safety for Using the Dryer
8 EN Technical Safety for Using the Dryer • Do not dry unwashed items in the appliance. • Fabric softeners, or similar products, should be used as specified by the fabric softener instructions. • Remove all objects from pockets such as lighters and matches. • Never stop the appliance before the end ...
Page 9 - Disposal
9 EN • The appliance must not be supplied through an external switching device, such as a timer, or connected to a circuit that is regularly switched on and off by a utility. • Remove clothes from the product immediately when drying is complete or the power is turned off during the drying process. L...
Page 10 - INSTALLATION; Specifications; Accessories
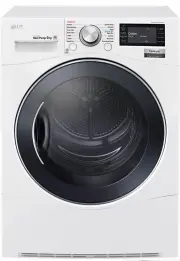
10 INSTALLATION EN Specifications 1 2 3 5 1 2 5 4 Water container Control panel Glass door Opaque door Air ventilation grill 1 2 3 4 5 Model TD-H901MW Power supply 220 - 240 V, 50 Hz Size 600 mm (W) X 690 mm (D) X 850 mm(H) Product weight 54 - 57 kg Allowable temperature 5 - 35 °C Max. capacity 9 kg...
Page 11 - Location; NOTE; Positioning; Ventilation Requirement
11 EN Installation Place Requirements Location Level floor : Allowable slope under the entire appliance is 1°. Power outlet : Must be within 1.5 meters of either side of the location of the appliance. • Do not overload the outlet with more than one appliance. • Do not place or store laundry products...
Page 12 - WARNING; Electrical Connection; Stacking Installation; Stacking Kit
12 EN WARNING • Avoid installing the appliance around a heat source.The rear side of the appliance must be well ventilated. Failure to follow these instructions may result in problems. • The appliance should not be installed next to a refrigeration appliance. • The appliance is not designed for mari...
Page 13 - Installation Procedure
13 EN Installation Procedure 1 Place the LG dryer on the LG washing machine. 2 Remove the two screws from the bottom of the rear cover on each side as illustrated below. 3 Align the stacking kit holes and the rear cover holes. • 3-1) 600 mm • 3-2) 550 mm 4 Fasten the two screws that were removed ear...
Page 14 - Condensed Water Drain-out; CAUTION; Leveling the appliance
14 EN Condensed Water Drain-out Normally, condensed water is pumped up to the water container where water is collected until manually emptied. Water can also be drained out directly to a mains drain, especially when the dryer is stacked on top of a washing machine. With a connecting kit for the main...
Page 15 - OPERATION; Using the Appliance
15 EN Condensed Water Drain-out Normally, condensed water is pumped up to the water container where water is collected until manually emptied. Water can also be drained out directly to a mains drain, especially when the dryer is stacked on top of a washing machine. With a connecting kit for the main...
Page 16 - Sorting Laundry
16 EN CAUTION • Be careful! The drum inside may still be hot. • The appliance must not be used for purposes other than those for which it was designed. NOTE • The final part of a tumble dryer cycle occurs without heat (cool down cycle) to ensure that laundry is left at a temperature that ensures the...
Page 17 - Control Panel
17 EN Control Panel Time Left 00 hr 10 min Dry Power Button • Press the Power button to turn power on and off. • Press the Power button to cancel the Delay End function. Programme Selector • Programmes are available according to the laundry type. • The lamp will light up to indicate the selected pro...
Page 18 - Programme Table; Drying Programme
18 EN Programme Table Drying Programme Sensor Dry Programmes Programme Laundry Type Detail Drying Level Max. Load Capacity Cotton Towels, dressing gowns and bed linen For thick and quilted fabrics Extra 9 kg Bath towels, tea towels, underwear and cotton socks For fabrics that do not need to be irone...
Page 20 - Extra Options
20 EN Extra Options = Default Programme Dry Mode Option Programme Dry Level Off Normal Turbo Hand Iron Damp Dry Beep Cotton Extra ● ● ● Cupboard ● ● ● Iron ● ● ● Mixed Fabric Extra ● ● ● Cupboard ● ● ● Iron ● ● ● Easy Care Cupboard ● ● ● Iron ● ● ● Bulky Item ● Jeans ● Towel ● Quick Dry ● Sports Wea...
Page 21 - Appliance Settings
21 EN Appliance Settings Setting Wi-Fi, Beeper, and Brightness settings can be changed. Wi-Fi Setting OK ON Beeper OFF Brightness 100% Wi-Fi ( ) Refer to 'SMART FUNCTIONS' for detailed information. Beeper ( ) Once the Beeper function is set, the setting is memorized even after the power is turned of...
Page 22 - Option Programme; Favourite
22 EN Option Programme Favourite The Favourite option allows you to store a customized dry programme for future use. 1 Turn the appliance on. 2 Select a programme. 3 Select the option or additional programme.(Anti Crease, Dry Mode etc.) 4 Press and hold the Favourite option button for three seconds....
Page 23 - Child Lock; Locking the Control Panel; Dry Mode
23 EN Child Lock Use this option to disable the controls. This feature can prevent children from changing cycles or operating the appliance. Locking the Control Panel 1 Press and hold the Child Lock button for three seconds. 2 A beeper will sound, and a message will appear on the display.When the Ch...
Page 24 - Hand Iron
24 EN Option Hand Iron This function keeps the garments more moist than the standard Iron dry level. 1 Turn the appliance on. 2 Select a programme. 3 Press the Dry Level button until Iron is selected. 4 Press the Option button and select Hand Iron . 5 Press the Start/Pause button. Damp Dry Beep With...
Page 26 - SMART FUNCTIONS; Using LG SmartThinQ; Things to check before using LG
26 SMART FUNCTIONS EN Using LG SmartThinQ Application Things to check before using LG SmartThinQ • For appliances with the or logo 1 Check the distance between the appliance and the wireless router (Wi-Fi network). • If the distance between the appliance and the wireless router is too far, the signa...
Page 27 - Installing LG SmartThinQ; Using Dryer Cycle
27 EN Installing LG SmartThinQ Search for the LG SmartThinQ application from the Google Play Store or Apple App Store on a smart phone. Follow instructions to download and install the application. NOTE • If you choose the simple login to access the LG SmartThinQ application, you must go through the ...
Page 28 - Download Cycle; Smart DiagnosisTM Using a Smart
28 EN To Disable Remote Start: When the Remote Start is activated, press and hold the Remote Start button for 3 seconds. Download Cycle Download new and special cycles that are not included in the basic cycles on the appliance.Appliances that have been successfully registered can download a variety ...
Page 29 - Using Smart DiagnosisTM; Smart DiagnosisTM Through the
29 EN Using Smart Diagnosis™ Smart Diagnosis™ Through the Customer Information Centre Use this function if you need an accurate diagnosis by an LG Electronics customer information centre when the appliance malfunctions or fails. Use this function only to contact the service representative, not durin...
Page 30 - MAINTENANCE; Cleaning the Lint Filter
30 MAINTENANCE EN WARNING • Remove the power plug when you clean the appliance. Not removing the plug may result in electric shock. Cleaning the Lint Filter Clean the lint filter before each drying cycle.Cleaning the lint filter will reduce drying time and energy consumption. 1 Open the door. 2 Remo...
Page 31 - Wiping the Moisture Sensor
31 EN Emptying the Water Container Condensed water is collected in the water container.Empty the water container after every use. Not doing so will affect the drying performance.If the water container is full, an error massage appears and a chime will sound while the appliance is in operation. If th...
Page 32 - TROUBLESHOOTING; Diagnosing Problems
32 TROUBLESHOOTING EN The appliance is equipped with an automatic error-monitoring system to detect and diagnose problems at an early stage. If the appliance does not function properly or does not function at all, check the following before you call for service: Diagnosing Problems Symptoms Reason S...
Page 36 - Error Codes; OE
36 EN Error Codes Symptoms Reason Solution The door has been opened while the appliance is in operation or the appliance is being operated without the door being closed properly. • Close the door completely. • If the icon is not released, call for service. dE4 Door switch detection is not working pr...
Page 37 - Memo