LG TD-C80NPW - Manuals
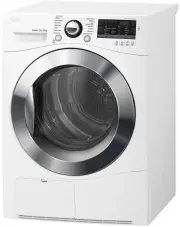
User Manual LG TD-C80NPW


Summary
TABLE OF CONTENTS This manual may contain images or content different from the model you purchased. This manual is subject to revision by the manufacturer. SAFETY INSTRUCTIONS .......................................................03 IMPORTANT SAFETY INSTRUCTIONS .......................................
03 SAFETY INSTRUCTIONS The following safety guidelines are intended to prevent unforeseen risks or damage from unsafe or incorrect operation of the appliance. The guidelines are separated into ‘WARNING’ and ‘CAUTION’ as described below. This symbol is displayed to the indicate matters and operations...
04 Installation • Make sure the appliance is properly installed, grounded, and adjusted by qualified service personnel according to the installation instructions. • Never attempt to operate this appliance if it is damaged, malfunctioning, partially disassembled, or has missing or broken parts, inclu...
LG Dryers Manuals
-
 LG DC90V9V9W
Manual
LG DC90V9V9W
Manual
-
 LG DVH45-08W
User Manual
LG DVH45-08W
User Manual
-
 LG DVH5-08W
User Manual
LG DVH5-08W
User Manual
-
 LG DVH9-09B
User Manual
LG DVH9-09B
User Manual
-
 LG DVH9-09W
User Manual
LG DVH9-09W
User Manual
-
 LG TD-C8031E
User Manual
LG TD-C8031E
User Manual
-
 LG TD-C90NPE
User Manual
LG TD-C90NPE
User Manual
-
 LG TD-H802SJW
User Manual
LG TD-H802SJW
User Manual
-
 LG TD-H803CSW
User Manual
LG TD-H803CSW
User Manual
-
 LG DLE0442W
User Manual
LG DLE0442W
User Manual
-
LG DLE0442W
Manual
-
 LG DLE1001W
User Manual
LG DLE1001W
User Manual
-
LG DLE1001W
Manual
-
 LG DLE1101W
User Manual
LG DLE1101W
User Manual
-
LG DLE1101W
Manual
-
 LG DLE1310W
User Manual
LG DLE1310W
User Manual
-
 LG DLE1501W
User Manual
LG DLE1501W
User Manual
-
 LG DLE2050W
User Manual
LG DLE2050W
User Manual
-
 LG DLE2101W
User Manual
LG DLE2101W
User Manual
-
LG DLE2101W
Manual