Page 2 - eatures; Ultra big Capacity Drum; Lower Energy Consumption; ontents
2 F eatures Ultra big Capacity Drum The Ultra big 8.0kg capacity drum on this LG Dryer allows you todry your washing in larger loads than ever before Energy save Lower Energy Consumption LG dryers use less energy than conventional dryers due to thecutting-edge technology we have applied to the dryin...
Page 3 - Safety Instructions; afety Instructions; WARNING
Safety Instructions 3 S afety Instructions To help reduce any risk of electric shock, fire, or other personal or property injury when using your dryer, please follow basic safety instructions. WARNING Serious injury or death may occur when not observing the following rules. Not allowed actions. • Be...
Page 6 - Installation Instructions; Safety Information; Risk of Injury; Stacking Installation Instructions; nstallation Instructions
Installation Instructions Safety Information Risk of Injury The dryer is very heavy so you shouldn’t try to lift it alone. Do not lift the dryer by grasping any of the protruding parts e.g. the jog dial or the door. they may break off. Risk of Tripping Risk of tripping caused by hoses hanging down o...
Page 7 - Shape; Stacking Kit
Installation Instructions 7 I nstallation Instructions Shape and assembly direction 21.7 inch (550mm) Washer Top plate size 23.6 inch (600mm) Stacking Kit In order to stack this dryer an LG stacking kit isrequired. This dryer may only be stacked on top of an LG wash-er. DO NOT attempt to stack this ...
Page 8 - Earthing Instructions; CAUTION; Note
Installation Instructions 8 I nstallation Instructions Earthing Instructions This appliance must be earthed. in the event ofmalfunction or breakdown, earthing will reduce therisk of electric shock by providing a path of leastresistance for the electric current.This appliance is equipped with a earth...
Page 9 - Level the Dryer
Installation Instructions 9 I nstallation Instructions Level the Dryer 1. Leveling the dryer prevents undesirable noiseand vibration. Place your dryer in solid andlevel Area. When placing your dryer in an solid and levelarea where water is not dripping and freezing,flammable materials are not stored...
Page 10 - p p e a r a n c e & D e s i g n
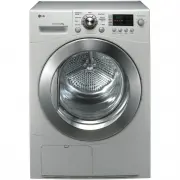
Appearance & Design 10 A p p e a r a n c e & D e s i g n RC8011A / RC8011B / RC8011C / RC8011D / TD-C800E / TD-C809E / TD-C8035E / TD-C8031E RC8011A1 / RC8011B1 / RC8011C1 / RC8011D1 / TD-C803E Water Container Control Panel Condenser Cover Air Ventilation Grill Water Container Control Panel ...
Page 11 - Control Panel; Program Selector
Appearance & Design 11 A p p e a r a n c e & D e s i g n Control Panel Program Selector LED Display • Time Display• Indicator Lamps & Left Time Additional FunctionButtons Drying Level • Iron • Light• Standard• Very• Extra • More Time• Less Time• Option• Buzzer• Time Delay/Favourite Anti-...
Page 12 - perating Your Dryer; Cycle Selection Table
Operating Y our Dryer 12 O perating Your Dryer Extra Cotton Cycles(Note) Select thegentle cycle by pressing theoption button forheat-sensitiveitems Towels, dressing gownsand bed linen For thick and quilted fabrics Very Terry towels, tea towels,towels, bed linen For thick and quilted fabrics which do...
Page 13 - Please read before using your LG Dryer for the first time; container and condenser.
Operating Y our Dryer 13 O perating Your Dryer Please read before using your LG Dryer for the first time After removing the packaging, please carry out the following checks to ensure the LG Dryer is correctly installed and ready for use. 1. Check the dryer is well balanced by using a spirit level. I...
Page 14 - After operation is completed, open the
Operating Y our Dryer 14 O perating Your Dryer 5. Close the door. Before you close the door, make sure fabricsare well placed inside and that foreign objects,especially flammable ones, are not caughtaround door. 6. Select the drying cycle you want. You can choose a cycle by turning the program contr...
Page 15 - Additional Functions; dditional Functions
Additional Functions 15 A dditional Functions RC8011A / RC8011B / RC8011C / RC8011D / TD-C800E RC8011A1 / RC8011B1 / RC8011C1 / RC8011D1 / TD-C803E TD-C809E / TD-C8035E / TD-C8031E
Page 16 - Drum Light/Hand Iron; Favourite
Additional Functions 16 More Time/Less Time Press More Time or Less Time until the desireddrying time is set. Drum Light/Hand Iron Drum Light (Glass Door) - During operating cycle, you can see the drum inside by choosing drum light function.It helps easy viewing the drying cycle. Hand Iron (Opaque D...
Page 17 - Buzzer; Option
Additional Functions 17 Buzzer This is a function to able to adjust volume ofbeeper sound. A dditional Functions Option Gentle - This is a function to shorten or lengthen the cycle time by increasing or decreasing temperature. - This option only is used with the Cotton and Mixed Fabrics cycles. Damp...
Page 18 - aring for Your Dryer; How important care and cleaning is~
Caring for Y our Dryer 18 C aring for Your Dryer How important care and cleaning is~ It’s not very difficult to care for your dryer. All you haveto do is to follow the information below. Clean Lint Filter Clean lint filter after each use and check it before each use. Itshould also be cleaned if the ...
Page 19 - Condenser
Caring for Y our Dryer 19 C aring for Your Dryer Condenser Condenser is also a very important part for efficient drying performance result so it needs a special care from you.It is recommended that condenser be cleaned three or four times a year or when the condenser clean lamp blinks. 1. Push the c...
Page 20 - Condensed Water Drain-out
Caring for Y our Dryer 20 C aring for Your Dryer 1. Take connectingkit out. Ventilation Grille and Cool AirInlet Grille Vacuum the front ventilation grill 3~4 time a year tomake sure there must be no build-up of lints or dirtswhich cause improper intake air flow. Moisture Sensor? This device senses ...
Page 21 - dditional Tips for Smart Use; Below are fabric care labels.
Additional T ips for Smart Use 21 A dditional Tips for Smart Use Drying GuideCapacity for laundry type Woolen Article Dry woolens in "wool" cycle. Be sure to follow fabric care label "symbols", first. Wool is not completely dried from the program so don't repeatdrying. Pull woolens t...
Page 22 - Spare Parts; Disposal of the Dryer
Additional T ips for Smart Use 22 A dditional Tips for Smart Use Spare Parts Spare parts that are required under the termsof warranty are provided free of charge. If the warranty has expired then spare parts must bepurchased from the service centre. Accessory Parts • Accessories available for this p...
Page 23 - roubleshooting Guidelines; Troubleshooting Tips; Water is leaking; The clothes shrinked
T roubleshooting Guidelines 23 T roubleshooting Guidelines Troubleshooting Tips To save you time and money, the following page will help answer your questions before service call. Questions What to do Dryer doesn't work 1. Check dryer is plugged in. 2. Check "Start" button is pressed.3. Chec...
Page 24 - Error Mode; Drum light does not work
T roubleshooting Guidelines 24 roubleshooting Guidelines Error Mode • : LED displays “ ” in case of the door open. The door must be closed and start Button must be pressed for re-operation. Drum light does not work • Call customer service • : If display errors continue to occur, unplug the power cor...
Page 25 - echnical Data; Electrical Requirements
T echnical Data 25 echnical Data 850 mm 640 mm 600 mm Weight : 50 kg You are sure to check the rating plate on thedryer to make sure the dryer has right rating. T Electrical Requirements Ventilation Requirement Volts Hertz Watts 220-240 V Australia, New Zealand 50 Hz 2250 W Alcove or Under Counter C...
Page 27 - emo