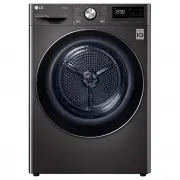
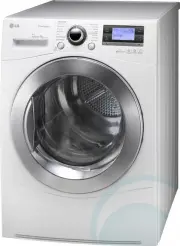
Page 2 - Ultra Big Capacity Drum; Lower Energy Consumption; Features
2 Ultra Big Capacity Drum The ultra big capacity drum on this LG dryer allows you todry more clothes, saving time! Energy Lower Energy Consumption LG Heat Pump dryers use less energy than conventional dryers dueto an optimized heat exchanger and self cleaning technology.This LG Heat Pump dryer has b...
Page 3 - Safety Instructions; Hazards; WARNING; No earthing may cause a malfunction or an electric shock.; May cause a malfunction, fire or electric shock.; A damaged power cord may cause fire or electric shock.; Doing so may cause an electric shock.
3 Safety Instructions Hazards WARNING • Serious injury or death may occur when not observing the following rules.• This product must only be used for its intended purpose. The instructions provided in this manual must be adhered in order to minimise the risk of damage to the unit and seriousinjury. ...
Page 6 - Stacking Installation Instructions; Installation Instructions; Safety Information; Risk of Injury; CAUTION; CAUTION Concerning the power cord
6 ■ Stacking Installation Instructions Installation Instructions The following instructions will guide you through the initial steps of setting up your dryer.Please note that every section of this manual provides important information regarding thepreparation and use of your dryer, and it is importa...
Page 7 - Stacking Kit
7 Installation Instructions Stacking Kit In order to stack this dryer to an LG frontload washer, an LG stacking kit is required. This dryer may only be stacked on top of anLG washer. DO NOT attempt to stack thisdryer on any other washer, as damage,injury or property damage could result. 3. Align the...
Page 8 - Earthing Instructions; Wall; Condensed Water Drain; NOTE; - Do not install the dryer where there
8 Installation Instructions Earthing Instructions This appliance must be earthed. In theevent of malfunction or breakdown, earthingwill reduce the risk of electric shock byproviding a path of least resistance for theelectric current.This appliance is equipped with an earthedcord and an earthing plug...
Page 9 - Level the Dryer; Dryer is raised
9 ■ Level the Dryer 1. Levelling the dryer prevents unnecessarynoise and vibration. Place your dryer on asolid, level floor. Place the dryer in an area free fromflammable materials, condensation andfreezing conditions. 2. If the dryer is not properly level, adjustthe front levelling feet as necessar...
Page 11 - Cycle Selection Table; Operating Your Dryer
11 ■ Cycle Selection Table Operating Your Dryer Sensor Dry Cycle Cycle Laundry Type Detail Drying Level Cotton MixedFabric Easycare Extra Towels, dressing gowns andbed linen For thick and quilted fabrics Very Terry towels, tea towels,towels and bed linen For thick and quilted fabrics thatdo not need...
Page 13 - Please read before using your LG dryer for the first time; Place laundry into the drum after
13 ■ Please read before using your LG dryer for the first time Operating Your Dryer After removing the packaging, please carry out the following checks to ensure the LGdryer is correctly installed and ready for use. (See installation instructions.) 1. Check the dryer is well balanced by using a spir...
Page 14 - After the cycle has finished, open the
14 Operating Your Dryer 5. Close the door. Before you close the door, make surefabrics are placed well inside and thatforeign objects, especially flammableones, are not caught around door. 6. Select the desired drying cycle. You can choose a cycle by turning thecycle selector knob until the required...
Page 15 - Clean the filter and empty water
15 Operating Your Dryer 9. Clean the filter and empty water container. The filter should be cleaned after eachload. 10. Turn off the dryer. Press the ‘‘Power’’ button. Clean thefilter.(Replace thefilter if it isdamaged.) CAUTION It must not be used for purposes otherthan those for which it was desig...
Page 16 - Place the drying rack over the bottom
16 ■ Rack Dry ( depending on the model ) The dryer rack is placed inside the dryer asseen in the picture below. Remove anddiscard packing material before use.The Rack Dry is designed for use with itemsthat must be dried flat, without tumbling,including sweaters and delicate fabrics. 1. Open the door...
Page 17 - Additional Functions; Power
17 Additional Functions Power • Press the Power button to turn power on and off. • To cancel the Time Delay function, the power button should be pressed. Additional programme Options. • Use these buttons to select the desired options for the selected cycle. Cycle Selector • Cycles can be selected ac...
Page 18 - Hand Iron; Favorite
18 ■ Time Delay You can use the Time Delay option todelay the finishing time of drying cycle.Maximum Time Delay is 19 hours.Minimum Time Delay is 3 hours.1. Turn the dryer on.2. Select a cycle then press the Time Delay button.3. Set time delay hour(s) by pressing the “ ”, “ ” button. 4. Press Start/...
Page 19 - Before using the Tag On function; Turning on the NFC function of the smart phone
19 Before using the Tag On function • The Tag On function allows you to conveniently use the LG SmartDiagnosis™ and Cycle Download features to communicate with your appliance from your own smart phone. • To use the Tag On function: 1 . Download the LG Smart Laundry & DW Global App to your smart ...
Page 20 - The Tag On guide; Tag On position
20 Before using the Tag On function ■ The Tag On guide Tag On position • Tag On: Look for the Tag On icon next to the LED screen onthe control panel. This is where you position your smart phone whenusing the Tag On function with the LGSmartDiagnosis™ and Cycle Download features ofthe LG Smart Laundr...
Page 21 - Caring for Your Dryer; Caring for your Dryer is Very Important; - Lint must not be left to accumulate
21 Caring for Your Dryer NOTE If the filter is not fitted to the dryer,you can not operate the dryer. Caring for your Dryer is Very Important It’s not difficult to care for your dryer, but it isimportant that you do care for it, to get the bestout of it. Clean Filter Clean the filter after each use ...
Page 22 - - Warm air is vented outward through; Condensed Water Drain-out
22 Caring for Your Dryer ■ Ventilation Grill and Cool AirInlet Grill Unplug the power, then vacuum the frontventilation grill 3-4 times ayear to make sure there is no build up of lintor dirt that may cause improper air flow. NOTE - Warm air is vented outward through the ventilation grill. - Adequate...
Page 23 - Additional Tips for Efficient Use; Drying Guide
23 8 kg 8 kg 8 kg 4 kg 4 kg 4 kg 4 kg 4 kg 2 kg 3 kg 4.5 kg 2 kg 3 kg 1.5 kg Additional Tips for Efficient Use ■ Drying Guide Display Drying Time (Including Cooling Time) 180 min 150 min 140 min 80 min 70 min 60 min 70 min 60 min 120 min 110 min 210 min 50 min 50 min 48 min 1 kg Extra Cotton Mixed F...
Page 24 - Below are fabric care labels.; Symbols
24 Additional Tips for Efficient Use Woollens Dry woollens on “wool’’ cycle. Be sure tofollow fabric care label symbols first. Woolmay not be completely dried from the cycle,so don't repeat drying. Pull woollens to theiroriginal shape and dry them flat. Woven and Loopknit Materials Some woven and lo...
Page 25 - Spare Parts
25 Additional Tips for Efficient Use ■ Spare Parts Spare parts that are required under theterms of the warranty are provided free ofcharge. If the warranty has expired thenspare parts must be purchased from theservice centre. ■ Accessory Parts • Accessories available for this product ( depending on ...
Page 26 - Troubleshooting Guide; Troubleshooting Tips; Issue
26 Troubleshooting Guide ■ Troubleshooting Tips To save you time and money, the following page may help answer your questions beforecalling for service. Dryer won’t run It takes a long time to dry Dryer is operating but“Time Left” in the displaydoesn’t change. Clothes are covered in fluff The drying...
Page 27 - Error Messages
27 • , , , : If error message continues to occur, unplug the power cord and call the service centre for advice. Troubleshooting Guide ■ Error Messages • : The door must be closed and the Start/Pause button must be pressed for re- operation. If error message continues to occur, unplug the power cord ...
Page 28 - Using Smart DiagnosisTM
28 Troubleshooting Guide NOTE Smart Diagnosis™ function isavailable only for the products with aSmart Diagnosis™ mark. Should youhave an analog phone, the SmartDiagnosis™ function may notoperate. NOTE “Smart Diagnosis is a troubleshootingfeature designed to assist, not replace,the traditional method...
Page 29 - Technical Data; Electrical Requirements; Watts; Alcove or
29 Technical Data ■ Electrical Requirements ■ Ventilation Requirement ■ Max. capacity : 8 kg ■ Allowable temperature : 5 ~ 35°C ■ Depth with door open : 1090mm Ensure you connect the dryer to an outletwith the correct operating voltage. Theratings plate on your dryer shows you whatthe voltage should...
Page 30 - Disposal notice; Disposal of your old appliance; remove the door to prevent children from being trapped inside.
30 Disposal notice Disposal of your old appliance 1. All electrical and electronic products should be disposed of separately from the municipal waste stream via designatedcollection facilities appointed by the government or the local CityCouncil. 2. The correct disposal of your old appliance will he...