Page 2 - TABLE OF CONTENTS
2 TABLE OF CONTENTS TABLE OF CONTENTS 3 IMPORTANT SAFETY INSTRUCTIONS 9 PRODUCT OVERVIEW 9 Parts9 Accessories 10 INSTALLATION 10 Installation Overview10 Product Specifications11 Before Installing the Range12 Installing the Range14 Connecting Electricity18 Engaging the Anti-tip Device18 Optional Rear...
Page 3 - IMPORTANT SAFETY INSTRUCTIONS; WARNING; TO REDUCE THE RISK OF TIPPING, THE APPLIANCE MUST BE SECURED BY A
3 IMPORTANT SAFETY INSTRUCTIONS ENGLISH IMPORTANT SAFETY INSTRUCTIONS Read and follow all instructions when using the range to prevent the risk of fire, electric shock, personal injury, or damage. This guide does not cover all possible conditions that may occur. Always contact your service agent or ...
Page 4 - SAFETY PRECAUTIONS; DO NOT TOUCH HEATING ELEMENTS OR INTERIOR SURFACES OF OVEN.; Never use your appliance for warming or heating the room.
4 IMPORTANT SAFETY INSTRUCTIONS SAFETY PRECAUTIONS • DO NOT TOUCH HEATING ELEMENTS OR INTERIOR SURFACES OF OVEN. Heating elements may be hot even though they are dark in color. Interior surfaces of an oven become hot enough to cause burns. During and after use, do not touch or let clothing or other ...
Page 5 - FLAMMABLE MATERIALS; ELECTRICAL SAFETY; CAUTION; DEEP FAT FRYER
5 IMPORTANT SAFETY INSTRUCTIONS ENGLISH FLAMMABLE MATERIALS WARNING Be certain that all packing materials are removed from the appliance before operating. Keep plastic, clothes, paper, and other flammable materials away from parts of the appliance that may become hot. • Do not store or use flammable...
Page 6 - CHILD SAFETY; Do not leave children alone; GLASS-CERAMIC COOKING SURFACE; DO NOT TOUCH SURFACE
6 IMPORTANT SAFETY INSTRUCTIONS CHILD SAFETY • Do not touch the hot surface between the bottom of the oven door and the top of the drawer on the front of the oven while the oven is in operation. The surface becomes hot and can cause burns and other injury. • Do not leave small children unattended ne...
Page 7 - Never leave; ENERGY SAVING TIPS; Do not use water on grease fires.
7 IMPORTANT SAFETY INSTRUCTIONS ENGLISH • Always place the pan in the center of the surface unit you are cooking on. Never leave surface units unattended at high heat settings. Proper contact of cookware to burner also will improve efficiency. Boilovers cause smoking and greasy spills that may catch...
Page 8 - SAFETY WHEN CLEANING; Do not use oven cleaners.; COOK MEAT AND POULTRY THOROUGHLY
8 IMPORTANT SAFETY INSTRUCTIONS • Pull the oven rack to the stop-lock position when loading and unloading food from the oven. This helps prevent burns caused by touching hot surfaces of the door and oven walls. • Do not use the oven if a heating element develops a glowing spot during use or shows ot...
Page 9 - PRODUCT OVERVIEW; Parts
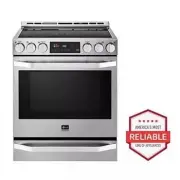
9 PRODUCT OVERVIEW ENGLISH PRODUCT OVERVIEW Parts Cooktop Glass-ceramic Model & serial number plate Oven mode knob Gasket Oven door Cooktop controller Warming drawer Accessories Included Accessories Heavy rack (2ea) Gliding rack (1ea) Meat probe (1ea) Cleaner Cooktop cleaner (1ea) Non-scratch sc...
Page 10 - INSTALLATION; Installation Overview; Product Specifications; Oven Range Models
10 INSTALLATION INSTALLATION Installation Overview Please read the following installation instructions first after purchasing this product or transporting it to another location. Check and choose the proper location Plug in the power cord Engage the anti-tip device Test run Install anti-tip device L...
Page 11 - Before Installing the Range
11 INSTALLATION ENGLISH Before Installing the Range WARNING Tip - Over Hazard A child or adult can tip the range and be killed. Verify the anti-tip bracket has been installed. Ensure the anti-tip bracket is engaged when the range is moved. Do not operate the range without the anti-tip bracket in pla...
Page 12 - Installing the Range; Unpacking and Moving the Range; Choosing the Proper Location
12 INSTALLATION Installing the Range Unpacking and Moving the Range CAUTION • You should use two or more people to move and install the range. (Excessive Weight Hazard) Failure to do so can result in back or other injury. • Do not use the door handles to push or pull the range during installation or...
Page 13 - Dimensions and Clearances
13 INSTALLATION ENGLISH Dimensions and Clearances NOTE Save for the use of the local electrical inspector. 36" (91.4 cm) 29.8" (75.7 cm) 24" (60.9 cm) Cabinet Cabinet opening A Acceptable electrical outlet area 3" (7.6 cm) 24" (60.9 cm) 3" (7.6 cm) 25" (63.5 cm) Normal co...
Page 14 - Installing the Anti-tip Device; Leveling the Range; Connecting Electricity; Electrical Requirements
14 INSTALLATION Installing the Anti-tip Device Anti-tip bracket Leveling leg WARNING Tip - Over Hazard A child or adult can tip the range and be killed. Verify the anti-tip bracket has been installed. Ensure the anti-tip bracket is engaged when the range is moved. Do not operate the range without th...
Page 15 - Connecting the Power Cord
15 INSTALLATION ENGLISH WARNING • Allow 2 to 3 ft (61.0 cm to 91.4 cm) of slack in the line so that the range can be moved if servicing is ever necessary. • The power supply cord and plug should not be modified. If it will not fit the outlet, have a proper outlet Installed by a qualified electrician...
Page 18 - Engaging the Anti-tip Device; Installing the Rear Filler
18 INSTALLATION Engaging the Anti-tip Device • Move the range close enough to the opening to plug into the receptacle. • Slide the range into position ensuring that the back leg slides under the anti-tip bracket. The range should sit flush against the back wall when properly installed. • Carefully a...
Page 19 - Test Run
19 INSTALLATION ENGLISH Test Run Check if the range is properly installed and run a test cycle. 1 Turn the oven mode knob to the Off position to start test. 2 Turn each knob to the Hi position to check that the surface heating elements are working properly. The elements should glow red and radiate h...
Page 20 - OPERATION; Control Panel Overview
20 OPERATION OPERATION Control Panel Overview Hold 3 seconds 1 2 3 4 5 6 7 10 8 9 Hot Surface Indicator The hot surface indicator light glows as long as any surface cooking area is too hot to touch.It remains on after the element is turned off and until the surface has cooled to approximately 150 ˚F...
Page 21 - Knob Positions
21 OPERATION ENGLISH Knob Positions After cleaning the oven knobs, make sure to replace each knob in the correct position. Failure to do so can result in improper operation of the burners. Dual Single Single Mode Single Triple
Page 22 - Changing Oven Settings; Clock
22 OPERATION Changing Oven Settings Clock The clock must be set to the correct time of day in order for the automatic oven timing functions to work properly. 1 Set the oven mode knob to the Off position. 2 Press and hold Cook Time for three seconds. CLO shows in the display. 3 Press plus(+) or minus...
Page 23 - Settings
23 OPERATION ENGLISH Timer On/Off The Timer On/Off serves as an extra timer in the kitchen that beeps when the set time has run out. It does not start or stop cooking.The Timer On/Off feature can be used during any of the oven control functions. Setting the Timer (for example to set 5 minutes) 1 Set...
Page 24 - Lockout
24 OPERATION Adjusting the Oven Temperature Your new oven may cook differently from the one it replaced. Use your new oven for a few weeks to become more familiar with it before changing the temperature settings. If after familiarizing yourself with the new oven, you still think that it is too hot o...
Page 26 - Using the Cooktop; Cooking Areas; Hot Surface Indicator; Using the Cooktop Elements
26 OPERATION Using the Cooktop Cooking Areas The cooking areas on your range are identified by permanent circles on the glass cooktop surface. For the most efficient cooking, fit the pan size to the element size. Pans should not extend more than 1 / 2 to 1-inch beyond the cooking area. When a contro...
Page 27 - The Recommended Surface Cooking
27 OPERATION ENGLISH Turning on the Dual Element There is one dual element located in the left front position. Use the dual element as a dual or single element. 1 Push in the appropriate knob. 2-A Turn the knob counterclockwise to use it as a Single element. 2-B Turn the knob clockwise to use it as ...
Page 28 - Using the Proper Cookware
28 OPERATION Using the Proper Cookware The size and type of cookware will influence the settings needed for the best cooking results. Be sure to follow the recommendations for using proper cookware. Cookware should have flat bottoms that make good contact with the entire surface heating element. Che...
Page 29 - Using the Oven; Before Using the Oven; Using Oven Racks; Bake
29 OPERATION ENGLISH Using the Oven Before Using the Oven NOTE • Because the oven temperature cycles, an oven thermometer placed in the oven cavity may not show the same temperature that is set on the oven. • It is normal for the convection fan to run while preheating during a regular bake cycle. • ...
Page 30 - Convection Mode
30 OPERATION Baking Tips • Baking time and temperature will vary depending on the characteristics, size, and shape of the baking pan used. • Check for food doneness at the minimum recipe time. • Use metal bakeware (with or without a nonstick finish), heatproof glass-ceramic, ceramic or other bakewar...
Page 31 - Recommended Baking and Roasting
31 OPERATION ENGLISH Recommended Baking and Roasting Guide Baking results will be better if baking pans are centered in the oven as much as possible. If cooking on multiple racks, place the oven racks in the positions shown. Rack and Pan Placement Multiple rack baking Rack (Position 3) Rack (Positio...
Page 32 - Broil
32 OPERATION Broil The Broil function uses intense heat from the upper heating element to cook food. Broiling works best for tender cuts of meat, fish, and thinly cut vegetables. Some models may feature a hybrid broiler consisting of an inner broiler that utilizes a carbon heating element which prov...
Page 33 - Recommended Broiling Guide
33 OPERATION ENGLISH Recommended Broiling Guide The size, weight, thickness, starting temperature, and your preference of doneness will affect broiling times.This guide is based on meats at refrigerator temperature. For best results when broiling, use a pan designed for broiling. Food Quantity and/o...
Page 34 - Warm
34 OPERATION Tips for BroilingBeef • Steaks and chops should always be allowed to rest for five minutes before being cut into and eaten. This allows the heat to distribute evenly through the food and creates a more tender and juicy result. • Pieces of meat that are thicker than two inches should be ...
Page 35 - Speed Roast
35 OPERATION ENGLISH Speed Roast The Speed Roast feature is designed to quickly roast poultry. The combination of intense heat from the upper heating element and heated air from the back heating element result in crispier food and help to save cooking time. Speed roasting is especially good for medi...
Page 36 - Remote Start
36 OPERATION Remote Start If the appliance is registered on a home Wi-Fi network,this function starts preheating and then holds the temperature for up to an hour (including preheating time). If the appliance is not registered on the network, “OFF” appears in the display. Follow the instructions on p...
Page 37 - Operating the Warming; Setting the Warming Drawer Control; Warming Drawer food/power level
37 OPERATION ENGLISH Operating the Warming Drawer The Warming Drawer keeps hot cooked foods at serving temperature.All food placed in the Warming Drawer should be covered with an oven-safe lid or aluminum foil to maintain quality. Do not place foil on bottom or sides of drawer. Do not use plastic wr...
Page 39 - SMART FUNCTIONS; LG ThinQ Application; LG ThinQ Application Features
39 SMART FUNCTIONS ENGLISH SMART FUNCTIONS LG ThinQ Application This feature is only available on models with the or logo.The LG ThinQ application allows you to communicate with the appliance using a smartphone. LG ThinQ Application Features Cleaning This function helps you to check the energy effic...
Page 40 - Installing the LG ThinQ Application; Open Source Software Notice; FCC Notice (For transmitter
40 SMART FUNCTIONS NOTE • The wireless network name (SSID) should be a combination of English letters and numbers. (Do not use special characters.) • Smartphone user interface (UI) may vary depending on the mobile operating system (OS) and the manufacturer. • If the security protocol of the router i...
Page 41 - FCC RF Radiation Exposure; Using LG ThinQ to Diagnose Issues
41 SMART FUNCTIONS ENGLISH FCC RF Radiation Exposure Statement This equipment complies with FCC radiation exposure limits set forth for an uncontrolled environment. This transmitter must not be co-located or operating in conjunction with any other antenna or transmitter.This equipment should be inst...
Page 42 - MAINTENANCE; Cleaning the Glass-Ceramic
42 MAINTENANCE MAINTENANCE Cleaning the Glass-Ceramic Cooktop CAUTION • Do not use scrub pads or abrasive cleaning pads. They may damage your cooktop surface. • For your safety, wear an oven mitt or pot holder while using a scraper on the hot cooking surface. • Read and follow all instructions and w...
Page 43 - Metal Marks and Scratches; EasyClean
43 MAINTENANCE ENGLISH Metal Marks and Scratches ANY DAMAGE OR FAILURE OF THE PRODUCT RESULTING FROM 1 OR 2 BELOW MAY NOT BE COVERED UNDER THE LIMITED WARRANTY. 1. Be careful not to slide pots and pans across the cooktop. Doing so will leave metal markings on the cooktop surface. To help remove thes...
Page 44 - When to Use EasyClean; Cleaning Tips
44 MAINTENANCE When to Use EasyClean ® Suggested Cleaning Method Example of Oven Soiling Soil Pattern Types of Soils Common Food Items That Can Soil Your Oven EasyClean ® Small drops or spots Cheese or other ingredients Pizza Light splatter Fat/grease Steaks, broiled Fish, broiled Meat roasted at lo...
Page 46 - Self Clean; Before Starting Self Clean; Setting Self Clean
46 MAINTENANCE Self Clean The Self Clean cycle uses extremely hot temperatures to clean the oven cavity. While running the Self Clean cycle, you may notice smoking or an odor. This is normal; especially if the oven is heavily soiled.During Self Clean, the kitchen should be well ventilated to minimiz...
Page 47 - Setting Self Clean with a Delayed; Changing the Oven Light
47 MAINTENANCE ENGLISH Setting Self Clean with a Delayed Start 1 Remove all racks and accessories from the oven. 2 Turn the oven mode knob to select Self Clean . The oven defaults to the recommended four-hour self clean for a moderately soiled oven. Press plus(+) or minus(-) to select a self clean t...
Page 48 - Cleaning the Exterior; Painted and Decorative Trim; Front Manifold Panel and Knobs; Oven Racks
48 MAINTENANCE Cleaning the Exterior Painted and Decorative Trim For general cleaning, use a cloth with hot soapy water. For more difficult soils and built-up grease, apply a liquid detergent directly onto the soil. Leave it on for 30 to 60 minutes. Rinse with a damp cloth and dry. Do not use abrasi...
Page 49 - Oven Door; Broiler Pan and Grid; Removing and Replacing; Removing the Door
49 MAINTENANCE ENGLISH Oven Door • Use soapy water to thoroughly clean the oven door. Rinse well. Do not immerse the door in water. • You may use a glass cleaner on the outside glass of the oven door. Do not spray water or glass cleaner on the door vents. • Do not use oven cleaners, cleaning powders...
Page 50 - Replacing the Door; Replacing the Drawer; Door Care Instructions
50 MAINTENANCE Replacing the Door 1 Firmly grasp both sides of the door at the top. 2 With the door at the same angle as the removal position, seat the indentation of the hinge arms into the bottom edge of the hinge slots. The notch in the hinge arms must be fully seated into the bottom edge of the ...
Page 51 - TROUBLESHOOTING; FAQs
51 TROUBLESHOOTING ENGLISH TROUBLESHOOTING FAQs What types of cookware are recommended for use with the cooktop? • The pans must have a flat bottom and straight sides. • Only use heavy-gauge pans. • The pan size must match the amount of food to be prepared and the size of the surface element. • Use ...
Page 53 - Before Calling for Service
53 TROUBLESHOOTING ENGLISH Before Calling for Service Before you call for service, review this list. It may save you time and expense. The list includes common occurrences that are not the result of defective workmanship or materials in this appliance. Symptoms Possible Causes / Solutions Range is n...