Page 2 - TABLE OF CONTENTS
2 TABLE OF CONTENTS 3 PRODUCT FEATURES 4 ImPORTANT SAFETy INSTRUCTIONS 10 BEFORE USE 10 Accessories11 Componen ts 12 HOW TO USE 12 How to use Gas Surface Burners 12 - Before Use 13 - Gas Burners 13 - Using the Gas Surface Burners 14 - Top-of-Range Cookware 15 - Using the Griddle 16 How to Use the Ov...
Page 3 - ENGLISH; SAFE AND CONVENIENT GAS RANGE
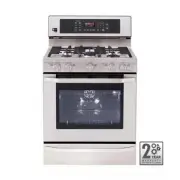
3 PRODUCT FEATURES ENGLISH SAFE AND CONVENIENT GAS RANGE Provides safety and convenience for cooking. Superboil (17000 BTU) can quickly bring a pot of water to a boil. MULTIPLE GAS BURNER SIZES Choose a burner to fit the size of your cookware.Cooking multiple items at once is possible by using diffe...
Page 4 - WHAT TO DO IF YOU SMELL GAS; try to light any appliance.; WARNING; ImPORTANT SAFETy INSTRUCTIONS
4 IMPORTANT SAFETy INSTRUCTIONS Always comply with the following precautions to avoid dangerous situations and to ensure the peak performance of your product. WARNING Indicates a hazardous situation which, if not avoided, could result in death or serious injury. CAUTION Indicates a hazardous situati...
Page 5 - IMPORTANT SAFETY NOTICE; CAUTION
5 IMPORTANT SAFETy INSTRUCTIONS ENGLISH IMPORTANT SAFETY NOTICE Enforcement Act requires the Governor of California to publish a list of substances known to the state to cause birth defects or other reproductive harm, and requires businesses to warn customers of potential exposure to such substances...
Page 7 - SURFACE BURNERS
7 IMPORTANT SAFETy INSTRUCTIONS ENGLISH SURFACE BURNERS WARNING y Even if the top burner flame goes out, gas is still flowing to the burner until the knob is turned to the “OFF” position. If you smell gas, immediately open a window and ventilate the area for five minutes prior to using the burner. D...
Page 8 - BROILER; COOK MEAT AND POULTRY THOROUGHLY
8 IMPORTANT SAFETy INSTRUCTIONS BROILER Always use a broiler pan and a grid for excess fat and grease drainage. This will help to reduce splatter, smoke, and flare-ups.The igniter for the infrared ceramic broil burner on the ceiling of the oven will glow orange periodically during normal broil opera...
Page 9 - OVEN; READ ALL INSTRUCTIONS BEFORE USING THE APPLIANCE.; SAVE THESE INSTRUCTIONS
9 IMPORTANT SAFETy INSTRUCTIONS ENGLISH OVEN When opening the door of a hot oven, stand away from the range. The hot air and steam that escape can cause burns to hands, face and eyes. WARNING NEVER block any slots, holes or passages in the oven bottom or cover an entire rack with materials such as a...
Page 10 - BEFORE USE; Accessories; NOTE
10 BEFORE USE BEFORE USE Accessories Make sure that all parts are included after purchasing this product. NOTE y Contact LG Customer Service if any accessories are missing. y For your safety and extended product life, only use authorized components. y The manufacturer is not responsible for product ...
Page 11 - Components
11 BEFORE USE ENGLISH Components Make sure to understand the names and function of each part.* Throughout this manual, the features and appearance may vary depending on your model. Anti-tip bracket Grates Small burner Self clean latch Automatic oven light switch Roast rack Heavy rack Heavy rack Oven...
Page 12 - HOW TO USE; Gas Surface Burners; Before use; Make sure that all burners are properly placed.
12 HOW TO USE HOW TO USE Gas Surface Burners Before use Read all instructions before using. Make sure that all burners are properly placed. Make sure that all grates are properly placed before using the burner. CAUTION DO NOT operate the burner for an extended period of time without cookware on the ...
Page 13 - Gas burners; Medium and Large Burner; Extra large burner; Using the gas surface burners; Selecting the Flame Size
13 HOW TO USE ENGLISH Gas burners Your gas range cooktop has five sealed gas burners.These can be assembled and separated. Follow the guide below. 1 2 3 4 Medium and Large Burner The medium and large burners are the primary burners for most cooking. These general purpose burners can be turned down f...
Page 14 - In Case of Power Failure:
14 HOW TO USE In Case of Power Failure: In case of a power failure, you can light the gas surface burn-ers on your range with a match.Surface burners in use when an electrical power failure occurs will continue to operate normally. 1 Hold a lit match to the burner, then push in the control knob. 2 T...
Page 15 - Using the Griddle; How to Place the Griddle:
15 HOW TO USE ENGLISH CAUTION DO NOT remove the griddle plate until the cooktop grates, surfaces and griddle plate are completely cooled. CAUTION The griddle plate on the cooktop may become very hot when using the cooktop, oven or broiler systems. Always use oven mitts when placing or removing thegr...
Page 16 - How to Use the Oven; Choose the upper or lower oven for proper cooking.
16 HOW TO USE How to Use the Oven Before use Read all instructions before using. Make sure the electrical power cord and the gas valve are properly connected. Check it for safety. Check the correct use of the range depending on the type of food you will cook. Make sure you know how to use the oven (...
Page 18 - Using the Control Panel
18 HOW TO USE Using the Control Panel 1 5 15 6 2 4 7 9 10 11 12 13 17 16 14 8 3 Display Name Description 1 CONVECTION BAKE Touch the key to select baking with the Convection function. 2 BAKE Touch the key to enter the normal bake function. 3 WARM / OPTIONS – Touch this key to hold food warm in the o...
Page 19 - Operating Instructions
19 HOW TO USE ENGLISH Operating Instructions How to set the convection auto conversion function When using convection bake and roast, the convection autoconversion feature will automatically convert entered regularbaking temperatures to convection baking temperatures.This feature is activated so tha...
Page 20 - How to select Fahrenheit or Celsius; How to Set the Clock Time:
20 HOW TO USE How to select Fahrenheit or Celsius Your oven control is set to use the Fahrenheit temperature selections but you may change this to use the Celsius selec-tions. 1 Touch and hold the WARM key for 3 seconds. Then touch the WARM key 5 times and “Unit” will display. 2 Touch the number 1 k...
Page 21 - How to Use the Timer; How to Use the Oven Lockout
21 HOW TO USE ENGLISH How to Use the Timer The timer does not control oven operations. The maximum setting on the timer is 11 hours and 59 minutes. 1 Touch the TIMER ON/OFF key once for minutes and seconds, touch the key twice for hours and minutes. 2 Touch the number key to select the desired time....
Page 22 - Removing the racks; Preheating and Pan Placement
22 HOW TO USE Removing the racks : 1. While wearing oven mitts, grasp the oven rack. 2. Pull the rack straight out until it stops. 3. Lift up the front of the rack. 4. Pull out the rack. Replacing the racks : 1. While wearing oven mitts, place the end of the rack on the support. 2. Tilt the front en...
Page 23 - BAKE; Power Outage
23 HOW TO USE ENGLISH BAKE BAKE is used to prepare foods such as pastries, breads, casseroles and roasts. The oven can be programmed to bake at any temperature from 170°F (77°C) to 550°F (288°C). The default temperature is 350°F (177°C). To set the oven to BAKE (example to 375°F): 1 Touch the BAKE k...
Page 24 - BROIL
24 HOW TO USE BROIL Your oven is designed for CLOSED DOOR broiling. 1 Place the food on the grid of the broiler pan. 2 Follow suggested rack positions in the Broiling Guide. 3 The oven door must be closed to begin broiling. The oven door must be closed during broiling. 4 Touch the BROIL key once for...
Page 25 - Broiling Chart
25 HOW TO USE ENGLISH Broiling Chart • Broiling times may be affected by the size, weight, thickness, starting temperature and your preference of doneness. This guide is based on meats at refrigerated temperatures. NOTE The USDA advises that consuming raw or undercooked fish, meat, or poultry can in...
Page 26 - START TImE (DELAyED TImED
26 HOW TO USE COOK TImE (TImED COOK) The TIMED COOK feature allows you to set the oven to cook for a specific length of time. This feature can only be used with the BAKE, CONVECTION BAKE, CONVECTION ROAST and FAVORITE modes. Setting the TIMED COOK function (example, BAKE at 300°F for 30 minutes): Ma...
Page 27 - CONVECTION BAKE; Cookware for Convection Cooking
27 HOW TO USE ENGLISH CONVECTION BAKE Convection baking allows for even cooking and excellentresults when using multiple racks at the same time. It could also shorten cooking time. Benefits of CONVECTION BAKE 1 ) Even bake results using multiple racks. 2 ) Faster cooking time. Setting the CONVECTION...
Page 28 - CONVECTION ROAST; Roasting Rack Instructions
28 HOW TO USE CONVECTION ROAST The CONVECTION ROAST feature is designed to give optimum roasting performance. CONVECTION ROAST combines cooking with the convection fan to roast meats and poultry. The heated air circulates around the food from all sides, sealing in juices and flavors. Foods are crisp...
Page 29 - WARm
29 HOW TO USE ENGLISH multi-Rack Baking You can bake foods with excellent results using multiple racks because heated air is circulated evenly throughout the oven. Multi-rack baking may increase cook times slightly for some foods but the overall result is time saved. Cookies, muffins, biscuits and o...
Page 30 - PROOF; FAVORITES
30 HOW TO USE PROOF Setting the PROOF function: This feature maintains a warm oven for rising yeast leavenedproducts before baking. 1 Use rack B or C for proofing. 2 Touch the WARM key twice. PrF will appear in the dis- play. 3 Touch the START key. 4 Touch the CLEAR OFF key when proofing is finished...
Page 31 - WARmING DRAWER; Warming Drawer Rack Positions; The rack can be used in 2 ways:; Operating The Warming Drawer
31 WARMING DRAWER ENGLISH WARmING DRAWER Warming Drawer Rack Positions The rack can be used in 2 ways: • In the upright position to allow low profile food items to be placed both under and on top of the rack (for example, rolls or biscuits on top of the rack and a casserole dish under-neath). • In t...
Page 32 - To Crisp Food Items; When Using the Warming Drawer
32 WARMING DRAWER To Crisp Food Items • Place food in a low sided dish or pan. • Preheat on 1(Low) setting. • Check crispness after 45 minutes. Add time if needed. To Warm Serving Bowls and Plates To warm serving bowls and plates, set the control on 1(Low) . • Use only heat-safe dishes. • To heat fi...
Page 33 - CARE AND CLEANING; Gas Surface Burner; Removing and Replacing the Gas Surface Burner; After Cleaning the Burner Heads/Caps
33 CARE AND CLEANING ENGLISH CARE AND CLEANING Gas Surface Burner Removing and Replacing the Gas Surface Burner Grates and burner caps/heads can be removed for care and cleaning. General burner Burner cap is properly set. Burner cap is NOT properly set. Burner Heads/Caps For even and unhampered flam...
Page 34 - Burner Grates; Cleaning the Burner Grates; Cooktop Surface; Stainless Steel Surfaces
34 CARE AND CLEANING Burner Grates The range consists of three separate professional-style grates. For maximum stability, these grates should only be used when in their proper position. The two side grates can be interchanged from left to right and front to back. The center grate can be interchanged...
Page 35 - Oven air vents; Oven Door; Control Panel
35 CARE AND CLEANING ENGLISH Oven air vents Air openings are located at the rear of the cooktop, at the top and bottom of the oven door, and at the bottom of the range. Front manifold panel and knobs It is best to clean the manifold panel after each use of the oven. For cleaning, use a damp cloth an...
Page 36 - Removing the oven door; Replacing the oven door
36 CARE AND CLEANING Removing and Replacing the Oven Door and Warming Drawer Removing the oven door 1. F ully open the door. Pull the hinge locks down toward the door frame, to the unlocked position. A tool, such as a small flat-blade screwdriver, may be required. 2. Firmly grasp both sides of the d...
Page 37 - Removing the Warming Drawer; Replacing the Warming Drawer
37 CARE AND CLEANING ENGLISH Removing the Warming Drawer Most cleaning can be done with the drawer in place; howev-er, the drawer may be removed if further cleaning is needed. Use warm water to thoroughly clean. 1. Fully open the drawer. 2. Remove the two screws. 3. Locate the glide lever on each si...
Page 38 - Setting Self Clean; SELF CLEAN; Before starting Self Clean:
38 CARE AND CLEANING Setting Self Clean The Self- Clean function has cycle times of 2, 3, or 4 hours. Self Clean Soil Guide Soil Level Cycle Setting Lightly soiled oven cavity 2 Hour Self Clean Moderately Soiled Oven Cavity 3 Hour Self Clean Heavily Soiled Oven Cavity 4 Hour Self Clean CAUTION DO NO...
Page 39 - After the Self Clean cycle; Setting Self Clean with a delayed
39 CARE AND CLEANING ENGLISH During Self Clean: • The self clean cycle uses extremely hot temperatures to clean the oven cavity. While running the Self Clean cycle, you may notice smoking or an odor. This is nor-mal; especially if the oven is heavily soiled. • As the oven heats, you may hear sounds ...
Page 40 - Changing the Oven Light; To replace the oven light; Broiler Pan and Grid; Oven racks
40 CARE AND CLEANING Changing the Oven Light The oven light is a standard 40-watt appliance bulb. It will turn on when the oven door is open. When the oven door is closed, touch the OVEN LIGHT key to turn the light on or off. To replace the oven light 1 Unplug the range or disconnect power. 2 Turn t...
Page 41 - BEFORE REQUESTING SERVICE
41 BEFORE REQUESTING SERVICE ENGLISH BEFORE REQUESTING SERVICE Symptoms and Questions Possible Cause/Solution Top burners do not light or do not burn evenly y The plug on range is not completely inserted in the electrical outlet. y Make sure the electrical plug is inserted into a live, properly grou...
Page 44 - WARRANTy
44 WARRANTy To Prove Warranty Coverage Retain your Sales Receipt to prove date of purchase. A copy of your Sales Receipt must be submitted at the time warranty service is provided. To Obtain the Nearest Authorized Service Center or Sales Dealer, or to Obtain Product, Customer, or Service Assistance ...
Page 45 - MANUAL DEL PROPIETARIO; ESTUFA DE GAS; Lea detenidamente estas instrucciones antes utilizar y; ESP
MANUAL DEL PROPIETARIO ESTUFA DE GAS LSRG309ST Lea detenidamente estas instrucciones antes utilizar y guárdelas como referencia para el futuro. ESP AÑOL www.lg.com P/No.: MFL33029604
Page 46 - IndIcE dE cOntEnIdOS
2 INDIcE DE cONTENIDOs IndIcE dE cOntEnIdOS 3 cArActEríStIcAS dEL PrOductO 4 InStruccIOnES dE SEGurIdAd IMPOrtAntES 10 AntES dE uSAr 10 Accesorios11 Componentes 12 cÓMO uSAr 12 Cómo usar las hornillas a gas de la superficie 12 - Antes de usar 13 - Hornillas a gas 13 - Uso de las hornillas a gas de l...
Page 47 - DIVERsOs TAMAÑOs DE HORNILLAs A gAs
3 cARAcTERísTIcAs DEL PRODUcTO ESP AÑOL DIVERsOs TAMAÑOs DE HORNILLAs A gAs Elija la hornilla que mejor se adapte al tamaño de su batería de cocina.Es posible utilizar varias hornillas a la vez para cocinar distintas cosas al mismo tiempo. EsTUFA A gAs sEgURA, cONVENIENTE Proporciona seguridad y con...
Page 48 - InStruccIOnES dE SEGurIdAd IMPOrtAntES; QUÉ HACER SI HUELE GAS; intente encender ningún aparato.; DISPOSITIVO ANTI-VUELCO; ADVERTENcIA; TODAS LAS ESTUFAS PUEDEN VOLCARSE
4 INsTRUccIONEs DE sEgURIDAD IMPORTANTEs InStruccIOnES dE SEGurIdAd IMPOrtAntES Cumpla siempre con lo indicado en las siguientes señales de avisos de seguridad para evitar situaciones peligrosas y para asegura- rse de obtener el máximo rendimiento de su producto. ADVERTENcIA Indica una situación pel...
Page 49 - AVISO IMPORTANTE DE SEGURIDAD; PRECAUCIONES DE SEGURIDAD; PREcAUcIóN
5 INsTRUccIONEs DE sEgURIDAD IMPORTANTEs ESP AÑOL AVISO IMPORTANTE DE SEGURIDAD La Ley de Cumplimiento dispone que el Gobernador de California debe publicar una lista de sustancias conocidas por el Estado que pueden ocasionar defectos de nacimiento u otros daños reproductivos; asimismo, requiere que...
Page 51 - HORNILLAS DE LA SUPERFICIE
7 INsTRUccIONEs DE sEgURIDAD IMPORTANTEs ESP AÑOL HORNILLAS DE LA SUPERFICIE ADVERTENcIA y Aunque la llama de la hornilla se apague, el gas continúa saliendo hasta que la perilla se gire a la posición "OFF" (APAGADO). Si huele gas, abra una ventana de inmediato y ventile el lugar por cinco m...
Page 52 - ASADOR; COCINE COMPLETAMENTE LA CARNE Y EL POLLO; AUTOLIMPIEZA DEL HORNO
8 INsTRUccIONEs DE sEgURIDAD IMPORTANTEs ASADOR Siempre use una cacerola de asado y una parrilla para drenar el exceso de grasa y cebo, esto ayudará a reducir salpicaduras, humo y llamaradas. El encendedor del asador cerámico infrarrojo que se encuentra localizado en la parte superior del interior d...
Page 53 - HORNO; LEA TODAS LAS INSTRUCCIONES ANTES DE UTILIZAR EL APARATO.; CONSERVE ESTAS INSTRUCCIONES
9 INsTRUccIONEs DE sEgURIDAD IMPORTANTEs ESP AÑOL HORNO Cuando abra la puerta de un horno caliente, aléjese lo más posible del aparato. El aire caliente y el vapor que salen del aparato podrían provocar quemaduras en sus manos, cara y/u ojos. ADVERTENcIA NUNCA obstruya ninguna ranura, orificio o con...
Page 54 - NOTA; AntES dE uSAr; Accesorios
10 ANTEs DE UsAR NOTA y Comuníquese con el Centro de Atención al Cliente de LG en caso de que falte algún accesorio. y Por su seguridad y para lograr una óptima durabilidad del producto, utilice únicamente componentes autorizados. y El fabricante no será responsable por el mal funcionamiento del pro...
Page 55 - componentes
11 ANTEs DE UsAR ESP AÑOL componentes Asegúrese de entender los nombres y función de cada pieza.* A lo largo de este manual, las características y apariencia del producto pueden variar dependiendo de su modelo. soporte Anti- vuelco Rejillas Quemador pequeño seguro de autolimpieza Interruptor de luz ...
Page 56 - cÓMO uSAr; cómo usar las hornillas a gas de la superficie; Antes de usar
12 cóMO UsAR cÓMO uSAr cómo usar las hornillas a gas de la superficie Antes de usar Lea todas las instrucciones antes de usar el producto. Asegúrese de que todas las hornillas estén correctamente colocadas. Asegúrese de que las hornillas y parrillas se hayan enfriado antes de apoyar su mano, agarrad...
Page 57 - Hornillas a Gas; cómo seleccionar el tamaño de llama
13 cóMO UsAR ESP AÑOL Hornillas a Gas La cocina de su estufa tiene cinco hornillas selladas a gas.Estas pueden ser ensambladas y separadas. Siga la guía a continuación. 1 2 3 4 Hornilla mediana y grande Las hornillas medianas y grandes son las hornillas prin-cipalmente utilizadas para la mayoría de ...
Page 58 - En caso de falla en la energía; uso de gratinadores de cocina:
14 cóMO UsAR En caso de falla en la energía eléctrica: En caso de que haya una falla en la energía eléctrica, puede encender las hornillas superiores con un fósforo. Las hornillas superiores que se encuentren en uso al producirse una falla en la energía eléctrica continuarán funcionando con normali-...
Page 59 - usando la parrilla
15 cóMO UsAR ESP AÑOL PREcAUcIóN NO retire la plancha de la parrilla hasta que las rejillas, su- perficies de la estufa y la propia parrilla se hayan enfriado por completo. PREcAUcIóN La plancha de la parrilla puede calentarse mucho al usar la estufa, el horno o los sistemas de asado.Use siempre gua...
Page 60 - cÓMO uSAr EL HOrnO
16 cóMO UsAR cÓMO uSAr EL HOrnO Antes de usar Lea todas las instrucciones antes de usar. Asegúrese de que el cable de alimentación eléctrica y la válvula de gas estén correctamente conectados. Verifíquelo por cuestiones de seguridad. Verifique cómo utilizar de manera correcta la estufa, dependiendo ...
Page 61 - No cubra ningún estante o base con papel aluminio.
17 cóMO UsAR ESP AÑOL No obstruya, toque o coloque objetos alrededor del conducto de venti-lación del horno cuando el mismo esté encendido. Su horno es ventilado a través de conductos ubicados en el centro, encima de la parrilla de la hornilla. No obstruya la ventilación del horno cuando éste se enc...
Page 62 - cómo usar el panel de control
18 cóMO UsAR cómo usar el panel de control 1 5 15 6 2 4 7 9 10 11 12 13 17 16 14 8 3 Pantalla Nombre Descripción 1 HORNEADO POR CONVECCIÓN Toque el tecla para escoger la función de horneado por convección. 2 HORNEADO Toque el tecla para activar la función de horneado normal. 3 CALENTAMIENTO / OPCION...
Page 63 - Instrucciones de Funcionamiento
19 cóMO UsAR ESP AÑOL Instrucciones de Funcionamiento como fijar la función de auto conversión de convección del horno inferior Cuando use el horneado o el asado por convección, la caracter-ística de funcionamiento de auto conversión, convertirá automáti-camente las temperaturas regulares a temperat...
Page 64 - Ajustes predeterminados mínimos y máximos:; cómo seleccionar Grados Fahrenheit; cómo ajustar el volumen del bíper:
20 cóMO UsAR Ajustes predeterminados mínimos y máximos: Todas las características enumeradas tienen ajustes de temperatura y de hora mínimos y máximos que pueden ser ingresados en el control. Sonará un bip de aceptación cada vez que se toque una tecla de control. Sonará un tono de error (dos tonos c...
Page 65 - cómo usar el temporizador:; cómo utilizar la característica de blo-
21 cóMO UsAR ESP AÑOL NOTA Si la característica de bloqueo es activada por la ap-ertura de cualquiera de las puertas, éstas últimas no cerraran completamente hasta que la característica de bloqueo sea desactivada. cómo usar el temporizador: El temporizador no controla las funciones del horno. El aju...
Page 66 - Precalentamiento y colocación
22 cóMO UsAR retirar los estantes: 1. Usando guantes de cocina, agarre el estante del horno. 2. Tire del estante hacia afuera en forma recta hasta que haga tope. 3. Levante la parte delantera del estante. 4. Tire del estante hacia afuera. Volver a colocar los estantes: 1. Usando guantes de cocina, c...
Page 67 - HOrnEAr; corte del Suministro Eléctrico; Sugerencias de Horneado
23 cóMO UsAR ESP AÑOL HOrnEAr La función de HORNEADO se utiliza para preparar platillos tales como pasteles, panes, guisados y comidas asadas. Se puede programar el horno para que hornee a cualquier tem-peratura, desde 170°F (77°C) a 550°F (288°C). La tempera-tura predeterminada es de 350°F (177°C)....
Page 68 - ASAr
24 cóMO UsAR ASAr Su horno está diseñado para asar a la parrilla con la PUERTA CERRADA. 1 Colocar los alimentos sobre la parrilla de la bandeja de asado. 2 Cumpla con las posiciones recomendadas para las bande- jas que se indican en la guía de asado a la parrilla. 3 La puerta del horno debe permanec...
Page 69 - tabla para la Función de Asar
25 cóMO UsAR ESP AÑOL tabla para la Función de Asar Alimento Cantidad y/o grosor Bandeja Posición Tiempo para la primera cara (min.) Tiempo para la segunda cara (min.) Comentarios Carne picada Bien hecha Filetes de ternera Poco hechaEn su puntoBien hecha Poco hechaEn su puntoBien hecha Tocino Chulet...
Page 71 - cOnVEccIÓn HOrnEAdO; utensilios de cocina para el cocinado
27 cóMO UsAR ESP AÑOL cOnVEccIÓn HOrnEAdO El horneado por convección permite un cocinado parejo y por lo tanto excelentes resultados incluso usando múltiples bandejas al mismo tiempo. Puede también disminuir el tiempo de cocinado operando el modo CONVECCIÓN HOR - NEADO entre 300°F(150°C) ~ 550°F(285...
Page 72 - cOnVEctIOn rOASt (ASAdO; Instrucciones de la Parrilla Asadora
28 cóMO UsAR cOnVEctIOn rOASt (ASAdO POr cOnVEccIÓn) La característica Conv. Roast (rostizado por convección) se encuentra diseñada para of recer un óptimo desempeño de rostizado. La característica de rostizado por convección com-bina una cocción con el ventilador de convección para rostizar carnes ...
Page 73 - Horneado de Varias Bandejas
29 cóMO UsAR ESP AÑOL Horneado de Varias Bandejas Como el aire caliente está circulando uniformemente por el horno, los alimentos pueden hornearse obteniendo excelen-tes resultados usando varias bandejas. El horneado en varias bandejas podría incrementar el tiempo de cocción ligeramente para ciertos...
Page 74 - FErMEntAr; FAVOrItOS
30 cóMO UsAR FErMEntAr Configuración de la función FERMENTAR: Esta función mantiene el horno caliente para leudar productos con levadura antes de hornearlos. 1 Utilice el estante B o C para fermentar. 2 Toque el tecla WARM dos veces. Aparecerá PrF en la pantalla. 3 Toque START . 4 Toque el tecla CLE...
Page 75 - cAJÓn cALEntAdOr; disposición de las posiciones del; El soporte puede usarse de dos maneras:; Funcionamiento del cajón
31 cóMO UsAR ESP AÑOL cAJÓn cALEntAdOr disposición de las posiciones del soporte de la gaveta de calentamiento El soporte puede usarse de dos maneras: • Coloc ado hacia arriba permite introducir alimentos de poca altura tanto debajo como sobre el soporte (por ejemplo, panecillos o bizcochos en la pa...
Page 76 - Volver a Hacer crujientes Alimentos ya Blandos; Para calentar cuencos y Platos para Servir; Al usar la Gaveta de calentamiento
32 cóMO UsAR Volver a Hacer crujientes Alimentos ya Blandos • Introduzca los alimentos en platos o recipientes de pared baja. • Precaliente usando el ajuste 1 . • Verifique si están ya crujientes tras 45 minutos. Añada tiempo si fuese necesario. Para calentar cuencos y Platos para Servir Para calent...
Page 77 - cómo limpiar los cabezales/tapas de; cuIdAdO y LIMPIEzA; Hornilla a gas de la superficie
33 cUIDADO y LIMPIEzA ESP AÑOL cómo limpiar los cabezales/tapas de las hornillas Para lograr una llama pareja y completa, las hendiduras de los cabezales de las hornillas deben estar siempre limpias. Los cabezales de las hornillas y la tapa de la hornalla pueden levantarse. • Lave las tapas de las h...
Page 78 - Parrillas de las hornillas; cómo limpiar las parrillas de las; Superficie de la estufa; Superficies de acero inoxidable
34 cUIDADO y LIMPIEzA Parrillas de las hornillas La estufa contiene tres parrillas separadas de estilo profesional. Para logar su máxima estabilidad, estas parrillas solo deben ser utilizadas cuando estén en la posición correcta. Las dos parrillas laterales pueden intercambiarse de izquierda a derec...
Page 79 - conductos de ventilación del horno; Puerta del horno
35 cUIDADO y LIMPIEzA ESP AÑOL conductos de ventilación del horno Los orificios de ventilación se encuentran en la parte trasera de la estufa, en la parte superior e inferior de la puerta del horno, y en la parte inferior de la estufa. Panel de control Para evitar que se active el panel de control d...
Page 80 - Volver a colocar la puerta del horno; REcAUcIóN
36 cUIDADO y LIMPIEzA Volver a colocar la puerta del horno 1. Sostenga firmemente de la parte superior ambos lados de la puerta. 2. Con la puerta en el mismo ángulo que la posición de ex- tracción, coloque la Muesca del brazo de la bisagra en el borde inferior de la ranura de la bisagra. La Muesca e...
Page 81 - Sacar el cajón calentador; Volver a colocar el cajón calentador
37 cUIDADO y LIMPIEzA ESP AÑOL Sacar el cajón calentador La mayor parte de la limpieza se puede realizar con el cajón en su lugar; sin embargo, si es necesario se puede sacar el cajón para realizar una limpieza más a fondo. Use agua tibia para limpiar por completo. 1. Abra la puerta del cajón por co...
Page 82 - configuración de la Auto-limpieza
38 cUIDADO y LIMPIEzA configuración de la Auto-limpieza La función de Auto-Limpieza tiene ciclos que pueden durar 2, 3, o 4 horas. Guía de Suciedad para la Auto-limpieza Nivel de Suciedad Configuración del Ciclo Cavidad del horno levemente sucia Auto-limpieza de 2 Horas Cavidad del horno moderadamen...
Page 83 - durante La Auto-Limpieza; Luego del ciclo de Auto-Limpieza
39 cUIDADO y LIMPIEzA ESP AÑOL durante La Auto-Limpieza • El ciclo de auto-limpieza utiliza temperaturas extrema-damente elevadas para limpiar la cavidad del horno. Al ejecutar el ciclo de Auto-Limpieza, puede percibir humo u olores. Esto es normal; especialmente si el horno está muy sucio. • A medi...
Page 84 - cómo cambiar la luz del horno; Para reemplazar la luz del horno:; Bandejas del horno; cómo limpiar la bandeja y la rejilla para
40 cUIDADO y LIMPIEzA cómo cambiar la luz del horno La luz del horno es una bombilla estándar para artefactos de 40 vatios (watts). Se encenderá cuando la puerta del horno esté abierta. Cuando la puerta del horno esté cerrada, toque la tecla OVEN LIGHT para prender o apagar la luz. Para reemplazar l...
Page 85 - AntES dE SOLIcItAr SErVIcIO tÉcnIcO
41 ANTEs DE sOLIcITAR sERVIcIO TÉcNIcO ESP AÑOL AntES dE SOLIcItAr SErVIcIO tÉcnIcO Síntomas y preguntas Posible causa/ solución Los quemadores no se prenden o sus llamas no son uniformes. y El tomacorriente del horno no está introducido correctamente en la toma de pared. y Asegúrese de que el tomac...
Page 88 - GArAntíA
44 gARANTíA Para probar su cobertura de garantía Conserve la factura de venta del producto para probar la fecha en que lo compró. Deberá presentar la factura de venta en caso de recibir servicio técnico en garantía. Para ubicar el centro de servicio técnico o distribuidor de ventas autorizado más ce...
Page 89 - nOtA
Para probar su cobertura de garantía Conserve la factura de venta del producto para probar la fecha en que lo compró. Deberá presentar la factura de venta en caso de recibir servicio técnico en garantía. Para ubicar el centro de servicio técnico o distribuidor de ventas autorizado más cercano, o bie...