Page 3 - CAUTION; Cautions and Warnings; Safety Information
Safety Information Safet y Inf orma tion 1 CAUTION RISK OF ELECTRIC SHOCK DO NOT OPEN CAUTION: TO REDUCE THE RISK OF ELECTRIC SHOCK DO NOT REMOVE COVER (OR BACK) NO USER- SERVICEABLE PARTS INSIDE REFER SERVICING TO QUALIFIED SERVICE PERSONNEL. This lightning flash with arrowhead symbol within an equ...
Page 5 - IMPORTANT SAFETY
Safety Information Safet y Inf orma tion 1 CAUTION: DO NOT ATTEMPT TO MODIFY THIS PRODUCT IN ANY WAY WITHOUT WRITTEN AUTHORIZATION FROM LG ELECTRONICS CORPORATION. UNAUTHORIZED MODIFICATION COULD VOID THE USER’S AUTHORITY TO OPERATE THIS PRODUCT. THIS EQUIPMENT IS INTENDED TO RECEIVE AND DECODE SIGN...
Page 6 - Contents
Contents 1 Safety Information 3 Cautions and Warnings 2 Preparation 8 Introduction 8 About the “ ” Symbol Display 8 Symbols Used in this Manual 8 Supplied Accessories 9 Playable Discs 9 Regional Code 10 File compatibility 11 Main Unit 12 Remote control 3 Installation 14 Power connections 14 Connecti...
Page 8 - Preparation; Introduction; About the “ ” Symbol Display; NOTE; Supplied Accessories
Preparation P reparation 2 2 Preparation Introduction About the “ ” Symbol Display “ ” may appear on your TV display during operation and indicates that the function explained in this owner’s manual is not available on that specific media. Symbols Used in this Manual NOTE Indicates special notes and...
Page 9 - Playable Discs
Preparation P reparation 2 Playable Discs DVD-VIDEO (8 cm / 12 cm disc)Discs such as movies that can be purchased or rented. DVD±R (8 cm / 12 cm disc) Video mode and finalized onlySupports the dual layer disc alsoDVD±R discs that contain Video, Music or Photo files. - - - DVD-RW (8 cm / 12 cm disc) ...
Page 10 - File compatibility; Overall; Video Files; Audio Files
10 Preparation P reparation 2 File compatibility Overall Available File extensions: “.jpg”, “.avi”, “.mpg”, “.mpeg”, “.mp3”, “.wma” The file name is limited to 20 characters.Depending on the size and number of the files, it may take several minutes to read the contents on the media. Maximum Files/Me...
Page 11 - Main Unit
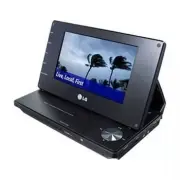
11 Preparation P reparation 2 Main Unit a LCD screen b Menu control buttons • left/right/up/down: Use to select an item in the menu. • ENTER: Press to confirm menu selection. c Playback control buttons • N (Play) / X (Pause): Press to start playback and pause playback temporarily, press again to exi...
Page 12 - Remote control
12 Preparation P reparation 2 Remote control POWER ( 1 ): Switches the player ON or OFF. AUDIO ( ): Selects an audio language or audio channel. SUBTITLE ( ): Selects a subtitle language. ANGLE ( ): Selects a DVD camera angle, if available. SKIP ( . / > ): Goes to the next or previous chapter / tr...
Page 13 - Put the Battery into the Remote
1 Preparation P reparation 2 Put the Battery into the Remote Control Pinch the battery holder clip together then pull the tab to remove the battery holder. Insert the battery with the + facing in the same direction as the + on the battery holder. Replace the battery holder with battery into the Remo...
Page 14 - Power connections; AC adapter; Connecting the Automotive; Automotive adapter; Installation
1 Installation Installa tion 3 Power connections Connecting the AC Adapter Connect the supplied AC adapter from the unit to a power socket. Connecting the AC Adapter Power cordrelease knob Right side of the unit Plug into the “DC 12V IN” jack. Plug into a power source. AC adapter This AC adapter ope...
Page 16 - Battery Pack; Rechargeable Battery
1 Installation Installa tion 3 Battery Pack Attaching the Battery Pack The following picture shows how to attach or dettach the battery pack. You can attach or dettach the battery pack as the following Attaching the Battery Pack Dettaching the Battery Pack Rechargeable Battery Its rechargeable batte...
Page 17 - Unfolding the LCD; Extending the
1 Installation Installa tion 3 Unfolding the LCD panel To unfold the LCD panel, place the unit on a stable and even surface such as on a table. When finished using the unit, return the LCD panel to its original position. Do not leave the LCD panel in the face-up position, or sudden shocks may damage...
Page 18 - USB Flash Drive; Playback content in the USB
1 Installation Installa tion 3 USB Flash Drive connection This player can play video, music and photo files contained in the USB Flash Drive. Playback content in the USB Flash Drive 1. Connect a USB Flash Drive to the USB port until it fits into place. USB Flash Drive connection 2. Press MODE. 3. Se...
Page 19 - Settings for DVD; Adjust the Setup Settings; Menu Language
1 Installation Installa tion 3 Settings for DVD Player You can change the settings for the DVD player in the [Setup] menu. Adjust the Setup Settings 1. Press MODE. 2. Select [DISC] option using b / B , and press ENTER ( ). 3. Press SETUP. The [Setup] menu appears. 4. Use v / V to select the first se...
Page 20 - TV Aspect Ratio; Display Mode
20 Installation Installa tion 3 [DISPLAY] Menu TV Aspect Ratio Select which screen aspect to use based on the shape of your TV screen. [4:3] Select when a standard 4:3 TV is connected. [16:9] Select when a 16:9 wide TV is connected. Display Mode If [ TV Aspect Ratio] option is set to [4:3], you will...
Page 21 - Settings for TV; When you select the TV mode
21 Installation Installa tion 3 NOTE If you make a mistake before pressing ENTER ( ), press CLEAR. Then input the correct password. Area Code Enter the code of the area whose standards were used to rate the DVD video disc, based on the list on page 38. [OTHERS] Menu B.L.E. (Black Level Expansion) To...
Page 22 - Auto Scan
22 Installation Installa tion 3 4. Use v / V to select a first setup option, and press B to move to the second level. 5. Use v / V to select a desired setting, and press ENTER ( ) to confirm your selection. Auto Scan Automatically finds all digital channels available through the built-in antenna and...
Page 23 - TV Rating - US Rating
2 Installation Installa tion 3 TV Rating - US Rating Blocks TV programs that you or your family may not wish to watch, based on the rating scheme set. 1. Select [ TV Rating] option then press B . 2. Select [US Rating] option then press B . 3. Enter the 4-digit password. The menu for Movie rating sel...
Page 24 - TV Rating - Downloadable; TV Rating - Canadian Rating
2 Installation Installa tion 3 TV Rating - Downloadable Rating The rating information can be updated if the TV station sends the downloadable rating information. 1. Select [ TV Rating] option then press B . 2. Select [Downloadable Rating] option then press B . 3. Select a rating title or TV rating t...
Page 25 - Password
2 Installation Installa tion 3 5. Press B . The menu for French rating selection will appear. 6. Use v / V to select a French rating. French Rating Description E Exempt - Exempt programming includes: news, sports, etc. G General - Program intended for audience of all ages. 8 ans+ Not recommended for...
Page 26 - General Playback; Playing Discs; Operation
2 Operation Oper ation 4 General Playback Playing Discs 1. Open the disc lid, and place a disc on the disc tray. 2. Close the disc lid. 3. Press MODE. 5. Select [DISC] option using b / B , and press ENTER ( ). For the most Audio CD and DVD-ROM discs, playback starts automatically. 6. Select a file u...
Page 27 - Using the disc menu; To display the disc menu; Resume playback; Advanced Playback; Repeat Playback; Repeating a specific portion
2 Operation Oper ation 4 Using the disc menu DVD To display the disc menu The menu screen may be displayed first after loading a disc which contains a menu. If you want to display the disc menu while playback, press MENU. Use v / V / b / B buttons to navigate through menu items. To display the Title...
Page 28 - Hearing a different audio
2 Operation Oper ation 4 Hearing a different audio DVD MOVIE During playback, press press AUDIO ( ) repeatedly to select desired audio language, audio track or audio channel. NOTE Some discs allow you to change audio selections only via the disc menu. In this case, press TITLE or MENU button and cho...
Page 30 - Displaying content information
0 Operation Oper ation 4 On-Screen display You can display and adjust various information and settings about the content. Displaying content information on-screen DVD MOVIE 1. While playback, press DISPLAY to show various playback information. a f e d c b a Title – current title number/total number ...
Page 31 - Playing a video file; Changing subtitle code page
1 Operation Oper ation 4 Playing a video file You can play video files contained in a disc/USB Flash Drive. 1. Insert a disc or connect USB Flash Drive. 2. Press MODE. 3. Select [DISC] or [USB] option using b / B , and press ENTER ( ). 4. Select [MOVIE] by pressing TITLE repeatedly if you need. 5. S...
Page 32 - Viewing a photo
2 Operation Oper ation 4 Viewing a photo You can view photo files using this player. 1. Insert a disc or connect USB Flash Drive. 2. Press MODE. 3. Select the [DISC] or [USB] option using b / B , and press ENTER ( ). 4. Select [PHOTO] by pressing TITLE repeatedly if you need. 5. Select a file using ...
Page 33 - Listening to music
Operation Oper ation 4 Listening to music The player can play Audio CDs and audio files. 1. Insert a disc or connect USB Flash Drive. 2. Press MODE. 3. Select the [DISC] or [USB] option using b / B , and press ENTER ( ). 4. Select a music file or audio track using v / V , and press ENTER ( ) to play...
Page 34 - Viewing the TV; Channel Selection; Channel List
Operation Oper ation 4 Viewing the TV Program You can view the TV program through the built-in Mobile Digital Television tuner. 1. Extend the built-in antenna on the unit to its full length. 2. Press MODE. 3. Select the [ TV ] option using b / B , and press ENTER ( ). 4. Select a channel using CH +/...
Page 35 - Program Information Display
Operation Oper ation 4 Program Information Display The Information Display appears if you press the DISPLAY button on the remote control while viewing a program. The Program Information shows items listed below. Channel NumberStation NameProgram TitleClosed Caption Icon ( ) Indicates that the curren...
Page 36 - Notes on Discs; Maintenance
Maintenance Main tenanc e 5 Notes on Discs Handling Discs Do not touch the playback side of the disc. Hold the disc by the edges so that fingerprints do not get on the surface. Never stick paper or tape on the disc. Storing Discs After playing, store the disc in its case. Do not expose the disc to d...
Page 37 - Troubleshooting; Symtom
Troubleshooting Trouble shoo ting 6 6 Troubleshooting Troubleshooting Symtom Cause & Solution The Power does not turned on. Plug the power cord into the wall outlet securely.The battery is discharged. Recharge the battery. •• The unit does not start playback. Insert a playable disc. (Check the d...
Page 38 - Appendix; Area Code List; Area
Appendix Appendix 7 7 Appendix Area Code List Choose an area code from this list. Area Code Area Code Area Code Area Code Afghanistan AF Argentina AR Australia AU Austria AT Belgium BE Bhutan BT Bolivia BO Brazil BR Cambodia KH Canada CA Chile CL China CN Colombia CO Congo CG Costa Rica CR Croatia H...
Page 39 - Language code List; Language
Appendix Appendix 7 Language code List Use this list to input your desired language for the following initial settings: [Disc Audio], [Disc Subtitle] and [Disc Menu]. Language Code Language Code Language Code Language Code Afar 6565 Afrikaans 6570 Albanian 8381 Ameharic 6577 Arabic 6582 Armenian 728...
Page 40 - General; Specifications
0 Appendix Appendix 7 General Power requirements: DC 12 V 2 A Dimensions (W x H x D): Approx. 237 mm x 54 mm x 149 mm (9.3 x 2.1 x 5.9 inches) with battery pack Net Weight (Approx.): Approx. 1.2 kg (2.7 lbs) with battery pack Operating temperature: 0 °C to 40 °C (32 °F to 104 °F) Operating humidity:...