Page 2 - SPECIAL FEATURE; TOUCH SCREEN LCD DISPLAY; EASY-ACCESS REVERSIBLE DOOR; NOTE
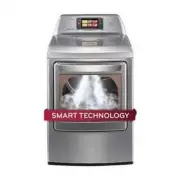
2 SPECIAL FEATURE TOUCH SCREEN LCD DISPLAY The full color touch screen LCD control displays all cycle, setting, progress and control information. Selections, navigation and adjustments are made by touching the icons on the screen for the desired actions. SMART THINQ SMART DIAGNOSIS™ - Should you exp...
Page 3 - ENGLISH; READ ALL INSTRUCTIONS BEFORE USE; WARNING; Your Safety and the safety of others is very important.; DANGER; WHAT TO DO IF YOU SMELL GAS:
3 ENGLISH IMPORTANT SAFETY INSTRUCTIONS READ ALL INSTRUCTIONS BEFORE USE w WARNING For your safety, the information in this manual must be followed to minimize the risk of fire or explosion, electric shock, or to prevent property damage, injury to persons, death. Your Safety and the safety of others...
Page 4 - BASIC SAFETY PRECAUTIONS; CALIFORNIA SAFE DRINkING WATER AND TOxIC ENFORCEMENT ACT
4 IMPORTANT SAFETY INSTRUCTIONS READ ALL INSTRUCTIONS BEFORE USE w WARNING For your safety, the information in this manual must be followed to minimize the risk of fire or explosion, electric shock, or to prevent property damage, injury to persons, death. BASIC SAFETY PRECAUTIONS w WARNING To reduce...
Page 5 - GROUNDING INSTRUCTIONS; SAFETY INSTRUCTIONS FOR INSTALLATION
5 ENGLISH IMPORTANT SAFETY INSTRUCTIONS READ ALL INSTRUCTIONS BEFORE USE w WARNING For your safety, the information in this manual must be followed to minimize the risk of fire or explosion, electric shock, or to prevent property damage, injury to persons, death. GROUNDING INSTRUCTIONS w WARNING Imp...
Page 7 - SAFETY INSTRUCTIONS FOR CONNECTING ELECTRICITY; SAVE THESE INSTRUCTIONS
7 ENGLISH IMPORTANT SAFETY INSTRUCTIONS READ ALL INSTRUCTIONS BEFORE USE w WARNING For your safety, the information in this manual must be followed to minimize the risk of fire or explosion, electric shock, or to prevent property damage, injury to persons, death. SAFETY INSTRUCTIONS FOR CONNECTING E...
Page 9 - PARTS AND FEATURES; Components; INCLUDED ACCESSORIES
9 ENGLISH PARTS AND FEATURES PARTS AND FEATURES Components INCLUDED ACCESSORIES Terminal Block Access Panel (Electric Models) Gas Connection Location (Gas Models) Exhaust Duct Outlet Power Cord Location (Gas Models) Leveling Feet Control panel Reversible door Front-Mount Lint Filter Drying Rack NOTE...
Page 10 - LCD SCREEN INTRODUCTION; MENU OPTION BUTTONS
10 PARTS AND FEATURES LCD SCREEN INTRODUCTION HOME/CYCLE SCREEN(S) The full color LCD touch screen controls are operated by touching the icons or various areas of the screen as described in this Owner’s Manual. Touching the icons or buttons changes the displayed information or navigates among the di...
Page 11 - CYCLE INFORMATION SCREENS
11 ENGLISH CYCLE INFORMATION SCREENS Selecting a cycle will display the cycle information screen. The cycle information screen allows you to view or modify the cycle settings and options of the selected cycle either before or while paused during the cycle. SELECTED CYCLE Displays the icon and name o...
Page 12 - Preview installation order
12 INSTALLATION INSTRUCTIONS Preview installation order Checking and choosing the proper location Leveling the dryer Connecting Electric Dryers (Electric Dryer Type) Venting the Dryer Plugging in the power cord and grounding Connecting Gas Dryers (Gas Dryer Type) Duct check test (Refer to page 27.) ...
Page 13 - Installation location requirements; Clearances; InstallatIon spacIng for recessed area or closet InstallatIon
13 ENGLISH INSTALLATION INSTRUCTIONS Installation location requirements w WARNING Read all installation instructions completely before installing and operating your dryer! It is important that you review this entire manual before installing and using your dryer. Detailed instructions concerning elec...
Page 14 - recommended InstallatIon spacIng for cabInet InstallatIon; Leveling the dryer
14 INSTALLATION INSTRUCTIONS Clearance (Cont.) recommended InstallatIon spacIng for cabInet InstallatIon • For cabinet installation with a door, minimum ventilation openings in the top of the cabinet are required. *Required spacing**For side or bottom venting, 2 inches (5.1 cm) spacing is allowed. C...
Page 15 - Reversing the door
15 ENGLISH INSTALLATION INSTRUCTIONS w WARNING • To avoid damage to the dryer or the door, support the door with a stool or box that fits under the door, or have an assistant support the weight of the door. • Avoid dropping the door to avoid damage to the door or the floor. THe DRYeR DOOR IS VeRY LA...
Page 16 - Changing the dryer vent location; optIon 1: sIde VentIng
16 Changing the dryer vent location w WARNING • Use a heavy metal vent.• Do not use plastic or thin foil duct.• Clean old ducts before installing this dryer.• To reduce the risk of personal injury, adhere to all industry recommended safety procedures including the use of long sleeved gloves and safe...
Page 17 - Venting the dryer
17 ENGLISH Venting the dryer w WARNING To reduce the risk of fire, electric shock, or personal injury when using this appliance, follow basic precautions, including the following: • Do not crush or collapse ductwork. Failure to follow these instructions can result in fire or death. • Do not allow du...
Page 18 - routIng and connectIng ductwork; ductwork; INCORRECT VENTING
18 INSTALLATION INSTRUCTIONS Venting the dryer (cont.) routIng and connectIng ductwork ductwork WALL CAP TYPE 0 1 2 3 4 0 1 2 3 4 NUMBER OF 90° ELBOWS MAxIMUM LENGTH OF 4-INCH DIAMETER RIGID METAL DUCT 65 ft. (19.8 m) 55 ft. (16.8 m) 47 ft. (14.3 m) 36 ft. (11.0 m) 28 ft. (8.5 m) 55 ft. (16.8 m) 47 ...
Page 19 - Connecting gas dryers; electrical requirements for gas models only
19 ENGLISH Connecting gas dryers w WARNING To reduce the risk of fire, electric shock, or personal injury when using this appliance, follow basic precautions, including the following: electrical requirements for gas models only w WARNING To reduce the risk of fire, electric shock, or personal injury...
Page 20 - connecting the gas supply
20 Connecting gas dryers (cont.) w WARNING To reduce the risk of fire, electric shock, or personal injury when using this appliance, follow basic precautions, including the following: • Installation and service must be performed by a qualified installer, service agency, or the gas supplier. Failure ...
Page 21 - Connecting electric dryers; electrical requirements for electric models only
21 ENGLISH Connecting electric dryers w WARNING To help prevent fire, electric shock, serious injury, or death, the wiring and grounding must conform to the latest edition of the National Electrical Code, ANSI/NFPA 70 and all applicable local regulations. please contact a qualified electrician to ch...
Page 22 - USA only; four-wire connection for electric dryers:
22 INSTALLATION INSTRUCTIONS Connecting electric dryers (cont.) USA only w WARNING • Connect the power cord to the terminal block. Each colored wire should be connected to same color screw. Wire color indicated on manual is connected to the same color screw in block. Failure to follow these instruct...
Page 23 - four-wire connection for electric dryers: direct wire
23 ENGLISH INSTALLATION INSTRUCTIONS Connecting electric dryers (cont.) USA only w WARNING • Connect the power cord to the terminal block. Each colored wire should be connected to same color screw. Wire color indicated on manual is connected to the same color screw in block. Failure to follow these ...
Page 24 - three-wire connection for electric dryers:
24 INSTALLATION INSTRUCTIONS Connecting electric dryers (cont.) USA only w WARNING • Connect the power cord to the terminal block. Each colored wire should be connected to same color screw. Wire color indicated on manual is connected to the same color screw in block. Failure to follow these instruct...
Page 25 - three-wire connection for electric dryers: direct wire
25 ENGLISH INSTALLATION INSTRUCTIONS Connecting electric dryers (cont.) USA only w WARNING • Connect the power cord to the terminal block. Each colored wire should be connected to same color screw. Wire color indicated on manual is connected to the same color screw in block. Failure to follow these ...
Page 26 - Special requirements for; testing dryer Heating; GAS MODELS; checking airflow
26 INSTALLATION INSTRUCTIONS Special requirements for manufactured or mobile homes Any installation in a manufactured or mobile home must comply with the Manufactured Home Construction and Safety Standards Title 24 CFR, Part 32-80 or Standard CAN/CSA0Z240 MH and local codes and ordinances. If you ar...
Page 28 - Restricted or Blocked Airflow; HS
28 INSTALLATION INSTRUCTIONS Installation test (Exhaust check) (cont.) Restricted or Blocked Airflow Avoid long runs or runs with multiple elbows or bends. excess or crushed transition duct Too many elbows or exhaust too long Check for blockages and lint buildup. Make sure the ductwork is not crushe...
Page 29 - HOW TO USE; BASIC OPERATION
29 ENGLISH HOW TO USE SELECT A CYCLE Scroll through the cycle screens, by either touching the arrow buttons or swiping the screen, and select your desired cycle. Touch a cycle button to view its preset dry level, temperature, dry time, and option settings. HOW TO USE BASIC OPERATION BEGIN CYCLE Touc...
Page 30 - CYCLE GUIDE
30 HOW TO USE CYCLE GUIDE The cycle guide below shows the available options and recommended fabric types. Cycle Fabric or Load Type Temperature Dry Level Time in Min. Easy Iron Wrinkle Care Reduce Static Damp Dry Beep Cotton/Normal Use this cycle for everyday fabrics including cottons and blends. Me...
Page 31 - manual dry cycles; Certified by NSF; sensor dry cycles
31 ENGLISH Default Setting (Bold) = Available Option CYCLE GUIDE The cycle guide below shows the available options and recommended fabric types. HOW TO USE NOTE The default time and actual time will vary depending on the size of the load and moisture content. manual dry cycles Use Manual Dry cycle...
Page 32 - Check the lint filter before every; Loading the Dryer; loading tips
32 HOW TO USE Following are instructions for starting and using your new dryer. please refer to specific sections of this manual for more detailed information. Check the lint filter before every load Always make sure the lint filter is clean before starting a new load; a clogged lint filter will inc...
Page 33 - CYCLE SETTINGS BUTTONS; TIME DRY
33 ENGLISH HOW TO USE CYCLE SETTINGS BUTTONS each cycle has default settings that are selected automatically. You may also customize these settings using the cycle modifier buttons. AUTO DRY cycles are designed to properly care for specific fabrics and loads. TIMeD DRY cycles have default settings, ...
Page 34 - TIME AND STATUS SCREEN; CYCLE STATUS
34 HOW TO USE TIME AND STATUS SCREEN The Time and Status Display shows the cycle time, cycle progress, and vent status. When the dryer is turned on, the display will illuminate. B A E C D CYCLE STATUS Displays the cycle status. A ESTIMATED TIME REMAINING After the cycle has started, the dryer will d...
Page 35 - MENU OPTIONS BUTTONS AND SCREENS
35 ENGLISH HOW TO USE PRODUCT REGISTRATION To use the connectivity features of your appliance, you must first create a user ID and password at the LG Smart TinkQ website (http://us.smartthinq.com). Once that is completed, use the product Registration screen to register your appliance to your online ...
Page 37 - STEAM FUNCTIONS; CYCLE OPTIONS AND SPECIAL FEATURES
37 ENGLISH HOW TO USE STEAM FUNCTIONS LG’s new steam technology allows you to inject fabrics with a swirling jet of hot steam to refresh clothes, reduce static, and make ironing easier. Simply select the STeAM FReSH™ cycle, or you can add a steam option to selected cycles. Using the STEAMFRESH™ Cycl...
Page 38 - FILLING THE STEAM FEEDER (IF USING A STEAM FUNCTION); STEAM CYCLE GUIDE
38 FILLING THE STEAM FEEDER (IF USING A STEAM FUNCTION) HOW TO USE CYCLE STEAM DEFAULT TIME TEMP. CONTROL DRY LEVEL FABRIC STATE FABRIC TYPE MAxIMUM AMOUNT STeAM SANITARY TM 39 minutes Dry Comforter Bedding Children’s clothing Single (1 each) 3 lbs. STeAM FReSH TM 20 minutes Dry Comforter Shirts* ...
Page 40 - SMART THINQ OPERATION
40 SMART THINQ OPERATION SMART APPLIANCE CONNECTIVITY SMART APPLIANCE CONNECTIVITY Connecting this appliance to a Wi-Fi network allows you to use its many connectivity features. The ZigBee modem is used for Smart Grid connectivity, where available. 1. Open the cover by pulling it open at the top. 2....
Page 41 - CONNECTIVITY OVERVIEW
41 ENGLISH 1. Click “Sign In” in the upper right corner of the web page.2. On the login page, below the ID and password boxes, click the Membership “Join” button. 3. On the next page, you must agree to the terms of use and the privacy statement. Click “Confirm.” 4. Next, in the ID box, enter your em...
Page 42 - SMART GRID; CONNECTIVITY SETUP; PRODUCT REGISTRATION
42 SMART APPLIANCE CONNECTIVITY SMART GRID If your utility company has equipped your home with Smart Grid technology, you will need to contact the utility company for information regarding the set up of the ZigBee modem and the Smart Grid features. Your utility company can provide you with informati...
Page 43 - SMART THINQ
43 ENGLISH To use the Smart Adapt features of this appliance, the appliance must first be registered (refer to the previous sections). This allows the system to identify you and your appliance so that you can take advantage of the Smart Adapt features. each time you turn on the appliance it will che...
Page 44 - LG SMART APPLIANCE; SMART DIAGNOSISTM
44 SMART ACCESS Monitor your cycle operation so you know how much time is left in the cycle. You can even shut the machine off if you need to. SMART ADAPT This feature allows you to find and download special cycles to fit your particular laundry needs. SMART MANAGER (LAUNDRY GUIDE) The Smart Manager...
Page 45 - MAINTENANCE; Regular cleaning; cleaning the exterior
45 ENGLISH MAINTENANCE MAINTENANCE Regular cleaning w WARNING To reduce the risk of fire, electric shock, or personal injury when using this appliance, follow basic precautions, including the following: • Unplug the dryer before cleaning to avoid the risk of electric shock. Failure to follow this wa...
Page 46 - Before calling for service
46 TROUBLESHOOTING Before calling for service Your dryer is equipped with an automatic error-monitoring system to detect and diagnose problems at an early stage. If your dryer does not function properly or does not function at all, check the following before you call for service. Problem Possible Ca...
Page 48 - Audible Diagnosis
48 SMART DIAGNOSIS™ SYSTEM Audible Diagnosis Should you experience any problems with your dryer, it has the capability of transmitting data to your Smart phone using the LG Smart Laundry Application or via your telephone to the LG call center. SMART DIAGNOSIS™ cannot be activated unless your dryer i...
Page 49 - SMART DIAGNOSISTM Using Your Smart Phone; OPEN SOURCE SOFTWARE
49 ENGLISH SMART DIAGNOSIS™ Using Your Smart Phone 1. Make sure that your appliance is connected to Wi-Fi by checking the Wi-Fi icon on the upper right hand corner of the display screen. 2. Touch the Smart ThinQ button on the lower part of the Screen.3. Touch the Smart Diagnosis button.4. Touch the ...
Page 50 - TO CONTACT LG ELECTRONICS BY; Dryer drum 10 years limited warranty; Parts only. Customer will be responsible for any labor or; LG DRYER LIMITED WARRANTY - USA; appropriate option to locate your nearest LG; Product Registration Information
50 Your LG Dryer will be will repaired or replaced, at LG’s option, if it proves to be defective in material or workmanship under normal use, during the warranty period (“Warranty Period”) set forth below, effective from the date (“Date of Purchase”) of original consumer purchase of the product. Thi...
Page 51 - MANUAL DE PROPIETARIO; PANTALLA TÁCTIL; secadora luego de la instalacion para futuras consultas.; ESP
MANUAL DE PROPIETARIO PANTALLA TÁCTIL SECADORA Antes de comenzar la instalacion, lea atentamente estas instrucciones. Esto simplifi cara la instalacion y asegurara que la secadora esta instalada en forma correcta y segura. Conserve estas instrucciones cerca de la secadora luego de la instalacion para...
Page 52 - PANTALLA TÁCTIL LCD; NOTA
2 CARACTERÍSTICAS ESPECIALES PANTALLA TÁCTIL LCD La pantalla táctil LCD a todo color muestra todos los ciclos, configuraciones, progreso e información de control. Las selecciones, la navegación y los ajustes se realizan tocando los iconos en la pantalla de las acciones deseadas. SMART THINQ SMART DI...
Page 53 - LEA TODAS LA INSTRUCCIONES ANTES DE USAR; ADVERTENCIA; Su Seguridad y la de los demás son de suma importancia.; PELIGRO; QUÉ HACER SI HUELE GAS:
3 ESP AÑOL INSTRUCCIONES IMPORTANTES DE SEGURIDAD LEA TODAS LA INSTRUCCIONES ANTES DE USAR w ADVERTENCIA Por su seguridad, debe seguir la información indicada en este manual para minimizar el riesgo de incendio o explosión, descarga eléctrica, o para prevenir daños a la propiedad, lesiones personale...
Page 54 - PRECAUCIoNES báSICAS dE SEGURIdAd; (CALIfoRNIA SAfE dRINkING WAtERAtER ANd toxIC ENfoRCEmENt ACt)
4 INSTRUCCIONES IMPORTANTES DE SEGURIDAD LEA TODAS LA INSTRUCCIONES ANTES DE USAR w ADVERTENCIA Por su seguridad, se debe seguir la información indicada en este manual para minimizar el riesgo de incendio o explosión, descarga eléctrica, o para prevenir daños a la propiedad, lesiones personales o mu...
Page 55 - INStRUCCIoNES dE CoNExIóN A tIERRA; INStRUCCIoNES ImPoRtANtEImPoRtANtES PARA LA INStALACIóN
5 ESP AÑOL INSTRUCCIONES IMPORTANTES DE SEGURIDAD LEA TODAS LA INSTRUCCIONES ANTES DE USAR w ADVERTENCIA Por su seguridad, se debe seguir la información indicada en este manual para minimizar el riesgo de incendio o explosión, descarga eléctrica, o para prevenir daños a la propiedad, lesiones person...
Page 56 - INStRUCCIoNES ImPoRtANtES PARA LA INStALACIóN
6 INSTRUCCIONES IMPORTANTES DE SEGURIDAD LEA TODAS LA INSTRUCCIONES ANTES DE USAR w ADVERTENCIA Por su seguridad, se debe seguir la información indicada en este manual para minimizar el riesgo de incendio o explosión, descarga eléctrica, o para prevenir daños a la propiedad, lesiones personales o mu...
Page 57 - GUARdE EStAS INStRUCCIoNES
7 ESP AÑOL INSTRUCCIONES IMPORTANTES DE SEGURIDAD LEA TODAS LA INSTRUCCIONES ANTES DE USAR w ADVERTENCIA Por su seguridad, se debe seguir la información indicada en este manual para minimizar el riesgo de incendio o explosión, descarga eléctrica, o para prevenir daños a la propiedad, lesiones person...
Page 59 - PIEZAS Y CARACTERÍSTICAS; Componentes; ACCESORIOS INCLUIDOS
9 ESP AÑOL PIEZAS Y CARACTERÍSTICAS NOTA • Póngase en contacto con el Departamento de atención al cliente de LG, en el número 1-800-243-0000 (1-888-542-2623 en Canadá) si falta alguno de los accesorios. • Para su seguridad, y con el fin de ampliar la vida útil de su secadora, utilice sólo componente...
Page 60 - INTRODUCCIÓN A LA PANTALLA LCD; PANTALLAS DE CICLO/INICIO; botoNES dE oPCIoNES dE mENÚ
10 PIEZAS Y CARACTERÍSTICAS INTRODUCCIÓN A LA PANTALLA LCD PANTALLAS DE CICLO/INICIO Los controles de la pantalla táctil LCD a todo color se operan tocando los iconos o las varias áreas de la pantalla, como se describe en este Manual del propietario. Tocar los iconos o botones cambia la información ...
Page 61 - PANTALLAS DE INFORMACIÓN DEL CICLO; CoNfIGURACIóN dE CICLo
11 ESP AÑOL PANTALLAS DE INFORMACIÓN DEL CICLO Si selecciona un ciclo, se mostrará la pantalla de información del ciclo. La información del ciclo le permite visualizar o modificar las configuraciones del ciclo y las opciones del ciclo seleccionado antes de que el ciclo comience o durante este, mient...
Page 62 - INSTRUCCIONES PARA LA INSTALACIÓN; Vista previa del orden de instalación
12 INSTRUCCIONES PARA LA INSTALACIÓN INSTRUCCIONES PARA LA INSTALACIÓN Vista previa del orden de instalación Comprobación y elección de la ubicación adecuada Nivelación de la secadora Conexión de secadoras a gas (Tipo de secadoras gas) ventilación de la secadora Conexión del enchufe y la toma de tie...
Page 63 - Requisitos del lugar de instalación; Espacios de instalación
13 ESP AÑOL INSTRUCCIONES PARA LA INSTALACIÓN Requisitos del lugar de instalación w ADVERTENCIA Siga las instrucciones de funcionamiento y cuidado incluidas en este manual y conseguirá que su secadora ofrezca un servicio fiable y duradero. es importante que revise todo este manual antes de instalar ...
Page 64 - Nivelación de la secadora
14 INSTRUCCIONES PARA LA INSTALACIÓN Espacios de instalación (Cont.) Separación recomendada para la inStalación en un habitáculo cerrado • Al realizar la instalación en un habitáculo cerrado debe haber salidas de ventilación mínimas en la parte superior e inferior del lugar. *espacio requerido** par...
Page 65 - Inversión de la puerta
15 ESP AÑOL INSTRUCCIONES PARA LA INSTALACIÓN w ADVERTENCIA • Para evitar daños en la secadora o en la puerta, sujete dicha puerta con un taburete o una caja de un tamaño acorde o consiga un apoyo que soporte el peso de la puerta. • Evite que la puerta se caiga para que no se produzcan daños en la p...
Page 66 - opción 1: Ventilación lateral; opción 2: Ventilación inferior
16 Cómo cambiar la ubicación del conducto de ventilación de la secadora w ADVERTENCIA • Utilice material para ventilación de metal pesado.• No utilice conductos de plástico o aluminio delgado.• Limpie los conductos antiguos antes de instalar esta secadora. • Para reducir el riesgo de lesiones person...
Page 67 - Cónexión del conducto de ventilación de la secadora
17 ESP AÑOL Cónexión del conducto de ventilación de la secadora w ADVERTENCIA para reducir el riesgo de incendio, descargas eléctricas o heridas al usar su electrodoméstico, siga las precauciones básicas, incluyendo lo siguiente: • No aplaste ni doble el sistema de conducto. Si no se siguen estas in...
Page 68 - direccionamiento y conexión del SiStema de; Sistema de conducto; vENtILACIóN dE ESCAPE
18 INSTRUCCIONES PARA LA INSTALACIÓN Conexión del conducto de ventilación de la secadora (cont.) direccionamiento y conexión del SiStema de conducto de eScape Sistema de conducto tIPo dE tAPA dE PAREd 0 1 2 3 4 0 1 2 3 4 NÚmERo dE CodoS dE 90° LoNG. máx. dE CoNdUCto mEtáLICo fLExIbLE dE dIám. 4” 65 ...
Page 69 - Conexión de secadoras a gas; requisitos eléctricos para modelos a gas únicamente
19 ESP AÑOL INSTRUCCIONES PARA LA INSTALACIÓN Conexión de secadoras a gas w ADVERTENCIA para reducir el riesgo de incendio, descargas eléctricas o heridas al usar su electrodoméstico, siga las precauciones básicas, incluyendo lo siguiente: requisitos eléctricos para modelos a gas únicamente w ADVERT...
Page 70 - conexión del suministro de gas; conexión eléctrica
20 Conexión de secadoras a gas (cont.) w ADVERTENCIA para reducir el riesgo de incendio, descargas eléctricas o heridas al usar su electrodoméstico, siga las precauciones básicas, incluyendo lo siguiente: • La instalación y el mantenimiento deben proveerse por un instalador calificado, agencia de ma...
Page 71 - Cómo conectar las secadoras eléctricas; requisitos eléctricos únicamente para modelos eléctricos; requisitos eléctricos especiales para viviendas móviles o
21 ESP AÑOL Cómo conectar las secadoras eléctricas w ADVERTENCIA para ayudar a evitar incendios, descargas eléctricas, heridas graves o muerte, el cableado e instalación a tierra deben cumplir con la última edición del Código Eléctrico Nacional, ANSI/NFPA 70 y todas las regulaciones locales aplicabl...
Page 72 - conexión de cuatro hilos para secadoras
22 Cómo conectar las secadoras eléctricas (cont.) SÓLO EE.UU. w ADVERTENCIA • Conecte el cable de suministro de corriente al bloque terminal. Cada cable de color, se debe conectar al tornillo del mismo color. El color del cable que figura en el manual se conecta el tornillo del mismo color en el blo...
Page 73 - conexión de cuatro hilos para secadoras eléctricas:
23 ESP AÑOL w ADVERTENCIA • Conecte el cable de suministro de corriente al bloque terminal. Cada cable de color se debe conectar al tornillo del mismo color. El color del cable que figura en el manual se conecta el tornillo del mismo color en el bloque. de otro modo se podrá producir un flujo de cor...
Page 74 - conexión de tres hilos para secadoras eléctricas:
24 • Instale un cable eléctrico de 30 A, 240 v, listado por UL con un conductor de cobre Núm. 10 AWG como mínimo y terminales de bucle cerrado o de horquilla con extremos doblados hacia arriba. 2. Conecte los dos conductores calientes del cable eléctrico a los tornillos del bloque terminal exterior....
Page 76 - Requisitos especiales para viviendas; comprobación del calentamiento; modELoS A GAS; revisión del flujo de aire
26 INSTRUCCIONES PARA LA INSTALACIÓN Requisitos especiales para viviendas móviles o prefabricadas Cualquier instalación en una vivienda móvil o prefabricada debe realizarse de conformidad con los estándares de seguridad y construcción de viviendas prefabricadas, Título 24 CFR, Parte 32-80 o estándar...
Page 77 - Test de Instalación (Comprobación del sistema de evacuación)
27 ESP AÑOL INSTRUCCIONES PARA LA INSTALACIÓN Una vez haya instalado la secadora, haga este test para asegurarse de que las condiciones del sistema de evacuación son las adecuadas para el funcionamiento correcto de la secadora. este test tiene como objetivo mostrarle si existe algún problema importa...
Page 78 - Test de Instalación; flujo de Aire Restringido o bloqueado
28 INSTRUCCIONES PARA LA INSTALACIÓN Test de Instalación (Comprobación del sistema de evacuación) (cont.) flujo de Aire Restringido o bloqueado evite funcionamientos prolongados o funcionamientos con múltiples formaciones de torceduras o codos. Conducto demasiado largo o muy torcido Tubería demasiad...
Page 79 - MODO DE UTILIZACIÓN; FUNCIONAMIENTO BÁSICO
29 ESP AÑOL MODO DE UTILIZACIÓN SELECCIoNAR UN CICLo Desplácese por las pantallas de ciclo, ya sea tocando los botones de flecha o deslizando la pantalla, y seleccione el ciclo deseado. Toque un botón de ciclo para visualizar el nivel de secado, la temperatura, el tiempo de secado y las configuracio...
Page 80 - GUÍA DE CICLO
30 MODO DE UTILIZACIÓN GUÍA DE CICLO La siguiente guía de ciclo muestra las opciones disponibles y los tipos de telas recomendados. Ciclo tipo de tela o de carga temperatura Nivel de secado tiempo en minutos Planchado fácil Cuidado de arrugas Reducción estática timbre de secado húmedo Algodón/Normal...
Page 81 - Certificado por NSf
31 ESP AÑOL Ciclo tipo de tela o de carga temperatura Nivel de secado tiempo en minutos Planchado fácil Cuidado de arrugas Reducción estática timbre de secado húmedo Delicada Utilice este ciclo para tejidos, tela delicada y sintética. baja Muy seco Más seco Normal Menos seco Sec húm 53 43 32 21 16 ...
Page 82 - Revise el filtro de pelusa antes de; Clasificación de cargas; etiquetas de mantenimiento de las telas; Cómo cargar la secadora; consejos útiles de carga
32 MODO DE UTILIZACIÓN Revise el filtro de pelusa antes de cada uso Asegúrese siempre de que el filtro de pelusa esté limpio antes de iniciar una carga nueva; un filtro de pelusa bloqueado incrementará los tiempos de secado. para limpiarlo, tire del filtro de pelusa verticalmente y, con los dedos, e...
Page 83 - BOTONES DE CONFIGURACIÓN DE CICLO
33 ESP AÑOL MODO DE UTILIZACIÓN BOTONES DE CONFIGURACIÓN DE CICLO Cada ciclo tiene configuraciones predeterminadas que se seleccionan automáticamente. Además, puede personalizar estas configuraciones usando los botones modificadores de ciclo. Los ciclos de SeCADO AUTOMÁTICO están diseñados para cuid...
Page 84 - PANTALLA TIEMPO Y ESTADO; EStAdo dEL CICLo
34 PANTALLA TIEMPO Y ESTADO La pantalla de tiempo y estado muestra el tiempo del ciclo, el progreso del ciclo y el estado de la ventilación. Cuando la secadora se enciende, la pantalla se ilumina. B A E C D EStAdo dEL CICLo Muestra el estado del ciclo. A tIEmPo REStANtE EStImAdo Una vez que el ciclo...
Page 85 - PANTALLAS Y BOTONES DE OPCIONES DE MENÚ
35 ESP AÑOL MODO DE UTILIZACIÓN REGIStRo dEL PRodUCto para usar las características de conectividad de su equipo, primero debe crear un nombre de usuario y una contraseña en el sitio web LG Smart ThinQ (http://us.smartthinq.com). Una vez completado el registro, utilice la pantalla de registro del pr...
Page 87 - OPCIONES DE CICLO Y CARACTERÍSTICAS ESPECIALES; Cómo usar el ciclo; Para usar el ciclo
37 ESP AÑOL MODO DE UTILIZACIÓN La secadora presenta varias opciones de ciclos adicionales y funciones especiales que se adaptan a sus necesidades individuales. PLANCHAdo fáCIL La opción easy Iron (planchado fácil) deja las telas uniformes y humedecidas en forma adecuada para planchar, lo que puede ...
Page 88 - GUÍA DE CICLO DE VAPOR
38 CICLo vAPoR tIEmPo PRoGRAmAdo PoR LA fábRICA CoNtRoL dE tEmP. NIvEL dE SECAdo EStAdo dE tELA tIPo dE tELA CANtIdAd máx. STeAM SANITARY TM 39 Min. Sega Camisas, Ropa de cama Ropa de niños Camisas (1 cada) 3 Ibs. STeAM FReSH TM 20 Min. Sega edredón Camisas* Camisas (1 cada) 5 cada + ReDUCCIóN eST...
Page 89 - NotAS ImPoRtANtES SobRE CICLoS dE vAPoR
39 ESP AÑOL NotAS ImPoRtANtES SobRE LoS CICLoS dE vAPoR: • Puede que el vapor no sea claramente visible durante los ciclos de vapor. esto es normal. • No use el ciclo STEAM FRESH™ con elementos como lana, manta de lana, camperas de cuero, seda, ropa húmeda, lencería, productos de espuma o mantas elé...
Page 90 - SmARt tHINQ oPERACIóN
40 SmARt tHINQ oPERACIóN CONECTIVIDAD SMART APPLIANCE CONECTIVIDAD SMART APPLIANCE Conectar este electrodoméstico con una red Wi-Fi le permite utilizar sus diversas funciones de conectividad. El módem ZigBee se utiliza para la conectividad Smart Grid (redes eléctricas inteligentes), en donde esté di...
Page 91 - INFORMACIÓN GENERAL ACERCA DE LA CONECTIVIDAD
41 ESP AÑOL 2. En la página de inicio de sesión, debajo del nombre de usuario y Contraseña, haga clic en el botón “Unirse” a la membresía. 3. En la página siguiente, usted debe aceptar las condiciones de uso y la declaración de privacidad. Haga clic en “Confirmar”. 4. Luego, en el cuadro de nombre d...
Page 92 - SmARt GRId; ZIGbEE; CONFIGURACIÓN DE CONECTIVIDAD; CoNfIGURACIóN dE Wi-fi
42 SmARt GRId Si su empresa de servicio eléctrico ha equipado su vivienda con un medidor inteligente con tecnología Smart Grid, deberá contactarse con la empresa de servicios para obtener información acerca de la configuración del módem ZigBee y de las características de red inteligente. Su compañía...
Page 93 - SmARt AdAPt
43 ESP AÑOL para usar las funciones Smart Adapt de este aparato, primero debe registrar el electrodoméstico (consulte las secciones anteriores). esto le permite al sistema identificarlos a usted y a su aparato para que usted pueda obtener los beneficios de las funciones Smart Adapt. Cada vez que enc...
Page 94 - APLICACIÓN LG SMART; SmARt dIAGNoSISTM
44 SmARt ACCESS Supervise el funcionamiento del ciclo para saber cuánto tiempo del ciclo queda. Incluso puede apagar la máquina si necesita hacerlo. SmARt AdAPt esta función le permite buscar y descargar ciclos especiales que se adecuen a sus necesidades particulares de lavado. SmARt mANAGER (LAUNdR...
Page 95 - MANTENIMIENTO; Limpieza regular; limpieza del exterior
45 ESP AÑOL MANTENIMIENTO MANTENIMIENTO Limpieza regular w ADVERTENCIA para reducir el riesgo de incendio, descargas eléctricas o heridas al usar su electrodoméstico, siga las precauciones básicas, incluyendo lo siguiente: • desenchufe la secadora antes de limpiar la misma para evitar el riesgo de d...
Page 96 - Antes de llamar a mantenimiento
46 RESOLUCIÓN DE PROBLEMAS Antes de llamar a mantenimiento Su secadora está equipada con un sistema de monitoreo de errores automático para la detección y el diagnóstico de problemas en una etapa temprana. Si su secadora no funciona adecuadamente o no funciona en lo absoluto, revise lo siguiente ant...
Page 98 - ESPECIFICACIONES
48 ESPECIFICACIONES ESPECIFICACIONES Secadora de modelos dLEx6001W dLGx6002W dLEx6001v dLGx6002v Descripción Secadora Requisitos eléctricos* Consulte la placa de clasificación para información en detalles. Requisitos de gas* NG: 4 a 10,5 pulgadas WC LP: 8 a 13 pulgadas WC (Solo modelos a gas) Dimens...
Page 99 - Autodiagnóstico utilizando su; Diagnóstico sonoro
49 ESP AÑOL SISTEMA SMART DIAGNOSIS™ Si tuviera algún problema con su secadora, la misma posee la capacidad de transmitir datos a un teléfono inteligente utilizando la aplicación Smart Laundry de LG o mediante el teléfono al Centro de atención telefónica de LG. La aplicación SMART DIAGNOSIS™, no pue...
Page 100 - SMART DIAGNOSISTM a través del centro; NOTIFICACIÓN DE SOFTWARE; Diagnóstico del Wi-Fi
50 NOTIFICACIÓN DE SOFTWARE DE FUENTE ABIERTA SMART DIAGNOSIS™ a través del centro de atención telefónica 1. Asegúrese de que su aparato esté conectado al Wi-Fi revisando el icono de Wi-Fi en la esquina superior derecha de la pantalla. 2. Toque el botón del Smart ThinQ en la parte inferior de la pan...
Page 101 - PARA CONTACTAR A LG ELECTRONICS; Garantía limitada del tambor de la secadora por 10; Solo las piezas. El cliente sera responsable de cual-; GARANTÍA LIMITADA DE LA SECADORA LG – EE. UU.; para ubicar a su Centro de Mantenimiento Autorizado LG; Información de registro del producto
51 ESP AÑOL Su secadora LG será reparada o reemplazada, a discreción de LG, si se comprueba que existe un defecto en el material o la mano de obra bajo condiciones de uso normales, durante el período de garantía (“Período de garantía”) establecido más abajo, vigente desde la fecha (“Fecha de compra”...
Page 108 - LG Customer Information Center
1-800-243-0000 USA 1-888-542-2623 CANADA LG Customer Information Center Register your product Online! www.lg.com