Page 2 - HVHWVHF
CONTENTS 1. SAFETY INSTRUCTIONS . . . . . . . . . . . . . . . . . . . . . . . . . . . . . . . . . . . . . . . . . . . . . . . . . . 3 2. PRODUCT DESCRIPTION . . . . . . . . . . . . . . . . . . . . . . . . . . . . . . . . . . . . . . . . . . . . . . . . . 5 3. CONTROL PANEL . . . . . . . . . . . . . ...
Page 3 - aus; Table of contents; Protection of the environment . 9
1. SAFETY INSTRUCTIONS Before the installation and use of the ap-pliance, carefully read the supplied in-structions. The manufacturer is not re-sponsible if an incorrect installation anduse causes injuries and damages. Alwayskeep the instructions with the appliancefor future reference. 1.1 Children ...
Page 4 - Intended use
WARNING! Dangerous voltage. • If the water inlet hose is damaged, im- mediately disconnect the mains plugfrom the mains socket. Contact theService to replace the water inlet hose. 1.3 Use • This appliance is intended to be used in household and similar applications suchas:– Farm houses.– By clients ...
Page 5 - Delivery
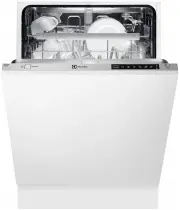
2. PRODUCT DESCRIPTION 1 2 3 4 7 9 5 6 11 8 10 1 Upper spray arm 2 Lower spray arm 3 Filters 4 Rating plate 5 Salt container 6 Air vent 7 Rinse aid dispenser 8 Detergent dispenser 9 Cutlery basket 10 Lower basket 11 Upper basket 2.1 Beam-on-Floor The Beam-on-Floor is a light that shows on the floor ...
Page 6 - In daily use; Activating the button lock:
3. CONTROL PANEL 1 2 3 4 5 6 7 8 9 1 On/off button 2 Display 3 Delay touchpad 4 Program touchpad 5 MyFavourite touchpad 6 TimeSaver touchpad 7 Multitab touchpad 8 EnergySaver touchpad 9 Indicators Indicators Description Salt indicator. It is always off while the program operates. Rinse aid indicator...
Page 7 - Deactivating the button lock:
4. PROGRAMS Program Degree of soilType of load Programphases Options P1 1) Normal soilCrockery and cut-lery PrewashWash 50 °CRinsesDry TimeSaverEnergySaverMultitab P2 2) AllCrockery, cutlery,pots and pans PrewashWash from 45 °C to70 °CRinsesDry EnergySaverMultitab P3 3) Mixed soilCrockery, cutlery,p...
Page 8 - Warning
Consumption values Program 1) Duration(min) Energy(kWh) Water(l) P1 147 - 161 0.79 - 0.96 10.4 - 12.6 P2 40 - 150 0.7 - 1.5 7 - 14 P3 130 - 140 1.3 - 1.5 14 - 15 P4 150 - 160 1.4 - 1.6 13 - 14 P5 55 - 65 1.0 - 1.2 9 - 10 P6 30 0.9 9 P7 14 0.1 4 1) The pressure and the temperature of the water, the v...
Page 9 - Protection of the; Packaging; Getting to know your; Control panel
5. OPTIONS Activate or deactivate the optionsbefore the start of a program. Youcannot activate or deactivate theoptions while a program operates. If one or more options are set,make sure that the related indica-tors are on before the programstarts. 5.1 MyFavourite With this option you can set and sa...
Page 10 - Overview of menu; Rinse aid
5.5 Acoustic signals The acoustic signals operate when theappliance has a malfunction or when theadjustment of the level of the water soft-ener occurs. It is not possible to deacti-vate these acoustic signals.There is also an acoustic signal that oper-ates when the programme is completed.By default,...
Page 11 - Setting amount of rinse aid; Utensils; Not suitable
Water hardness Water softener adjustment German degrees (°dH) French degrees (°fH) mmol/l Clarke degrees Electronic < 4 < 7 < 0.7 < 5 1 2) 1) Factory setting. 2) Do not use salt at this level. Electronic adjustment 1. Press the on/off button to activate theappliance. Make sure that the a...
Page 12 - Glass and utensil damage; Note; Cups and glasses
6.3 Filling the rinse aid dispenser M AX 1 2 3 4 + - A B D C 1. Press the release button ( D ) to open the lid ( C ). 2. Fill the rinse aid dispenser ( A ), no more than the mark 'max'. 3. Remove the spilled rinse aid with anabsorbent cloth to prevent too muchfoam. 4. Close the lid. Make sure that t...
Page 13 - Pans; Bottom basket; Cutlery basket
7.2 Setting and starting a program The Auto Off function To decrease the energy consumption, thisfunction automatically deactivates the ap-pliance a few minutes after:• You have not closed the door to start the program. • The program is completed. Setting mode For some settings it is necessary that ...
Page 14 - Small accessories holder *
8. HINTS AND TIPS 8.1 The water softener Hard water contains a high quantity ofminerals that can cause damage to theappliance and bad washing results. Thewater softener neutralises these minerals.The dishwasher salt keeps the water soft-ener clean and in good conditions. It isimportant to set the ri...
Page 15 - Adjusting the height of the; lower
9. CARE AND CLEANING WARNING! Before maintenance, deactivatethe appliance and disconnect themains plug from the mains socket. Dirty filters and clogged sprayarms decrease the washing re-sults.Make a check regularly and, ifnecessary, clean them. 9.1 Cleaning the filters A B C C 1. Turn the filter ( A...
Page 16 - Detergent; Adding detergent; PO
10. TROUBLESHOOTING The appliance does not start or it stopsduring operation.Before you contact the Service, refer tothe information that follows for a solutionto the problem. With some problems, the displayshows an alarm code: • - The appliance does not fill with water. • - The appliance does not d...
Page 18 - Overview of programmes; Programm
12. INSTALLATION If floor is n ot level, adjustlevelling legs t o s uit The hos e s hould not beextended by more than2 metres or water pump-out problems m a y occu r Remove entire plasticmembrane from sink trapspigot & fit drain hose to spigotwith clamp There should be a minimum2mm gap between t...
Page 19 - Programme selection; on the appliance door.; Additional options; Express Wash/ Speed
In order to pass the safety valve throughthe kitchen cabinets, an opening of atleast 45 mm x 90 mm is needed. Water drain hose The highest point of the drain hose mustbe no more than 600 mm from the floorand must have a continuous fall to theplumbing connection.The drain hose can be lengthened using...
Page 20 - Operating; Switching on the appliance; Turn on the tap fully.
13. WARRANTY FOR SALES IN AUSTRALIA AND NEWZEALANDAPPLIANCE: DISHWASHER This document sets out the terms andconditions of the product warrantiesfor Electrolux Appliances. It is an im-portant document. Please keep it withyour proof of purchase documents ina safe place for future referenceshould you r...
Page 21 - End of programme
owner’s cost and risk while in transitto and from Electrolux or its ASC. 6. Proof of purchase is required beforeyou can make a claim under this war-ranty. 7. You may not make a claim under thiswarranty unless the defect claimed isdue to faulty or defective parts orworkmanship. Electrolux is not liab...
Page 22 - Switching off the appliance; Interrupting the programme; Terminating the programme
Before calling for service, please ensure that the steps listed in point 13 above have been followed. FOR SERVICE or to find the address ofyour nearest state servicecentre in Australia Please call 13 13 4 9 For the cost of a local call (Aus- tralia only) SERVICE AUSTRALIA ELECTROLUX HOMEPRODUCTS www...
Page 23 - Cleaning and; If you find such deposits:; Rinse aid; Check the refill indicator
Page 24 - Filters