Dimplex BLF7451-AU - User Manual
Dimplex BLF7451-AU Fireplace – User Manual, read for free online in PDF format. We hope this helps you resolve any issues you may have. If you have further questions, please contact us through the contact form.


Table of Contents:
- Page 2 – Table of Contents; Site Selection
- Page 3 – Welcome & Congratulations; Serial Number; Please carefully read and save
- Page 4 – IMPORTANT SAFETY INSTRUCTIONS; Read all instructions before using this appliance.
- Page 6 – SAVE THESE INSTRUCTIONS
- Page 7 – Quick Reference Guide; Figure 1
- Page 8 – Fireplace Installation
- Page 9 – Surface Installation; Figure 2
- Page 10 – Figure 3
- Page 11 – Flush Mounted; Figure 5; Figure 4
- Page 12 – Figure 6; Figure 7
- Page 13 – Front Glass Installation; Figure 8
- Page 14 – Figure 9
- Page 15 – Operation; A C D E F
- Page 16 – Heat Only Mode; Disable Heat
- Page 19 – Maintenance; Partially Reflective Glass; Contact Details
Owner’s Manual
Model
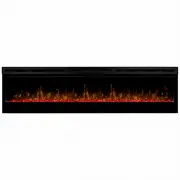
BLF7451-AU/
PRISM 74"
IMPORTANT SAFETY INFORMATION:
Always read this manual first
before attempting to install or use this fireplace. For your safety, always
comply with all warnings and safety instructions contained in this manual
to prevent personal injury or property damage.
EN
08/53543/0 (AU/NZ) Issue 2
OCN 10955
"Loading the manual" means you need to wait until the file loads and becomes available for online reading. Some manuals are very large, and the time they take to appear depends on your internet speed.
Summary
Table of Contents Always use a qualified technician or service agency to repair this fireplace. ! NOTE: Procedures and tech- niques that are considered important enough to emphasize. CAUTION: Procedures and tech- niques which, if not carefully followed, will result in damage to the equip- ment. WARN...
3 Welcome & Congratulations Serial Number Label Rating Label with Model Number Thank you and congratulations for choosing to purchase an electric fireplace from Dimplex, the world leader in electric fireplaces. Please carefully read and save these instructions. CAUTION: Read all instructions and...
IMPORTANT SAFETY INSTRUCTIONS Read all instructions before using this appliance. When using electrical appliances, basic precautions should always be followed to reduce the risk of fire, electrical shock and injury to persons, including the following:1. If the appliance is damaged, check with the su...