Page 2 - English; WALT; SAVE THESE INSTRUCTIONS; For your own safety, read the instruction manual before; General Safety Instructions
English 1 IF YOU HAVE ANY QUESTIONS OR COMMENTS ABOUT THIS OR ANY D E WALT TOOL, CALL US TOLL FREE AT: 1-800-4-D E WALT (1-800-433-9258) SAVE THESE INSTRUCTIONS Important Safety Instructions for All Tools WARNING: For your own safety, read the instruction manual before operating the planer. Failure ...
Page 3 - ALWAYS USE SAFETY GLASSES.
English 2 Minimum Gauge for Cord Sets Ampere Rating Volts Total Length of Cord in Feet (meters) 120V 25 (7.6) 50 (15.2) 100 (30.5) 150 (45.7) 240V 50 (15.2) 100 (30.5) 200 (61.0) 300 (91.4) More Than Not More Than AWG 0 6 18 16 16 14 6 10 18 16 14 12 10 12 16 16 14 12 12 16 14 12 Not Recommended • W...
Page 4 - Clean out your tool often, especially after heavy use.
English 3 • Be sure that the cutter knives are mounted as described in the instruction manual and check that all bolts are firmly tightened before connecting unit to power source. • To avoid injury, never rotate the cutter block directly with your hands. • Keep guards in place and in good working or...
Page 5 - If you elect to mount your planer onto a piece of plywood,; ASSEMBLY; DO NOT REMOVE GUARDS; DUST EJECTION PORTS; Specifi cations; Transporting the Planer; For your own safety, it is; Bench Mounting
English 4 Always mount your planer firmly to prevent movement. To enhance the tool’s portability, it can be mounted to a piece of 1/2" (12.7mm) or thicker plywood which can then be clamped to your work support or moved to other job sites and reclamped. NOTE: If you elect to mount your planer ont...
Page 6 - DO NOT OPERATE YOUR PLANER WITHOUT THE; TO REMOVE THE DUST EJECTION PORT; OPERATION; WARNING: To reduce the risk of serious personal injury,; Depth Adjustment; DEPTH ADJUSTMENT SCALE; Material Removal Gauge
English 5 K H H C I 3. Slide the notches in the dust port over the pins on the chip ejection chute. 4. Rotate the port until the button engages the dust ejection chute and locks in place. WARNING: DO NOT OPERATE YOUR PLANER WITHOUT THE DUST EJECTION PORT LOCKED INTO PLACE. DO NOT INSERT ANYTHING INT...
Page 7 - DO NOT SWITCH THE UNIT ON WITH THE MATERIAL; Speed Selection
English 6 3. Crank the carriage down on the ma terial until the material removal bar engages the wood. You will see the red arrow begin to move up the scale indicating the amount of material to be removed with the carriage at that height. 4. Adjust the carriage height until the desired depth of cut ...
Page 8 - TO PLANE YOUR MATERIAL; DO NOT TURN THE UNIT ON WITH THE MATERIAL; Snipe; TO AVOID SNIPE; Twisted, Cupped and Bowed Wood
English 7 DAMAGE TO THE HEIGHT ADJUST MENT SYSTEM ON YOUR PLANER WILL RESULT. PLANING BASICSProper Planing Technique TO PLANE YOUR MATERIAL 1. Lower the carriage to the desired height for your first pass. 2. Turn the unit on and feed the material into the feed rollers. 3. Examine the finished cut an...
Page 9 - TO PLANE TWISTED WOOD; TWISTED WOOD MAY; If your material is only slightly twisted:; Do not flip the board back and forth between each pass as; TO PLANE BOWED WOOD; Changing the Planer Knives; DISCONNECT THE PLANER FROM THE POWER; TO CHANGE PLANER KNIVES; Use the T-wrench to remove the four screws in the top of the
English 8 TO PLANE TWISTED WOOD WARNING: TWISTED WOOD MAY JAM YOUR THICKNESS PLANER. IF A JAM OCCURS, TURN THE POWER OFF, DISCONNECT THE POWER SUPPLY AND RAISE THE CARRIAGE TO RELEASE THE MATERIAL FROM THE CUTTER HEAD. If your material is only slightly twisted: Plane both sides alternating from one ...
Page 10 - If only one side of the knife is worn:
English 9 8. Use the T-wrench to remove the eight screws on the knife clamp and set them in the small screws bin (S) on the front panel of the planer (Fig. 5). 9. Use the magnets on the top of the T-wrench to attract the knife clamp and lift it off of the cutter head. One of the knives should now be...
Page 11 - Brush Change; TO REPLACE THE BRUSHES ON YOUR PLANER; Calibrating the Depth Adjustment Scale; To prevent the planer from
English 10 MAINTENANCE WARNING: To reduce the risk of serious personal injury, turn tool off and disconnect tool from power source before making any adjustments or removing/installing attachments or accessories. Brush Change U Your planer is equipped with brush caps (U) that are external to the moto...
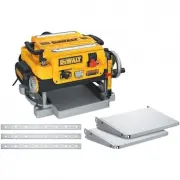
Page 12 - TO ACCESS THE FAN; Be sure to properly attach the fan housing and; Accessories; Since accessories, other than those offered by; DW7351 Accessory Folding Tables; For your own safety, read the tool instruction manual
English 11 NOTE: Circuit breaker overload is often the result of dull knives. Change your knives on a regular basis to avoid tripping your breaker. Check your knives before re-setting the circuit breaker and continuing to plane.See the Troubleshooting Guide on page 14 for additional information on c...
Page 13 - The planer could tilt or fall from the table if it is not; TO REMOVE THE TABLES; Repairs
English 12 WARNING: The planer could tilt or fall from the table if it is not properly secured opposite the end where the folding table is being installed. Serious injury may result. 3. Place the spring onto the small end of the stepped bolt. 4. Insert the end of the bolt with the spring around it i...
Page 14 - YEAR FREE SERVICE
English 13 433-9258). This warranty does not apply to accessories or damage caused where repairs have been made or attempted by others. This warranty gives you specific legal rights and you may have other rights which vary in certain states or provinces. In addition to the warranty, D E WALT tools a...
Page 15 - IF THE MATERIAL DOES NOT FEED PROPERLY, CHECK FOR:
English 14 Troubleshooting Guide IF THE UNIT DOES NOT RUN, CHECK TO SEE: • if the unit is plugged in. • if the dust shroud is properly in place. • if the top cover is properly in place. • if the circuit breaker needs to be reset. IF THE MATERIAL DOES NOT FEED PROPERLY, CHECK FOR: • excess clogging i...
Page 17 - Français
Français 16 • UTILISER L’OUTIL APPROPRIÉ. Ne pas forcer un outil ou un accessoire à faire une tâche pour laquelle il n’est pas conçu. • UTILISER UNE RALLONGE APPROPRIÉE. Vérifier si la rallonge est en bon état. S’il y a lieu d’utiliser une rallonge, s’assurer que celle-ci est de calibre suffisamment...
Page 18 - N’UTILISER QUE LES ACCESSOIRES RECOMMANDÉS.
Français 17 • N’UTILISER QUE LES ACCESSOIRES RECOMMANDÉS. Consulter le guide d’utilisation pour les accessoires recommandés. L’utilisation d’accessoires inadéquats risque d’entraîner des blessures. • NE JAMAIS SE METTRE DEBOUT SUR L’OUTIL. On risque alors de graves blessures si l’outil s’incline ou ...
Page 19 - AVERTISSEMENT; Caractéristiques; 6 pieds par minute
Français 18 AVERTISSEMENT : il est recommandé de se mettre à deux personnes pour soulever cet appareil afin d’éviter les risques de blessures graves. AVERTISSEMENT : pendant l’utilisation, porter systématiquement une protection auditive individuelle adéquate homologuée ANSI S12.6 (S3.19). Sous cert...
Page 20 - WALT font l’objet d’essais en usine si; Transport de la raboteuse; pour sa propre; Montage sur un établi; si l’on décide de monter la raboteuse sur une pièce de; ASSEMBLAGE; NE PAS DÉPOSER
Français 19 Connexion électrique S’assurer que la source d’alimentation correspond à l’indication sur la plaque signalétique. Les mentions Volts, 50/60 Hz ou “AC only” (c.a. seulement) signifient que la raboteuse doit être alimentée seulement par du courant alternatif et jamais par du courant contin...
Page 21 - NE PAS UTILISER LA RABOTEUSE TANT; FONCTIONNEMENT; AVERTISSEMENT : pour réduire tout risque de dommages; Interrupteur marche/arrêt
Français 20 POUR INSTALLER LE SYSTÈME D’ÉVACUATION DES POUSSIÈRES K H H C I 1. Sélectionner l’orifice adéquat (I). 2. Appuyer sur le bouton de verrouillage (K) sur la chute d’évacuation des copeaux (H). 3. Faire glisser les encoches de l’orifice d'évacuation sur les goupilles de la chute d'évacuatio...
Page 22 - MANIVELLE DE RÉGLAGE DE LA PROFONDEUR; NE PAS METTRE L’APPAREIL EN MARCHE; Sélection de la vitesse
Français 21 MANIVELLE DE RÉGLAGE DE LA PROFONDEUR Un tour de manivelle en sens horaire abaisse le porte-couteaux. Un tour de manivelle en sens antihoraire fait remonter le porte-couteaux. Jauge de coupe du matériau La raboteuse est équipée d’une jauge de O coupe du matériau (O). Cette jauge sert à m...
Page 23 - POUR RABOTER LA PIÈCE DE MATÉRIAU
Français 22 n’ont pas la capacité suffisante pour le volume de copeaux évacués durant le rabotage. Ceux-ci risquent d’obstruer le tuyau de l’aspirateur et de bloquer l’évacuation. Voir le Guide de dépannage, page 30, pour de plus amples renseignements. Verrouillage automatique du chariot Il n’y a pa...
Page 24 - toujours raboter dans le sens; Arrondi; POUR ÉVITER LES ARRONDIS; Bois tordu, bombé et gauchi; POUR RABOTER LE BOIS TORDU; LE BOIS TORDU; Si la pièce est seulement légèrement tordue :; ne pas retourner la planche d’un côté et de l’autre entre
Français 23 LARGEUR/HAUTEUR/PROFONDEUR MINIMALE/MAXIMALE NOTA : toujours raboter dans le sens du grain. Soutenir la pièce de matériau correctement en tout temps. Il n’est pas recommandé de raboter des pièces d’une largeur inférieure à 3/4 po. Si on doit raboter une pièce étroite, rassembler plusieur...
Page 25 - POUR RABOTER DU BOIS; GAUCHI; DÉBRANCHER LA RABOTEUSE DE LA; POUR REMPLACER LES COUTEAUX DE LA RABOTEUSE; Utiliser le tourne-à-gauche pour enlever les quatre vis dans la
Français 24 POUR RABOTER DU BOIS DESSUS PLAT DESSOUS PLAT GAUCHI Les rouleaux d’alimentation et le porte-couteaux de la raboteuse élimineront le gauchissement du matériau durant le passage. Par contre, lorsque la pièce sortira de la raboteuse, elle sera libérée de la pression exercée par les rouleau...
Page 26 - AVERTISSEMENT : NE JAMAIS S’APPROCHER LES DOIGTS; Si un seul côté du couteau est usé :; ENTRETIEN; Remplacement des
Français 25 5. Pousser le carénage antipoussière vers la gauche pour le dégager du boîtier du ventilateur. 6. Sortir le carénage antipoussière de l’appareil (fig. 3) et le mettre de côté. 7. Le porte-couteaux est maintenant à découvert. Si les huit vis dans la bride du porte-couteaux ne sont pas vis...
Page 27 - POUR REMPLACER LES BALAIS SUR LA RABOTEUSE; Étalonnage de l’échelle de réglage de la; pour prévenir les mises en marche
Français 26 POUR REMPLACER LES BALAIS SUR LA RABOTEUSE 1. Utiliser le tourne-à-gauche pour enlever le V couvercle supérieur et l’écran de protection des balais sur la raboteuse. 2. Utiliser un tournevis à tête plate pour dévisser le capuchon des balais situé à l’arrière de l’appareil, à droite (V). ...
Page 28 - POUR ACCÉDER AU VENTILATEUR; Accessoires; MONTAGE ET INSTALLATION DU MATÉRIEL DE BASE
Français 27 remplacement de la courroie d’entraînement doit être effectué par un technicien d’entretien qualifié. Ventilateur d’évacuation des copeaux On doit régulièrement nettoyer et enlever les débris du ventilateur d’évacuation des copeaux de la raboteuse. NOTA : IL FAUT METTRE LA RABOTEUSE HORS...
Page 29 - la raboteuse risque d’être inclinée ou de; POUR ENLEVER LES TABLES; Réparations
Français 28 AVERTISSEMENT : la raboteuse risque d’être inclinée ou de tomber de la table si on n’immobilise pas correctement l’extrémité opposée de celle où l’on installe la table pliante. On risque ainsi de graves blessures. 3. Poser le ressort sur l’extrémité plus FIG. 7 petite du boulon à gradins...
Page 30 - CONTRAT D’ENTRETIEN GRATUIT D’UN AN
Français 29 Garantie limitée de trois ans D E WALT réparera, sans frais, tout produit défectueux causé par un défaut de matériel ou de fabrication pour une période de trois ans à compter de la date d’achat. La présente garantie ne couvre pas les pièces dont la défectuosité a été causée par une usure...
Page 31 - SI L’APPAREIL NE FONCTIONNE PAS, VÉRIFIER :; moteur et empêchera le déclenchement du disjoncteur.
Français 30 Guide de dépannage SI L’APPAREIL NE FONCTIONNE PAS, VÉRIFIER : • si l’appareil est branché; • si le carénage antipoussière est bien en place; • si le couvercle supérieur est bien en place; • s’il faut réenclencher le disjoncteur. SI LES PIÈCES DE MATÉRIAU N’AVANCENT PAS CORRECTEMENT DANS...
Page 32 - Español; CONSERVE ESTAS INSTRUCCIONES
Español 31 SI TIENE ALGUNA PREGUNTA O DESEA HACER ALGÚN COMENTARIO SOBRE ESTA O CUALQUIER OTRA HERRAMIENTA D E WALT, MARQUE EL NÚMERO SIN COSTO: 1-800-4-D E WALT (1-800-433-9258) CONSERVE ESTAS INSTRUCCIONES Instrucciones de seguridad importantes para todas las herramientas ADVERTENCIA: por su propi...
Page 34 - UTILICE LOS ACCESORIOS RECOMENDADOS.
Español 33 • REDUZCA EL RIESGO DE PUESTAS EN MARCHA ACCIDENTALES. Asegúrese de que el interruptor esté apagado antes de conectar el enchufe. • UTILICE LOS ACCESORIOS RECOMENDADOS. Consulte el manual de instrucciones para conocer los accesorios recomendados. El uso de accesorios inadecuados puede con...
Page 35 - ADVERTENCIA: siempre lleve la debida protección auditiva; Especifi caciones; 6 pies por minuto
Español 34 interiores y pueden suponer un riesgo de lesiones graves, choque eléctrico o electrocución. UTILICE SIEMPRE LENTES DE SEGURIDAD. ADVERTENCIA: por su propia seguridad, se recomienda que dos personas carguen esta máquina, o se podrían ocasionar lesiones graves. ADVERTENCIA: siempre lleve la...
Page 36 - si opta por instalar la cepilladora en una pieza de triplay, cuide; MONTAJE; NO QUITE LAS; PUERTOS DE EXPULSIÓN DE POLVO; Conexión eléctrica; WALT se prueban de fábrica si la herramienta no funciona,; Transporte de la cepilladora; Por su propia seguridad, se; Instalación en el banco
Español 35 NOTA: si opta por instalar la cepilladora en una pieza de triplay, cuide que los tornillos con que la instale no sobresalgan por la parte inferior de la madera. El triplay debe asentarse plano sobre el soporte de trabajo. PRECAUCIÓN: la superficie de instalación no debe estar pandeada o d...
Page 37 - PARA INSTALAR LA EXPULSIÓN DE POLVO; NO HAGA FUNCIONAR LA CEPILLADORA SIN; PARA QUITAR EL PUERTO DE EXPULSIÓN DE POLVO; FUNCIONAMIENTO; ADVERTENCIA: para reducir el riesgo de lesiones; Ajuste de la profundidad; Escala de ajuste de la profundidad
Español 36 PARA INSTALAR LA EXPULSIÓN DE POLVO K H H C I 1. Seleccione el puerto (I). 2. Presione el botón de cierre (K) en la tolva de expulsión de virutas (H). 3. Deslice las ranuras del puerto de polvo sobre las clavijas de la tolva de expulsión de virutas. 4. Gire el puerto hasta que el botón se...
Page 38 - MANIVELA DE AJUSTE DE LA PROFUNDIDAD; Medidor de eliminación de material; NO ENCIENDA LA UNIDAD CON EL MATERIAL; Selección de velocidad
Español 37 MANIVELA DE AJUSTE DE LA PROFUNDIDAD Al girar la manivela en sentido de las manecillas del reloj, la cabeza de corte baja. Al girar la manivela en sentido contrario a las manecillas del reloj, la cabeza de corte sube. Medidor de eliminación de material La cepilladora está dotada de un med...
Page 39 - PARA CEPILLAR EL MATERIAL
Español 38 La manguera de la aspiradora puede obstruirse, deteniendo el flujo de virutas. Consulte la Guía de solución de problemas, página 47, para obtener más información. Bloqueo automático del carro La cepilladora no tiene bloqueo manual del carro. Los cuatro postes con rosca tienen como parte d...
Page 40 - cepille siempre siguiendo la veta. En; Tirón; PARA EVITAR EL TIRÓN; Madera torcida, abombada y arqueada; PARA CEPILLAR MADERA TORCIDA; LA MADERA TORCIDA; Si el material sólo está ligeramente doblado:; no gire la pieza hacia delante y hacia atrás entre cada pase
Español 39 ANCHURA, ALTURA Y ESPESOR MÍNIMOS Y MÁXIMOS NOTA: cepille siempre siguiendo la veta. En todo momento, sostenga correctamente la pieza en la que trabaja. No se recomienda cepillar material con una anchura de menos de 3/4 de pulgada. Si tiene que cepillar materiales muy estrechos, siempre q...
Page 41 - Los rodillos de alimentación y la; Cambio de las cuchillas de la cepilladora; DESCONECTE LA CEPILLADORA DE LA; PARA CAMBIAR LAS CUCHILLAS DE LA CEPILLADORA; Use la llave en T para quitar los cuatro tornillos que están en la
Español 40 PARA CEPILLAR MADERAARQUEADA Los rodillos de alimentación y la PARTE SUPERIOR PLANA PARTE INFERIOR PLANA cabeza de corte de la cepilladora presionarán eliminando el arco del material conforme se va alimentando. No obstante, cuando el material salga de la cepilladora, la presión de los rod...
Page 42 - ADVERTENCIA: MANTENGA LOS DEDOS SEPARADOS; Si sólo está desgastado un lado de las cuchillas:; MANTENIMIENTO
Español 41 5. Empuje la cubierta de polvo a la izquierda para liberarla de la carcasa del ventilador. 6. Quite la cubierta de polvo de la unidad (Fig. 3) y déjela a un lado. 7. La cabeza de corte queda expuesta. Si no se pueden ver los ocho tornillos de la abrazadera de la cabeza de corte, use un tr...
Page 43 - PARA REEMPLAZAR LAS; Mantenimiento de la base
Español 42 Cambio de escobillas La cepilladora está dotado de casquillos U de escobilla (U) fuera del motor. Si hay que reemplazar las escobillas, empiece por comprar un juego nuevo en un centro de servicio D E WALT o con un concesionario autorizado para dar servicio a los productos D E WALT. Use so...
Page 44 - PARA ACCEDER AL VENTILADOR; Accesorios
Español 43 ADVERTENCIA: para evitar que la cepilladora se encienda inesperadamente si se activa el disyuntor y corta la electricidad, cerciórese de que el interruptor esté en posición OFF (apagado) antes de restablecer la electricidad. NOTA: la sobrecarga del disyuntor es con frecuencia resultado de...
Page 45 - la cepilladora podría ladearse o caer de la mesa
Español 44 La mesa plegable DW7351 debe incluir: 2 mesas plegables 4 tornillos de 4 resortes cabeza 4 tornillos 4 tuercas escalonados INSTALACIÓN Y CONFIGURACIÓN DEL MATERIAL DE LA BASE 1. Coloque la cepilladora en una mesa segura o un banco de trabajo. Coloque la cepilladora de modo que se pueda ac...
Page 46 - PARA QUITAR LAS MESAS; Presione los tornillos con resorte de la base y deslice los dos; Reparaciones; WALT u otras organizaciones; PARA REPARACIÓN Y SERVICIO DE SUS; Póliza de Garantía
Español 45 PARA QUITAR LAS MESAS 1. Presione los tornillos con resorte de la base y deslice los dos extremos de la mesa hacia usted para que se liberen de los agujeros. Es recomendable usar la llave en T de la cepilladora para empujar los tornillos de modo que queden al nivel de la base, a fin de po...
Page 47 - AÑO DE SERVICIO GRATUITO
Español 46 Para hacer efectiva esta garantía deberá presentar su herramienta y esta póliza sellada por el establecimiento comercial donde se adquirió el producto, de no contar con ésta, bastará la factura de compra. EXCEPCIONES. Esta garantía no será válida en los siguientes casos: • Cuando el produ...
Page 48 - si sus etiquetas de advertencia se vuelven; Tensión de alimentación:
Español 47 REEMPLAZO GRATUITO DE LAS ETIQUETAS DE ADVERTENCIAS: si sus etiquetas de advertencia se vuelven ilegibles o faltan, llame al 1-800-4-D E WALT para que se le reemplacen gratuitamente. Información Técnica DW735 Tensión de alimentación: 120 V AC Consumo de corriente: AC 15 A Frecuencia de al...
Page 49 - SI LA UNIDAD NO FUNCIONA, REVISE PARA VER:; y evitará que se active el disyuntor
Español 48 Guía de solución de problemas SI LA UNIDAD NO FUNCIONA, REVISE PARA VER: • si la unidad está conectada. • si la cubierta de polvo está en su lugar correcto. • si la cubierta superior está en su lugar correcto . • si es necesario restablecer el disyuntor. SI EL MATERIAL NO SE ALIMENTA ADEC...