Page 4 - ADDITIONAL SPECIFIC SAFETY RULES
stock, and cleaning rags are removed away from the machine before turning on. 14. Keep safety guards in place at all times when the machine is in use. If removed for maintenance purposes, use extreme caution and replace the guards immediately when maintenance is complete. 15. Make sure the tool is f...
Page 5 - SAVE THESE INSTRUCTIONS.
5 SAVE THESE INSTRUCTIONS. Refer to them often and use them to instruct others. 12. Never reach into the cutterhead area while the machine is running. Your hands can be drawn into the knives. 13. Do not stand in line of the workpiece. Kickback can cause injury. 14. Allow the cutterhead to reach full...
Page 6 - GROUNDING INSTRUCTIONS; POWER CONNECTIONS; MOTOR SPECIFICATIONS
1. All grounded, cord-connected machines: In the event of a malfunction or breakdown, grounding provides a path of least resistance for electric current to reduce the risk of electric shock. This machine is equipped with an electric cord having an equipment-grounding conductor and a grounding plug. ...
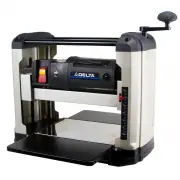
Page 7 - EXTENSION CORDS; KEY FEATURES AND COMPONENTS; D E
EXTENSION CORDS Use proper extension cords. Make sure your extension cord is in good condition and is a 3-wire extension cord which has a 3 - p ro n g g ro u n d i n g t y p e p l u g a n d m a t c h i n g receptacle which will accept the machine’s plug. When using an extension cord, be sure to use ...
Page 8 - HARDWARE PACKAGE
8 Compare all parts to the list below and check that all parts are present and in good condition. Report any missing or damaged parts to your distributor or dealer. Prior to tool assembly and use, read this manual thoroughly to familiarize yourself with proper assembly, maintenance and safety proced...
Page 9 - ATTACH HEIGHT ADJUSTMENT HANDLE; ASSEMBLY; ATTACH REVERSIBLE DUST PORT; CONNECTING TO DUST COLLECTOR
9 ATTACH HEIGHT ADJUSTMENT HANDLE Refer to Figure 1 1. Remove the rubber cap (A) from the top of the height adjustment crank shaft (B). 2. Use an M5 x 16mm hex head screw, M5 flat washer, and supplied t-handle hex wrench to secure the height adjustment handle to shaft (C). 3. Replace the rubber cap....
Page 10 - OPERATION; RESETTING THE ON-BOARD CIRCUIT BREAKER
10 STARTING AND STOPPING THE PLANER LOCKING THE PLANER USING THE SAFETY KEY OPERATION Make sure that the switch is in the "OFF" position before plugging cord into outlet. Do not touch the plug’s metal prongs when unplugging or plugging in the cord. In the event of a power outage (such as a b...
Page 11 - ELIMINATING SNIPE
11 OPERATION ELIMINATING SNIPE Snipe is a short depression created at the beginning and/or end of a board after it passes through the planer. Figure 5 shows how snipe occurs when a board enters the cutting area of the planer with the leading end elevated. The same effect can be created when the trai...
Page 12 - MAINTENANCE; CHANGING OR REVERSING KNIVES; OTHER RECOMMENDED MAINTENANCE
12 MAINTENANCE CHANGING OR REVERSING KNIVES D i s c o n n e c t t h e m a c h i n e f r o m t h e p o w e r s o u r c e b e f o r e m a k i n g a n y adjustments! Planer knives are dangerously sharp. Use extreme caution when inspecting, removing, sharpening, or replacing knives into the cutter head....
Page 13 - ACCESSORIES; WARRANTY; FIVE YEAR LIMITED WARRANTY; Delta® Power Equipment Corporation
ACCESSORIES A complete line of accessories is available from your DELTA ® Supplier, DELTA ® Factory Service Centers, and DELTA ® Factory Service Centers, and DELTA ® Authorized Service Centers. Please visit our Web Site www.DeltaMachinery. com for an online catalog or for the name or your nearest su...
Page 14 - PARTS, SERVICE OR WARRANTY ASSISTANCE
REPLACEMENT PARTS Use only identical replacement parts. For a parts list or to order parts, visit our website at www.DeltaMachinery. com. You can also order parts from your nearest factory-owned branch, Authorized Warranty Service Center or by calling Technical Service Manager at 1-800-223-7278 to r...
Page 17 - RÈGLES DE SÉCURITÉ GÉNÉRALES
17 RÈGLES DE SÉCURITÉ GÉNÉRALES LE NON-RESPECT DE CES RÈGLES PEUT ENTRAÎNER DES BLESSURES PERSONNELLES GRAVES. • POUR VOTRE PROPRE SÉCURITÉ, ASSUREZ-VOUS D’AVOIR BIEN LU ET COMPRIS LE MANUEL D’UTILISATION AVANT DE FAIRE FONCTIONNER L’APPAREIL. Apprenez à connaître son domaine d’utilisation et ses li...
Page 18 - RÈGLES DE SÉCURITÉ SPÉCIFIQUES SUPPLÉMENTAIRES
RÈGLES DE SÉCURITÉ SPÉCIFIQUES SUPPLÉMENTAIRES 1. N ' U T I L I S E Z PA S C E T A P PA R E I L a v a n t q u ’ i l soit entièrement assemblé et installé selon les instructions. Un appareil qui n'est pas correctement assemblé peut provoquer une blessure grave. 2. Demandez conseil, à votre superviseu...
Page 19 - CONSERVEZ CES CONSIGNES.
CONSERVEZ CES CONSIGNES. Consultez-les souvent et utilisez-les pour enseigner les autres. pièce. Un rebond peut provoquer une blessure. 14. Laissez le porte-outil atteindre sa pleine vitesse avant d'insérer une pièce. 15. Lorsque vous rabotez un matériel courbé, placez le côté concave (creux vers le...
Page 20 - RACCORDEMENTS ÉLECTRIQUES; INSTRUCTIONS DE MISE À LA TERRE; SPÉCIFICATIONS DU MOTEUR
FIG. A FIG. B BROCHES PORTEUSES DE COURANT LA BROCHE DE MISE À LA TERRE EST LA PLUS LONGUE DES TROIS BOÎTE DE COURANT DE MISE À LA TERRE BOÎTE DE COURANT DE MISE À LA TERRE MOYENS DE MISE À LA TERRE ADAPTATEUR Un circuit électrique séparé devrait être utilisé pour vos appareils. Les fils du circuit ...
Page 21 - RALLONGES; CARACTÉRISTIQUES ET COMPOSANTES IMPORTANTES
RALLONGES Utilisez des rallonges appropriées. Assurez-vous que la rallonge est en bon état et qu’il s’agit d’une rallonge à trois fils avec une fiche de mise à la terre à trois broches et d ’ u n r é c e p t a c l e c o r re s p o n d a n t à l a f i c h e d e l’appareil. Lorsque vous utilisez une r...
Page 22 - MATÉRIEL
Comparez toutes les pièces à la liste ci-dessous et vérifiez que toutes les pièces sont présentes et en bon état. Signalez toute pièce manquante ou endommagée à votre distributeur ou revendeur. Avant de passer à l’assemblage de l’appareil et à son utilisation, lisez attentivement le présent manuel p...
Page 23 - MONTAGE; FIXER L'ORIFICE RÉVERSIBLE
FIXER LA POIGNÉE DE RÉGLAGE DE LA HAUTEUR Consultez la Figure 1 1. Retirez le capuchon en caoutchouc (A) de la partie supérieure de l'arbre à vilebrequin de réglage de la hauteur (B). 2. Utilisez une vis à tête hexagonale M5 x 16 mm, une rondelle plate M5, et la clé à six pans avec poignée en T four...
Page 24 - FONCTIONNEMENT; RÉINITIALISER LE DISJONCTEUR INTÉGRÉ
DÉMARRER ET ARRÊTER LA RABOTEUSE VERROUILLER LA RABOTEUSE AU MOYEN DE LA CLÉ DE SÉCURITÉ FONCTIONNEMENT Assurez-vous que l’interrupteur est en position « OFF » (Arrêt) avant de brancher le cordon dans la prise. Ne touchez pas aux broches métalliques de la fiche au moment de brancher ou de débrancher...
Page 25 - ÉLIMINER UNE ENTAILLE
FONCTIONNEMENT ÉLIMINER UNE ENTAILLE Une entaille est un petit creux créé au début et/ou à la fin de la planche après qu'elle soit passée à travers la raboteuse. La figure 5 illustre comment une entaille se crée lorsqu'une planche entre dans la zone de coupe de la raboteuse avec l'extrémité avant su...
Page 26 - ENTRETIEN; CHANGER OU INVERSER LES LAMES; AUTRE ENTRETIEN RECOMMANDÉ
ENTRETIEN CHANGER OU INVERSER LES LAMES Débranchez l’appareil de la source d’alimentation avant de faire des ajustements! Les lames de la raboteuse sont e x t r ê m e m e n t t r a n c h a n t e s . Soyez très prudent lorsque vous inspectez, retirez, aiguisez ou remplacez les lames dans le porte-out...
Page 27 - GARANTIE LIMITÉE DE CINQ ANS; Delta
AMÉRIQUE LATINE : La présente garantie ne s’applique pas aux produits vendus en Amérique latine. Pour les produits vendus en Amérique latine, veuillez consulter les renseignements au sujet de la garantie pour un pays particulier figurant sur l’emballage, appeler la compagnie locale ou consulter notr...
Page 28 - AIDE POUR LES PIÈCES, LE SERVICE OU LA GARANTIE
PIÈCES DE RECHANGE Utilisez uniquement des pièces de rechange identiques. Pour obtenir une liste de pièces ou commander des pièces, rendez- vous sur notre site à l’adresse www.DeltaMachinery.com/service. Vous pouvez aussi commander des pièces auprès de votre représentant local, du centre de service ...
Page 30 - INSTRUCCIONES IMPORTANTES DE SEGURIDAD; NORMAS DE SEGURIDAD: DEFINICIONES
INSTRUCCIONES IMPORTANTES DE SEGURIDAD LEA Y COMPRENDA TODAS LAS ADVERTENCIAS E INSTRUCCIONES DE OPERACIÓN ANTES DE USAR ESTE EQUIPO. No cumplir con todas las instrucciones enumeradas a continuación puede causar una descarga eléctrica, incendios y/o lesiones personales graves o daños a la propiedad....
Page 31 - REGLAS GENERALES DE SEGURIDAD
REGLAS GENERALES DE SEGURIDAD N O S E G U I R E S TA S R E G L A S D E S E G U R I D A D P U E D E O C A S I O N A R L E S I O N E S PERSONALES GRAVES. • POR SU PROPIA SEGURIDAD, LEA Y COMPRENDA EL MANUAL DE INSTRUCCIONES ANTES DE OPERAR LA UNIDAD. Conozca los usos y las limitaciones de la unidad, a...
Page 32 - REGLAS ESPECÍFICAS DE SEGURIDAD ADICIONALES
REGLAS ESPECÍFICAS DE SEGURIDAD ADICIONALES 1. NO OPERE ESTA MÁQUINA hasta que esté completamente ensamblada e instalada de acuerdo con las instrucciones. Una máquina ensamblada de manera incorrecta puede causar lesiones graves. 2. Busque consejo de su supervisor, instructor u otra persona calificad...
Page 33 - GUARDE ESTAS INSTRUCCIONES.
GUARDE ESTAS INSTRUCCIONES. Consúltelas con frecuencia y úselas para dar instrucción a otros. 12. Nunca introduzca las manos en el área de la cabeza de corte mientras la máquina esté en funcionamiento. Las manos pueden ser atraídas hacia las cuchillas. 13. No se pare en línea recta a la pieza de tra...
Page 34 - CONEXIONES DE ALIMENTACIÓN; ESPECIFICACIONES DEL MOTOR
Se debe utilizar un circuito eléctrico por separado para sus máquinas. Este circuito no debe ser inferior a un cable calibre 14 y debe estar protegido con un fusible con retardo de tiempo de 20 amperes. Si se utiliza un alargador eléctrico, use únicamente alargadores eléctricos trifilares con enchuf...
Page 35 - ALARGADORES ELÉCTRICOS; CARACTERÍSTICAS Y COMPONENTES CLAVE
ALARGADORES ELÉCTRICOS Utilice los alargadores eléctricos adecuados. Cerciórese de que l o s a l a rg a d o r e s e l é c t r i c o s e s t é n e n b u e n a s condiciones y de que sean del tipo de alargadores eléctricos con 3 cables que tienen un enchufe con conexión a tierra con 3 clavijas y un to...
Page 36 - PAQUETE DE TORNILLERÍA
Compare todas las partes con la siguiente lista y compruebe que todas las partes estén presentes y en buenas condiciones. Reporte cualquier parte que falte o esté dañada a su distribuidor o concesionario. Antes de ensamblar y usar la herramienta, lea con atención este manual para familiarizarse con ...
Page 37 - MANIVELA DE AJUSTE DE ALTURA; ENSAMBLE; COLOQUE EL PUERTO DE POLVO; CONEXIÓN AL COLECTOR DE POLVO
MANIVELA DE AJUSTE DE ALTURA Consulte la Figura 1 1. Retire la tapa de caucho (A) de la parte superior de la manivela de ajuste de altura (B). 2. Use un tornillo de cabeza hexagonal M5 x 16 mm, arandela plana M5 y la llave hexagonal de manija en T suministrada para asegurar la manivela de ajuste de ...
Page 38 - FUNCIONAMIENTO; RESTABLECIMIENTO DEL INTERRUPTOR DE CIRCUITO INTEGRADO; AJUSTE DE LA ALTURA DE CORTE
ENCENDIDO Y APAGADO DEL CEPILLO BLOQUEO DEL CEPILLO CON LA LLAVE DE SEGURIDAD FUNCIONAMIENTO Asegúrese de que el interruptor esté en la posición de "OFF" (APAGADO) antes de conectar el cable al tomacorriente. No toque las puntas de metal del enchufe cuando desconecte o conecte el cable. En c...
Page 39 - ELIMINACIÓN DE BISELES
FUNCIONAMIENTO ELIMINACIÓN DE BISELES Los biseles son depresiones cortas creadas al principio o al final de la tabla después de que pasa por el cepillo. La Figura 5 muestra cómo ocurren los biseles cuando una tabla entra al área de corte del cepillo con el extremo delantero elevado. El mismo efecto ...
Page 40 - MANTENIMIENTO; CAMBIO O INVERSIÓN DE LAS CUCHILLAS; OTRO MANTENIMIENTO RECOMENDADO
40 MANTENIMIENTO CAMBIO O INVERSIÓN DE LAS CUCHILLAS Desconecte la máquina de la fuente de poder antes de realizar cualquier ajuste. L a s c u c h i l l a s d e l c e p i l l o s o n p e l i g r o s a m e n t e a f i l a d a s . U s e precaución extrema al inspeccionar, retirar, afilar o reemplazar ...
Page 41 - ACCESORIOS; GARANTÍA LIMITADA DE CINCO AÑOS
AMÉRICA LATINA: Esta garantía no se aplica a los productos vendidos en América Latina. Para los productos vendidos en América Latina, vea la información de garantía específica del país contenida en el embalaje, llame a la empresa local o consulte el sitio web para obtener información de garantía. AC...
Page 42 - ASISTENCIA SOBRE GARANTÍA, SERVICIO O PIEZAS
PIEZAS DE REPUESTO Utilice solamente piezas de repuesto idénticas. Para obtener una lista de las piezas o para hacer un pedido de piezas, visite nuestro sitio web en www.DeltaMachinery.com. También puede hacer un pedido de piezas desde su sucursal de la fábrica más cercana, el centro autorizado de s...
Page 44 - 9 Roush Street
99 Roush Street Anderson, SC 29625 (800) 223-7278 www.DeltaMachinery.com Copyright © 2013 DELTA ® Power Equipment Corporation DPEC002724 - 12-10-13