Page 2 - Precaution; Charging the Date/Time Battery; Trademark Acknowledgements; FCC Notice; Canadian Radio Interference Regulations
Precaution Camera Body Temperature If your camera is used for prolonged periods, the camera body may becomewarm. Please be aware of this and take care when operating the camera for anextended period. About the LCD Monitor The LCD monitor is produced with extremely high-precision manufacturingtechniq...
Page 3 - Table of Contents
Table of Contents 1 Read this First ............................................................................. 4 Quick Start .................................................................................. 8 Components Guide ................................................................... 10...
Page 5 - Icon Conventions in the Text
Table of Contents 3 Icon Conventions in the Text ○ ○ ○ ○ ○ ○ ○ ○ ○ ○ ○ ○ ○ ○ ○ ○ ○ ○ ○ ○ ○ This mark denotes topics about issues that may affect the camera’s operation. ○ ○ ○ ○ ○ ○ ○ ○ ○ ○ ○ ○ ○ ○ ○ ○ ○ ○ ○ ○ ○ This mark denotes additional topics that complement the basic operatingprocedures. ○ ○ ○ ...
Page 6 - Please Read; Test Shots; Safety Precautions; Read this First
4 Read This First Please Read Test Shots Before you try to photograph important subjects, we highly recommend that youshoot several trial images to confirm that the camera is operating and beingoperated correctly. Please note that Canon Inc., its subsidiaries and affiliates, and itsdistributors are ...
Page 7 - Warnings
Read This First 5 Warnings • Do not aim the camera directly into the sun or at other intense light sources which could damage your eyesight. • Do not trigger the flash in close proximity to human or animal eyes. Exposure to the intense light produced by the flash may damage eyesight. In particular, ...
Page 9 - Cautions; Preventing Malfunctions; Avoid Strong Magnetic Fields
Read This First 7 • Always keep the terminals of the battery charger clean. Do not place metal objects on top of the terminals. There is a risk of fire and other hazards. Cautions • Avoid using, placing or storing the equipment in places subject to strong sunlight or high temperatures, such as the d...
Page 10 - varies between regions.; Quick Start
8 Quick Start 1 Charge the Battery (p. 15). Charge the battery using the supplied batterycharger. The charging is complete when thecharging indicator turns from orange to green.• Please note that the battery charger shape varies between regions. 2 Install the Battery (p. 17). Open the CF card slot/b...
Page 11 - on the
Quick Start 9 6 Focus (p. 34). Aim the camera and lightly press the shutterbutton halfway. Two beeps will sound when theautofocus is set. 7 Shoot (p. 34). Press the shutter button all the way. You will hearthe sound of the shutter close when the shot iscomplete. 8 View the recorded image (p. 46). Th...
Page 12 - Front View; Components Guide
10 Components Guide * To connect the camera to a computer or printer, use one of the following cables. • Computer: USB Interface Cable IFC-300PCU (supplied with this camera)• Card Photo Printer CP-10 (optional): Direct Interface Cable DIF-100 (supplied with the CP-10) • Bubble Jet Printer with the d...
Page 13 - scratches during shipment. Remove it before using the camera.
Components Guide 11 Back / Bottom View Viewfinder (p. 36) Strap Eyelet (p. 26) DC Coupler Cable Cover(p. 19) CF Card Slot/Battery Cover(p. 17, 21) Tripod Socket • The LCD monitor is covered with a thin plastic film for protection against scratches during shipment. Remove it before using the camera.
Page 14 - Controls; Upper Indicator
12 Components Guide Controls ● Upper Indicator The indicators shine or flash when the shutter button is pressed or thefollowing operations are underway. • Green: Ready to record / Ready to communicate (during a computerconnection) • Flashing Green: Powering up / Recording to CF card / Reading CF car...
Page 15 - Shooting Mode Dial; Use the shooting mode dial to switch between the shooting modes.; • Image Zone
Components Guide 13 Shooting Mode Dial Use the shooting mode dial to switch between the shooting modes. • : Auto (p. 44) The camera automatically selects settings. • Image Zone The camera automatically selects settings according tothe image composition type. : Portrait (p. 49): Landscape (p. 49): Ni...
Page 16 - Operating the Multicontroller
14 Components Guide Operating the Multicontroller The multicontroller is used to select choices, images and menus on the LCDmonitor and confirm the selection. Moving the cursor on the LCD monitor up anddown. Use C or D to select a menu item on the LCD monitor. Moving the cursor on the LCD monitor le...
Page 17 - Charging the Battery Pack; • After charging, unplug the battery charger and; Preparing the Camera
Preparing the Camera 15 Charging the Battery Pack Recharge Battery Pack NB-2L (supplied) with Battery Charger CB-2LT or CB-2LTE before you use thecamera for the first time and subsequently when the “Charge the battery pack” message is displayed. 1 Align the edge of the battery pack withthe line on t...
Page 18 - Battery Pack Handling Precautions; Keep the battery pack and camera terminals (
16 Preparing the Camera Charging the Battery Pack (continued) Battery Pack Handling Precautions • Keep the battery pack and camera terminals ( ) clean at all times. Dirty terminals may cause a poor contact between the battery pack and camera. Polishthe terminals with a tissue or a dry cloth before c...
Page 19 - Installing the Battery Pack; • Check that the power/mode indicator is not lit.
Preparing the Camera 17 Installing the Battery Pack Install Battery Pack NB-2L (supplied) into the camera as follows. Use a householdpower source to power the camera for extended periods (p. 19). 1 Turn off the camera (p. 27, 29). • Check that the power/mode indicator is not lit. 2 Slide the CF card...
Page 20 - Battery Low Status
18 Preparing the Camera Installing the Battery Pack (continued) ○ ○ ○ ○ ○ ○ ○ ○ ○ ○ ○ ○ ○ ○ ○ ○ ○ ○ ○ ○ ○ ○ Battery Low Status The following icon and/or message appears when the battery becomes low. Battery Performance (Battery Pack NB-2L at full charge) * The data above reflects standard Canon test...
Page 21 - Using a Household Power Source; • Always disconnect the power cord from the
Preparing the Camera 19 Using a Household Power Source You are advised to use AC Adapter Kit ACK700* (optional) for long periods of useand when connecting to a computer or printer. * Consists of Compact Power Adapter CA-PS700, DC Coupler DR-700 and a power cord. 1 Attach the power cord to the compac...
Page 22 - Using a Household Power Source (continued)
20 Preparing the Camera Using a Household Power Source (continued) ○ ○ ○ ○ ○ ○ ○ ○ ○ ○ ○ ○ ○ ○ ○ ○ ○ ○ ○ ○ ○ ○ • Always turn the camera’s power off before connecting or disconnecting the compact power adapter. • Use of any adapter other than AC Adapter Kit ACK700 may cause malfunction of the camera ...
Page 23 - Installing a CF Card
Preparing the Camera 21 Installing a CF Card 1 Turn off the camera (p. 27, 29). • Check that the power/mode indicator is not lit. 2 Slide the CF card slot/battery cover inthe direction of the arrow to open thecover. 3 Insert the CF card with the label facingout and the arrow pointing in. • Push the ...
Page 24 - CF Cards and Estimated Capacities (Recordable Images)
22 Preparing the Camera Installing a CF Card (continued) CF Cards and Estimated Capacities (Recordable Images) • These figures reflect standard shooting conditions established by Canon. Actual totals may var y according to the subject, shooting conditions and shooting mode. • The following are the a...
Page 25 - CF Card Handling Precautions; Do not attempt to disassemble or alter a CF card.
Preparing the Camera 23 CF Card Handling Precautions • CF cards are high-precision electronic devices. Do not bend, force, or subjectthem to shocks or vibration. • Do not attempt to disassemble or alter a CF card. • Moving a CF card rapidly between temperature extremes may cause condensationto form ...
Page 26 - Setting the Date / Time
24 Preparing the Camera Setting the Date / Time The Set Date/Time menu will appear the first time the camera power is tur ned onor whenever the built-in rechargeable lithium battery charge is low. Start from Step5 to set the date and time. 1 Turn on the camera (p. 27). 2 Press the button. • The [ (R...
Page 27 - Setting the Language; • The
Preparing the Camera 25 Setting the Language 1 Turn on the camera (p. 27). 2 Press the button. • The (Rec.) or (Play) menu appears. 3 Select the (Set up) menu using A on the multicontroller. • Pressing the button also switches between menus. 4 Select [Language] using C or D on the multicontroller an...
Page 28 - Attaching the Strap; • Optional soft case appearance and
26 Preparing the Camera Attaching the Strap Thread the small loop of the wrist strapthrough the strap holder on the cameraand pull the large loop through thesmall loop until the strap is firmlysecured. ○ ○ ○ ○ ○ ○ ○ ○ ○ ○ ○ ○ ○ ○ ○ ○ ○ ○ ○ ○ ○ ○ • Avoid waving the camera about or catching it on othe...
Page 29 - Turning the Power On / Off; Computer connection mode*; Turning On/Off the Camera in Shooting Mode; Close the lens cover.; • The power goes off.; • The power goes off.; Basic Functions
Basic Functions 27 Turning the Power On / Off The power/mode indicator remains lit while the power of the camera is on. Thepower/mode indicator indicates the state of the camera as follows. Orange: Shooting modeGreen: Replaying mode/Printer connection mode* Yellow: Computer connection mode* Off: The...
Page 30 - Turning on the camera without the startup sound and image
28 Basic Functions Turning the Power On / Off (continued) ○ ○ ○ ○ ○ ○ ○ ○ ○ ○ ○ ○ ○ ○ ○ ○ ○ ○ ○ ○ ○ ○ • You will hear a startup sound and see the startup image when the power comes on. (To change the startup sound and image, see below and pages 41 and 139.) • The startup image does not appear when t...
Page 31 - Switching between Shooting and Replaying; Shooting Mode; or press the shutter button halfway.; Replaying Mode (With the Lens Cover Closed); • The camera is switched to Shooting mode.
Basic Functions 29 Switching between Shooting and Replaying You can quickly switch between Shooting mode and Replaying mode. This isconvenient when you wish to shoot again after checking or deleting an imageimmediately after it is shot. 2 Shooting Mode 1 Slide the power/replay lever to the right (p....
Page 32 - Switching the LCD Monitor Display Mode
30 Basic Functions Switching the LCD Monitor Display Mode The LCD monitor can be used to confirm an image during shooting, to replayrecorded images or to adjust menu settings. Pressing the button switches the LCD monitor display mode. 2 Shooting Mode • Pressing the button cycles the LCD monitor to t...
Page 33 - Information Displayed on the LCD Monitor; The following displays in information view.
Basic Functions 31 Information Displayed on the LCD Monitor The LCD monitor displays information in Shooting or Replaying mode, such as thecamera settings, remaining image capacity and shooting date / time. 2 Shooting Mode The following displays in information view. • The icons in the shaded boxes a...
Page 34 - Switching the LCD Monitor Display Mode (continued)
32 Basic Functions Switching the LCD Monitor Display Mode (continued) 2 Replaying Mode In simple display mode, the following informationappears. In detailed display mode, the followinginformation also appears. • In addition to the above, the ISO speed, shutter speed, aper ture setting, histogram and...
Page 35 - About the Histogram; Notice Concerning Shooting
Basic Functions 33 ○ ○ ○ ○ ○ ○ ○ ○ ○ ○ ○ ○ ○ ○ ○ ○ ○ ○ ○ ○ ○ ○ About the Histogram The histogram is a graph that allows you to judge the brightness of the recordedimage. The greater the bias toward the left in the graph, the darker the image. Thegreater the bias toward to the right, the brighter the...
Page 36 - Pressing the Shutter Button; Pressing Halfway
34 Basic Functions Pressing the Shutter Button The shutter button features a two-stage action. ● Pressing Halfway Pressing halfway automatically sets the exposure, focus and white balance. • The indicators shine or flash as follows. • Green: Metering complete (two beepssound) • Orange: Flash will fi...
Page 38 - Using the Optical Viewfinder to Shoot; The camera is equipped with an optical viewfinder.; The Parallax Phenomenon
36 Basic Functions Using the Optical Viewfinder to Shoot The camera is equipped with an optical viewfinder. • Align the square brackets (autofocus metering field) inside the viewfinder on the primarysubject to compose the image. • The viewfinder has a field of vision of approximately 82% of the actu...
Page 39 - Telephoto / Wide Angle; • Slide the zoom lever toward; Digital Zoom; • An image already zoomed with the optical
Basic Functions 37 Adjusting the Zoom (Focal Length) The focal length can be adjusted from 7.1 to 21.3 mm (equivalent to 35 to 105mm in 35 mm film format). Telephoto / Wide Angle • Slide the zoom lever toward to zoom in (telephoto). • Slide the zoom lever toward to zoom out (wide angle). Digital Zoo...
Page 40 - Selecting Menus and Settings
38 Basic Functions Selecting Menus and Settings Menus are used to adjust shooting, replaying, date / time and electronic soundsettings. Watch the LCD monitor while performing the following procedures. 1 Press the button. • In Shooting mode, the [ (Rec.)] menu appears. In Replaying mode, the [ (Play)...
Page 41 - Menu Settings and Factory Defaults
Basic Functions 39 Menu Settings and Factory Defaults This chart shows the options for each menu and the default settings. Menu Item Resolution (Movie) Compression File Format Drive Mode ISO Speed Digital Zoom Spot AE Point Review File No. Reset Contrast Sharpness Saturation Protect Rotate Erase all...
Page 43 - Default camera theme; Changing My Camera Settings; Press the; • Pressing the; Select a menu item using; Customizing the Camera (My Camera Settings)
Customizing the Camera (My Camera Settings) 41 My Camera allows you to customize the start-up image and start-up, shutter,operation and self-timer sounds. Each menu item has three choices. e.g. Start-up image [ ] [ ] [ ] [ ] Default camera theme [ ] Science fiction theme [ ] Animal (bird or dog) the...
Page 44 - Select setting content using
42 Customizing the Camera (My Camera Settings) Changing My Camera Settings (continued) 5 Select setting content using B or A on the multicontroller. 6 Press the button. • Pressing the button closes the menu and makes the settings take effect. • In Shooting mode, the menu can be closed by pressing th...
Page 45 - Customizing My Camera Settings; File format of My Camera Settings; Start-up Sound, Shutter Sound, Operation Sound and Selftimer Sound
Customizing the Camera (My Camera Settings) 43 Customizing My Camera Settings You can customize the contents of menu [ ] and [ ] using the supplied software and storing these to your camera. File format of My Camera Settings ● Start-up Image • Recording image format JPEG (Base line JPEG) • Sampling ...
Page 46 - Auto Mode; Turn the shooting mode dial to; • Two beeps will sound when the camera has; Shooting - Letting the Camera Select Settings
44 Shooting - Letting the Camera Select Settings Auto Mode In this mode, all you have to do is press the shutter button and let the camera doeverything else. 1 Check that the camera is in Shooting mode (p. 27). 2 Turn the shooting mode dial to . 3 Aim the camera at the subject. 4 Use the zoom lever ...
Page 48 - Checking an Image Right after Shooting; Checking the Image; Keeping the Shutter Button Pressed; Changing the Image Display Duration; Select a Review setting and press the
46 Shooting - Letting the Camera Select Settings Checking an Image Right after Shooting Checking the Image After a photo is taken, the image displays on the LCD monitor for two seconds.There are two ways to display the image for longer. 2 Keeping the Shutter Button Pressed The image continues to app...
Page 49 - Using the Flash; Use the flash according to the guidelines below.; Built-in Flash Settings; The flash cannot be used with some shooting modes.
Shooting - Letting the Camera Select Settings 47 Using the Flash Use the flash according to the guidelines below. 1 Press the button to switch betweenflash modes. • The selected flash mode appears on the LCD monitor. 2 Shoot the image. • The flash will fire if the indicator beside the viewfinder shi...
Page 50 - About the Red-Eye Reduction Function
48 Shooting - Letting the Camera Select Settings Using the Flash (continued) ○ ○ ○ ○ ○ ○ ○ ○ ○ ○ ○ ○ ○ ○ ○ ○ ○ ○ ○ ○ ○ ○ • When shooting with a high ISO sensitivitiy and using the built-in flash, there is more of a chance of overexposure the closer you are to the subject. ○ ○ ○ ○ ○ ○ ○ ○ ○ ○ ○ ○ ○ ○...
Page 51 - Portrait Mode; Turn the shooting mode dial to .; Landscape Mode; Use this mode to shoot expansive landscape scenes.; • Shooting procedures are the same as for the
Shooting - Letting the Camera Select Settings 49 Portrait Mode Use this mode when you want the subject to appear sharp and the background to blur. 1 Turn the shooting mode dial to . • Shooting procedures are the same as for the Auto Mode (p. 44). ○ ○ ○ ○ ○ ○ ○ ○ ○ ○ ○ ○ ○ ○ ○ ○ ○ ○ ○ ○ ○ ○ • The AEB...
Page 52 - Night Scene Mode; Fast Shutter; Use this mode to shoot fast moving objects such as sports figures.
50 Shooting - Letting the Camera Select Settings Night Scene Mode Use this mode to capture human subjects against the backdrop of an evening sky ornight scene. The people are illuminated with light from the flash while the backdropis captured at a slow shutter speed so that both appear correctly exp...
Page 53 - Slow Shutter
Shooting - Letting the Camera Select Settings 51 Slow Shutter Use this mode to shoot moving objects to make them appear blurred such as riverrapids. 1 Turn the shooting mode dial to . • Shooting procedures are the same as for the Auto mode (p. 44). ○ ○ ○ ○ ○ ○ ○ ○ ○ ○ ○ ○ ○ ○ ○ ○ ○ ○ ○ ○ ○ ○ • The A...
Page 54 - Changing the Color Effect; Turn Shooting mode dial to
52 Shooting - Letting the Camera Select Settings Changing the Color Effect You can shoot with different color effects. 1 Turn Shooting mode dial to . • The LCD monitor turns on and displays the color effects menu. 2 Select a color effect using B or A on the multicontroller. 3 Press . • You can also ...
Page 55 - Stitch Assist Mode; Framing a Subject
Shooting - Letting the Camera Select Settings 53 Stitch Assist Mode Use this mode to shoot a series of overlapping frames for merging (stitching) into alarge panoramic image using a computer. ○ ○ ○ ○ ○ ○ ○ ○ ○ ○ ○ ○ ○ ○ ○ ○ ○ ○ ○ ○ ○ ○ • Please use the bundled PhotoStitch program to merge the images...
Page 56 - Shooting; • The LCD monitor will turn on.; Select the shooting sequence using; • You can also press the shutter button directly to; To Shoot a Distant Subject
54 Shooting - Letting the Camera Select Settings Shooting Images can be shot in the following 5 sequences in Stitch Assist mode. 1 Turn the shooting mode dial to . • The LCD monitor will turn on. 2 Select the shooting sequence using B or A on the multicontroller and press . • You can also press the ...
Page 57 - Shoot the first image.; • Minor discrepancies in the overlap can be corrected; Use the same procedures to shoot the remaining frames.
Shooting - Letting the Camera Select Settings 55 3 Shoot the first image. • The exposure and white balance settings are set and locked with the first image. 4 Compose and shoot the second image sothat it overlaps the first. • Minor discrepancies in the overlap can be corrected with the software. • A...
Page 58 - Movie Mode; • The LCD monitor turns on and displays the maximum; Press the shutter button all the way.; 20) setting. The clip will end automatically after this
56 Shooting - Letting the Camera Select Settings Movie Mode Use this mode to shoot movie frames. The resolution can be set to 320 x 240pixels (default setting) or 160 x 120 pixels in [Resolution] of the [ (Rec.)] menu (p. 61). 1 Turn the shooting mode dial to . • The LCD monitor turns on and display...
Page 59 - Macro Mode; button is pressed halfway.
Shooting - Letting the Camera Select Settings 57 Macro Mode Use the macro mode to shoot close-ups of subjects in the range of 10 to 80 cm(3.9 in. to 2.7 ft.) at maximum wide angle and 30 to 80 cm (1.0 ft. to 2.7 ft.) atmaximum telephoto. 1 Press the button to turn the LCD monitor on. 2 Press the but...
Page 60 - You can take pictures with the self-timer in any shooting mode.
58 Shooting - Letting the Camera Select Settings Self-Timer You can take pictures with the self-timer in any shooting mode. 1 In the [ (Rec.)] menu, select [Drive Mode]. • See Selecting Menus and Settings (p. 38). 2 Select [ ] or [ ], then press the button. • When [ ] is selected, the shutter releas...
Page 61 - Continuous Mode; Press the shutter button halfway to lock the focus.
Shooting - Letting the Camera Select Settings 59 Continuous Mode Use this mode to shoot successive frames while the shutter button is fully pressed. 1 In the [ (Rec.)] menu, select [Drive Mode]. • See Selecting Menus and Settings (p. 38). 2 Select [ ] or [ ], then press the button. 3 Press the shutt...
Page 62 - • The lens will zoom to the maximum optical
60 Shooting - Letting the Camera Select Settings Digital Zoom With the combined optical and digital zoom functions, images can bezoomed as follows. PowerShot S30: 3.8 times, 4.8 times, 6.0 times, 7.4 times, and 10 timesPowerShot S40: 4.3 times, 5.3 times, 6.7 times, 8.2 times, and 11 times 1 Press t...
Page 63 - Changing the Resolution and Compression; Shooting - Selecting Particular Effects
Shooting - Selecting Particular Effects 61 Camera settings such as image resolution and compression, shutter speed andaperture can be freely changed for shooting. ○ ○ ○ ○ ○ ○ ○ ○ ○ ○ ○ ○ ○ ○ ○ ○ ○ ○ ○ ○ ○ ○ • Please see Auto Mode (p. 44) for shooting procedures once you have changed a setting. Chang...
Page 64 - Changing the Resolution and Compression (continued); Turn the shooting mode dial to the desired shooting mode.
62 Shooting - Selecting Particular Effects * This figure reflects standard shooting conditions established by Canon. Actual figures may vary according to the subject and shooting conditions. * Please see the list of CF cards and their approximate capacities (p. 22). Approximate File Size for One Ima...
Page 66 - Changing the File Format; Turn the shooting mode dial to ,
64 Shooting - Selecting Particular Effects Changing the File Format The recording file format can be switched to the RAW format. With the standard JPEGfile format, the camera processes images after capturing them to produce optimal results.The JPEG format compresses images so that more can be stored...
Page 67 - Program AE; • The shutter speed and aperture settings will be set
Shooting - Selecting Particular Effects 65 Program AE Use the program AE mode to have the camera automatically set the shutter speedand aperture settings to match the brightness of the scene. 1 Turn the shooting mode dial to . 2 Shoot the image. • The shutter speed and aperture settings will be set ...
Page 68 - Setting the Shutter Speed; • The shutter speed appears on the LCD monitor if it is; Select a speed using; • The correct exposure has been set if the shutter
66 Shooting - Selecting Particular Effects ○ ○ ○ ○ ○ ○ ○ ○ ○ ○ ○ ○ ○ ○ ○ ○ ○ ○ ○ ○ ○ ○ • If the aperture value shows in red, the image is under- or overexposed (insufficient light). Adjust the shutter speed using B or A on the multicontroller until the aperture value display turns to white. • The na...
Page 69 - Shutter Speed Display
Shooting - Selecting Particular Effects 67 ○ ○ ○ ○ ○ ○ ○ ○ ○ ○ ○ ○ ○ ○ ○ ○ ○ ○ ○ ○ ○ ○ • Please note that camera shake becomes a factor at low shutter speeds. If the camera shake warning appears in the center of the LCD monitor, secure thecamera to a tripod before shooting. • The aperture value and ...
Page 70 - Setting the Aperture; • The aperture setting appears on the LCD monitor if it is; Select a value using
68 Shooting - Selecting Particular Effects Setting the Aperture When you set the aperture in the aperture-priority AE mode, the cameraautomatically selects a shutter speed to match the brightness. Selecting a loweraperture value (opening the aperture) allows you to fade the background andcreate a be...
Page 71 - Aperture Setting Display
Shooting - Selecting Particular Effects 69 ○ ○ ○ ○ ○ ○ ○ ○ ○ ○ ○ ○ ○ ○ ○ ○ ○ ○ ○ ○ ○ ○ • If the shutter speed shows in red on the LCD monitor, the image is under- or overexposed (insufficient light). Adjust the aperture value using B or A on the multicontroller until the shutter speed display turns ...
Page 72 - Manually Setting the Shutter Speed and Aperture; • The shutter speed and aperture settings appears on the
70 Shooting - Selecting Particular Effects Manually Setting the Shutter Speed and Aperture You can manually set the shutter speed and aperture to achieve a particular effect.This is convenient for shooting fireworks and other images where it is difficult toset the correct exposure automatically. 1 T...
Page 73 - Selecting an AF Frame; • The three frames appear on the LCD monitor.; Select the AF frame using; • The selected frame appears green.; Press; • You can immediately shoot the image using the selected AF frame by
Shooting - Selecting Particular Effects 71 Selecting an AF Frame The AF frame indicates the area of the composition on which the camera focuses.You can set the AF frame in the following way. 1 Press . • The three frames appear on the LCD monitor. 2 Select the AF frame using B or A on the multicontro...
Page 75 - Adjusting the Exposure Compensation
Shooting - Selecting Particular Effects 73 Adjusting the Exposure Compensation Adjust the exposure compensation setting to avoid making the subject too darkwhen it is backlit or shot against a bright background. 1 Press the button once. • The icon and exposure compensation bar will appear on the LCD...
Page 76 - Setting the White Balance; • The balance setting menu appears on the LCD; Select a setting using; • Please see the next page regarding the; shutter button without pressing
74 Shooting - Selecting Particular Effects Setting the White Balance When the white balance mode is set to match the light source, the camera canreproduce colors more accurately. Set the white balance mode to a natural orartificial light setting according to the circumstances. 1 Press the button twi...
Page 77 - Setting a Custom White Balance
Shooting - Selecting Particular Effects 75 Setting a Custom White Balance You can set a custom white balance to obtain the optimal setting for the shootingconditions by having the camera evaluate a subject such as a white piece of paperor cloth, or a photo-quality gray card. 1 Press the button twice...
Page 83 - Locking the Flash Exposure Setting (FE Lock)
Shooting - Selecting Particular Effects 81 Locking the Flash Exposure Setting (FE Lock) You can lock the flash exposure so that the exposure settings are correctly set for aparticular portion of your subject. For an explanation of how differentcombinations of light metering options and a selected AF...
Page 84 - Switching between Light Metering Modes; • Each press of the
82 Shooting - Selecting Particular Effects Switching between Light Metering Modes Center-weighted averaging is the default light metering mode. This can beswitched to spot light metering. 1 Press the button to turn on the LCD monitor. 2 Press the button to select the metering mode. • Each press of t...
Page 86 - Shooting Problem Subjects for the Autofocus; The autofocus may not work well on the following types of subjects.; Shooting with Focus Lock; Focus Lock Method 1; • The AE setting will also lock when you do this. The exposure may
84 Shooting - Selecting Particular Effects Shooting Problem Subjects for the Autofocus The autofocus may not work well on the following types of subjects. • Subjects with extremely low contrast to the surroundings • Subjects mixing close and far objects • Subjects with extremely bright objects at th...
Page 87 - Focus Lock Method 2; button are
Shooting - Selecting Particular Effects 85 Focus Lock Method 2 1 Press the button to turn on the LCD monitor. 2 Press the shutter button halfway to lock the focus. Keep itpressed and press the button. • The icon appears on the LCD monitor.• The focus setting will lock even if the shutter button and ...
Page 88 - Shooting Problem Subjects for the Autofocus (continued); Shooting in Manual Focus Mode
86 Shooting - Selecting Particular Effects Shooting Problem Subjects for the Autofocus (continued) Shooting in Manual Focus Mode The focus can be manually set. 1 Press the button to turn on the LCD monitor. 2 Press and hold the button, then use C or D on the multicontroller. • The focus will lock an...
Page 89 - Manually Setting Image Characteristics; Select a value for the item and press the; ISO speed
Shooting - Selecting Particular Effects 87 Manually Setting Image Characteristics The ISO speed, contrast, sharpness and saturation settings can be adjusted for shooting. 1 In the [ (Rec.)] menu, select one of the above items. • See Selecting Menus and Settings (p. 38). 2 Select a value for the item...
Page 90 - Manually Setting Image Characteristics (continued)
88 Shooting - Selecting Particular Effects Manually Setting Image Characteristics (continued) 3 Shoot the image. ○ ○ ○ ○ ○ ○ ○ ○ ○ ○ ○ ○ ○ ○ ○ ○ ○ ○ ○ ○ ○ ○ • These functions can only be selected in the , , and shooting modes. In the mode, however, the ISO speed cannot be set to [Auto]. • These sett...
Page 91 - Resetting the File Numbers; You can select the way file numbers are assigned.; About File Numbers
Shooting - Selecting Particular Effects 89 Resetting the File Numbers You can select the way file numbers are assigned. 1 In the [ (Rec.)] menu, select [File No. Reset]. • See Selecting Menus and Settings (p. 38). 2 Select [On] or [Off] and press the button. ○ ○ ○ ○ ○ ○ ○ ○ ○ ○ ○ ○ ○ ○ ○ ○ ○ ○ ○ ○ ○...
Page 92 - Functions Available in Each Shooting Mode; This chart shows the functions available in each shooting mode.
90 Shooting - Selecting Particular Effects Functions Available in Each Shooting Mode This chart shows the functions available in each shooting mode. ● ● – – ● ● ● – – ● ● ● ● – – – – – ● – – – – – ● ● ● ● – – ● ● ● ● – ● ● ● ● ● ● ● ● ● ● ● ● ● ● ● – ● – ● – – – – ● ● ● ● ● – – ● ● ● ● – ● ● ● ● ● –...
Page 94 - Viewing Images Singly (Single Image Replay); Move between images using; Replaying
92 Replaying Viewing Images Singly (Single Image Replay) You can view the recorded images on the LCD monitor. 1 Slide the power/replay lever to theright. • The last recorded image appears (Single Image Replay). 2 Move between images using B or A on the multicontroller. • Use B to move to the previou...
Page 95 - Magnifying Images; Slide the power/replay lever to the right.
Replaying 93 Magnifying Images In single image replay, the displayed image can be shown magnified by anapproximate factor of 2.5 or 5 for PowerShot S30 and 3 or 6 for PowerShot S40. 1 Slide the power/replay lever to the right. 2 Slide the zoom lever toward . • The display cycles to the next magnific...
Page 96 - Up to nine images can be viewed at once in Index Replay.
94 Replaying Viewing Nine Images at a Time(Index Replay) Up to nine images can be viewed at once in Index Replay. 1 Slide the power/replay lever to the right. 2 Press the button. • Nine images appear at once (Index Replay). 3 Change the image selection using B , A , C or D on the multicontroller. 4 ...
Page 97 - Jumping Between Images; Single Replay
Replaying 95 Jumping Between Images The display can be advanced or set back 9 images in either single image replay orindex replay. 1 Press the button while in single replay (p. 92) or index replay (p. 94). • The jump bar appears. 2 The displayed image(s) change. Single Replay • Jump 9 images behind ...
Page 98 - Viewing Movies; Pausing and Resuming Play
96 Replaying Viewing Movies You can replay the images shot in mode. 1 Slide the power/replay lever to the right. • Movies cannot be viewed in index replay. 2 Display an image shot in mode using B or A on the multicontroller. • A movie displays with the instruction on it. 3 Press . • The movie images...
Page 99 - Rotating Images in the Display; Images can be rotated 90o and 270o clockwise on the LCD monitor.; and press; • The image cycles to the next orientation (90o; • The Play menu appears again. Press the
Replaying 97 Rotating Images in the Display Images can be rotated 90º and 270º clockwise on the LCD monitor. Original 90º 270º 1 In the [ (Play)] menu, select [Rotate] and press . • See Selecting Menus and Settings (p. 38). 2 Select an image you want to rotateusing B or A on the multicontroller and ...
Page 100 - Attaching Sound Annotations to Images; Playing back the Sound Annotations
98 Replaying Attaching Sound Annotations to Images In replay mode (including single replay, index replay, magnifying replay and the replayimmediately after shooting in Shooting mode) you can attach sound annotations (up to60 seconds) to an image. The sound data is saved in WAVE format. 1 Press the b...
Page 101 - Starting a Slide Show; Pausing and Resuming a Slide Show
Replaying 99 Automated Playback (Slide Show) Starting a Slide Show All images, or a selection of images, can be displayed one-by-one in an automatedslide show. 1 In the [ (Play)] menu, select [Slide Show] and press . • See Selecting Menus and Settings (p. 38).• The slide show menu appears. 2 Select ...
Page 102 - Selecting Images for Slide Shows
100 Replaying Automated Playback (Slide Show) (continued) Selecting Images for Slide Shows You can mark images for inclusion in slide shows 1-3. Up to 100 images may bemarked per slide show. Images display in the order of their selection. 1 Display the slide show menu (p. 99). 2 Select [Program] usi...
Page 103 - • The image selection screen will close.; Adjusting the Play Time and Repeat Settings; • Select a play time.; Repeat
Replaying 101 5 Press the button. • The image selection screen will close. Adjusting the Play Time and Repeat Settings You can change the play time for all the images in a show and have the showrepeat itself continuously. 1 Display the slide show menu. 2 Select [Set up] using B or A on the multicont...
Page 104 - • The set up menu closes.
102 Replaying Automated Playback (Slide Show) (continued) 5 Press the button. • The set up menu closes. ○ ○ ○ ○ ○ ○ ○ ○ ○ ○ ○ ○ ○ ○ ○ ○ ○ ○ ○ ○ ○ ○ • The display interval may vary somewhat for some images.• Slide shows can be easily edited on a computer with the supplied softwar e. See the Software ...
Page 105 - Protecting Images
Replaying 103 Protecting Images You can protect important images from accidental erasure. 1 In the [ (Play)] menu, select [Protect] and press . • See Selecting Menus and Settings (p. 38). 2 Select an image you want to protectusing B or A on the multicontroller and press . • The icon appears on prote...
Page 106 - Erasing Images Singly; press; Erasing
104 Erasing Erasing Images Singly ○ ○ ○ ○ ○ ○ ○ ○ ○ ○ ○ ○ ○ ○ ○ ○ ○ ○ ○ ○ ○ ○ • Please note that erased images cannot be recovered. Exercise caution before erasing a file. 1 Set the camera to the replay mode (p. 29). 2 Select the image you wish to erase using B or A on the multicontroller and press ...
Page 107 - Erasing All Images
Erasing 105 Erasing All Images ○ ○ ○ ○ ○ ○ ○ ○ ○ ○ ○ ○ ○ ○ ○ ○ ○ ○ ○ ○ ○ ○ • Please note that erased images cannot be recovered. Exercise caution before erasing a file. 1 In the [ (Play)] menu, select [Erase all] and press . • See Selecting Menus and Settings (p. 38). 2 Select [OK] using B or A on t...
Page 108 - Formatting a CF Card
106 Erasing Formatting a CF Card You should format a new CF card or one from which you wish to erase all imagesand other data. ○ ○ ○ ○ ○ ○ ○ ○ ○ ○ ○ ○ ○ ○ ○ ○ ○ ○ ○ ○ ○ ○ • Please note that formatting (initializing) a CF card erases all data, including protected images and other file types. Please c...
Page 109 - Selecting Images for Printing; Singly
Print Settings (DPOF Print Settings) 107 Images on a CF card can be individually selected for printing in a specified numberof copies. You can also select the print type and whether or not to print the dateand file number. These settings are compatible with the Digital Print Order Format(DPOF) stand...
Page 110 - Selecting Images for Printing (continued); Select images for printing.; Single Images
108 Print Settings (DPOF Print Settings) Selecting Images for Printing (continued) 3 Select images for printing. Single Images • When the print type (p. 99) is set to [Standard] or [Both], select an image using B or A on the multicontroller. You can set the number of copies(up to 99) to be printed u...
Page 111 - Setting the Print Style; The following print settings can be selected.
Print Settings (DPOF Print Settings) 109 Setting the Print Style The following print settings can be selected. 1 Display the Print Order menu (p. 107). 2 Select [Set up] using B or A on the multicontroller and press . 3 Select [Print Type], [Date] or [File No.] using C or D on the multicontroller. 4...
Page 112 - • The set up menu will close and the Print Order menu will reappear.
110 Print Settings (DPOF Print Settings) ○ ○ ○ ○ ○ ○ ○ ○ ○ ○ ○ ○ ○ ○ ○ ○ ○ ○ ○ ○ ○ ○ • When [Print Type] is set to [index], the [Date] and [File No.] cannot be set to [On].• If [Print Type] is set to [Both], both [Date] and [File No.] can be set to [On], however, only the file number is printed for ...
Page 113 - Resetting the Print Settings
Print Settings (DPOF Print Settings) 111 Resetting the Print Settings The print settings can all be removed at once. The print type is reset to [Standard]and the date and file number options are set to [Off]. 1 Display the Print Order menu (p. 107). 2 Select [Reset] using B or A on the multicontroll...
Page 114 - • When you insert the cable, make sure the
112 Printing with Card Photo Printer CP-10 (Optional) Card Photo Printer CP-10, sold separately, can be connected to the camera andused to print images very easily directly from the camera. It can also be used withthe DPOF print settings. Connecting Card Photo Printer CP-10to the Camera Two direct i...
Page 115 - appears on the camera LCD monitor and the
Printing with Card Photo Printer CP-10 (Optional) 113 4 Slide the power/replay lever to the rightto turn on the camera. • appears on the camera LCD monitor and the power/mode indicator is lit in green when theprinter is properly connected to the camera. ○ ○ ○ ○ ○ ○ ○ ○ ○ ○ ○ ○ ○ ○ ○ ○ ○ ○ ○ ○ ○ ○ • ...
Page 116 - Printing; • You can also select [Print] by pressing the
114 Printing with Card Photo Printer CP-10 (Optional) Printing An image can be printed when displayed in single replay or selected in index replay. 1 Choose an image using B or A on the multicontroller and press . 2 Set the number of prints, the print style and cropping settingsas required. • Select...
Page 117 - Selecting the Number of Copies; • You can specify from 1 to 99 prints.; You can select from among the following print styles.
Printing with Card Photo Printer CP-10 (Optional) 115 Selecting the Number of Copies 1 In Replaying mode, press and select the [Copies] option using C or D on the multicontroller. 2 Specify the desired number of copies using B or A on the multicontroller. • You can specify from 1 to 99 prints. Setti...
Page 119 - Trimming (Printing a Portion of an Image); Prior to Trimming; In Replaying mode, press; Changing the Size of the Trimming Frame
Printing with Card Photo Printer CP-10 (Optional) 117 Trimming (Printing a Portion of an Image) You can specify which portion for an image gets printed. ○ ○ ○ ○ ○ ○ ○ ○ ○ ○ ○ ○ ○ ○ ○ ○ ○ ○ ○ ○ ○ ○ Prior to Trimming Please set the Print Style (Image, Borders and Date) first before setting the trimmin...
Page 121 - • The image will start to print and, when it is
Printing with Card Photo Printer CP-10 (Optional) 119 Printing with DPOF Print Settings onCard Photo Printer CP-10 You can use the DPOF print settings to print with Card Photo Printer CP-10(optional). 1 In the [ (Play)] menu, select [Print Order] and press . • See Selecting Menus and Settings (p. 38...
Page 123 - Connecting Bubble Jet Printer to the Camera; Printing with Bubble Jet Printer (Optional)
Printing with Bubble Jet Printer (Optional) 121 Bubble Jet Printer* with the direct print function, sold separately, can be connectedto the camera and used to print images very easily directly from the camera. It canalso be used with the DPOF print settings. * Not sold in some regions To find out if...
Page 124 - Connecting Bubble Jet Printer to the Camera (continued)
122 Printing with Bubble Jet Printer (Optional) Connecting Bubble Jet Printer to the Camera (continued) ○ ○ ○ ○ ○ ○ ○ ○ ○ ○ ○ ○ ○ ○ ○ ○ ○ ○ ○ ○ ○ ○ • When you detach the cable from the camera, hold the plug and do not pull by the cable. ○ ○ ○ ○ ○ ○ ○ ○ ○ ○ ○ ○ ○ ○ ○ ○ ○ ○ ○ ○ ○ ○ • Please see the Bu...
Page 125 - Cancel Printing; Printing Errors
Printing with Bubble Jet Printer (Optional) 123 Printing An image can be printed when displayed in single replay or selected in index replay. 1 Choose an image using B or A on the multicontroller and press . 2 Set the number of prints, the print style and cropping settingsas required. • Selecting th...
Page 127 - • The setting is complete and the Print Order
Printing with Bubble Jet Printer (Optional) 125 2 Choose [Paper], [Borders] or [Date] using C or D on the multicontroller. 3 Set the selection using B or A on the multicontroller. 4 Press the button. • The setting is complete and the Print Order menu resumes. • If [Borderless] is selected as the pri...
Page 130 - • The image starts printing and, when it is
128 Printing with Bubble Jet Printer (Optional) Printing with DPOF Print Settings onBubble Jet Printer You can use the DPOF print settings to print using Bubble Jet Printer with the directprint function (optional). 1 In the [ (Play)] menu, select [Print Order] and press . • See Selecting Menus and S...
Page 132 - Selecting Images for Transferring; Image Transfer Settings (DPOF Transfer Order)
130 Image Transfer Settings (DPOF Transfer Order) Using the camera, you can make marks on images you wish to transfer and attachto e-mails. (Please use the supplied software for actually transferring images.) Thesesettings are compatible with the Digital Print Order Format (DPOF) standards. ○ ○ ○ ○ ...
Page 133 - Select images for transferring.
Image Transfer Settings (DPOF Transfer Order) 131 3 Select images for transferring. Single Images • Select an image using B or A on the multicontroller and mark or remove marks fromimages using C or D on the multicontroller. • You can use the same procedures to select images in index replay (3 image...
Page 134 - Resetting the Transfer Settings; The transfer marks can all be removed at once.
132 Image Transfer Settings (DPOF Transfer Order) Resetting the Transfer Settings The transfer marks can all be removed at once. 1 Display the Transfer Order menu (p. 130). 2 Select [Reset] using B or A on the multicontroller and press . 3 Select [OK] using B or A on the multicontroller and press .
Page 135 - List of Menu Options
List of Menu Options 133 The chart below lists menu items and settings. See Selecting Menus and Settings(p. 38) to learn how to select a setting. Rec. Menu * Some items may not appear in certain shooting modes (p. 90). Resolution (Excluding ) Resolution ( ) Compression File Format Drive Mode p. 61 p...
Page 138 - Play Menu
136 List of Menu Options Protect Rotate Erase all Slide Show Print Order Transfer Order p. 103 p. 97 p. 105 p. 99 p. 107 p. 130 Protects images from accidental erasure. Rotates images 90 or 270 degrees clockwise in the display. Erases all images from a CF card (excluding protected images). Plays ima...
Page 139 - Set up Menu
List of Menu Options 137 Set up Menu Sets whether or not the beep sounds when the shutter button is pressed or when a menu operation is performed. • On • Off (Still beeps to warn of an error even when set to Off) See also “How the [Beep] setting in the [ (Set up)] menu and each sound setting in the ...
Page 141 - My Camera Menu; ] of each item using the supplied software.
List of Menu Options 139 Sets the start-up image when you turn on the camera. • • 1 • • Sets the start-up sound when you turn on the camera. See also “How the [Beep] setting in the [ (Set up)] menu and each sound setting in the [ (My Camera)] menu are related” on page 140. • • 1 • • Sets the shutter...
Page 143 - Resetting all of the Settings to Default; • You can turn on the camera into either Shooting or Replaying mode.; • The message “Reset settings to default?”; • The screen on the right hand appears while
List of Menu Options 141 Resetting all of the Settings to Default You can reset all of the menu and button operation settings to default except for[Date/Time], [Language], and [Video System]. 1 Turn on the camera. • You can turn on the camera into either Shooting or Replaying mode. 2 Press the butto...
Page 144 - Attach AV Cable AVC-DC100 to the; Shooting / Replaying with a TV Monitor
142 Shooting / Replaying with a TV Monitor A video-compatible television connected via the supplied AV cable AVC-DC100 canbe used to view images as you shoot or replay them. 1 Turn off the camera (p. 27, 29). 2 Attach AV Cable AVC-DC100 to the terminal on the camera. 3 Plug the other ends of the AV ...
Page 145 - Camera Care and Maintenance; Camera body; Appendices
Appendices 143 Camera Care and Maintenance Use the following procedures to clean the camera body, lens, viewfinder, LCDmonitor and other parts. Camera body Wipe the body clean with a soft cloth or eyeglasslens wiper. Lens First use a lens blower brush to remove dust anddirt, then remove any remainin...
Page 146 - Troubleshooting
144 Appendices Troubleshooting Problem Cause Solution Power is not turned on CF card slot/battery cover openedInsufficient battery volatge Poor contact between camera and battery terminalsCamera is in replaying or computer/printer modeFlash is charging (flashing orange indicator) CF card full CF car...
Page 149 - List of Messages
Appendices 147 List of Messages The following messages may appear on the LCD monitor. Reset settings to default? Do you wish to reset all the camera and menu settingsto default? Resetting Resetting all the camera and menu settings to default Busy... Image is being recorded to, or read from, CF card....
Page 150 - Unidentified Image
148 Appendices List of Messages (continued) Cannot magnify!: You attempted to magnify an image that wasphotographed with another camera, recorded in adifferent format, or edited on a computer. Cannot rotate: You attempted to rotate an image that wasphotographed with another camera, recorded in adiff...
Page 151 - The ink cassette is experiencing a problem.
Appendices 149 The following messages may appear on the camera’s LCD monitor when CardPhoto Printer CP-10 is printing. No Paper: Paper cassette is incorrectly inserted or out of paper.Or the paper feed isn’t operating correctly. No Ink: The ink cartridge has not been inserted or has run outof ink. I...
Page 152 - No print head is installed in the printer.
150 Appendices List of Messages (continued) The following messages may appear when the camera is connected to Bubble JetPrinter with the direct print function. The error number is displayed on the control panel of Bubble Jet Printer. Pleaserefer to the Bubble Jet Printer Quick Start Guide for the re...
Page 153 - Specifications; PowerShot S30 / PowerShot S40
Appendices 151 Specifications All data is based on Canon’s standard testing methods. Subject to change without notice. PowerShot S30 / PowerShot S40 Camera effective S30 Approx. 3.2 million pixels: S40 Approx. 4 million Image sensor: S30 1/1.8 inch CCD (Total number of pixels: approx. 3.3 million) S...
Page 156 - CompactFlashTM Card
154 Appendices CompactFlash™ Card Card slot type: Type I Dimensions: 36.4 x 42.8 x 3.3 mm (1.4 x 1.7 x 0.1 in.) Weight: Approx. 10 g (0.4 oz.)
Page 157 - Index
Index 155 A AC Adapter Kit 19AEB Mode 77AE Lock 79AF Frame Auto Selection 71Manual Selection 71 Aperture-Priority AE ( ) 68 Aperture Settings 65, 66, 68, 70Auto Mode ( ) 44 Auto Exposure Bracketing (AEB Mode) 77Auto Replay (Slide Show) 99, 136A/V Out Terminal 10, 142 B Battery Pack Charging 15Handli...
Page 160 - NORTH AMERICA; Canon Customer Support
158 Canon Customer Support Canon Inc. 30-2 Shimomaruko 3-chome, Ohta-ku, Tokyo146-8501, Japan NORTH AMERICA Canon U.S.A., Inc. Canon Customer Care CenterPhone (US): 1-800-828-4040 (Available Mon. - Fri., 9 AM to 8 PM Eastern Time) Canon Canada Inc. Phone (Canada): 1-800-OK-CANON (1-800-652-2666) (24...
Page 161 - OCEANIA; ASIA
Canon Customer Support 159 Finland Canon OY Puhelin: 010 54420 Fax: 010 544 4571Help Desk: 0600 0 22606 (14,80 mk/min+pvm) Help Desk: 0600 0 22666 (enint. 40mk/puhelu+pvm) Sähköposti: [email protected] Canon (Schweiz) AG Tel. 01-835-6161 Fax: 01-835-6526 Hotline 0900 57 55 20 Canon Svenska AB Tel: 0...
Page 163 - Flowchart and Reference Guides; Camera User Guide; Printer with the direct print function, please refer to the; User Guide
Flowchart and Reference Guides This Guide Shooting with the Camera Software Starter Guide Installing the Software Software Starter Guide Connecting the Camera to a Computer Software Starter Guide Downloading Images to a Computer Camera User Guide • This guide covers both the PowerShot S30 and PowerS...


 Canon PowerShot Pro 90 IS User Manual
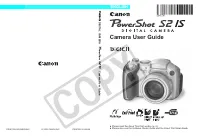 Canon Powershot S2 IS Manual
 Canon PowerShot S3 IS Manual
 Canon PowerShot S5 IS Manual
 Canon POWERSHOT S10 User Manual
 Canon PowerShot S30 Manual
 Canon Powershot S60 Manual
 Canon Powershot S70 User Manual
 Canon Powershot S80 Manual
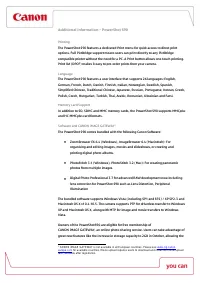 Canon PowerShot S90 User Manual
 Canon PowerShot S95 User Manual
 Canon PowerShot S110 Manual