Page 2 - READ CAREFULLY BEFORE USING!
READ CAREFULLY BEFORE USING! CANON SOFTWARE LICENSE AGREEMENT IMPORTANT - READ THIS AGREEMENT BEFORE USING THE SOFTWARE ON THE CD-ROM INTHIS BOX. BY USING THE SOFTWARE, YOU AGREE TO BE BOUND BY THE TERMS OF THISAGREEMENT. This is a license agreement (the “Agreement”) between you and Canon Inc. (“Can...
Page 4 - Disclaimer
ii Disclaimer • While every effort has been made to ensure that the information contained in this guide is accurate and complete, no liability can be accepted for any errors or omissions. Canon Inc.reserves the right to change the specifications of the hardware and software describedherein at any ti...
Page 5 - Loading Images with TWAIN-Compliant Application
1 Using the Software on the Windows Platform Introducing the Software ........................................... 2 System Requirements .................................................. 4 Installing the Software ............................................... 5 Connecting the Camera to a Computer ....
Page 6 - Introducing the Software; PowerShot Solution Disk; PowerShot S10/S20 Connection Functions; (Also effective for CF card readers or PC card readers); Image File Management Functions; facilitate visual searches.; Image Printing Functions; • Lets you create your own exclusive albums.; Supports PhotoStitch Panoramas; special effects to your images.
2 Introducing the Software This section introduces the powerful software programs provided on the supplied CD-ROMfor the Windows platform. PowerShot Solution Disk ZoomBrowser EX To load PowerShot S10/S20 images, start ZoomBrowser EX. PowerShot S10/S20 Connection Functions (Also effective for CF card...
Page 7 - Windows; PhotoStitch; effortlessly merges them.; TWAIN Drivers
3 Windows PhotoStitch • Automatically arranges images shot in Stitch Assist mode into the correct order and effortlessly merges them. • Merges any number of images horizontally or vertically, or in a matrix format.• Makes images with straight lines appear natural not crooked when merged. (Select the...
Page 8 - System Requirements; have been merged in PhotoStitch.
4 System Requirements The following system requirements must be met to install and operate the software. • A CD-ROM drive is required to install the software.• QuickTime 3.0 or higher is required to save images in the QuickTime VR format that have been merged in PhotoStitch. •Computer Model IBM PC/A...
Page 9 - Installing the Software; Installing from the PowerShot Solution Disk; Close any application programs that are running.; The installer panel will automatically display.
5 Windows Installing the Software Installing from the PowerShot Solution Disk 1. Close any application programs that are running. 2. Place the supplied Solution Disk in the CD-ROM drive. The installer panel will automatically display. • If the installer panel does not automatically display, use the ...
Page 10 - Select the software that you wish to install.; Software Installed with the Standard Setup Option; Installing Adobe PhotoDeluxe Home Edition; If You Will Be Connecting via a USB Port
6 5. Select the software that you wish to install. • Select [Standard Setup] for a typical installation.• Select [Custom Setup] if you wish to install only the minimum required programs. Software Installed with the Standard Setup Option PhotoStitchPowerShot RS-232C TWAIN DriverZoomBrowser EX PhotoRe...
Page 11 - Connecting the Camera to a Computer; Connecting to a USB Port; the image loading software automatically.; Connecting via a CF Card Reader or PC Card Slot
7 Windows Connecting the Camera to a Computer There are three interfaces that can be used to connect the camera to a computer. Once aconnection is established using one of the three interfaces, you can start the softwareand begin to load the camera images. ( ➔ p. 15 or 28) Connecting to a USB Port (...
Page 12 - Requirements for the USB Interface; at the same time. The cameras may not operate correctly.; Important
8 Connecting to a USB Port Requirements for the USB Interface • The USB interface can only be used to connect the camera to computers purchased with Windows 98 preinstalled (clean installation). The USB ports oncomputers running versions of Windows 98 upgraded from Windows 3.1 orWindows 95 may not o...
Page 13 - detaching the USB cables.
9 Windows PUSH Button 1. Attach the supplied USB cable to a USB port directly on the computerand to the DIGITAL terminal of the PowerShot S10/S20 as shown below. • There is no need to turn the camera or computer power off when attaching or detaching the USB cables. • Please consult your computer’s m...
Page 14 - The dialog will change to the search selection dialog.; What to Do if the Installation Does Not Proceed Properly; Installing the Driver Software; First USB Connection Only; Note Regarding Installation; PowerShot USB TWAIN Driver.
10 • Your computer may prompt you to insert the CD-ROM containing your Windows system software during the installation. Have the Windows disk handy in case it is required. 1. Attach the PowerShot S10/S20 to the computer's USB port and turn themode dial to the position ( ➔ p. 8). The [Add New Hardwar...
Page 17 - Turn on the computer and start Windows.
13 Windows Connecting to a Serial Port (COM Port) 1. Shut down the computer and turn the camera’s mode dial to the Offposition. 2. Attach the supplied serial cable to a serial port on the computer and tothe camera’s DIGITAL terminal as shown below. • Please consult your computer’s manual for the loc...
Page 18 - Place the CF card in the PC card adapter.
14 Connecting via a CF Card Reader or PC Card Slot To load images directly from a CF card to a computer, eject the card from the camera,place it in a separately sold PC card adapter (PCMCIA card adapter) and insert theassembly into the PC card slot as shown below.The adapter is not required if your ...
Page 19 - Starting ZoomBrowser EX; Open a connection between the camera and computer.; • Connecting to a USB Port (; Turn the camera’s mode dial to the; From Loading to Printing; Auto Save and Batteries; by pressing
15 Windows Starting ZoomBrowser EX 1. Open a connection between the camera and computer. • Connecting to a USB Port ( ➔ p. 8) • Connecting to a Serial Port ( ➔ p. 13) • Connecting via a CF Card Reader or PC Card Slot ( ➔ p. 14) 2. Turn the camera’s mode dial to the position. 3. Start ZoomBrowser EX....
Page 20 - Settings for Applications that Start Automatically; Open the [My Computer] window while the camera is connected to the; Serial Interface; Having Trouble Connecting to the Computer?; • There is usually no need to change the baud rate setting from 115.2 K,
16 Settings for Applications that Start Automatically • Follow the procedures below to start ZoomBrowser EX without first displaying the [PowerShot S10 Event] or [PowerShot S20 Event] dialog. 1. Open the [My Computer] window while the camera is connected to the computer via the USB interface. 2. Ope...
Page 21 - PC Card Reader or PC Card Slot Interface; ZoomBrowser EX Camera Window
17 Windows PC Card Reader or PC Card Slot Interface Click the [IMPORT IMAGES] button and select [From Dcim]. Thumbnail images willdisplay in the camera window. ZoomBrowser EX Camera Window The camera window will open when a connection to a camera or CF card is initiated.Thumbnail (small) images will...
Page 22 - Loading Images from the Camera; Create a folder in which to save the images from the camera.; Click the renamed folder in the explorer view.
18 Loading Images from the Camera 1. Create a folder in which to save the images from the camera. In the explorer view, right click the [My Images] folder. Select [Rename Folder] fromthe pop-up menu and input a folder name. 2. Select the renamed folder. Click the renamed folder in the explorer view....
Page 23 - The downloaded images will display in the browser area.
19 Windows The downloaded images will display in the browser area. To disconnect the camera, click the close box at the upper right of the camera window. The camera window will close. Browser Area
Page 24 - Printing Images; Adjust the print settings if you wish to change the page layout.; The Print dialog will display.
20 Printing Images 1. Select the image(s) you wish to print and click the [PRINT] button. The PhotoRecord printing utility will start and the selected image(s) will automaticallydisplay in a page layout. 2. Adjust the print settings if you wish to change the page layout. Please refer to page 27 or t...
Page 25 - Basic Procedures for Using ZoomBrowser EX; Displaying Images; Zooming Images In and Out; (b) Selecting a Folder in the Explorer View
21 Windows Basic Procedures for Using ZoomBrowser EX This section provides a simple explanation of the basic procedures for using ZoomBrowserEX. Please refer to the ZoomBrowser EX Help file for more details. Displaying Images Zooming Images In and Out (a) Double-Clicking the Browser Area Double-clic...
Page 26 - Zooming a Single Image; Double-click an image in the browser area.; Displaying Images in Chronological Order
22 Zooming a Single Image Double-click an image in the browser area. Displaying Images in Chronological Order Select a folder or some images, click the [View] menu and select [TimeTunnel].• The selected image(s) will display in a time tunnel window.• Please refer to the TimeTunnel Help file for more...
Page 27 - Organizing Images; Changing the Image Location; You can change the location of an image by dragging and dropping it.; Add a New Library Folder; and its subfolders in ZoomBrowser EX.; Refresh the Contents of a Library
23 Windows Organizing Images Changing the Image Location You can change the location of an image by dragging and dropping it. The [Image Library One] folder is located within the folder in which ZoomBrowser EXwas installed. The explorer view displays files at levels below this folder. Add a New Libr...
Page 28 - Saving Computer Images to a CF Card in the Camera; Select the images from the computer and click the [Open] button.; The selected image will be saved onto the camera’s CF card.; Editing Camera Slide Shows; slide show will display on the right side.
24 Saving Computer Images to a CF Card in the Camera 1. Open the camera window. ( ➔ p. 15) 2. Click the [UPLOAD] button in the camera window. 3. Select the images from the computer and click the [Open] button. The [Upload Images from Disk] dialog will display. Select the images you wish tosave to th...
Page 29 - Stitching Panoramas Together with PhotoStitch; To Merge Images Registered in ZoomBrowser EX; The PhotoStitch program will start.; Images Shot in Stitch Assist Mode
25 Windows Stitching Panoramas Together with PhotoStitch To Merge Images Registered in ZoomBrowser EX • You can merge a series of overlapping images into a single, seamless panorama.• Select the images in the browser area, click the [Edit] menu and select [PhotoStitch]. The PhotoStitch program will ...
Page 30 - Editing and Applying Special Effects to Images; Select images from the browser area of ZoomBrowser EX.
26 Editing and Applying Special Effects to Images 1. Confirm that the Adobe PhotoDeluxe program has been installed.(Install it from the Adobe PhotoDeluxe CD-ROM) 2. Select images from the browser area of ZoomBrowser EX. 3. Click the [Edit] menu and select [Edit Image using Adobe PhotoDeluxeHome Edit...
Page 31 - Image Resizing Mode
27 Windows Printing Images Select the folder or image(s) for printing from the browser area or camera window and clickthe [PRINT] button to start the PhotoRecord program. The selected images will automati-cally display in a page layout. Please refer to the PhotoRecord Help file for more details. Use...
Page 32 - Starting the Software; Connect the camera to the computer.
28 Loading Images with TWAIN-CompliantApplication Programs This section explains how to load images into TWAIN-compliant application programs.Please read the manual for each application program for detailed instructions.This example uses Adobe PhotoDeluxe to illustrate typical procedures. Starting t...
Page 33 - Guide to the TWAIN Driver Window; The acquired image will appear in the window of Adobe PhotoDeluxe.
29 Windows Guide to the TWAIN Driver Window Loading Images from the Camera 1. Click the [Camera] button. • Click the [My Computer] button if you are loading images directly from a CF card.• The images from the camera or CF card will display in the thumbnail display area. 2. Select an image and click...
Page 34 - Troubleshooting the Driver Software Installation; Confirm the Following Conditions:; the Scanners and Cameras Properties dialog?
30 Troubleshooting the Driver Software Installation Confirm the Following Conditions: 1. Is the camera connected to the computer correctly? (p. 7)2. Is the camera's mode dial in the position? 3. Is the battery charge sufficient? You are recommended to use the AC adapter when connecting to a computer...
Page 39 - Loading Images with Plug-In Compliant Application
35 Using the Software on the Macintosh Platform Introducing the Software ......................................... 36 System Requirements ................................................ 38 Installing the Software ............................................. 39 Connecting the Camera to a Computer ....
Page 40 - Connection Functions; • Prints a specified number of images on a single page.
36 Introducing the Software This section introduces the powerful software programs provided on the supplied CD-ROMfor Macintosh computers. PowerShot Solution Disk PowerShot Browser To load PowerShot S10/S20 images, start PowerShot Browser. PowerShot S10/S20 Connection Functions (Also effective for C...
Page 41 - Macintosh; PowerShot Plug-In Module
37 Macintosh PhotoStitch • Automatically arranges images shot in Stitch Assist mode into the correct order and effortlessly merges them. • Merges any number of images horizontally or vertically, or in a matrix format.• Makes images with straight lines appear natural not crooked when merged (Select t...
Page 43 - Software Installed with the Easy Install Option; Installing Adobe PhotoDeluxe
39 Macintosh Installing the Software Installing from the PowerShot Solution Disk 1. Close any application programs that are running. 2. Place the supplied Solution Disk in the CD-ROM drive. 3. Double-click the [CD-ROM] icon. 4. Double-click the[PowerShot Installer]icon. The installer panel willdispl...
Page 44 - Connecting to a Serial Port (Printer or Modem Port)
40 Connecting the Camera to a Computer There are three interfaces that can be used to connect the camera to a computer. Once aconnection is established using one of the three interfaces, you can start the softwareand begin to load the camera images. ( ➔ p. 45 or 55) Connecting to a USB Port ( ➔ p. 4...
Page 47 - • Please consult your computer’s manual for the port locations.; Turn on the computer.
43 Macintosh Always press the [PUSH] button on the connector to detach the cable from the camera’s DIGITAL terminal. PUSH Button Precaution for Unplugging Cables from theDIGITAL Terminal Connecting to a Serial Port (Printer or Modem Port) 1. Shut down the computer and turn the camera’s mode dial to ...
Page 49 - Starting PowerShot Browser
45 Macintosh From Loading to Printing This section provides a simple explanation of the procedures for using PowerShot Browserto load and print images. Please refer to the PowerShot Browser Help file for more details. Canon PowerShot Icon Auto Save and Batteries When the camera is connected to a com...
Page 50 - Use one of the three interfaces to display the camera window.; Click the [The application program below will
46 Serial Interface Click the [CAMERA] button. Thumbnail images will display in the camera window.( ➔ p. 51) Having Trouble Connecting to the Computer? If the settings for the connection port are notcorrect, the [Communication Settings] dialogwill display. (It will not display if you areconnecting v...
Page 51 - PowerShot Browser Camera Window
47 Macintosh PowerShot Browser Camera Window The camera window will open when a connection to a camera or CF card is initiated.Thumbnail (small) images will display. Thumbnail The image of the connected camera or CF card will display. PC Card Reader or PC Card Slot Interface Click the arrow to the l...
Page 52 - Create a new folder within the PowerShot Browser Folder.; Click the newly created folder in the explorer view.
48 Loading Images from the Camera 1. Select the [PowerShot Browser Folder]. Click the arrow to the left of the folder in the explorer view and display thecontents of the [PowerShot Browser Folder]. 2. Create a new folder within the PowerShot Browser Folder. Click the [PowerShot Browser Folder], choo...
Page 54 - Basic Procedures for Using PowerShot Browser; You can zoom images in and out by clicking the
50 Basic Procedures for Using PowerShot Browser This section provides a simple explanation of the basic procedures for using PowerShotBrowser. Please refer to the PowerShot Browser Help file for more details. Displaying Images Zooming Images In and Out You can zoom images in and out by clicking the ...
Page 55 - (a) Dragging an Image from the Browser Area and Dropping It to the; Refresh the Contents of the Browser Area
51 Macintosh Organizing Images Changing the Image Location (a) Dragging an Image from the Browser Area and Dropping It to the Explorer View. (b) Drag and Drop a Folder within the Explorer View. Refresh the Contents of the Browser Area If you have used the Macintosh Finder or another program to move ...
Page 57 - To Merge Images Registered in PowerShot Browser
53 Macintosh Stitching Panoramas Together with PhotoStitch To Merge Images Registered in PowerShot Browser • You can merge a series of overlapping images into a single, seamless panorama.• Select the images in the browser area, choose the [Edit] menu and select [PhotoStitch]. The PhotoStitch program...
Page 58 - Select images from the browser area of PowerShot Browser.; Adding Sound Files to Images
54 Editing and Applying Special Effects to Images 1. Confirm that the Adobe PhotoDeluxe program has been installed.(Install it from the Adobe PhotoDeluxe CD-ROM) 2. Select images from the browser area of PowerShot Browser. 3. Click the [Edit] menu and select [Adobe PhotoDeluxe]. Please refer to the ...
Page 59 - Installing the Plug-In Module; Connect the camera to the conputer.; • This step is not required from the second time onward.; USB Interface
55 Macintosh Loading Images with Plug-In CompliantApplication Programs This section explains how to load images with Plug-In compliant application programs.Please read the manual for each application program for detailed instructions.This example uses Adobe PhotoDeluxe to illustrate typical procedur...
Page 60 - What to Do if the [PowerShot Browser not found] Dialog Appears
56 Serial Interface Select the port and baud rate settings, and click the [Set] button.• Select the port to which the camera is attached.• There is usually no need to change the baud rate setting from 115.2 K, but if you are having trouble with the connection, try a slower baud rate. What to Do if t...
Page 61 - Guide to the Plug-In Module Window
57 Macintosh Guide to the Plug-In Module Window Loading Images from the Camera 1. Click the [Camera] button. • Click the [Computer] button if you are loading images directly from a CF card.• The images from the camera or CF card will display in the thumbnail display area. 2. Select an image and clic...
Page 62 - Troubleshooting the Computer Connection; Is the cable between the camera and computer correctly attached?; • Set the baud rate to a lower setting in the [Communication Settings]
58 Troubleshooting the Computer Connection Double-Check: 1. Is the cable between the camera and computer correctly attached? ( ➔ p. 7 or p. 40) 2. Is the camera’s mode dial turned to the position? ( ➔ p. 10 or p. 45) 3. Is the battery charge sufficient? You are recommended to use the AC adapter when...
Page 63 - Customer Support; Canon Customer Support; NORTH AMERICA
59 Customer Support Canon Customer Support Canon Inc. 30-2 Shimomaruko 3-chome, Ohta-ku, Tokyo146-8501, Japan NORTH AMERICA Canon U.S.A., Inc. Canon Customer Care CenterPhone (US): 1-800-828-4040 (Available Mon. - Fri., 9 AM to 8 PM Eastern Time) Canon Canada Inc. Phone (Canada): 1-800-OK-CANON (1-8...
Page 64 - OCEANIA
60 Canon Norge as Tlf. 22 62 93 21 Faks: 22 62 06 15E-mail: [email protected] Finland Canon OY Puhelin: 010 54420 Fax: 010 544 4571Help Desk: 0600 0 22606 (14,80 mk/min+pvm)Help Desk: 0600 0 22666 (enint. 40mk/puhelu+pvm)Sähköposti: [email protected] Canon (Schweiz) AG Tel. 01-835-6161, Fax 01-835-6...
Page 65 - Adobe Customer Support; To view information on the support options available from Adobe:
61 Adobe Customer Support To view information on the support options available from Adobe: Windows 1. Use the Microsoft windows Explorer to open the [Support] folder in thePhotoDeluxe Home Edition CD-ROM. 2. Double-click the folder that corresponds to your geographic location.Inside, you will find a...


 Canon POWERSHOT PRO 1 User Manual
 Canon Powershot Pro70 User Manual
 Canon PowerShot Pro 90 IS User Manual
 Canon Powershot S2 IS User Manual
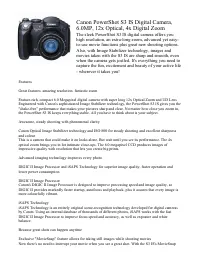 Canon PowerShot S3 IS User Manual
 Canon PowerShot S5 IS User Manual
 Canon PowerShot S30 User Manual
 Canon PowerShot S40 User Manual
 Canon Powershot S60 User Manual
 Canon Powershot S70 User Manual
 Canon Powershot S80 User Manual
 Canon PowerShot S90 User Manual