Page 2 - READ CAREFULLY BEFORE USING!; Disclaimer
READ CAREFULLY BEFORE USING! CANON SOFTWARE LICENSE AGREEMENT IMPORTANT - READ THIS AGREEMENT BEFORE USING THE SOFTWARE ON THE CD-ROM INTHIS BOX. BY USING THE SOFTWARE, YOU AGREE TO BE BOUND BY THE TERMS OF THISAGREEMENT. This is a license agreement (the “Agreement”) between you and Canon Inc. (“Can...
Page 4 - ii; Safety Precautions; Warnings; Introduction; • Windows
ii Safety Precautions Please read the safety precautions carefully before using this product. Ensure that you usethe product correctly according to the procedures described in this guide.The following safety precautions are intended to instruct you in the safe and correctoperation of the product and...
Page 5 - WindowsWindows; Using the Software
1 WindowsWindows Using the Software on the Windows Platform Introducing the Software ............................................................ 2 Camera and Software Compatibility ..................................... 5 System Requirements .............................................................
Page 6 - Introducing the Software; Canon Digital Camera Solution Disk; ZoomBrowser EX; Camera Connection Functions; (Also effective for CF card readers or PC card readers); Image File Management Functions; facilitate visual searches.; Image Printing Functions
2 Introducing the Software This section introduces the powerful software programs for the Windows platformcontained on the CD-ROM included with the camera. Some camera models do not support some of the software functions. Pleasecheck the Camera and Software Compatibility chart to confirm the compati...
Page 7 - Windows; Supports PhotoStitch Panoramas; made smaller for transmission.; PhotoStitch; effortlessly merges them.; RemoteCapture; the computer. The images load directly into the computer.; TWAIN Drivers; in the QuickTime VR format that you merged with PhotoStitch.
3 Windows Supports PhotoStitch Panoramas • Allows you to select camera images or images registered with ZoomBrowser EX and start PhotoStitch from within ZoomBrowser EX to merge a series of images into apanorama in a few simple steps. Supports Adobe Photoshop LE or PhotoDeluxe Home Edition • Allows y...
Page 8 - Adobe Photoshop LE; graphics for the web.; Adobe PhotoDeluxe Home Edition
4 Adobe Photoshop LE CD-ROM* Adobe Photoshop LE • Allows you to edit images, apply special effects, print and create sophisticated graphics for the web. Adobe PhotoDeluxe Home Edition CD-ROM* Adobe PhotoDeluxe Home Edition • Allows you to edit images and effortlessly create greeting cards, birthday ...
Page 9 - Camera and Software Compatibility
5 Windows Camera and Software Compatibility The Canon Digital Camera Solution Disk contains a number of software programs anddrivers. Check the chart below for the compatibility of your particular camera model witheach program’s special functions. * Only compatible with computers with built-in USB p...
Page 10 - System Requirements
6 System Requirements The following system requirements must be met to install and operate the software. = Computer Model IBM PC / AT compatible = OS* Windows 95, Windows 98 (Including the Second Edition),Windows NT 4.0 (Service Pack 3 or a later version required)or Windows 2000 = CPU Pentium 133 MH...
Page 11 - Installing/Uninstalling the Software; Installing from the Canon Digital Camera Solution Disk; Close any programs that are running.; The installer panel will automatically display.
7 Windows Installing/Uninstalling the Software Installing from the Canon Digital Camera Solution Disk If you are installing the software onto Windows NT 4.0 or Windows 2000, you mustfirst log on as the administrator and then install the software. 1. Close any programs that are running. 2. Place the ...
Page 12 - If You Will Be Connecting via a USB Port; Uninstalling the Software
8 Installing from the Adobe Photoshop LE CD-ROM Place the Adobe Photoshop LE CD-ROM in the drive and double-click the [My Computer],[Photosle], [English], and [Photosle] folders, followed by the [Setup.exe] file. Follow theon-screen instructions to continue with the installation. You must input the ...
Page 13 - Installing the USB Driver; Notes Regarding Installation; Installing the USB Driver into Windows 98; The “Add New Hardware Wizard” dialog will appear after a moment.
9 Windows Installing the USB Driver (Preinstalled Windows 98/2000 Systems Only) Notes Regarding Installation • The USB driver only needs to be installed the first time the camera is connected via the USB interface. Installation is not required from the second time onward. • Do not cancel the install...
Page 14 - Place the Canon Digital Camera Solution Disk in the CD-ROM drive.
10 3. Select [Search for the best driver for your device (recommended)] andclick the [Next] button. The dialog will change to the one that allows you to specify the search location. 4. Place the Canon Digital Camera Solution Disk in the CD-ROM drive. 5. Place a check in the [Specify a location] opti...
Page 15 - The computer will start to copy the driver files from the CD-ROM.
11 Windows The computer will start to copy the driver files from the CD-ROM. When all the required files have been copied, the dialog will state that theinstallation is complete. What to Do if You Are Prompted for the Windows System Diskduring the Driver File Copying Process • If prompted for the Wi...
Page 16 - Installing the USB Driver into Windows 2000; The “Found New Hardware Wizard” dialog will appear after a moment.
12 Installing the USB Driver into Windows 2000 Begin by logging onto the computer as an Administrator and then install the USBdriver. 1. Once you have attached the USB cable to the camera and computer, setthe camera to the mode for communicating with a computer. Refer to Where to Find Instructions f...
Page 18 - Click [No to All] if the “Confirm File Replace” dialog displays.; drive and restart the computer as instructed.
14 8. Click the [Yes] button if the “Digital Signature Not Found” messagedisplays. 9. Click [No to All] if the “Confirm File Replace” dialog displays. 10. Read the message and click the [Finish] button. An event dialog for your camera model will display to allow you to select applicationprograms. ( ...
Page 19 - Using ZoomBrowser EX the First Time; What to Do if the “Caution! Connection Time” Dialog Displays; see the Camera User Guide for details.; Starting ZoomBrowser EX; USB Interface; Attach the camera to the computer with the USB cable.
15 Windows Using ZoomBrowser EX the First Time (From Loading to Printing) This section provides a simple explanation of the procedures for using ZoomBrowser EXto perform each of the steps from loading to printing. Please refer to the ZoomBrowserEX Help file for more details. Some camera models do no...
Page 20 - How to Have ZoomBrowser EX Start Automatically; computer via the USB interface.; CF Card Reader or PC Card Slot Interface; Start ZoomBrowser EX.
16 How to Have ZoomBrowser EX Start Automatically • If you want ZoomBrowser EX to start automatically without first displaying the event dialog, use the procedures below to change the settings.1. Open the [My Computer] window while the camera is connected to the computer via the USB interface. 2. Op...
Page 21 - Serial Interface; Attach the camera to the computer with the serial cable.
17 Windows 3. Click the [Import Images] button and select [From D:\Dcim]. The images from the CF card will display in ZoomBrowser EX Camera Window assmall thumbnail images. ( ➜ p. 18) Serial Interface 1. Attach the camera to the computer with the serial cable. Refer to Where to Find Instructions for...
Page 22 - How to Check and Change Various Camera Settings; The ZoomBrowser EX Camera Window; Formats the CF card in the camera.
18 How to Check and Change Various Camera Settings • You can adjust the date, time and owner settings in the Camera Settings dialog using the computer when the camera is connected. You can also check the batterycharge and remaining memory capacity.1. In ZoomBrowser EX, click the [Setup Options] butt...
Page 23 - Loading and Saving Images from the Camera; Create a new folder in which to save the images from the camera.
19 Windows Loading and Saving Images from the Camera 1. Create a new folder in which to save the images from the camera. In the Tree View, right-click the [Image Library One] folder, select [New Folder] fromthe pop-up menu and input a folder name. 2. Select the new folder in the Tree View. 3. Select...
Page 25 - Printing Images; Adjust the print settings if you wish to change the page layout.; The Print dialog will display.
21 Windows Printing Images 1. Select the image(s) you wish to print and click the [Print Layout] button. • Movie images cannot be printed.• You must convert RAW images before printing them ( ➜ pp. 40-41, 52-54). The PhotoRecord printing utility will start and automatically display the selectedimage(...
Page 26 - Using Additional ZoomBrowser EX Functions; Displaying Images; Zooming Images In and Out
22 Using Additional ZoomBrowser EX Functions This section explains the additional features of ZoomBrowser EX. Please refer to theZoomBrowser EX Help file for more details. Some of the software functions are not supported by all of the camera models.Please check the Camera and Software Compatibility ...
Page 27 - Zooming a Single Image; About the Image Viewer Edit Panel
23 Windows Zooming a Single Image Double-click an image in the Browser Display Area to display it in the Image Viewer. Double-click the target image. Edit Panel Button About the Image Viewer Edit Panel • The edit panel displays when you click Edit Panel button in the Image Viewer. Crop Button Drag t...
Page 28 - Digital Camera Solution Disk.
24 Displaying Images in Chronological Order Select a folder or some images, click the [View] menu and select [TimeTunnel]. Theselected image(s) will display in a time tunnel. Please refer to the TimeTunnel Helpfile for more details on how to operate this function. Drag the tab up or down to gobackwa...
Page 29 - operate this function.; Showing Images in a Slide Show; Select a play method.; control panel to close the slide show.
25 Windows About the Print Mark Button • If the [Print Mark] button is clicked while an image is played in a slide show, PhotoRecord will automatically start after the slide show has finished and place thedisplayed image with a print mark in an auto layout. • Please refer to page 33 or the PhotoReco...
Page 30 - Organizing Images; Changing the File Location
26 Organizing Images Changing the File Location You can move an image file by dragging and dropping it onto another folder icon. The [Image Library One] folder is located within the folder in which ZoomBrowser EXwas installed. The Tree View displays files at levels below this folder. Adding a New Li...
Page 31 - Erasing Images; Erasing Images Singly; Check the image to make sure it can be deleted and click [Delete].; The image will be erased.; Erasing Images by Folder; A confirmation dialog will display.; Check the images to make sure they can be deleted and click [Delete].; The images and the folder will be erased.
27 Windows Erasing Images An image cannot be recovered after it is erased. Double-check to make sure youhave the right images before erasing. Erasing Images Singly 1. Select the target image in the Browser Display Area and click the [Delete]button. A confirmation dialog will display. 2. Check the im...
Page 32 - Saving Computer Images to a CF Card in the Camera; The “Upload Images from Disk” dialog will display.; Select the images from the computer and click the [Open] button.; The “Save to Camera” dialog will display.; Editing Camera Slide Shows; The slide show will be saved to the CF card in the camera.
28 Saving Computer Images to a CF Card in the Camera 1. Open the Camera Window. ( ➜ pp. 15-18) 2. Click the [Upload] button in the Camera Window. The “Upload Images from Disk” dialog will display. 3. Select the images from the computer and click the [Open] button. The “Save to Camera” dialog will di...
Page 33 - column below the thumbnails.
29 Windows Editing the Print Order Settings (DPOF) You can specify which images on a CF card you wish to print as well as the number ofcopies. You can also select the print type and whether or not the shooting date and filenumber information is printed with the image. A convenient feature of these s...
Page 34 - Sending Images via E-mail; Adjust the image size and compression.
30 Sending Images via E-mail You can send images as attachments to e-mail messages. You can adjust the image sizeand compression to reduce the file size for transmission. 1. Select the target image(s) in the Browser Display Area. 2. Click the [File] menu and select [Send Image(s) by E-Mail]. 3. Adju...
Page 35 - Merging Panoramic Images with PhotoStitch; To Merge Images Registered in ZoomBrowser EX; The PhotoStitch program will start.; Images Shot in Stitch Assist Mode; Please see the
31 Windows Merging Panoramic Images with PhotoStitch To Merge Images Registered in ZoomBrowser EX • You can merge a series of overlapping images into a single, seamless panorama.• Select the images in the browser area, click the [Edit] menu and select [PhotoStitch]. The PhotoStitch program will star...
Page 36 - Editing and Applying Special Effects to Images
32 Editing and Applying Special Effects to Images Adobe Photoshop LE 1. Confirm that Adobe Photoshop LE has been installed. 2. Select an image from the Browser Display Area of ZoomBrowser EX. 3. Click the [Edit] menu and select [Edit Image using Adobe Photoshop]. Please refer to the Adobe Photoshop ...
Page 37 - • You can also click the; PhotoRecord Window
33 Windows Printing Images • Select a folder or image(s) for printing from the Browser Display Area or Camera Window and click the [Print Layout] button to start the PhotoRecord program. • You can also click the button while an image is displayed in a slide show to add a print mark to it. When the s...
Page 38 - Creating a New Album; Image Resizing and Rotating Modes
34 Image Resizing Mode Image Rotating Mode Drag an arrow to resizethe image. The arrows displaywhen the mouse ispositioned over theimage. Click this to change torotating mode. Click thisto displaya pop-upmenu. Drag an arrow torotate the image. Click this to changeto image resizingmode. Click thisto ...
Page 39 - Shorten the name to enable printing.; Setting the Image Size for Printing; Fixed Photo Size; The Album Settings dialog will display.; Printing on Canon Perforated Paper
35 Windows Precaution when Printing from PhotoRecord fromWindows NT 4.0/Windows 2000 • If the printer name is too long, you may not be able to print from PhotoRecord. Shorten the name to enable printing. 1. Click the Windows [Start] menu and select [Settings] and [Printers].2. Click the printer name...
Page 40 - Shooting with RemoteCapture; camera also downloads the image directly to the computer.; RemoteCapture Window
36 Shooting with RemoteCapture RemoteCapture will start if you click the ZoomBrowser EX [Edit] menu and select[RemoteCapture] when the camera is connected to the computer via a USB port.RemoteCapture lets you activate the camera’s shutter button remotely from the computer.The captured image is autom...
Page 41 - The control buttons are used to shoot, delete and display images.; Using Interval and Timer Shooting; Interval Shooting; The Interval Shooting dialog will display.; Timer Shooting; You can set the time delay before an image is shot.; Printing a Thumbnail Index Sheet
37 Windows About the RemoteCapture Control Buttons The control buttons are used to shoot, delete and display images. Using Interval and Timer Shooting RemoteCapture can be used to shoot a set number of images at specified intervals(Interval Shooting) or to shoot an image after a specified delay (Tim...
Page 42 - Precautions when Shooting with RemoteCapture; Setting Basic Shooting Settings in RemoteCapture
38 Precautions when Shooting with RemoteCapture • If your computer is set to go into standby mode, there is no guarantee that RemoteCapture will continue to function after the computer has entered standbymode. Always turn off the standby function before you start shooting withRemoteCapture. • The ca...
Page 43 - Changing the Save Location and Other Preferences
39 Windows Selects whether the image is saved only onthe computer or on the camera’s CF card too. Sets the image file prefix. If the prefix is setto [Capture], for example, the first image willbe named [Capture_00001.jpg] andsuccessive images will have higher numbers. Sets the folder in which the im...
Page 44 - Converting RAW Images; Converting RAW Images without Adjusting the Quality; Converting RAW Images with Quality Adjustment; Select a RAW image from the Browser Display Area of ZoomBrowser EX.; The RAW Image Parameter Settings dialog will display.
40 Converting RAW Images The RAW format records the image data as captured by the camera’s image sensorwithout further processing by the camera. Although the data is compressed whenrecorded, the original data can be completely restored without any loss of quality, making itpossible to obtain high-qu...
Page 45 - The Preferences dialog will display.; Saving in the TIFF 16 Bits/Channel Format
41 Windows RAW Image Parameter Settings Dialog Precautions when Selecting and Adjusting the Attributes ofMultiple RAW Images Ensure that all images included in a multiple selection of RAW images are from thesame camera before attempting to adjust the image attributes. The white balancewill not adjus...
Page 46 - Backing Up Data; How to Restore the Database File from a Backup File
42 Backing Up Data You are recommended to use the following procedures to back up your image data afteryou add, delete or change images from ZoomBrowser EX. 1. Click the ZoomBrowser EX [File] menu and select [Backup Database]. When the backup is complete, the name of the backup file will display in ...
Page 47 - Using Adobe Photoshop LE; Installing the Software; Installing the TWAIN Driver; “Installing the USB Driver” (; Installing Adobe Photoshop LE; Starting the Software; Connecting the Camera to a USB Port; Connect the camera to the computer’s USB port.; Adobe Photoshop LE will start.
43 Windows Loading Images withTWAIN-Compliant Programs This section explains how to load images with TWAIN-compliant application programsusing Adobe Photoshop LE or Adobe PhotoDeluxe Home Edition. Please refer to themanual for each application program for more details. Using Adobe Photoshop LE Insta...
Page 48 - Connecting via a CF Card Reader or PC Card Slot; Connecting the Camera to a Serial Interface
44 Connecting via a CF Card Reader or PC Card Slot 1. Place the CF card into the CF card reader or into the PC card adapter andthen into the PC card slot. Refer to Where to Find Instructions for Attaching Your Camera to aComputer ( ➜ p. ii) for connection instructions. 2. Click the Windows [Start] m...
Page 50 - Loading Images; Downloading Images from the Camera; The camera images will appear in the Thumbnail Display Area.; Downloading Images Directly from a CF Card; The My Computer dialog will open.
46 Loading Images The TWAIN Driver can display still images only. Please start ZoomBrowser EX to downloadmovies to the computer. Downloading Images from the Camera 1. Click the [Camera] button. The camera images will appear in the Thumbnail Display Area. 2. Select the images you wish to download and...
Page 51 - Using Adobe PhotoDeluxe Home Edition; Installing Adobe PhotoDeluxe Home Edition; Start Adobe PhotoDeluxe Home Edition.
47 Windows Using Adobe PhotoDeluxe Home Edition Installing the Software Installing the TWAIN Driver This program is required to load camera images into the TWAIN-compliant applicationprograms. For instructions, see “Installing/Uninstalling the Software” ( ➜ p. 7) or “Installing the USB Driver” ( ➜ p...
Page 52 - The TWAIN driver will start.
48 5. Click the [1 Camera] tab. In the [Camera Models] option, confirm that [Canon XXX USB] (XXX will be replacedby your camera model name) or [Canon Digital Camera RS-232C] is selected. Ifseveral models are listed, select the one that corresponds to your camera. 6. Click the [Open Camera] button. T...
Page 55 - Camera User Guide; Click the [Camera Settings] button in the TWAIN Driver window.; Parameter Settings Dialog
51 Windows Setting the Parameters (EOS D30 Only) Up to three sets of parameters for loading images can be set in the TWAIN Driver usingthe Parameter Settings dialog in addition to the parameters already set on the camera. Please see the Camera User Guide to learn how to select the parameters for the...
Page 58 - RAW Image Parameter Settings Dialog; How to Change the File Transmission Format; Transmitting in the TIFF 16 Bits / Channel Format
54 RAW Image Parameter Settings Dialog Click this and a white point of theimage in the Preview Area to set itas the value for the white balance. Preview Area Resets the image quality settings to thestate in which the image was shot. Displays the image in thePreview Area at full size. Placing a check...
Page 59 - Troubleshooting the USB Driver Installation; Check This First; Is the camera connected to the computer correctly?; Uninstalling the USB Driver from Windows 98; Check the USB Driver Status
55 Windows Troubleshooting the USB Driver Installation Check This First 1. Is the camera connected to the computer correctly? Refer to Where to Find Instructions for Attaching Your Camera to aComputer ( ➜ p. ii) for connection instructions. 2. Is the camera power on? 3. Is the battery charge suffici...
Page 61 - This will show all the previously hidden files.
57 Windows What to Do if the [Inf] Folder Is Not Visible in the [Windows]Folder • Follow the procedures below to set the folder options to the “Show all files” setting. 1. Click the [View] menu and select [Folder Options].2. Click the [View] tab.3. In the [Hidden files] category, select [Show all fi...
Page 62 - Uninstalling the USB Driver from Windows 2000
58 What to Do if Your Camera Model Appears in the “Scanners andCameras Properties” Device List 1. Select the name of your camera model and click the [Remove] button. 2. Click [OK] to close the “Scanners and Cameras Properties” dialog. 3. Delete the [Drvdata.bin], [Drvdx.bin] and [Canon.IncCanon_DC] ...
Page 64 - This will show all the previously hidden files and folders.
60 5. In the dialog shown below, select [Yes, I want to uninstall this device] andclick the [Next] button. Click the [Finish] button when the “Add/Remove Hardware Wizard complete”message displays. 6. On the desktop, double-click the [My Computer] icon, [C:] icon, [Winnt]folder, and [Inf] folder in s...
Page 65 - Ensure that you have the correct files before deleting them.
61 Windows 7. Look for files starting with [Oem*]. A number such as 0 or 1 will appear in place of the “*”after the “Oem” prefix inthe file name.For each [Oem*] file there is a companion [Oem*.pnf] file with the samenumber following the “Oem” prefix (e.g. the Oem0 and Oem.pnf files formone set of Oe...
Page 67 - MacintoshMacintosh
63 MacintoshMacintosh Introducing the Software .......................................................... 64 Camera and Software Compatibility ................................... 67 System Requirements ............................................................... 68Installing / Uninstalling the So...
Page 68 - ImageBrowser
64 Introducing the Software This section introduces the powerful software programs for the Macintosh platformcontained on the CD-ROM included with the camera. Some camera models do not support some of the software functions.Please check the Camera and Software Compatibility chart to confirm thecompa...
Page 69 - Supports Adobe Photoshop LE or PhotoDeluxe; can be made smaller for transmission as e-mail attachments.; Canon Digital Camera Plug-In Module; Apple QuickTime
65 Windows Macintosh Supports Adobe Photoshop LE or PhotoDeluxe • Allows you to select images registered with ImageBrowser and start one of these photo-retouching programs from within ImageBrowser to edit and apply specialeffects to your images. Adjusting Images for Transmission by E-mail • Allows y...
Page 70 - Adobe PhotoDeluxe
66 Adobe Photoshop LE CD-ROM* Adobe Photoshop LE • Allows you to edit images, apply special effects, print and create sophisticated graphics for the web. Adobe PhotoDeluxe Home Edition CD-ROM* Adobe PhotoDeluxe • Allows you to edit images and effortlessly create greeting cards, birthday cards and ca...
Page 73 - Macintosh; The installer panel will display.
69 Macintosh Installing/Uninstalling the Software Installing from the Canon Digital Camera Solution Disk 1. Close any programs that are running. 2. Place the Canon Digital Camera Solution Disk in the CD-ROM drive. 3. Double-click the [CD-ROM] icon and the [Canon Digital Camera Installer]icon. The in...
Page 75 - Using ImageBrowser the First Time; What to Do if a Warning Dialog Displays; see the; Starting ImageBrowser
71 Macintosh Using ImageBrowser the First Time (From Loading to Printing) This section provides a simple explanation of the procedures for using ImageBrowser toperform each of the steps from loading to printing. Please refer to the ImageBrowserHelp file for more details. Some camera models do not su...
Page 76 - How to Set ImageBrowser to Not Start Automatically; The “Settings for USB Connection” dialog will display.
72 How to Set ImageBrowser to Not Start Automatically 1. Open the Apple menu and select [Control Panels] and [Canon USB Camera]. The “Settings for USB Connection” dialog will display. 2. Click the [The application program below will start.] option to clear the check mark.3. Click the close box at th...
Page 78 - The ImageBrowser Camera Window
74 The ImageBrowser Camera Window The Camera Window will open when a connection to a camera or CF card is initiated.Thumbnail (small) images will display. How to Check and Change Various Camera Settings • You can adjust the date, time and owner settings in the Camera Settings dialog using the comput...
Page 81 - Print Window
77 Windows Macintosh Printing Images 1. Select the image(s) you wish to print and click the [Print Layout] button. • Movie images cannot be printed.• You must convert RAW images before printing them (pp. 93-94, 104-106). The Print window will display with the images arranged in an auto layout. 2. Ad...
Page 82 - The Layout Options dialog will display.
78 Setting the Image Size for Printing Fixed Photo Size Images can be printed at standard photo print size.Since the images are printed without gaps between them, they look like photo printswhen they are cut with a cutter. 1. Click the [Layout Options] button in the Print window. The Layout Options ...
Page 83 - Using Additional ImageBrowser Functions; You can zoom images in and out by clicking the; About the Viewer Window Edit Panel
79 Macintosh Using Additional ImageBrowser Functions This section explains the additional features of ImageBrowser. Please refer to theImageBrowser Help file for more details. Some of the software functions are not supported by all of the camera models.Please check the Camera and Software Compatibil...
Page 84 - Replaying Movies
80 Replaying Movies Double-click a thumbnail with the movie icon to start QuickTime Player and replay themovie.
Page 85 - Displaying Images in Chronological Order
81 Windows Macintosh Displaying Images in Chronological Order Select a folder, choose the [Display] menu and select [Switch to TimeTunnel]. All ofthe images in the selected folder will display in a time tunnel. To return to theBrowser Window, choose the [Display] menu and select [Switch to Browser V...
Page 86 - (a) Drag and drop images from the Browser Window to another; Refreshing the Contents of the Browser Window
82 Organizing Images Changing the File Location You can move an image file or folder by dragging and dropping it in another location. (a) Drag and drop images from the Browser Window to another folder in the Explorer View Section. (b) Drag and Drop a Folder within the Explorer View Section. Refreshi...
Page 87 - Click the target folder in the Explorer View Section.; The images in the folder will display in the Browser Window.
83 Windows Macintosh Erasing Images Erasing Images Singly Select the target image in the Browser Window and click the [Send to Trash] button. Erasing Images by Folder 1. Click the target folder in the Explorer View Section. The images in the folder will display in the Browser Window. 2. Click the [S...
Page 88 - The “Select Images to Add” dialog will display.; Adding Sound Annotations to Images
84 Saving Computer Images to a CF Card in the Camera 1. Open the Camera Window. ( ➜ pp. 71-74) 2. Click the [Upload] button in the Camera Window. The “Select Images to Add” dialog will display. 3. Select the images from the computer and click the [Open] button. The “Save to Camera” dialog will displ...
Page 89 - of the images you wish to print.
85 Windows Macintosh Editing the Print Order Settings (DPOF) You can specify which images on a CF card you wish to print as well as the number ofcopies. You can also select the print type and whether or not the shooting date and filenumber information is printed with the image. A convenient feature ...
Page 90 - Adjusting Images for Transmission by E-mail
86 Adjusting Images for Transmission by E-mail You can adjust the image size and compression to reduce the file size of an image fortransmission as an e-mail attachment. 1. Select the target image(s) in the Browser Window. 2. Click the [File] menu and select [Create Image for Email]. 3. Adjust the i...
Page 91 - To Merge Images Registered in ImageBrowser
87 Windows Macintosh Merging Panoramic Images with PhotoStitch To Merge Images Registered in ImageBrowser • You can merge a series of overlapping images into a single, seamless panorama.• Select the images in the browser area, choose the [Edit] menu and select [PhotoStitch]. The PhotoStitch program ...
Page 94 - About the RemoteCapture Control Buttons; Set the number of frames and interval value and click [Start].
90 About the RemoteCapture Control Buttons The control buttons are used to shoot, delete and display images. Click here to trigger the camera and take a shot. The image isautomatically saved to the computer.Pushing the camera’s shutter button directly will also save theimage to the computer. (Suppor...
Page 97 - Select a RAW image from the Browser Window of ImageBrowser.
93 Windows Macintosh Converting RAW Images The RAW format records the image data as captured by the camera’s image sensorwithout further processing by the camera. Although the data is compressed whenrecorded, the original data can be completely restored without any loss of quality, makingit possible...
Page 98 - Saving in the TIFF 16 Bits / Channel Format
94 RAW Image Parameter Settings Dialog How to Change the File Format 1. Click the ImageBrowser [Edit] menu and select [Preferences]. The Preferences dialog will display. 2. Change the format selected in the [File Format] tab and click [OK]. Saving in the TIFF 16 Bits / Channel Format When [TIFF 16 b...
Page 99 - Installing Plug-In Module; Starting Adobe Photoshop LE
95 Macintosh Loading Images with Plug-In CompliantApplication Programs This section explains how to load images with Plug-In compliant application programsusing Adobe Photoshop LE or Adobe PhotoDeluxe. Please refer to the manual for eachapplication program for more details. Using Adobe Photoshop LE ...
Page 100 - What to Do if the “ImageBrowser not found” Dialog Appears; Close the “Settings for USB; Start Adobe Photoshop LE.; Connect the camera to the computer with the serial cable.
96 What to Do if the “ImageBrowser not found” Dialog Appears If you install only the Canon Digital Camera Plug-In Module without ImageBrowser,the “ImageBrowser not found” dialog may display. If this happens, use the followingprocedures to prevent ImageBrowser from attempting to start automatically. ...
Page 101 - Click the icon and set the communication settings.; The images will appear in the Adobe Photoshop LE window.; The images on the CF card will appear in the Thumbnail Display Area.
97 Windows Macintosh Starting Plug-In Module and Loading Images Plug-In Module can display still images only. Please start ImageBrowser to downloadmovies to the computer. Downloading Images from the Camera 1. Click the Adobe Photoshop LE [File] menu and select [Import] and [CanonDigital Camera]. Plu...
Page 102 - Guide to the Plug-In Module Window
98 Rotate 90 Degrees Buttons Rotates selected image left or right90 degrees. Guide to the Plug-In Module Window Preferences Button Displays and changes theimage transmissionsettings. ( ➜ p. 106) Camera Settings Button Use to display and changethe camera settings.( ➜ p. 74) CommunicationSettings Butt...
Page 103 - Using Adobe PhotoDeluxe; Starting Adobe PhotoDeluxe
99 Windows Macintosh Using Adobe PhotoDeluxe Installing the Software Installing Plug-In Module This program is required to load camera images into Plug-In compliant applicationprograms. For instructions, see “Installing/Uninstalling the Software” ( ➜ p. 69). Installing Adobe PhotoDeluxe For installa...
Page 104 - Start Adobe PhotoDeluxe.
100 What to Do if the “ImageBrowser not found” Dialog Appears If you install only the Canon Digital Camera Plug-In Module without ImageBrowser,the “ImageBrowser not found” dialog may display. If this happens, use the followingprocedures to prevent ImageBrowser from attempting to start automatically....
Page 105 - Click the [Get Photo] button at the upper left of the window.; This step is not required after the first time.; Click the; The dialog will display.
101 Windows Macintosh Starting Plug-In Module and Loading Images Plug-In Module can display still images only. Please start ImageBrowser to downloadmovies to the computer. 1. Click the [Get Photo] button at the upper left of the window. 2. Click [Get Photo] from the tab that displays and select [Cam...
Page 107 - The Camera Settings dialog will display.
103 Windows Macintosh Setting the Parameters (EOS D30 Only) Up to three sets of parameters for loading images can be set in the Plug-In Moduleusing the Parameter Settings dialog in addition to the parameters already set on thecamera. Please see the Camera User’s Guide to learn how to select the para...
Page 111 - Troubleshooting the Computer Connection; Is the cable between the camera and computer correctly attached?; • Refer to; Windows Platform; • If you are using LocalTalk, has AppleTalk been set to Off?; Macintosh Platform
107 Troubleshooting the Computer Connection Double-Check: 1. Is the cable between the camera and computer correctly attached? • Refer to Where to Find Instructions for Attaching Your Camera to a Computer ( ➜ p. ii) for connection instructions. 2. Is the camera’ power on? 3. Is the battery charge suf...
Page 112 - Customer Support; Canon Customer Support
108 Customer Support Canon Customer Support Canon Inc. 30-2 Shimomaruko 3-chome, Ohta-ku, Tokyo146-8501, Japan NORTH AMERICA Canon U.S.A., Inc. Canon Customer Care CenterPhone (US): 1-800-828-4040(Available Mon. - Fri., 9 AM to 8 PM Eastern Time) Canon Canada Inc. Phone (Canada): 1-800-OK-CANON (1-8...
Page 113 - Adobe Customer Support
109 Adobe Customer Support Adobe Systems Inc. technical support information is available in the PDF file format on thesupplied CD-ROM. PDF File Location and Opening Instructions Place the Adobe Photoshop LE CD-ROM in the drive and double-click the [My Computer]icon on the Windows desktop, followed b...


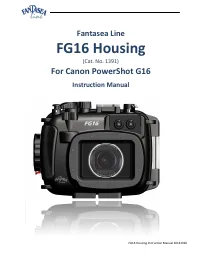 Canon PowerShot G16 User Manual
 Canon PowerShot N User Manual
 Canon PowerShot N2 User Manual
 Canon PowerShot N100 User Manual
 Canon POWERSHOT PRO 1 User Manual
 Canon Powershot Pro70 User Manual
 Canon Powershot S2 IS User Manual
 Canon PowerShot S3 IS User Manual
 Canon PowerShot S5 IS User Manual
 Canon POWERSHOT S10 User Manual
 Canon PowerShot S30 User Manual
 Canon PowerShot S40 User Manual