Canon PowerShot G16 - User Manual
Canon PowerShot G16 – User Manual, read for free online in PDF format. We hope this helps you resolve any issues you may have. If you have further questions, please contact us through the contact form.


Table of Contents:
- Page 2 – TABLE OF CONTENTS
- Page 3 – General Information; Note; Housing
- Page 4 – Features & Specifications
- Page 5 – INCLUDED IN PACKAGE
- Page 6 – IDENTIFICATION OF HOUSING PARTS
- Page 7 – Zoom Control –; Turning this control activates the camera zoom button:; Shutter Release –
- Page 8 – Cold-Shoe Mount for Lighting Accessories-; Enables mounting a flash, video light, torch or focus light; Flash Push Down Control –; popped-up by using the Flash Up switch.; Fiber Optic Cable Plate-
- Page 9 – Tripod Mounting Screw Holes –; Enable mounting the housing on a tray, thereby allowing for the; Back Side of Housing -; Shortcut
- Page 10 – Movie Button –; In playback mode, press this button to delete images.; Latch Dial –; Pushing this control activates the camera menu button.
- Page 11 – In shooting mode, press this button to move or resize the AF frame.; Anti-Glare Hood Rails –; Pushing this control activates the camera playback button.; Unlabeled Control –; This control does not operate any function on the G16 camera.; Flash Up –; . Turning the Flash Up control clockwise will not have any effect on; THE CANON POWERSHOT G16 DIGITAL CAMERA
- Page 12 – Canon PowerShot G16 Highlights; SETTING UP THE HOUSING; PREPARING THE CAMERA
- Page 13 – Peel the screen protector off the back side of the housing.
- Page 14 – OPENING THE HOUSING; Pull the; Therefore, it is best not to lock the housing and to
- Page 15 – In order to clean the O-ring, first remove it from the housing:; as this can also affect the effectiveness of the seal; Since the
- Page 16 – CLOSING THE HOUSING
- Page 17 – REMOVING THE CAMERA FROM THE HOUSING
- Page 18 – USING THE CAMERA BUILT-IN FLASH; backscatter
- Page 19 – Flash Push Down Control; OPTIONAL ACCESSORIES; EXTERNAL FLASHES; , please refer to the Fantasea website –
- Page 21 – When attaching Sea&Sea fiber optic cables to the housing; , housing adaptors should first be; FLASH & VIDEO LIGHTING SETS; The; BigEye Wide Angle Lenses; : Used to restore the colors absorbed by the water. In
- Page 22 – EyeGrabber Lens Holders; HOUSING HAND GRIP STRAP
- Page 23 – Always use the wrist lanyard with the hand strap.; COLD-SHOE CONNECTOR FOR LIGHTING ACCESSORIES
- Page 24 – FG16 HOUSING ACCESSORY SYSTEM
- Page 26 – FANTASEA PRODUCT CONSUMER LIMITED WARRANTY
- Page 27 – FANTASEA MOISTURE DETECTOR; Sensor unit is installed just under the camera (image #25 – item; IDENTIFICATION OF PARTS
- Page 28 – SILENCING THE ALARM; Disconnect the electrical wires plug from the alarm unit socket.; REPLACING BATTERIES; Prepare a new
- Page 29 – WARNING; Insert the electrical wires plug back into the alarm unit socket.; REPLACING THE ALARM UNIT
FG16 Housing Instruction Manual 20141020
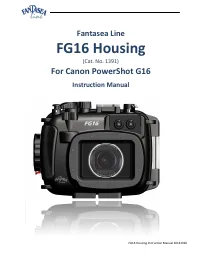
Fantasea Line
FG16 Housing
(Cat. No. 1391)
For Canon PowerShot G16
Instruction Manual
"Loading the manual" means you need to wait until the file loads and becomes available for online reading. Some manuals are very large, and the time they take to appear depends on your internet speed.
Was this manual helpful?
About this manual
- Brand
- Canon
- Model
- PowerShot G16
- Document type
- User Manual
- Language(s)
- English
- Pages
- 30
- File size
- 2.4 MB
- Format
Other Manuals for Canon PowerShot G16
Summary
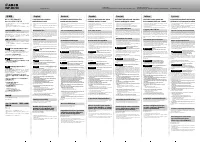
FG16 Housing Instruction Manual 20141020 2 TABLE OF CONTENTS TABLE OF CONTENTS ................................................................................................................................................ 2 DISCLAIMER ..................................................................
FG16 Housing Instruction Manual 20141020 3 DISCLAIMER While every effort has been made in order to ensure that the information included in this instruction manual is accurate and complete, no liability will be accepted for any errors or omissions. Fantasea Line reserves the right to change product s...
FG16 Housing Instruction Manual 20141020 4 Features & Specifications Depth rated to 60m/200 feet Made from durable injection molded Polycarbonate Access to all camera controls and functions Shock resistant Double O-ring main seal Special cold-shoe mount for lighting accessories Rem...
Ask a question
Related manuals
Popular Canon Other
More Canon Other models
 Canon PowerShot G7 X User Manual
 Canon PowerShot G7 X Mark II User Manual
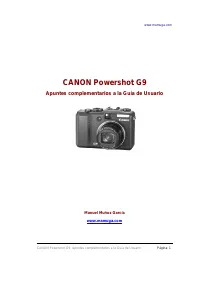 Canon PowerShot G9 User Manual
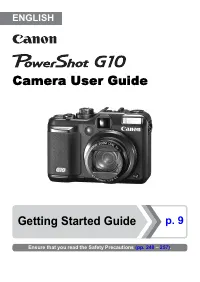 Canon PowerShot G10 User Manual
 Canon PowerShot G11 User Manual
 Canon PowerShot G15 User Manual
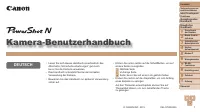 Canon PowerShot N User Manual
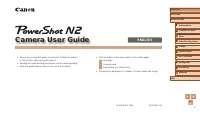 Canon PowerShot N2 User Manual
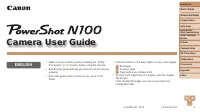 Canon PowerShot N100 User Manual
 Canon POWERSHOT PRO 1 User Manual
 Canon Powershot Pro70 User Manual
 Canon PowerShot Pro 90 IS User Manual