Yamaha CD-S2100SL - Manuals
Yamaha CD-S2100SL Player – User Manual in PDF format online.
Manuals:
User Manual Yamaha CD-S2100SL


Summary
2 En A Living Tradition in Sound A piano comes into this world through the perfect synergy of advanced technical skill and artistry. Such a piano can create sound that truly reflects the player’s feelings. The final stage in piano production is called “voicing”. It is here that the instrument is giv...
3 En NP-S2000 Soavo-1 NS-10M A-S3000 CD-S3000 NS-20 CA-1000 NS-690 B-1 PX-2 C-2 NS-1000M A-1 B-6 B-2x MX-10000 CX-10000 Excellence in Audio Achievement First HiFi System introduced in 1920 We introduced numerous HiFi components (turntables, FM/AM tuners, integrated amplifiers, preamplifiers, power a...
4 En ◆ Full-stage balanced signal transmission beginning with the DAC achieves the ultimate in CD reproduction ◆ Independent power supplies with digital and analog completely separated ◆ Exclusive Yamaha loading mechanism and high precision CD drive ◆ Left-right symmetrical design with rigid, stable...
Yamaha Players Manuals
-
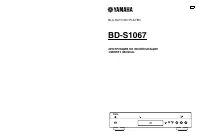 Yamaha BD-S1067
User Manual
Yamaha BD-S1067
User Manual
-
 Yamaha BDS477B
User Manual
Yamaha BDS477B
User Manual
-
 Yamaha BDS477T
User Manual
Yamaha BDS477T
User Manual
-
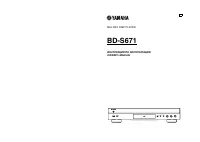 Yamaha BD-S671
User Manual
Yamaha BD-S671
User Manual
-
 Yamaha BDS677B
User Manual
Yamaha BDS677B
User Manual
-
 Yamaha CD-C603BL
User Manual
Yamaha CD-C603BL
User Manual
-
 Yamaha CDC-685
User Manual
Yamaha CDC-685
User Manual
-
Yamaha CDC-685
Manual
-
 Yamaha CDR-D651
User Manual
Yamaha CDR-D651
User Manual
-
Yamaha CDR-D651
Manual
-
 Yamaha CDR-HD1000
User Manual
Yamaha CDR-HD1000
User Manual
-
 Yamaha CDR-HD1300
User Manual
Yamaha CDR-HD1300
User Manual
-
Yamaha CDR-HD1300
Manual
-
 Yamaha CD-S2100BL
User Manual
Yamaha CD-S2100BL
User Manual
-
 Yamaha CD-S300
User Manual
Yamaha CD-S300
User Manual
-
 Yamaha CD-S303BL
User Manual
Yamaha CD-S303BL
User Manual
-
 Yamaha CDX-397MK2
User Manual
Yamaha CDX-397MK2
User Manual
-
 Yamaha CDX-497_CDX-397
User Manual
Yamaha CDX-497_CDX-397
User Manual
-
 Yamaha DRX-2
User Manual
Yamaha DRX-2
User Manual
-
Yamaha DRX-2
Manual