Page 2 - User Manual; Read This Manual; for an authorized technician.; Owner’s Manual; CAUTION
Page 2 User Manual Read This Manual Inside you’ll find many helpful hints on how to use and maintain your air conditioner properly. Just a little preventive care on your part can save you a great deal of time and money over the life of your air conditioner. You’ll find many answers to common problem...
Page 3 - SAFETY PRECAUTIONS; WARNING; This symbol indicates the possibility of death or serious injury.; Sa
User Manual Page 3 SAFETY PRECAUTIONS To prevent injury to the user or other people and property damage, the instructions shown here must be followed. Incorrect operation due to ignoring of instructions may cause harm or damage. The level of risk is shown by the following indications. • Plug in powe...
Page 5 - NOTE
User Manual Page 5 Power supply cord with 3-prong grounding plug and current detection device Do not, under any circumstances, cut, remove or bypass the grounding prong. Grounding type wall receptacle WARNING - For your safety • Do not store or use gasoline or other fl ammable vapors and liquids in ...
Page 6 - NOTES; notice a click as the RESET button pops out.; Operation of Current Device; Do not use this device to turn the unit on or off .
Page 6 User Manual NOTES The power supply cord contains a current device that senses damage to the power cord. Test your power supply cord as follows: 1. Plug in the air conditioner. 2. The power supply cord will have TWO buttons on the plug head. Press the TEST button. You will notice a click as th...
Page 7 - Normal Sounds; OPERATING INSTRUCTIONS; Instruc
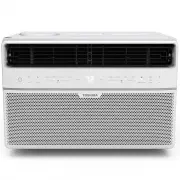
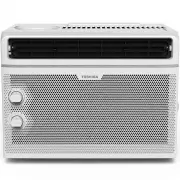
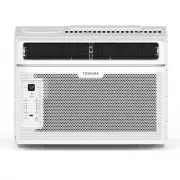
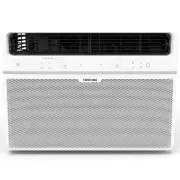
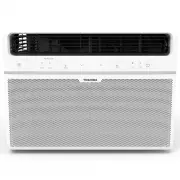
Normal Sounds OPERATING INSTRUCTIONS NOTE All the pictures in this manual are for illustrative purposes only. The actual shape of the air conditioner you purchased may be slightly diff erent, but its operation and functions will be similar. O perating Instruc tions RAC-WK05 Models RAC-WK06 / RAC-WK0...
Page 8 - To begin operating the air conditioner, follow these steps:; Air Directional Louvers; The louvers will allow you to direct the air flow Left or Right, or Up
O perating Instruc tions Air Conditioner Features (general) Air Conditioner Features (RAC-WK05 only) This air conditioner is designed to be operated under the following conditions: Cooling Operation Outdoor temp.: 64 ~ 109°F / 18 ~ 43°C Indoor temp.: 62 ~ 90°F / 17 ~ 32°C NOTES • The relative humidi...
Page 9 - has maximum cooling eff ect and airfl ow.; LOW COOL; has minimum cooling eff ect and airfl ow.; FAN MODE; NOTE: When selecting a fan speed, the compressor will not run.; THERMOSTAT; Electronic Control Operating Instructions; MODE
Before you begin, thoroughly familiarize yourself with the control panel as shown below and all its functions, then follow the symbol for the functions you desire. The unit can be controlled by the unit control alone or with the remote. COOL MODE The desired cool setting is selected by rotating the ...
Page 10 - Key Pad Features
TO TURN UNIT ON OR OFF: Press ON/OFF button to turn unit on or off . NOTE: The unit will automatically initiate the Energy Saver function under Cool, Dry, Auto (only Auto- Cooling and Auto-Fan) modes. TO CHANGE TEMPERATURE SETTING: Press UP/DOWN button to change temperature setting. NOTE: Press or h...
Page 11 - Displays; AS
To operate on Auto feature: - When you set the air conditioner to AUTO mode, it will automatically select cooling or fan only operation depending on what temperature you have selected and the current room temperature. - The air conditioner will control room temperature automatically according to tem...
Page 12 - Window Requirements; INSTALLATION INSTRUCTIONS; WARNING - Before You Begin; Installa; Phillips; Flathead
Page 12 User Manual Window Requirements Tools You Will Need Tools You May Use INSTALLATION INSTRUCTIONS WARNING - Before You Begin Read these instructions completely and carefully. • IMPORTANT - Save these instructions for local inspector’s use. • IMPORTANT - Observe all governing codes and ordinanc...
Page 13 - Prepare the Window; Top Rail Hardware; Packaging
User Manual Page 13 1. Prepare the Window 2. Prepare Air Conditioner Installa tion Instruc tions Lower sash must open sufficiently to allow a clear vertical opening (see dimension H in Table 1). Side louvers and the rear of the AC must have clear air space to allow enough air flow through the conden...
Page 15 - Secure the Accordion Panels
User Manual Page 15 NOTE If storm window blocks AC, see Fig. 15. Top Rail Bottom Rail Fig. 3 Fig. 3 “I” section Fig 2 Fig. 2 B. Slide the free end “ I “ section of the panel directly into the cabinet as shown in Fig. 2. Slide the panel down. Be sure to leave enough space to slip the top and bottom o...
Page 16 - A. Place the frame lock between the frame extensions and the; Install Support Bracket
Page 16 User Manual window frame Fig. 5 Fig. 6 Fig.6 Fig. 7 Fig. 8 Fig. 9 Fig. 9 FOAM SEAL Fig. 10 A. Place the frame lock between the frame extensions and the window sill as shown (Fig. 7). Drive 3/4” (19 mm) or 1/2” (12.7 mm) locking screws through the frame lock and into the sill. B. Drive 3/4” (...
Page 17 - Install R1 Hardware (only by applicable to Energy Star models); Repeat on the other side.
User Manual Page 17 6. Install R1 Hardware (only by applicable to Energy Star models) In order to minimize air leaks and ensure optimal insulation, it is necessary to install the included R1 hardware to the side curtain. Follow the instructions below. Step 1. After the unit is installed in the windo...
Page 18 - If AC is Blocked by Storm Window; In order to minimize air leaks between the
Page 18 User Manual 7. Install Weather Stripping (ENERGY STAR models only) If AC is Blocked by Storm Window Fig. 14 In order to minimize air leaks between the room air conditoner and the window opening, trim the weather stripping to the proper length, peel off the protective backing and plug any gap...
Page 19 - Preliminary Instructions
User Manual Page 19 Installa tion Instruc tions Do the following before beginning installation. See illustrations below. Check dimensions of your unit to determine model type: Unit Height: 17-5/8” Unit Width: 23-5/8” Min. Window Opening: 18-1/2” Min. Window Width: 28” Max. Window Width: 40-1/2” Prel...
Page 20 - Tools Required
Page 20 User Manual Installa tion Instruc tions 1. Check window opening size - the mounting parts furnished with this air conditioner are made to install in a wooden sill double-hung window. The standard parts are for window dimensions listed above. Open sash to a minimum of 19” (483 mm). See Fig. D...
Page 21 - Remove Chassis
User Manual Page 21 Installa tion Instruc tions A. Window Mounting 1 Remove Chassis 1. Pull down front grille and remove fi lter. (See Fig. 1). 2. Lift front grille upwards and place to one side. 3. Locate the four front screws and remove. These screws will be needed to re-install the front panel (s...
Page 22 - Install Top Rail and Side Bracket; Assemble Window Accordion Panels
Page 22 User Manual Installa tion Instruc tions 9. Add two foam inserts to holes in top of cabinet where shipping screws were removed from (see Fig. 6). 10. Your unit may come with internal packaging. This packaging must be removed prior to installing the air conditioner back into the cabinet. (see ...
Page 23 - Place Cabinet in Window Opening; Place cabinet in window with bottom sill angle fi rmly seated; Install Support Bracket
User Manual Page 23 Installa tion Instruc tions 4 Place Cabinet in Window Opening 1. Open window and mark center of window sill as shown (Fig. 11). 2. Place cabinet in window with bottom sill angle fi rmly seated over window sill as shown. Bring window down temporarily behind top rail to hold cabine...
Page 24 - Assemble sill angle bracket to support brackets; Extend Window Filler Panels; Carefully raise window to expose fi ller panel; Screws and
Page 24 User Manual Installa tion Instruc tions NOTE Check that air conditioner is tilted back about 1-1/4 in to 1-5/8 in (tilted about 3° to 4° downward to the outside). After proper installation, condensate should not drain from the overfl ow drain hole during normal use. Adjust the slope if other...
Page 25 - screw; Weather seals; Attach Window Filler Panels to Window Frame
User Manual Page 25 Installa tion Instruc tions 3/4” (or 1/2” ) long Hex-head screw Fig. 17A 4. Attach the top rail to window frame: Use a 3/32” drill bit to drill one hole through the hole in the middle the top rail into the window frame, and drive one 3/4” (or 1/2”) HEX-HEAD locking screw through ...
Page 26 - Install Chassis into Cabinet and Install Front to Unit; Select Wall Location; Prepare Wall
Page 26 User Manual Installa tion Instruc tions 9 Install Chassis into Cabinet and Install Front to Unit 1. Lift air conditioner and carefully slide into cabinet leaving 6” protruding. 2. DO NOT press or apply pressure to controls or fi nned coils. 3. Be sure chassis is firmly seated towards rear of...
Page 27 - Prepare and Install Cabinet
User Manual Page 27 Installa tion Instruc tions Fig. 21 Up to 8-1/2" Inside Frame Height Y X Inside Frame Widht NAIL SPACERS TO STUDS LE VEL Fig. 22 Carefully measure and cut an opening with the following dimensions depending on your model.See Fig. 20 and Fig. 21. WIDTH X = inside model width pl...
Page 28 - Screw or nail cabinet wooden frame using shims if frame is; C. Masonry Construction
Page 28 User Manual Installa tion Instruc tions NOTE Check that air conditioner is tilted back about 1-1/4” to 1-5/8” (tilted about 3° to 4° downward to the outside). After proper installation, condensate should not drain from the overfl ow drain hole during normal use. Adjust the slope if otherwise...
Page 29 - Removing AC From Window; Remove sash seal from between windows, and unscrew safety lock.
User Manual Page 29 Installa tion Instruc tions Removing AC From Window • Turn AC off , and disconnect power cord. • Remove sash seal from between windows, and unscrew safety lock. • Remove screws installed through frame and frame lock. • Remove the R1 Panel (ENERGY STAR models only). • Close (slide...
Page 30 - Air Filter Cleaning; Open the front panel.; CARE AND CLEANING; re
Page 30 User Manual Air Filter Cleaning Cabinet Cleaning Winter Storage The air fi lter should be checked at least once a month to see if cleaning is necessary. Trapped particles in the fi lter can build up and cause an accumulation of frost on the cooling coils. • Remove the fi lter by sliding it o...
Page 31 - TROUBLESHOOTING TIPS; Troubleshooting
User Manual Page 31 Before calling for service, review this list. It may save you time and expense. This list includes common occurrences that are not the result of defective workmanship or materials in this appliance. Problem Solution Air conditioner does not start Wall plug disconnected. Push plug...
Page 32 - REMOTE CONTROL OPERATING INSTRUCTIONS; Location of the remote controller; CAUTIONS
Page 32 User Manual Handling the Remote Controller Installing the Battery REMOTE CONTROL OPERATING INSTRUCTIONS Location of the remote controller • Use the remote controller within a distance of 16.4 ft (5 meters) from the air conditioner, pointing it towards the receiver. Reception is confi rmed by...
Page 33 - Remote Control Specifi cations; Model
User Manual Page 33 Remote Control Specifi cations O perating Instruc tions (W ith Remot e) Model RG15A(B)/E Rated Voltage 3.0V (Lithium battery CR2025) Lowest Voltage of CPU Emitting Signal 2.4 V Signal Receiving Range 16.4 ft (5 m) Environment -5 °C~60 °C (23°F~140°F) NOTE • Button design is based ...
Page 34 - Function Buttons; If the unit has ENERGY
Page 34 User Manual Function Buttons ON/OFF button MODE button TEMP UP button FAN button SLEEP button ENERGY SAVER button TEMP DOWN button TIMER button ONE TOUCH button Operation starts when this button is pressed and stops when the button is pressed again. Press this button to select the desired op...
Page 35 - Auto operation; How to Use the Buttons
User Manual Page 35 Oper ating Instruc tions (W ith Remot e) Auto operation Ensure the unit is plugged in and power is available.1. Press the ON/OFF button to start the air conditioner. 2. Press the MODE button to select Auto. 3. Press the TEMP UP/DOWN button to set the desired temperature. Cooling ...
Page 36 - Dehumidifying operation; Ensure the unit is plugged in and power is available.; Timer operation
Page 36 User Manual Dehumidifying operation Ensure the unit is plugged in and power is available. 1. Press the ON/OFF button to start the air conditioner. 2. Press the MODE button to select Dry. 3. Press the TEMP UP/DOWN button to set the desired temperature. 1 2 3 3 NOTE In the Dehumidifying mode, ...
Page 37 - COMBINED TIMER; (Setting both ON and OFF timers simultaneously); AUTO STOP >AUTO START
User Manual Page 37 O perating Instruc tions (W ith Remot e) COMBINED TIMER (Setting both ON and OFF timers simultaneously) AUTO STOP >AUTO START (On > Stop > Start operation) This feature is useful when you want to stop the air conditioner after you go to bed, and start it again in the mor...
Page 38 - Energy saver operation; Reorient or relocate the receiving antenna.
Page 38 User Manual Energy saver operation In this mode, the fan will continue to run for 3 minutes after the compressor shuts off. The fan then cycles on for 2 minutes at 10 minute inter vals until the room temperature is above the set temperature, at which time the compressor turns back on and coo...
Page 39 - Chemical Burn Hazard. Keep batteries away from children.
WARNING: Chemical Burn Hazard. Keep batteries away from children. This product contains a lithium button/coin cell battery. If a new or used lithium button/coin cell battery is swallowed or enters the body, it can cause severe internal burns and can lead to death in as little as 2 hours. Always comp...


 Toshiba RAC-PD0812CRRU
User Manual
Toshiba RAC-PD0812CRRU
User Manual
 Toshiba RAC-PD1013CWRU
User Manual
Toshiba RAC-PD1013CWRU
User Manual
 Toshiba RAC-PD1213CWRU
User Manual
Toshiba RAC-PD1213CWRU
User Manual
 Toshiba RAC-PD1414CWRU
User Manual
Toshiba RAC-PD1414CWRU
User Manual
 Toshiba RAC-PT1412HVWRU
User Manual
Toshiba RAC-PT1412HVWRU
User Manual
 Toshiba RAC-WK0512CMRU
User Manual
Toshiba RAC-WK0512CMRU
User Manual
 Toshiba RAC-WK0612CRRU
User Manual
Toshiba RAC-WK0612CRRU
User Manual
 Toshiba RAC-WK1012ESCWR
User Manual
Toshiba RAC-WK1012ESCWR
User Manual
 Toshiba RAC-WK1212ESCWR
User Manual
Toshiba RAC-WK1212ESCWR
User Manual
 Toshiba RAC-WK1514ESCWRU
User Manual
Toshiba RAC-WK1514ESCWRU
User Manual
 Toshiba RAC-WK1823ESCWR
User Manual
Toshiba RAC-WK1823ESCWR
User Manual
 Toshiba RAS-07
User Manual
Toshiba RAS-07
User Manual
 Toshiba RAS-07E2KV2G-A-IDUC
User Manual
Toshiba RAS-07E2KV2G-A-IDUC
User Manual
 Toshiba RAS-10E2KV2G-A-IDUC
User Manual
Toshiba RAS-10E2KV2G-A-IDUC
User Manual
 Toshiba RAS-12SKSX / RAS-12SASX
User Manual
Toshiba RAS-12SKSX / RAS-12SASX
User Manual
 Toshiba RAS-13E2KV2G-A-IDUC
User Manual
Toshiba RAS-13E2KV2G-A-IDUC
User Manual
 Toshiba RAS-16E2KV2G-A-IDUC
User Manual
Toshiba RAS-16E2KV2G-A-IDUC
User Manual
 Toshiba RAS-18E2KV2G-A-IDUC
User Manual
Toshiba RAS-18E2KV2G-A-IDUC
User Manual
 Toshiba RAS-22E2KV2G-A-IDUC
User Manual
Toshiba RAS-22E2KV2G-A-IDUC
User Manual
 Toshiba RAS-24E2KV2G-A-IDUC
User Manual
Toshiba RAS-24E2KV2G-A-IDUC
User Manual