Page 2 - Read This Manual; User Manual; CAUTION
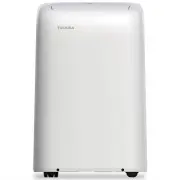
Page 2 User Manual Read This Manual Inside you’ll find many helpful hints on how to use and maintain your air conditioner properly. Just a little preventive care on your part can save you a great deal of time and money over the life of your air conditioner. You’ll find many answers to common problem...
Page 3 - SAFETY PRECAUTIONS; WARNING; This symbol addresses practices not related to physical injury.
User Manual Page 3 Sa fe ty Precautions SAFETY PRECAUTIONS To prevent injury to the user or other people and property damage, the instructions shown here must be followed. Incorrect operation due to ignoring of instructions may cause harm or damage. The level of risk is shown by the following indica...
Page 5 - flammable materials
User Manual Page 5 • Hold the plug by the head of the power plug when taking it out. Otherwise, it may cause electric shock and damage. • Ensure that the installation is properly secured to prevent the product from potentially falling. • Do not place heavy objects on the power cord and ensure that t...
Page 6 - recommended by the manufacturer.
Page 6 User Manual Sa fe ty Precautions WARNING This symbol shows that this appliance used a fl ammable refrigerant. If the refrigerant is leaked and exposed to an external ignition source, there is a risk of fi re. CAUTION This symbol shows that the operation manual should be read carefully. CAUTIO...
Page 7 - Operation of Current Device; NOTICE
User Manual Page 7 The power supply cord with this air conditioner contains a current detection device designed to reduce the risk of fi re. In the event that the power supply cord is damaged, it can not be repaired. It must be replaced with a cord from the manufacturer. Sa fe ty Precautions • Do no...
Page 8 - Preparation; Unit Operating Temperature Range:; Mode; Cool; OPERATING INSTRUCTIONS; Instruc; Exhaust Hose Installation:
Page 8 User Manual Preparation Control panel Handle (both sides) Outlet louver (automatic swing) Caster Panel r a e R t n o r F Power plug storage Power cord storage Bottom tray drain outlet Power cord outlet Drain outlet (heat pump models only) Upper air filter (behind the grille) Upper air intake ...
Page 9 - Control Panel Features
User Manual Page 9 Oper ating Instruc tions Control Panel Features Swing Button Used to initiate the Auto Swing feature. When the operation is ON, pressing the SWING button can stop the louver at the desired angle. Connect Button (Smart models only) Also used to initiate the wireless connection mode...
Page 10 - Operating Instructions; COOL operation
Page 10 User Manual O perating Instruc tions Operating Instructions COOL operation • Press the “MODE” button until the “COOL” indicator light comes on. • Press the ADJUST buttons Up ( ) or Down ( ) to select your desired room temperature. The temperature can be set within a range of 62°F~86°F/17°C~3...
Page 11 - SLEEP operation
User Manual Page 11 Oper ating Instruc tions SLEEP operation Pressing this button will increase (during cooling operation) or decrease (during heating operation, applicable models) 1°F/1°C after 30 minutes. The temperature will again increase (cooling) or decrease (heating) by another 1°F/1°C after ...
Page 12 - Figures with
Page 12 User Manual WATER DRAINAGE (cont.) • For Heat Pump models, remove the middle drain plug from the back of the unit and install the drain connector (5/8” universal female adapter) with a 3/4“ hose (not included). For models without the drain connector, attach the drain hose to the connector. P...
Page 13 - INSTALLATION INSTRUCTIONS; Installa; Choosing the Right Location; cm
User Manual Page 13 INSTALLATION INSTRUCTIONS Installa tion Instruc tions Choosing the Right Location Recommended Installation Your installation location should meet the following requirements: • Make sure that you install your unit on an even surface to minimize noise and vibration. • The unit must...
Page 14 - Accessories; Quantity; Tools Needed
Page 14 User Manual Accessories ts windows 19.4’’-62.2’’ (49.3-158.1 cm). n o i t p i r c s e D t r a P Unit adaptor Air exhaust passage Window Sliders Exhaust hose Bolt Foam seal A (adhesive) Foam seal B (adhesive) Foam seal C (Non-adhesive) Security bracket and 2 screws Drain hose Drain hose adapt...
Page 15 - Window Installation Kit; : Preparing the exhaust hose assembly; Depending on the size of your window,; Exhaust hose
User Manual Page 15 Installa tion Instruc tions Window Installation Kit 1: Preparing the exhaust hose assembly Press the exhaust hose into the Air exhaust passanger and unit adaptor, clamp automatically by elastic buckles of the adaptors. 2: Install the exhaust hose assembly to the unit Insert the u...
Page 16 - Type 1: Hung window installation
Page 16 User Manual Type 1: Hung window installation 1. Cut the adhesive foam seal A and B strips to the proper lengths, and attach them to the window sash and frame as shown. 2. Insert the window slider assembly into the window opening. 3. Cut the non-adhesive foam seal C strip to match the width o...
Page 17 - Type 2: Sliding window installation
User Manual Page 17 Type 2: Sliding window installation 1. Cut the adhesive foam seal A and B strips to the proper lengths, and attach them to the window sash and frame as shown. 2. Insert the window slider assembly into the window opening. 3. Cut the non-adhesive foam seal C strip to match the wind...
Page 18 - CARE AND CLEANING; re
Page 18 User Manual Air Filter Cleaning Unit Cleaning Store the Unit When Not in Use Safety Precautions CARE AND CLEANING Ca re and Cleaning • Always unplug the unit before cleaning or servicing.• DO NOT use flammable liquids or chemicals to clean the unit.• DO NOT wash the unit under running water....
Page 19 - TROUBLESHOOTING TIPS; Troubleshooting; Problem; Temperature setting is too high decrease the set temperature.
User Manual Page 19 TROUBLESHOOTING TIPS Troubleshooting T ips Before calling service, review this list. It may save you time and expense. This list includes common occurences that are not the result of defective workmanship or materials of this appliances. NOTICE Do not add extension to the exhaust...
Page 20 - emote Control Specifi; REMOTE CONTROL AND APP INSTRUCTIONS; Rated voltage
Page 20 User Manual R emote Control Specifi cations Function Buttons REMOTE CONTROL AND APP INSTRUCTIONS Before you begin using your new air conditioner, make sure to familiarize yourself with its remote control. The following is a brief introduction to the remote control itself. For instructions on ...
Page 21 - Handling the Remote Control; NOT SURE WHAT A FUNCTION DOES?; INSERTING AND REPLACING BATTERIES; BATTERY NOTES
User Manual Page 21 Handling the Remote Control NOT SURE WHAT A FUNCTION DOES? Refer to the Operating Instructions section of this manual for a detailed description of the functions available using the remote. NOTICE Button designs on your unit may differ slightly from the example shown. If the unit...
Page 22 - Remote LED Screen Indicators
Page 22 User Manual AUTO COOL DRY HEATFAN Transmission Indicator Lights up when remote sends signal to unit MODE display Displays the currentmode, including: TIMER ON display Displays when TIMER ON is set TIMER OFF display Displays when TIMER OFF is set Battery display Low battery detection SLEEP di...
Page 23 - Basic Functions; SETTING THE DESIRED TEMPERATURE; Changing the Fan Speed
User Manual Page 23 Basic Functions SETTING THE DESIRED TEMPERATURE The operating temperature range for this unit is 62°F-86°F (17-30°C). You can increase or decrease the set temperature in 1°F or 1°C increments. Changing the Mode 1. To change the operating mode, press the MODE button until the desi...
Page 24 - TIMER ON function; sec; TIMER OFF function
Page 24 User Manual Timer Functions NOTICE This number indicates the amount of time after the current time after which you want the unit to turn on. For example, if you set TIMER ON for 2 hours, “2.0h“ will appear on the screen, and the unit will turn on after 2 hours. Your air conditioning unit has...
Page 25 - either function by setting the timer to “0.0h“.; Setting both TIMER ON and; Your remote display; T i m e r o n
User Manual Page 25 Timer Functions (cont.) 3. Wait 2 seconds, then the TIMER OFF function will be activated. The digital display on your remote control will then return to the temperature display. NOTICE When setting the TIMER ON or TIMER OFF functions, up to 10 hours, the time will increase in 30 ...
Page 26 - How to Use the Advanced Functions
Page 26 User Manual How to Use the Advanced Functions SHORTCUT Function SWING Function MyTemp function SLEEP Function The SLEEP function is used to decrease energy use while you sleep (and don’t need the same temperature settings to stay comfortable). Used t The MyTemp function enables the remote co...
Page 27 - DECLARATION OF CONFORMITY; NOTE
User Manual Page 27 Rem ote Co ntro l an d App Instruc tions We hereby declare that this AC is in compliance with the essential requirements and other relevant provisions of Directive 1999/5/EC. 1. Supports operating systems: iOS 7+ or Android 4+.2. In the event of a OS update, there may be a delay ...
Page 28 - Devices required to use the Smart AC:; Smart Phone with compatible iOS or Android system.; SYSTEM OVERVIEW; icting information. The information displayed on the
Page 28 User Manual Remot e C on trol and App Instruc tions Devices required to use the Smart AC: 1. Smart Phone with compatible iOS or Android system. 2. Wireless Router (a 2.4GHz network is required to connect) 3. Smart Air Conditioner SYSTEM OVERVIEW DOWNLOAD AND INSTALL THE APP e d o c R Q e l p...
Page 29 - CREATE YOUR ACCOUNT; “Sign
User Manual Page 29 CREATE YOUR ACCOUNT • Make sure your smartphone is connected to your wireless router and your wireless router has a working 2.4GHz internet connection. • It is recommended to activate your account immediately to be able to recover your password by email. 6.1 Press “Sign Up”. 6.2 ...
Page 30 - ADDITIONAL APP AND SMART HOME FUNCTIONS; Operation is subject to the following two conditions:; Declaration of conformity; --Increase the separation between the equipment and receiver.
Page 30 User Manual ADDITIONAL APP AND SMART HOME FUNCTIONS For additional instructions regarding the features of the app and Smart Home skill capabilities, scan the QR code below. Re m ote Con trol an d App Instruc tions This device complies with Part 15 of the FCC Rules and it contains licence-exe...
Page 31 - Supplier's Declaration of Conformity; Responsible Party U.S. Contact Information
Supplier's Declaration of Conformity 47 CFR § 2.1077 Compliance Information Unique Identifier: RG57H4(B)/BGEFU1 Responsible Party U.S. Contact Information Midea America Corporation300 Kimball DrParsippany NJ07054 This device complies with Part 15 of the FCC Rules. Operation is subject to the followi...
Page 33 - Tipo; Tipo
MANUAL DEL USUARIO Tipo Portatil Aire Acondicionado de Habitación versión D - 10 - 2020 MANUAL DEL USUARIO RAC-PD1013CWRU RAC-PD0812CRRU RAC-PD1213CWRURAC-PD1414CWRU Tipo Portatil Aire Acondicionado de Habitación versión D - 10 - 2020 www.toshiba-lifestyle.com Precauciones de Seguridad Instrucciones...
Page 34 - Lea este Manual; Manual del propietario; PRECAUCIÓN
Page 32 User Manual Lea este Manual En su interior encontrará muchos consejos útiles sobre como usar y mantener su acondicionador de aire correctamente. Unos pocos cuidados por su parte pueden ahorrar una gran cantidad de tiempo y dinero, alargando la vida útil de su acondicionador de aire. Encontra...
Page 35 - PRECAUCIONES DE SEGURIDAD; Precauciones; AV I S O; ADVERTENCIA
User Manual Page 33 PRECAUCIONES DE SEGURIDAD Para evitar daños al usuario u otras personas y a la propiedad, las instrucciones que se muestran aquí deben ser seguidas. Las operaciones incorrectas por la ignora de las instrucciones podría causar perjuicios o lesiones. El nivel de riesgo está clasifi...
Page 38 - recomendados por el fabricante.; ADVERTENCIA (solo para usar refrigerante R32)
Page 36 User Manual Precauciones de Seguridad ADVERTENCIA Este símbolo muestra que este aparato ha utilizado un refrigerante infl amable. Si el refrigerante está fi ltrado y exposto a una fuente de ignición externa, hay riesgo de incendio. PRECAUCIÓN Este símbolo muestra que el manual de instruccion...
Page 39 - Operación del dispositivo de corriente; AVISO
User Manual Page 37 El cable de energía que acompaña este acondicionador de aire contiene un dispositivo de detección de corriente diseñado para reducir el riesgo de incendio. En el caso del cable de energía esté dañado, no se puede reparar. Debe sustituirlo por un cable del fabricante. Precauciones...
Page 40 - INSTRUCCIONES DE OPERACIÓN; Preparación; Trasera; Faja de Temperatura de Funcionamiento de la Unidad:; Modo; Instalación de la Manguera de Escape:
Page 38 User Manual INSTRUCCIONES DE OPERACIÓN Preparación Panel de control Mango de traslado (ambos os lados) Deflector de aire (oscilación automática) Rodízio Panel Trasera Frente Soporte del enchufe Soporte del cable Salida de drenaje de la bandeja inferior Salida del cable Salida de drenaje (sol...
Page 41 - Característica del Panel de Control
User Manual Page 39 Instruc ciones de Oper ación Característica del Panel de Control Botón Oscilación (Swing) Se utiliza para iniciar la función de oscilación automática. Cuando la operación está activada, al ector en el ángulo deseado. Función Connect (Smart models only) Se utiliza para iniciar el ...
Page 42 - Funcionamiento del FAN
Page 40 User Manual Botón del modo Sueño (Sleep) Se utiliza para iniciar la operación SLEEP. Pantalla de LEDs Muestra la temperatura ajustada en °F (Grados Fahrenheit) o °C (Grados Celsius) y los ajustes del Temporizador Automático. En los modos DRY y FAN, muestra la temperatura ambiente. Códigos de...
Page 43 - Función MyTemp
User Manual Page 41 TIMER: Funcionamiento Auto Start/Stop • Cuando la unidad esté encendida, al pulsar el botón del Temporizador se iniciará el programa de detención automática. La luz indicadora TIMER OFF se encenderá. Pulse el botón Arriba ( ) o Abajo ( ) para seleccionar la hora deseada. Pulse de...
Page 44 - Drenaje del Agua; Figuras con
Page 42 User Manual Drenaje del Agua • Durante los ciclos de los modos DRY, retire el tapón de drenaje superior de la parte trasera de la unidad e instale el conector de drenaje de 5/8 (conector “hembra” universal) con una manguerade 3/4” (comprada localmente). Para los modelos sin conector de drena...
Page 45 - Elevación de la manguera < 6ft; Solo unidades modelos heat pump
User Manual Page 43 Instruc ciones de O peración AVISO Asegúrese de volver a instalar fi rmemente el tapón de drenaje inferior para evitar fugas antes de usar la unidad. X Presione el soporte delcable de alimentaciónen la trasera delaparato. ¥ Elevación de la manguera < 6ft Adaptador de la mangue...
Page 46 - INSTRUCCIONES DE INSTALACIÓN; Elección de la Ubicación Correcta
Page 44 User Manual INSTRUCCIONES DE INSTALACIÓN Elección de la Ubicación Correcta Instalación Recomendada 50 cm 19.7 inch 50 cm 19.7 inch Su ubicación de instalación debe cumplir los siguientes requisitos: • Asegúrese de instalar la unidad en una superficie uniforme para minimizar el ruido y las vi...
Page 47 - Accesorios; Descripción; Adaptador para unidad; Cantidad; Herramientas Necesarias
User Manual Page 45 Accesorios El kit de instalación de ventanas es adaptable a ventanas de 19,4’’-62,2’’ (49,3-158,1 cm). Descripción Pieza Adaptador para unidad Conducto de aire de escape Deslizadores de ventana Manguera de escape Tornillo Junta de espuma A (adhesivo) Junta de espuma B (adhesivo) ...
Page 48 - Kit de Instalación en Ventanas; Después del montaje
Page 46 User Manual Kit de Instalación en Ventanas 1: Preparando el conjunto de la manguera de escape Presione la manguera de escape en el Paso de escape de aire y en el adaptador, abrazando automáticamente por las hebillas elásticas de los adaptadores. 2: Instale el conjunto de la manguera de escap...
Page 49 - Tipo 1: Instalación de ventanas de colgar
User Manual Page 47 Tipo 1: Instalación de ventanas de colgar 1. Corte el sello de espuma adhesiva A y B en tiras de acuerdo con las longitudes adecuadas, y adjúntela a la faja de la ventana y el marco como se muestra. 2. Inserte el conjunto deslizador de ventana en la abertura de la ventana. 3. Cor...
Page 50 - Tipo 2: Instalación de ventanas de deslizar
Page 48 User Manual Tipo 2: Instalación de ventanas de deslizar 1. Corte el sello de espuma adhesiva A y B tiras a laslongitudes adecuadas, y adjúntelas a la faja de la ventana yel marco como se muestra. 2. Inserte el conjunto del Deslizador de Ventana en la apertura de la ventana. 3. Corte sello de...
Page 51 - MANTENIMIENTO Y LIMPIEZA; Man; ATENCIÓN
User Manual Page 49 Limpieza del fi ltro de aire Limpieza del AC Portátil Almacene la unidad cuando no esté en uso Precauciones de Seguridad MANTENIMIENTO Y LIMPIEZA Man tenimien t y Limpie za • Desenchufe siempre la unidad antes de limpiarla o repararla. • NO use líquidos o productos químicos inflam...
Page 52 - SOLUCIONES DE PROBLEMAS; Solución; Problema; Asegurese de que puertas o ventanas estén cerradas.
Page 50 User Manual SOLUCIONES DE PROBLEMAS Solución de Problemas Antes de llamar al servicio técnico, revise esta lista. Puede ahorrarle una gran cantidad de tiempo y dinero. Esta lista incluye ocurrencias comunes que no son consecuencia de un trabajo o materiales defectuosos en el equipo. AVISO ¡N...
Page 53 - Especifi; INSTRUCCIONES DEL CONTROL REMOTO Y DEL APP; Model; l co
User Manual Page 51 Especifi caciones del Control Remoto Funcionamiento de los Botones INSTRUCCIONES DEL CONTROL REMOTO Y DEL APP Antes de empezar a utilizar el nuevo acondicionador de aire, asegúrese de familiarizarse con su control remoto. Lo que sigue es una breve introducción al propio control re...
Page 54 - Manejo del Control Remoto; ¿NO ESTÁ SEGURO DE ALGUNA FUNCIONALIDAD?; INSERCIÓN Y SUSTITUCIÓN DE BATERÍAS; AVISO SOBRE LA BATERÍA
Page 52 User Manual Manejo del Control Remoto ¿NO ESTÁ SEGURO DE ALGUNA FUNCIONALIDAD? Consulte la sección Instrucciones de Funcionamiento de este manual para obtener una descripción detallada de las funciones disponibles en el uso del control remoto. AVISO Los diseños de los botones de su unidad pu...
Page 55 - Indicadores de la pantalla de LEDs del Control Remoto
User Manual Page 53 AUTO COOL DRY HEATFAN Indicador de Transmisión Enciende cuando el control remoto envía una señal a la unidad Indicador del MODE Muestra el modo actual, incluso: Indicador del TIMER ON Aparece cuando TIMER ON está configurado Indicador del TIMER OFF Aparece cuando TIMER OFF está c...
Page 56 - Funciones Básicas; AJUSTANDO LA TEMPERATURA DESEADA; Para cambiar el modo de funcionamiento, pulse el botón MODE; Cambiando la Velocidad del Ventilador
Page 54 User Manual Funciones Básicas AJUSTANDO LA TEMPERATURA DESEADA El alcanze de la configuración de temperatura de esta unidad es de 62°F a 86°F (17°C - 30°C). Se puede aumentar o disminuir la temperatura ajustada en incrementos de 1°F o 1°C. Cambiando el Modo 1. Para cambiar el modo de funcion...
Page 57 - Configuración del TIMER ON; Configuración del TIMER OFF
User Manual Page 55 Funciones del Timer AVISO Este número indica la cantidad de tiempo después de la hora actual de la cual desea que la unidad se encienda. Por ejemplo, si establece TIMER ON durante 2 horas, aparecerá “2.0h” en la pantalla y la unidad se encenderá después de 2 horas. Su acondiciona...
Page 58 - gurar las funciones TIMER ON o TIMER OFF, hasta 10 horas,; Ajustando las funciones TIMER; La pantalla del control remote mostra:
Page 56 User Manual ContinúepresionandoTIMER ON oTIMER OFFhasta alcanzarel tiempodeseado. Funciones del Timer (cont.) 3. Espere 2 segundos y se activará la función TIMER OFF. El indicador digital del control remoto volverá al indicador detemperatura. AVISO gurar las funciones TIMER ON o TIMER OFF, h...
Page 59 - Cómo utilizar las funciones avanzadas
User Manual Page 57 Cómo utilizar las funciones avanzadas Función SHORTCUT Función SWING Función MyTemp Función SLEEP La función SLEEP es usada para ahorar energíamientras del sueño (y no necesita los ajustesde temperatura para mantenerse cómodo). Se utiliza para detener o iniciar el movimiento deld...
Page 60 - DECLARACIÓN DE CONFORMIDAD; - Reorientar o reubicar la antena receptora.
Page 58 User Manual Inst ruc cio nes del con tro l re m oto y d el A pp Declaramos que este Acondicionador de Aire cumple los requisitos esenciales y otras disposiciones pertinentes de la Directiva 1999/5/CE. 1. Soporte para los sistemas operativos: iOS 7+ o Android 4+..2. En el caso de una actualiz...
Page 61 - VISIÓN GENERAL DEL SISTEMA; Código QR de Apple; cámara de 5 megapíxeles.
User Manual Page 59 Instruc ciones del con trol r emot o y del App Dispositivos necesarios para utilizar el Acondicionador de aire inteligente: 1. Smartphone con sistema iOS o Android compatible. 2. Router inalámbrico (se requiere una red de 2.4GHz para conectarse) 3. Acondicionador de aire Intelige...
Page 62 - CREA TU CUENTA; Introduzca su dirección de correo
Page 60 User Manual CREA TU CUENTA • Asegúrese de que su Smartphone esté conectado a su router inalámbrico y que su router inalámbrico tenga una conexión a Internet de 2,4 GHz. • Se recomienda activar su cuenta inmediatamente para poder recuperar su contraseña por correo electrónico. 6.1 Pulse “Regi...
Page 63 - FUNCIONES ADICIONALES DE LA APLICACIÓN Y SMART HOME; Declaración de conformidad; interferencia mediante una o más de las siguientes medidas:
User Manual Page 61 FUNCIONES ADICIONALES DE LA APLICACIÓN Y SMART HOME Para obtener instrucciones adicionales sobre las características de la aplicación y las capacidades del sistema Smart Home, escanee el código QR a continuación Instrucciones de l co ntro l remoto y del Ap p Este dispositivo cump...
Page 64 - Identificador único
Declaración de conformidad del proveedor 47 CFR § 2.1077 Información sobre el cumplimiento Identificador único : RG57H4(B)/BGEFU1 Parte responsable Información de contacto de los Estados Unidos Midea America Corporation300 Kimball DrParsippany NJ07054 Este dispositivo cumple con la Parte 15 de las N...