Toshiba RAC-PD1013CWRU - Manuals

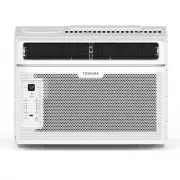
User Manual Toshiba RAC-PD1013CWRU


Summary
Page 2 User Manual Read This Manual Inside you’ll find many helpful hints on how to use and maintain your air conditioner properly. Just a little preventive care on your part can save you a great deal of time and money over the life of your air conditioner. You’ll find many answers to common problem...
User Manual Page 3 SAFETY PRECAUTIONS WARNING WARNING: This symbol indicates the possibility of death or serious injury. CAUTION: This symbol indicates the possibility of injury or damage to property. Sa fe ty Precautions To prevent injury to the user or other people and property damage, the followi...
Page 4 User Manual WARNING Sa fe ty Precautions • DO NOT allow children to play with the air conditioner. Children must be supervised around the unit at all times. • If the air conditioner is knocked over during use, turn off the unit and unplug it from the main power supply immediately. Visually in...
Toshiba Air Conditioners Manuals
-
 Toshiba RAC-PD0812CRRU
User Manual
Toshiba RAC-PD0812CRRU
User Manual
-
 Toshiba RAC-PD1213CWRU
User Manual
Toshiba RAC-PD1213CWRU
User Manual
-
 Toshiba RAC-PD1414CWRU
User Manual
Toshiba RAC-PD1414CWRU
User Manual
-
 Toshiba RAC-PT1412HVWRU
User Manual
Toshiba RAC-PT1412HVWRU
User Manual
-
 Toshiba RAC-WK0512CMRU
User Manual
Toshiba RAC-WK0512CMRU
User Manual
-
 Toshiba RAC-WK0612CRRU
User Manual
Toshiba RAC-WK0612CRRU
User Manual
-
 Toshiba RAC-WK0812ESCWR
User Manual
Toshiba RAC-WK0812ESCWR
User Manual
-
 Toshiba RAC-WK1012ESCWR
User Manual
Toshiba RAC-WK1012ESCWR
User Manual
-
 Toshiba RAC-WK1212ESCWR
User Manual
Toshiba RAC-WK1212ESCWR
User Manual
-
 Toshiba RAC-WK1514ESCWRU
User Manual
Toshiba RAC-WK1514ESCWRU
User Manual
-
 Toshiba RAC-WK1823ESCWR
User Manual
Toshiba RAC-WK1823ESCWR
User Manual
-
 Toshiba RAS-07
User Manual
Toshiba RAS-07
User Manual
-
 Toshiba RAS-07E2KV2G-A-IDUC
User Manual
Toshiba RAS-07E2KV2G-A-IDUC
User Manual
-
 Toshiba RAS-10E2KV2G-A-IDUC
User Manual
Toshiba RAS-10E2KV2G-A-IDUC
User Manual
-
 Toshiba RAS-12SKSX / RAS-12SASX
User Manual
Toshiba RAS-12SKSX / RAS-12SASX
User Manual
-
 Toshiba RAS-13E2KV2G-A-IDUC
User Manual
Toshiba RAS-13E2KV2G-A-IDUC
User Manual
-
 Toshiba RAS-16E2KV2G-A-IDUC
User Manual
Toshiba RAS-16E2KV2G-A-IDUC
User Manual
-
 Toshiba RAS-18E2KV2G-A-IDUC
User Manual
Toshiba RAS-18E2KV2G-A-IDUC
User Manual
-
 Toshiba RAS-22E2KV2G-A-IDUC
User Manual
Toshiba RAS-22E2KV2G-A-IDUC
User Manual
-
 Toshiba RAS-24E2KV2G-A-IDUC
User Manual
Toshiba RAS-24E2KV2G-A-IDUC
User Manual