Page 3 - Table of; C O N T E N T S
Table of C O N T E N T S Table of Contents Use and care manual Safety Definitions ....................................................... 4IMPORTANT SAFETY INSTRUCTIONS ........................ 5 9 PRECAUTIONS TO AVOID POSSIBLE EXPOSURE TO EXCESSIVE MICROWAVE ENERGY .......................... 5GROUN...
Page 5 - IMPORTANT SAFETY INSTRUCTIONS; READ ALL INSTRUCTIONS BEFORE USING THE APPLIANCE; PRECAUTIONS TO AVOID
5 9 IMPORTANT SAFETY INSTRUCTIONS READ ALL INSTRUCTIONS BEFORE USING THE APPLIANCE I M P O R T A N T S A F E T Y I N S T R U C T I O N S R E A D A L L I N S T R U C T I O N S B E F O R E U S I N G T H E A P P L I A N C E 9 PRECAUTIONS TO AVOID POSSIBLE EXPOSURE TO EXCESSIVE MICROWAVE ENERGY PRECAUTI...
Page 6 - GROUNDING INSTRUCTIONS; TV / Radio Interference
9 IMPORTANT SAFETY INSTRUCTIONS READ ALL INSTRUCTIONS BEFORE USING THE APPLIANCE 6 GROUNDING INSTRUCTIONS This appliance must be grounded. Grounding reduces risk of electric shock by providing a safe pathway for electric current in the event of a short circuit. If this oven is equipped with a cord h...
Page 7 - Cooking Safety; In Case of Fire; Cooking Items
7 9 IMPORTANT SAFETY INSTRUCTIONS READ ALL INSTRUCTIONS BEFORE USING THE APPLIANCE Cooking Safety CAUTION To avoid personal injury or property damage, observe the following: ▯ Do not leave oven unattended while in use. ▯ Do not store flammable material next to or in the oven. ▯ When flaming foods un...
Page 8 - Cooking Utensils; Glass Tray / Turntable Ring
9 IMPORTANT SAFETY INSTRUCTIONS READ ALL INSTRUCTIONS BEFORE USING THE APPLIANCE 8 CAUTION When using pre-packaged microwave popcorn, check package weight before using the popcorn function. Set the oven for the weight of the popcorn package. If these instructions are not followed, popcorn may not po...
Page 9 - Pacemakers; Fan Motor Operation; SAVE THESE INSTRUCTIONS.
9 9 IMPORTANT SAFETY INSTRUCTIONS READ ALL INSTRUCTIONS BEFORE USING THE APPLIANCE Pacemakers CAUTION To avoid pacemaker malfunction, consult physician or pacemaker manufacturer about effects of microwave energy on pacemaker. Fan Motor Operation After using the oven the fan motor can continue to run...
Page 10 - Tips for saving energy
10 Causes of Damage NOTICES: ▯ Metal e.g. a spoon in a glass must be kept at least 1 inch (25 mm) from the oven walls and the inside of the door. Sparks could irreparably damage the glass on the inside of the door. ▯ Water in the hot oven interior: Never pour water into the hot oven interior. St...
Page 11 - Getting to Know the Appliance; Parts
11 Getting to Know the Appliance This section outlines and describes the features, indicators and controls of the appliance. You will also find information on the various functions of your appliance. Parts Oven Vents The oven vents are located around the sides of the oven cavity. Warm air may be rel...
Page 12 - PLQV
12 Control Panel You can set your appliance's various functions on the control panel using the full touch color display. The full touch color display shows you the current settings. Operating Controls Use the controls to set your appliance simply and directly. Touch buttons There are sensors under t...
Page 13 - Before First Use; Before using the appliance for the first; Initial operation; Cleaning accessories
13 Before First Use Before you can use your new appliance, you must enter certain settings. You must also clean the oven cavity and accessories. Before using the appliance for the first time ▯ Appliance must be properly installed by a qualified technician before use. ▯ Remove all packing materials f...
Page 14 - Operating the appliance; Setting the appliance
14 Operating the appliance You have already learned about the controls and how they work. Now we will explain how to apply settings on your appliance. You will learn about what happens when you switch the appliance on and off, and how to select the operating mode. Setting the appliance Switching the...
Page 15 - Microwave; Microwave utensil guide
15 Microwave You can use the microwave to cook, heat up or defrost food quickly.To ensure optimum use of the microwave, please observe the notes on cookware and familiarize yourself with the data in the cooking charts at the end of this Use and Care Guide. Microwave utensil guide Suitable ovenware ▯...
Page 16 - Setting the microwave
16 Setting the microwave The appliance must be turned off. 1. Touch the ON l OFF touch button to switch on the appliance.You go directly to the main menu. 2. Touch “Microwave”. 3. A microwave power level in percent is suggested. 4. Touch the power level field and swipe to the left or right to select...
Page 17 - Suggestions for best results
17 Changing the microwave power level You can change the microwave power level at any time during operation, by touching the power level field on the display. Touch the 8 touch field to apply the settings. The operation continues automatically with the new settings. The cooking time has elapsed As s...
Page 18 - Microwave programs; Information on the settings; Beverage
18 Microwave programs You can prepare food very easily using the various programs. You select a program and enter the weight or amount of your food. The program then applies the most suitable settings. Note: The display will give you useful instructions for each of the microwave programs. Press the ...
Page 22 - Soften Ice Cream; Soften Cream Cheese; Timer; Kitchen Timer
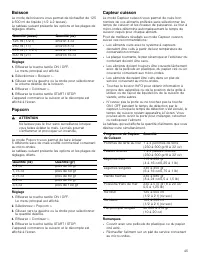
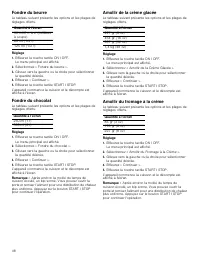
22 Soften Ice Cream The following chart shows the available options and settings ranges. Setting 1. Touch the ON l OFF touch button.The main menu is displayed. 2. Select “Soften Ice Cream”. 3. Swipe to the left or right to select the desired amount. 4. Touch “Continue”. 5. Touch the START l STOP tou...
Page 23 - Childproof Lock; Activating and Deactivating; Adjust Basic Settings; Changing the Settings
23 Childproof Lock Your appliance is equipped with a childproof lock so that children cannot switch it on accidentally or change any settings. Activating and Deactivating The appliance has to be turned off. 1. Touch and hold the LOCK touch button until "Panel Lock activated" is displayed. Th...
Page 24 - Cleaning and Maintenance; Cleaning Guide
24 Cleaning and Maintenance 9 WARNING Be sure the entire appliance has cooled and grease has solidified before attempting to clean any part of the appliance. Cleaning Guide ▯ For best performance and for safety reasons, keep the oven clean inside and outside. Take special care to keep the inner door...
Page 25 - Before Calling for Service
25 Before Calling for Service Before calling customer service, consider the suggestions and instructions below: Problem Suggestion Neither the display nor the oven operates. ▯ Properly insert the plug into a grounded power outlet. ▯ Reset the household circuit breaker or replace any blown fuses. The...
Page 26 - THERMADOR® Support; Before Calling Service; Data Plate
26 THERMADOR® Support Before Calling Service See the Use and Care Guide for troubleshooting information. Refer to the “Statement of Limited Product Warranty” in the Use and Care Guide.To reach a service representative, see the contact information at the front of the guide or in the following section...
Page 27 - STATEMENT OF LIMITED PRODUCT WARRANTY; What this Warranty Covers &; How Long the Warranty Lasts; Repair/Replace as Your Exclusive Remedy
27 STATEMENT OF LIMITED PRODUCT WARRANTY What this Warranty Covers & Who it Applies to The limited warranty provided by BSH Home Appliances Corporation (“BSH“) in this Statement of Limited Product Warranty applies only to the THERMADOR ® appliance (“Product“) sold to you, the first using purchas...
Page 29 - Table de; M A T I È R E S
Table de M A T I È R E S Table des Matières Notice d’utilisation Définitions de sécurité ............................................. 30CONSIGNES DE SÉCURITÉ IMPORTANTES .............. 31 9 MESURES DE PRÉCAUTION POUR ÉVITER L’EXPOSITION EXCESSIVE À L’ÉNERGIE MICRO-ONDE ................................
Page 31 - CONSIGNES DE SÉCURITÉ IMPORTANTES; LISEZ TOUTES LES INSTRUCTIONS AVANT D'UTILISER L'APPAREIL; MESURES DE
31 9 CONSIGNES DE SÉCURITÉ IMPORTANTES LISEZ TOUTES LES INSTRUCTIONS AVANT D'UTILISER L'APPAREIL C O N S I G N E S D E S É C U R I T É I M P O R T A N T E S L I S E Z T O U T E S L E S I N S T R U C T I O N S A V A N T D ' U T I L I S E R L ' A P P A R E I L 9 MESURES DE PRÉCAUTION POUR ÉVITER L’EXP...
Page 32 - INSTRUCTIONS DE MISE; Interférences radio/télévision
9 CONSIGNES DE SÉCURITÉ IMPORTANTES LISEZ TOUTES LES INSTRUCTIONS AVANT D'UTILISER L'APPAREIL 32 Pour réduire le risque de feu dans la cavité du four : ▯ Ne cuisez pas trop les aliments. Surveillez attentivement l’appareil quand des matériaux en papier, plastique et autres combustibles sont insérés ...
Page 33 - Consignes en matière de nettoyage; Sécurité de cuisson; En cas d’incendie
33 9 CONSIGNES DE SÉCURITÉ IMPORTANTES LISEZ TOUTES LES INSTRUCTIONS AVANT D'UTILISER L'APPAREIL Consignes en matière de nettoyage Lors du nettoyage des surfaces de la porte et du four qui se joignent ensemble à la fermeture de la porte, utilisez seulement des savons ou des détergents légers, non ab...
Page 34 - Articles de cuisson
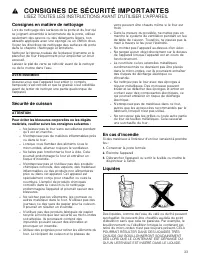
9 CONSIGNES DE SÉCURITÉ IMPORTANTES LISEZ TOUTES LES INSTRUCTIONS AVANT D'UTILISER L'APPAREIL 34 Lorsque vous faites chauffer des liquides, placez toujours une baguette en verre ou une cuillère dans le contenant. Vous pourrez ainsi éviter un retard d'ébullition. ATTENTION Du métal, par exemple, une ...
Page 35 - CONSERVEZ CES
35 9 CONSIGNES DE SÉCURITÉ IMPORTANTES LISEZ TOUTES LES INSTRUCTIONS AVANT D'UTILISER L'APPAREIL Utensiles de cuisson Voyez aussi Guide des ustensiles micro-ondables . Les ustensiles de cuisson, les plateaux de verre et les grilles deviennent chauds pendant la cuisson au micro- ondes. Utilisez des s...
Page 37 - Familiarisation avec l'appareil; Pièces
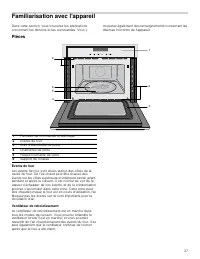
37 Familiarisation avec l'appareil Dans cette section, vous trouverez les explications concernant les témoins et les commandes. Vous y trouverez également des renseignements concernant les diverses fonctions de l’appareil. Pièces Évents de four Les évents de four sont situés autour des côtés de la c...
Page 38 - Panneau de commande
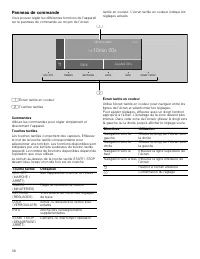
38 Panneau de commande Vous pouvez régler les différentes fonctions de l’appareil sur le panneau de commande au moyen de l’écran tactile en couleur. L’écran tactile en couleur indique les réglages actuels. Commandes Utilisez les commandes pour régler simplement et directement l’appareil. Touches tac...
Page 39 - Accessoires; Avant la première utilisation; Avant d’utiliser l’appareil pour la première; Fonctionnement initial
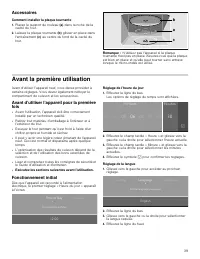
39 Accessoires Comment installer la plaque tournante 1. Placez le support de rouleau (a) dans la niche de la cavité du four. 2. Laissez la plaque tournante (b) glisser en place dans l'entraînement (c) au centre du fond de la cavité du four. Remarque : N'utilisez pas l'appareil si la plaque tournante...
Page 40 - Accessoires de nettoyage; Utilisation de l’appareil; Réglage de l’appareil
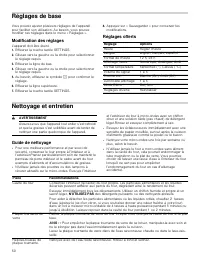
40 Réglages de l’heure à l’écran 1. Glissez vers la gauche pour accéder au prochain réglage. 2. Effleurez la ligne du bas. 3. Glissez vers la gauche ou la droite pour sélectionner comment l’horloge sera affichée lorsque l’appareil sera en mode veille. 4. Effleurez la touch tactile SETTINGS pour term...
Page 41 - Guide des ustensiles pour micro-ondes
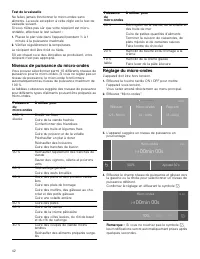
41 Sons L’appareil émet plusieurs sons en cours de fonctionnement. Un signal sonore est mis à chaque fois que vous effleurez une touche ou un champ tactile, ou à l’amorce ou à la fin de la cuisson. Vous pouvez modifier le niveau sonore dans le menu Réglages. ~ "Réglages de base" à la page 50...
Page 43 - Suggestions pour les meilleurs résultats
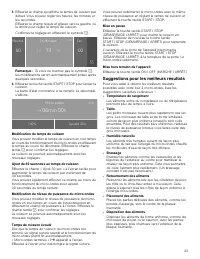
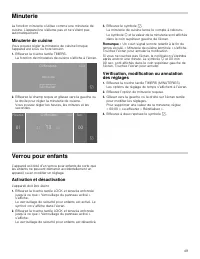
43 5. Effleurez le champ qui affiche le temps de cuisson par défaut. Vous pouvez régler les heures, les minutes et les secondes.Effleurez le champ requis et glissez vers la gauche ou la droite pour régler le temps de cuisson.Confirmez le réglage en effleurant le symbole 8 . Remarque : Si vous ne tou...
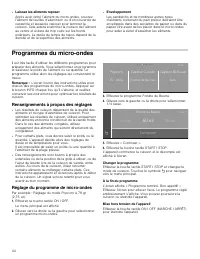
Page 44 - Programmes du micro-ondes; Renseignements à propos des réglages
44 ▯ Laissez les aliments reposer Après avoir retiré l’aliment du micro-ondes, couvrez l’aliment de feuilles d’aluminium ou d’un couvercle de casserole et laissez-le reposer pour terminer la cuisson. Cela aidera à terminer la cuisson de l’aliment au centre et évitera de trop cuire sur les bords exté...
Page 46 - Capteur Réchaud
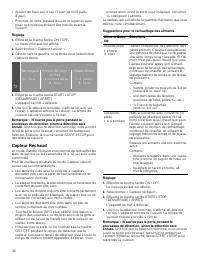
46 ▯ Ajouter de l'eau au riz sec (1 part de riz/2 parts d’eau). ▯ Pommes de terre, patates douces et légumes avec peau non poreuse doivent être percés avant la cuisson. Réglage 1. Effleurez la touche tactile ON I OFF.Le menu principal est affiché. 2. Sélectionnez « Capteur cuisson ». 3. Glissez vers...
Page 49 - Minuterie; Minuterie de cuisine; Verrou pour enfants; Activation et désactivation
49 Minuterie La fonction minuterie s’utilise comme une minuterie de cuisine. L'appareil ne s'allume pas et ne s'éteint pas automatiquement. Minuterie de cuisine Vous pouvez régler la minuterie de cuisine lorsque l’appareil est sous ou hors tension. 1. Effleurez la touche tactile TIMERS.La fonction d...
Page 50 - Réglages de base; Modification des réglages; Nettoyage et entretien; Guide de nettoyage
50 Réglages de base Vous pouvez ajuster plusieurs réglages de l’appareil pour faciliter son utilisation. Au besoin, vous pouvez modifier ces réglages dans le menu « Réglages ». Modification des réglages L'appareil doit être éteint. 1. Effleurez la touche tactile SETTINGS. 2. Glissez vers la gauche o...
Page 51 - Dépannage
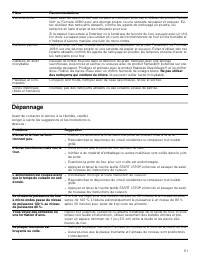
51 Dépannage Avant de contacter le service à la clientèle, veuillez songer à suivre les suggestions et les instructions ci- dessous : Verre de porte Lavez avec du savon et de l’eau ou avec un nettoyant pour verre. Utilisez du produit Fantas- tik® ou Formula 409® avec une éponge propre ou une serviet...
Page 52 - Soutien THERMADOR®; Avant d’appeler le service de réparations; Plaque signalétique
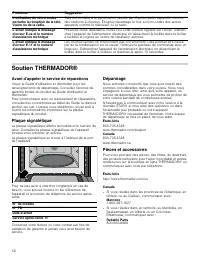
52 Soutien THERMADOR® Avant d’appeler le service de réparations Voyez le Guide d'utilisation et d'entretien pour les renseignements de dépannage. Consultez l'énoncé de garantie limitée du produit du Guide d'utilisation et d'entretien.Pour communiquer avec un représentant en réparations, consultez le...
Page 53 - ÉNONCÉ DE LA GARANTIE LIMITÉE; Couverture de la garantie :; Durée de la garantie; Réparation ou remplacement comme
53 ÉNONCÉ DE LA GARANTIE LIMITÉE Couverture de la garantie : La garantie limitée fournie par BSH Home Appliances Ltd. (« BSH ») dans le présent énoncé de garantie limitée s’applique seulement aux THERMADOR ® appareil (« Produit ») vendu au premier acheteur, en autant que le produit ait été acheté : ...