Page 2 - SAFETY INFORMATION; Children and vulnerable people safety
CONTENTS Safety information 2 Safety instructions 4 Product description 6 Daily use 8 Hints and tips 13 Care and cleaning 16 Troubleshooting 17 Installation 19 Technical data 21 Energy efficiency 22 Subject to change without notice. SAFETY INFORMATION Before the installation and use of the appliance...
Page 3 - General Safety
General Safety • WARNING: The appliance and its accessible parts become hot during use. Care should be taken to avoid touching heating elements. • Do not operate the appliance by means of an external timer or separate remote-control system. • WARNING: Unattended cooking on a hob with fat or oil can ...
Page 4 - SAFETY INSTRUCTIONS; Installation; WARNING! Only a qualified; Electrical Connection; WARNING! Risk of fire and
SAFETY INSTRUCTIONS Installation WARNING! Only a qualified person must install this appliance. WARNING! Risk of injury or damage to the appliance. • Remove all the packaging. • Do not install or use a damaged appliance. • Follow the installation instructions supplied with the appliance. • Keep the m...
Page 5 - Use; Care and cleaning
disconnect the appliance from the mains at all poles. The isolation device must have a contact opening width of minimum 3 mm. Use WARNING! Risk of injury, burns and electric shock. • Remove all the packaging, labelling and protective film (if applicable) before first use. • Use this appliance in a h...
Page 6 - WARNING! Risk of injury or; PRODUCT DESCRIPTION; Cooking surface layout
Service • To repair the appliance contact an Authorised Service Centre. • Use original spare parts only. Disposal WARNING! Risk of injury or suffocation. • Contact your municipal authority for information on how to discard the appliance correctly. • Disconnect the appliance from the mains supply. • ...
Page 7 - Heat setting displays
Sensor field Function Comment 4 Perfect-Heat To activate and deactivate the function. 5 - Heat setting display To show the heat setting. 6 - Timer indicators of cooking zones To show for which zone you set the time. 7 - Timer display To show the time in minutes. 8 Auto-Vent To activate and deactivat...
Page 8 - DAILY USE; WARNING! Refer to Safety; Activating and deactivating; The function deactivates the hob; The heat setting
Eco-Heat (3 step Residual heat indicator) WARNING! / / There is a risk of burns from residual heat. The indicator shows the level of the residual heat. If a given zone becomes too hot the function may lower the heat setting for neighbouring zones. The induction cooking zones produce the heat necessa...
Page 10 - Pause
starts to flash slowly the time counts down.To see the remaining time: set the cooking zone with . The indicator of the cooking zone starts to flash quickly. The display shows the remaining time.To change the time: set the cooking zonewith . Touch or . To deactivate the function: set thecooking zone...
Page 11 - Set the heat setting in 10 seconds. You; OffSound Control (Deactivating; Power levels
To deactivate the function: activate thehob with . Do not set the heat setting.Touch for 4 seconds. comes on. Deactivate the hob with .To override the function for only onecooking time: activate the hob with . comes on. Touch for 4 seconds. Set the heat setting in 10 seconds. You can operate the hob...
Page 12 - Operating the function automatically; Changing the automatic mode
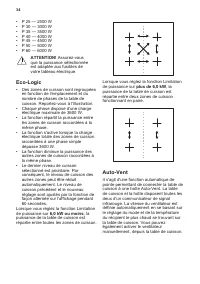
When you set the Power limitation function to more than 6.0 kW, power of the hob is divided between two cooking zones in a pair. Auto-Vent It is an advanced automatic function which connects the hob to an Auto-Vent hood. Both the hob and the hood have an infrared signal communicator. Speed of the fa...
Page 13 - HINTS AND TIPS; Cookware; Cookware is suitable for an induction; The noises during operation
To operate the hood directly on the hood panel deactivate the automatic mode of the function. When you finish cooking and deactivate the hob, the hood fan may still operate for a certain period of time. After that time the system deactivates the fan automatically and prevents you from accidental act...
Page 14 - The noises are normal and do not refer; Examples of cooking
cookware is made of different materials (sandwich construction). • humming: you use high power level. • clicking: electric switching occurs. • hissing, buzzing: the fan operates. The noises are normal and do not refer to hob malfunction. Eco-Off (Eco Timer) To save energy, the heater of the cooking ...
Page 15 - Hints and Tips for Perfect-Heat; To achieve the best results with the; Correct pans for function; Try to put a coin of 1, 2 or 5 Euro Cent
Hints and Tips for Perfect-Heat To achieve the best results with the function:• Start the function when the hob is cold (no manual heat up of the cookware is necessary). • Use cookware made of stainless steel with sandwich bottom. • Do not use cookware with embossment at the center of the bottom. Ex...
Page 16 - Hints and Tips for Auto-Vent; The hood in the picture is only; CARE AND CLEANING; General information
a. The pan is incorrect if you can put the coin between the ruler and the pan. b. The pan is correct if you can not put the coin between the ruler and the pan. Hints and Tips for Auto-Vent When you operate the hob with the function:• Protect the hood panel from direct sunlight. • Do not spot halogen...
Page 17 - discoloration: use a solution of water; TROUBLESHOOTING
an acute angle and move the blade on the surface. • Remove when the hob is sufficiently cool: limescale rings, water rings, fat stains, shiny metallic discoloration. Clean the hob with a moist cloth and non-abrasive detergent. After cleaning, wipe the hob dry with a soft cloth. • Remove shiny metall...
Page 19 - INSTALLATION; Before the installation
If you cannot find a solution... If you cannot find a solution to the problem yourself, contact your dealer or an Authorised Service Centre. Give the data from the rating plate. Give also three digit letter code for the glass ceramic (it is in the corner of the glass surface) and an error message th...
Page 20 - Assembly
One-phase connection - 230 V~ Two-phase connection - 400 V 2 ~ N L Black and brown Black L1 Brown L2 Assembly min.50mm min.500mm R 5mm min. 55mm 490 +1 mm 750 +1 mm min.28 mm min. 12 mm 20
Page 21 - TECHNICAL DATA; Rating plate
min. 60mm If the appliance is installed above a drawer, the hob ventilation can warm up the items stored in the drawer during the cooking process. You can instal a separation panel but it is not mandatory. TECHNICAL DATA Rating plate Model SI7844B PNC 949 594 449 00 Typ 62 D4A 01 AD 220 - 240 V / 40...
Page 22 - ENERGY EFFICIENCY; Product information according to EU 66/2014; ENVIRONMENTAL CONCERNS
ENERGY EFFICIENCY Product information according to EU 66/2014 Model identification SI7844B Type of hob Built-In Hob Number of cooking zones 4 Heating technology Induction Diameter of circular cook‐ ing zones (Ø) Left front Left rear Right front Right rear 21.0 cm 21.0 cm 21.0 cm 21.0 cm Energy consu...
Page 23 - INFORMATIONS DE SÉCURITÉ; Sécurité des enfants et des personnes vulnérables
TABLE DES MATIÈRES Informations de sécurité 23 Consignes de sécurité 25 Description de l'appareil 28 Utilisation quotidienne 30 Conseils 36 Entretien et nettoyage 40 En cas d'anomalie de fonctionnement 40 Installation 43 Caractéristiques techniques 45 Rendement énergétique 46 Sous réserve de modific...
Page 24 - Sécurité générale
• Les enfants ne doivent pas nettoyer ni entreprendre une opération de maintenance sur l'appareil sans surveillance. Sécurité générale • AVERTISSEMENT : L'appareil et ses parties accessibles deviennent chauds pendant son fonctionnement. Veillez à ne pas toucher les éléments chauffants. • Ne faites p...
Page 25 - AVERTISSEMENT! Risque de; Branchement électrique; AVERTISSEMENT! Risque
• AVERTISSEMENT : Utilisez uniquement les dispositifs de protection pour table de cuisson conçus ou indiqués comme adaptés par le fabricant de l'appareil de cuisson dans les instructions d'utilisation, ou les dispositifs de protection pour table de cuisson intégrés à l'appareil. L'utilisation de dis...
Page 26 - Utilisation
• Assurez-vous que le câble d'alimentation ou la fiche (si présente) n'entrent pas en contact avec les surfaces brûlantes de l'appareil ou les récipients brûlants lorsque vous branchez l'appareil à des prises électriques situées à proximité. • N'utilisez pas d'adaptateurs multiprises ni de rallonges...
Page 27 - Entretien et nettoyage
produits inflammables à l'intérieur ou à proximité de l'appareil, ni sur celui-ci. AVERTISSEMENT! Risque d'endommagement de l'appareil. • Ne laissez pas de récipients chauds sur le bandeau de commande. • Ne posez pas de couvercle de casserole chaud sur la surface en verre de la table de cuisson. • N...
Page 28 - DESCRIPTION DE L'APPAREIL; Description de la table de cuisson; Description du bandeau de commande
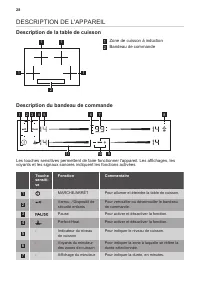
DESCRIPTION DE L'APPAREIL Description de la table de cuisson 2 1 1 1 1 1 Zone de cuisson à induction 2 Bandeau de commande Description du bandeau de commande 1 2 3 6 7 8 5 10 9 11 4 Les touches sensitives permettent de faire fonctionner l'appareil. Les affichages, les voyants et les signaux sonores ...
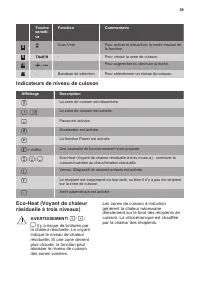
Page 30 - UTILISATION QUOTIDIENNE; Cette fonction arrête la table de; Pour activer la fonction pour une zone
UTILISATION QUOTIDIENNE AVERTISSEMENT! Reportez- vous aux chapitres concernant la sécurité. Activation et désactivation Appuyez sur pendant 1 seconde pour activer ou désactiver la table de cuisson. Arrêt automatique Cette fonction arrête la table de cuisson automatiquement si :• toutes les zones de ...
Page 31 - Fonction Power; Minuteur; Minuteur dégressif
niveau de cuisson souhaité. Au bout de3 secondes, s'allume.Pour désactiver la fonction : modifiez le niveau de cuisson. Fonction Power Cette fonction vous permet d'augmenter la puissance des zones de cuisson à induction. La fonction peut être activée pour la zone de cuisson à induction uniquement po...
Page 33 - Dispositif de sécurité enfants; Réglez le niveau de cuisson dans les; Commande OffSound
une modification accidentelle du réglage du niveau de cuisson.Réglez d'abord le niveau de cuisson.Pour activer la fonction : appuyez sur . s'affiche pendant 4 secondes.Le minuteur reste activé.Pour désactiver la fonction : appuyez sur . Le niveau de cuisson précédent s'allume. Lorsque vous éteignez ...
Page 36 - CONSEILS; Récipients; Les plats de cuisson conviennent pour; Bruits pendant le
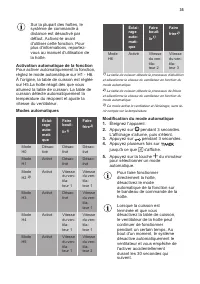
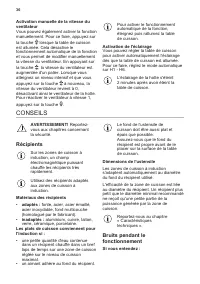
Activation manuelle de la vitesse du ventilateur Vous pouvez également activer la fonction manuellement. Pour ce faire, appuyez surla touche lorsque la table de cuisson est allumée. Cela désactive le fonctionnement automatique de la fonction et vous permet de modifier manuellement la vitesse du vent...
Page 37 - Exemples de cuisson
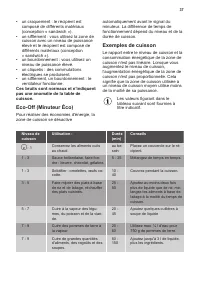
• un craquement : le récipient est composé de différents matériaux (conception « sandwich »). • un sifflement : vous utilisez la zone de cuisson avec un niveau de puissance élevé et le récipient est composé de différents matériaux (conception « sandwich »). • un bourdonnement : vous utilisez un nive...
Page 38 - Conseils pour Perfect-Heat; Pour obtenir les meilleurs résultats
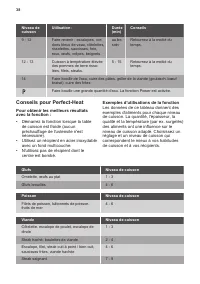
Niveau de cuisson Utilisation : Durée (min) Conseils 9 - 12 Faire revenir : escalopes, cor‐ dons bleus de veau, côtelettes, rissolettes, saucisses, foie, roux, œufs, crêpes, beignets. au be‐ soin Retournez à la moitié du temps. 12 - 13 Cuisson à température élevée des pommes de terre risso‐ lées, fi...
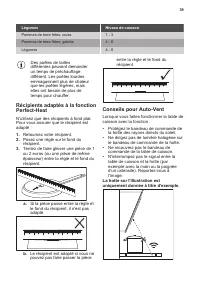
Page 39 - Récipients adaptés à la fonction; Posez une règle sur le fond du; Conseils pour Auto-Vent; La hotte sur l'illustration est
Légumes Niveau de cuisson Pommes de terre frites, crues 1 - 3 Pommes de terre frites, galette 4 - 6 Légumes 4 - 6 Des poêles de tailles différentes peuvent demander un temps de préchauffage différent. Les poêles lourdes emmagasinent plus de chaleur que les poêles légères, mais elles ont besoin de pl...
Page 40 - ENTRETIEN ET NETTOYAGE; Informations générales; métalliques brillantes : utilisez une; EN CAS D'ANOMALIE DE FONCTIONNEMENT; En cas d'anomalie de fonctionnement
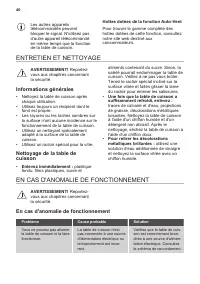
Les autres appareils télécommandés peuvent bloquer le signal. N'utilisez pas d'autre appareil télécommandé en même temps que la fonction de la table de cuisson. Hottes dotées de la fonction Auto-VentPour trouver la gamme complète des hottes dotées de cette fonction, consultez notre site web destiné ...
Page 42 - Si vous ne trouvez pas de
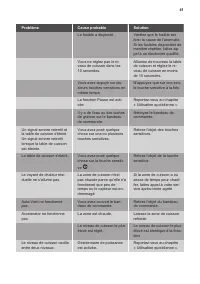
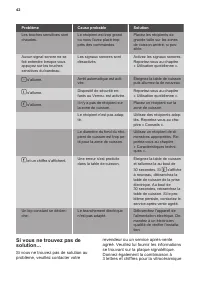
Problème Cause probable Solution Les touches sensitives sont chaudes. Le récipient est trop grand ou vous l'avez placé trop près des commandes. Placez les récipients de grande taille sur les zones de cuisson arrière, si pos‐ sible. Aucun signal sonore ne se fait entendre lorsque vous appuyez sur les...
Page 43 - Tables de cuisson intégrées
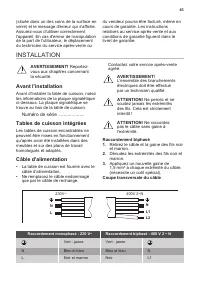
(située dans un des coins de la surface en verre) et le message d'erreur qui s'affiche. Assurez-vous d'utiliser correctement l'appareil. En cas d'erreur de manipulation de la part de l'utilisateur, le déplacement du technicien du service après-vente ou du vendeur pourra être facturé, même en cours d...
Page 44 - Montage
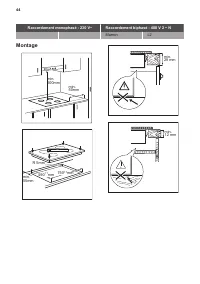
Raccordement monophasé - 230 V~ Raccordement biphasé - 400 V 2 ~ N Marron L2 Montage min.50mm min.500mm R 5mm min. 55mm 490 +1 mm 750 +1 mm min.28 mm min. 12 mm 44
Page 45 - CARACTÉRISTIQUES TECHNIQUES; Plaque signalétique
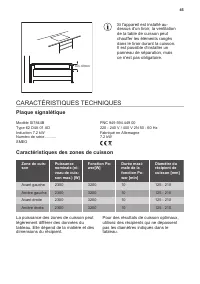
min. 60mm Si l'appareil est installé au- dessus d'un tiroir, la ventilation de la table de cuisson peut chauffer les éléments rangés dans le tiroir durant la cuisson. Il est possible d'installer un panneau de séparation, mais ce n'est pas obligatoire. CARACTÉRISTIQUES TECHNIQUES Plaque signalétique ...
Page 46 - RENDEMENT ÉNERGÉTIQUE; Informations sur le produit selon la norme EU 66/2014; EN MATIÈRE DE PROTECTION DE L'ENVIRONNEMENT
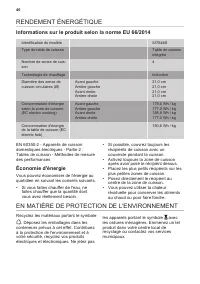
RENDEMENT ÉNERGÉTIQUE Informations sur le produit selon la norme EU 66/2014 Identification du modèle SI7844B Type de table de cuisson Table de cuisson intégrée Nombre de zones de cuis‐ son 4 Technologie de chauffage Induction Diamètre des zones de cuisson circulaires (Ø) Avant gauche Arrière gauche ...
Page 47 - SICHERHEITSHINWEISE; Sicherheit von Kindern und schutzbedürftigen
INHALTSVERZEICHNIS Sicherheitshinweise 47 Sicherheitsanweisungen 49 Gerätebeschreibung 52 Täglicher Gebrauch 53 Tipps und Hinweise 60 Reinigung und Pflege 64 Fehlersuche 64 Montage 67 Technische Daten 69 Energieeffizienz 70 Änderungen vorbehalten. SICHERHEITSHINWEISE Lesen Sie vor der Montage und de...
Page 48 - Allgemeine Sicherheit
• Halten Sie Kinder und Haustiere während des Betriebs oder der Abkühlphase vom Gerät fern. Berührbare Teile sind heiß. • Falls Ihr Gerät mit einer Kindersicherung ausgestattet ist, empfehlen wir, diese einzuschalten. • Kinder dürfen keine Reinigung und Wartung ohne Beaufsichtigung durchführen. Allg...
Page 49 - WARNUNG! Die Montage des; Elektrischer Anschluss
Stromversorgung zu unterbrechen. Verständigen Sie in jedem Fall den autorisierten Kundendienst. • Wenn das Netzkabel beschädigt ist, muss es vom Hersteller, einem autorisierten Kundendienst oder einer gleichermaßen qualifizierten Person ausgetauscht werden, um Gefahrenquellen zu vermeiden. • WARNUNG...
Page 50 - Verwendung
elektrischen Stromversorgung getrennt werden. • Stellen Sie sicher, dass die Daten auf dem Typenschild mit den elektrischen Nennwerten der Netzspannung übereinstimmen. • Vergewissern Sie sich, dass das Gerät ordnungsgemäß installiert ist. Lockere und unsachgemäße Kabel oder Stecker (falls vorhanden)...
Page 52 - GERÄTEBESCHREIBUNG; Kochfeldanordnung; Bedienfeldanordnung
GERÄTEBESCHREIBUNG Kochfeldanordnung 2 1 1 1 1 1 Induktionskochzone 2 Bedienfeld Bedienfeldanordnung 1 2 3 6 7 8 5 10 9 11 4 Bedienen Sie das Gerät über die Sensorfelder. Die Anzeigen, Kontrolllampen und akustischen Signale informieren Sie über die aktiven Funktionen. Sensor‐ feld Funktion Kommentar...
Page 53 - Anzeigen der Kochstufen; TÄGLICHER GEBRAUCH; WARNUNG! Siehe Kapitel
Sensor‐ feld Funktion Kommentar 9 - Auswählen der Kochzone. 10 / - Erhöhen oder Verringern der Zeit. 11 - Einstellskala Einstellen der Kochstufe. Anzeigen der Kochstufen Anzeigen Beschreibung Die Kochzone ist ausgeschaltet. - Die Kochzone ist eingeschaltet. Pause ist eingeschaltet. Accelerator ist e...
Page 54 - Abschaltautomatik; Mit dieser Funktion wird das Kochfeld; Kochstufe; Einschalten der Funktion für eine
Ein- und Ausschalten Berühren Sie 1 Sekunde lang, um das Kochfeld ein- oder auszuschalten. Abschaltautomatik Mit dieser Funktion wird das Kochfeld in folgenden Fällen automatisch ausgeschaltet:• Alle Kochzonen sind ausgeschaltet. • Nach dem Einschalten des Kochfelds wird keine Kochstufe gewählt. • D...
Page 55 - Timer; Kurzzeitmesser
eingeschaltet werden. Danach schaltet die Induktionskochzone automatisch wieder auf die höchste Kochstufe um. Siehe Kapitel „Technische Daten“. Einschalten der Funktion für eine Kochzone: Berühren Sie das Ende derrechten Einstellskala. leuchtet.Ausschalten der Funktion: Ändern Sie die Kochstufe. Per...
Page 57 - Kindersicherung; Funktion für einen einzelnen; Ein- und Ausschalten der
Kindersicherung Diese Funktion verhindert ein versehentliches Einschalten des Kochfelds.Einschalten der Funktion: Schalten Siedas Kochfeld mit ein. Stellen Sie keine Kochstufe ein. Berühren Sie 4 Sekunden lang. leuchtet auf. SchaltenSie das Kochfeld mit aus.Ausschalten der Funktion: Schalten Siedas ...
Page 60 - TIPPS UND HINWEISE; Kochgeschirr; Kochgeschirr eignet sich für
Wenn Sie nach Kochende das Kochfeld ausschalten, kann die Dunstabzugshaube noch eine gewisse Zeit in Betrieb sein. Nach dieser Zeit schaltet das System den Lüfter automatisch aus. Während der folgenden 30 Sekunden kann der Lüfter nicht wieder eingeschaltet werden. Manuelles Einstellen der Lüftergesc...
Page 61 - Betriebsgeräusche; Es gibt verschiedene; Anwendungsbeispiele für das
Siehe hierzu „Technische Daten“. Betriebsgeräusche Es gibt verschiedene Betriebsgeräusche:• Knacken: Das Kochgeschirr besteht aus unterschiedlichen Materialien (Sandwichkonstruktion). • Pfeifen: Sie haben die Kochzone auf eine hohe Stufe geschaltet und das Kochgeschirr besteht aus unterschiedlichen ...
Page 62 - Anwendungsbeispiele zum Kochen mit
Kochstufe Verwendung: Dauer (Min.) Hinweise 9 - 12 Bei geringer Hitze anbraten: Schnitzel, Cordon bleu, Kote‐ lett, Frikadellen, Bratwürste, Leber, Mehlschwitze, Eier, Pfannkuchen, Donuts. Nach Bedarf Nach der Hälfte der Zeit wen‐ den. 12 - 13 Braten bei starker Hitze: Rösti, Lendenstücke, Steaks. 5...
Page 63 - Geeignete Pfannen für die; Legen Sie ein Lineal auf den; Tipps und Hinweise für Auto-; Die abgebildete Dunstabzugshaube ist
Gemüse Kochstufe Bratkartoffeln, roh 1 - 3 Bratkartoffelplätzchen 4 - 6 Gemüse 4 - 6 Unterschiedliche Pfannengrößen können zu unterschiedlichen Aufheizzeiten führen. Schwere Pfannen speichern mehr Wärme als leichte Pfannen, benötigen aber auch mehr Zeit beim Aufheizen. Geeignete Pfannen für die Funk...
Page 64 - Dunstabzugshauben mit der Funktion; REINIGUNG UND PFLEGE; Allgemeine Informationen; Abkühlung des Kochfelds entfernt; FEHLERSUCHE
Andere ferngesteuerte Geräte können das Signal blockieren. Benutzen Sie keine anderen ferngesteuerten Geräte, wenn Sie diese Funktion des Kochfelds verwenden. Dunstabzugshauben mit der Funktion Auto-VentDie komplette Palette von Dunstabzugshauben, die mit dieser Funktion ausgestattet sind, finden Si...
Page 67 - Wenn Sie das Problem nicht; MONTAGE; Vor der Montage
Störung Mögliche Ursache Abhilfe Es ist ein konstanter Piepton zu hören. Unsachgemäßer elektri‐ scher Anschluss. Trennen Sie das Kochfeld von der Spannungsversor‐ gung. Wenden Sie sich an eine Elektrofachkraft zur Überprüfung der Installation. Wenn Sie das Problem nicht lösen können... Wenn Sie das ...
Page 68 - Kabelquerschnitt
Kabelquerschnitt NL1 N L 230V~ 400V 2~N L2 Einphasiger Anschluss - 230 V~ Zweiphasiger Anschluss - 400 V 2 ~ N Grün - gelb Grün - gelb N Blau und blau Blau und blau N L Schwarz und braun Schwarz L1 Braun L2 Montage min.50mm min.500mm R 5mm min. 55mm 490 +1 mm 750 +1 mm 68
Page 69 - TECHNISCHE DATEN; Typenschild
min.28 mm min. 12 mm min. 60mm Ist das Gerät über einer Schublade installiert, kann die Kochfeldbelüftung die in der Schublade aufbewahrten Gegenstände während des Garvorgangs erwärmen. Sie können, müssen aber nicht, eine Trennplatte installieren. TECHNISCHE DATEN Typenschild Modell SI7844B Produkt-...
Page 70 - Technische Daten der Kochzonen; ENERGIEEFFIZIENZ; Energie sparen
Technische Daten der Kochzonen Kochzone Nennleistung (höchste Kochstufe) [W] Funktion Power [W] Funktion Power maxi‐ male Dauer [min] Kochgeschirr‐ durchmesser [mm] Vorne links 2300 3200 10 125 - 210 Hinten links 2300 3200 10 125 - 210 Vorne rechts 2300 3200 10 125 - 210 Hinten rechts 2300 3200 10 1...
Page 71 - UMWELTTIPPS
• Stellen Sie das Kochgeschirr mittig auf die Kochzone. • Nutzen Sie die Restwärme, um die Speisen warm zu halten oder zu schmelzen. UMWELTTIPPS Recyceln Sie Materialien mit dem Symbol . Entsorgen Sie die Verpackung in den entsprechenden Recyclingbehältern. Recyceln Sie zum Umwelt- und Gesundheitssc...





 Smeg SI1F7645B
User Manual
Smeg SI1F7645B
User Manual
 Smeg CBE66MF
Manual
Smeg CBE66MF
Manual
 Smeg Campana decorativa Smeg KCVR9NE, cristal-negro, 7l
User Manual
Smeg Campana decorativa Smeg KCVR9NE, cristal-negro, 7l
User Manual
 Smeg CO200
Manual
Smeg CO200
Manual
 Smeg SUK61PX8
User Manual
Smeg SUK61PX8
User Manual
 Smeg BQ6030
Manual
Smeg BQ6030
Manual
 Smeg VA91XVG
Manual
Smeg VA91XVG
Manual
 Smeg SE2641CX
Manual
Smeg SE2641CX
Manual
 Smeg SUK81MFX
Installation Manual
Smeg SUK81MFX
Installation Manual
 Smeg SCA301X
Manual
Smeg SCA301X
Manual
 Smeg CR305AP
Manual
Smeg CR305AP
Manual
 Smeg NCT 335 E
Manual
Smeg NCT 335 E
Manual
 Smeg ST337
User Manual
Smeg ST337
User Manual
 Smeg SCA130P
Manual
Smeg SCA130P
Manual
 Smeg SA702X-5
Manual
Smeg SA702X-5
Manual
 Smeg S 34 STRP
Manual
Smeg S 34 STRP
Manual
 Smeg WDI147
User Manual
Smeg WDI147
User Manual
 Smeg SNZ61MFA1
Manual
Smeg SNZ61MFA1
Manual
 Smeg ST4108
Manual
Smeg ST4108
Manual