Smeg SA45MX2 - Manuals
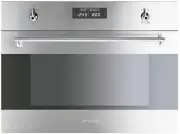
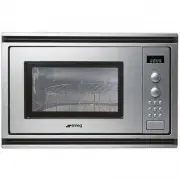
User Manual Smeg SA45MX2


Summary
Table of Contents GB-IE 3 INSTRUCTIONS FOR THE USER : these provide recommendations for use, a description of the controls and the correct procedures for cleaning and maintaining the appliance INSTRUCTIONS FOR THE INSTALLER : these are intended for the qualified engineer who is to install, commissio...
Precautions for Use GB-IE 4 1 PRECAUTIONS FOR USE THIS MANUAL IS AN INTEGRAL PART OF THE APPLIANCE. TAKE GOOD CARE OF IT AND KEEP IT TO HAND THROUGHOUT THE OVEN'S LIFE CYCLE. WE URGE YOU TO READ THIS MANUAL AND ALL THE INFORMATION IT CONTAINS CAREFULLY BEFORE USING THE APPLIANCE. INSTALLATION MUST B...
Disposal Instructions GB-IE 5 2 DISPOSAL INSTRUCTIONS - OUR ENVIRONMENT POLICY Our products are only packaged using non-pollutant, environment-friendly, recyclable materials. We urge you to cooperate by disposing of the packaging properly. Contact your local dealer or the competent local organisatio...
Smeg Microwaves Manuals
-
 Smeg FME20EX3
User Manual
Smeg FME20EX3
User Manual
-
 Smeg FME20TC3
User Manual
Smeg FME20TC3
User Manual
-
 Smeg FME24B-2
User Manual
Smeg FME24B-2
User Manual
-
 Smeg FME24N-2
User Manual
Smeg FME24N-2
User Manual
-
 Smeg FME24X-2
User Manual
Smeg FME24X-2
User Manual
-
 Smeg FMI120
User Manual
Smeg FMI120
User Manual
-
 Smeg FMI325X
User Manual
Smeg FMI325X
User Manual
-
 Smeg FMIU020X
User Manual
Smeg FMIU020X
User Manual
-
 Smeg OTR316XU
User Manual
Smeg OTR316XU
User Manual
-
 Smeg SA34MX
User Manual
Smeg SA34MX
User Manual
-
 Smeg SA35MX
User Manual
Smeg SA35MX
User Manual
-
Smeg SA35MX
Manual
-
 Smeg SA37X
User Manual
Smeg SA37X
User Manual
-
Smeg SA37X
Manual
-
 Smeg SA384X
User Manual
Smeg SA384X
User Manual
-
Smeg SA384X
Manual
-
 Smeg SA985-2CX
User Manual
Smeg SA985-2CX
User Manual
-
Smeg SA985-2CX
Manual
-
 Smeg SA985-2CX1
User Manual
Smeg SA985-2CX1
User Manual
-
 Smeg SA987CX
User Manual
Smeg SA987CX
User Manual