Smeg PX140- Manuals
Smeg PX140– User Manual, Manual in PDF format online.
Manuals:
User Manual Smeg PX140
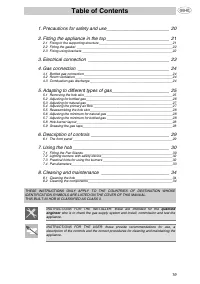


Summary
Precautions for Safety and Use 20 1. Precautions for safety and use THIS MANUAL IS AN INTEGRAL PART OF THE APPLIANCE. TAKE GOOD CARE OF IT AND KEEP IT TO HAND THROUGHOUT THE HOB'S LIFE CYCLE. USERS ARE ADVISED TO READ THIS MANUAL AND ALL THE INSTRUCTIONS IT CONTAINS BEFORE USING THE HOB. ALSO KEEP T...
Instructions for the Installer 21 2. Fitting the appliance in the top The procedures required below must be carried out by a skilled builder and/or joiner. The hob can be installed on various materials, including masonry, metal, solid wood and wood finished with plastic laminates, provided the mater...
Instructions for the Installer 22 2.2 Fitting the gasket Fit the insulating gasket provided carefully around the outside edge of the hole made in the top as shown below, pressing it down with your hands so that its entire surface fits snugly. Follow the dimensions shown, bearing in mind that the lon...
Manual Smeg PX140


Summary
Precautions for Safety and Use 20 1. Precautions for safety and use THIS MANUAL IS AN INTEGRAL PART OF THE APPLIANCE. TAKE GOOD CARE OF IT AND KEEP IT TO HAND THROUGHOUT THE HOB'S LIFE CYCLE. USERS ARE ADVISED TO READ THIS MANUAL AND ALL THE INSTRUCTIONS IT CONTAINS BEFORE USING THE HOB. ALSO KEEP T...
Instructions for the Installer 21 2. Fitting the appliance in the top The procedures required below must be carried out by a skilled builder and/or joiner. The hob can be installed on various materials, including masonry, metal, solid wood and wood finished with plastic laminates, provided the mater...
Instructions for the Installer 22 2.2 Fitting the gasket Fit the insulating gasket provided carefully around the outside edge of the hole made in the top as shown below, pressing it down with your hands so that its entire surface fits snugly. Follow the dimensions shown, bearing in mind that the lon...
Smeg Manuals
-
 Smeg SI1F7645B
User Manual
Smeg SI1F7645B
User Manual
-
 Smeg CBE66MF
Manual
Smeg CBE66MF
Manual
-
 Smeg Campana decorativa Smeg KCVR9NE, cristal-negro, 7l
User Manual
Smeg Campana decorativa Smeg KCVR9NE, cristal-negro, 7l
User Manual
-
 Smeg CO200
Manual
Smeg CO200
Manual
-
 Smeg SUK61PX8
User Manual
Smeg SUK61PX8
User Manual
-
 Smeg BQ6030
Manual
Smeg BQ6030
Manual
-
 Smeg VA91XVG
Manual
Smeg VA91XVG
Manual
-
 Smeg SE2641CX
Manual
Smeg SE2641CX
Manual
-
 Smeg SUK81MFX
Installation Manual
Smeg SUK81MFX
Installation Manual
-
Smeg SUK81MFX
Manual
-
 Smeg SCA301X
Manual
Smeg SCA301X
Manual
-
 Smeg CR305AP
Manual
Smeg CR305AP
Manual
-
 Smeg NCT 335 E
Manual
Smeg NCT 335 E
Manual
-
 Smeg ST337
User Manual
Smeg ST337
User Manual
-
 Smeg SCA130P
Manual
Smeg SCA130P
Manual
-
 Smeg SA702X-5
Manual
Smeg SA702X-5
Manual
-
 Smeg S 34 STRP
Manual
Smeg S 34 STRP
Manual
-
 Smeg WDI147
User Manual
Smeg WDI147
User Manual
-
 Smeg SNZ61MFA1
Manual
Smeg SNZ61MFA1
Manual
-
 Smeg ST4108
Manual
Smeg ST4108
Manual