Siemens Dishwasher - Manuals
Siemens Dishwasher – User Manual in PDF format online.
Manuals:
User Manual Siemens Dishwasher
1

2

3

4

5

6

7

8

9

10

11

12

13

14

15

16

17

18

19

20

21

22

23

24

25

26

27

28

29

30

31

32

33

34

35

36

37

38

39

40

Summary
Page 2 - HVHWVHF; Downloaded from DishWasher-Manual.com Manuals
6WDUW 5HVHWVHF K K PLQ $ % & 5HVHWVHF Downloaded from DishWasher-Manual.com Manuals
Page 3 - Table of contents
en 3 Table of contents 8 Intended use . . . . . . . . . . . . . . . 4 ( Safety instructions . . . . . . . . . . 4 Before you switch ON the appliance . . . . . . . . . . . . . . . . . . . 4Delivery . . . . . . . . . . . . . . . . . . . . . . . . 5Installation . . . . . . . . . . . . . . . . . . . . ....
Page 4 - Intended use
en Intended use 4 Timer programming . . . . . . . . . . . . . 22End of programme . . . . . . . . . . . . . . 22Automatic switch off / interior light . . . . . . . . . . . . . . . . . . . . 22Switching off the appliance . . . . . . . . 23Interrupting the programme . . . . . . . 23Terminating the prog...
Siemens Manuals
-
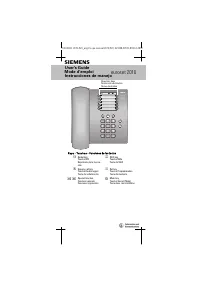
 Siemens 140
User Manual
Siemens 140
User Manual
-
 Siemens 2000
User Manual
Siemens 2000
User Manual
-
 Siemens 2010
User Manual
Siemens 2010
User Manual
-
 Siemens 2015
User Manual
Siemens 2015
User Manual
-
 Siemens 300
User Manual
Siemens 300
User Manual
-
 Siemens 3000
User Manual
Siemens 3000
User Manual
-
 Siemens 4000
User Manual
Siemens 4000
User Manual
-
 Siemens 440
User Manual
Siemens 440
User Manual
-
 Siemens 54
User Manual
Siemens 54
User Manual
-
 Siemens 6RA70
User Manual
Siemens 6RA70
User Manual
-
 Siemens 8WD44
User Manual
Siemens 8WD44
User Manual
-
 Siemens A110
User Manual
Siemens A110
User Manual
-
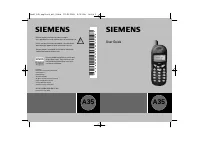 Siemens A35
User Manual
Siemens A35
User Manual
-
 Siemens A36
User Manual
Siemens A36
User Manual
-
 Siemens A40
User Manual
Siemens A40
User Manual
-
 Siemens A51
User Manual
Siemens A51
User Manual
-
 Siemens A52
User Manual
Siemens A52
User Manual
-
 Siemens A55
User Manual
Siemens A55
User Manual
-
 Siemens A56
User Manual
Siemens A56
User Manual
-
 Siemens A60
User Manual
Siemens A60
User Manual