Shark ZD201 - Manuals
Shark ZD201 – User Manual, Manual in PDF format online.
Manuals:
User Manual Shark ZD201


Manual Shark ZD201


Summary
s h a r k c l e a n . c o m s h a r k c l e a n . c o m READ ALL INSTRUCTIONS BEFORE USING THIS VACUUM1. Inspect power cord and plug for any damage before use. DO NOT use vacuum cleaner with a damaged cord or plug. Turn off all controls before plugging in or unplugging the vacuum cleaner. Store your...
s h a r k c l e a n . c o m s h a r k c l e a n . c o m ASSEMBLY ASSEMBLY 1. Place Pod onto Floor Nozzle Post. 2. Insert Wand into pod. 3. Attach the bottom Accessory Holder onto the pod. 4. Insert Handle into wand. 5. Attach Hose Clip to wand. 6. Connect Hose to back of pod. 7. Store accessories on...
s h a r k c l e a n . c o m s h a r k c l e a n . c o m NOTE: All accessories are compatible with both the wand and the handle. WHOLE-HOME CLEANING CLEANING MODES To engage Brushroll , step on floor nozzle and tilt handle back firmly. Press the Power/Surface switch to the appropriate floor setting. ...
Shark Manuals
-
 Shark NV356E
User Manual
Shark NV356E
User Manual
-
 Shark BU3521
User Manual
Shark BU3521
User Manual
-
Shark BU3521
Manual
-
 Shark S8201
User Manual
Shark S8201
User Manual
-
 Shark FA222
Manual
Shark FA222
Manual
-
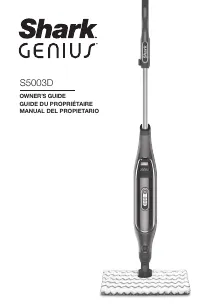 Shark S5003D
User Manual
Shark S5003D
User Manual
-
 Shark NV141
User Manual
Shark NV141
User Manual
-
 Shark S7201
User Manual
Shark S7201
User Manual
-
Shark S7201
Manual
-
 Shark RV2410WD
User Manual
Shark RV2410WD
User Manual
-
 Shark AZ913ANZ
User Manual
Shark AZ913ANZ
User Manual
-
 Shark LA322
User Manual
Shark LA322
User Manual
-
 Shark HZ251
User Manual
Shark HZ251
User Manual
-
 Shark RV2001
User Manual
Shark RV2001
User Manual
-
Shark RV2001
Manual
-
 Shark SV1115
Manual
Shark SV1115
Manual
-
 Shark WD101
User Manual
Shark WD101
User Manual
-
 Shark HP200
User Manual
Shark HP200
User Manual
-
Shark HP200
Manual
-
 Shark HP100
User Manual
Shark HP100
User Manual