Shark NV751 - Manuals
Shark NV751 – User Manual in PDF format online.
Manuals:
User Manual Shark NV751


Summary
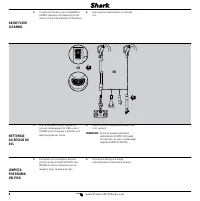
8 0 0 . 7 9 8 . 7 3 9 8 3 IMPORTANT SAFEGUARDS FOR HOUSEHOLD USE ONLY READ ALL INSTRUCTIONS BEFORE USE SAVE THESE INSTRUCTIONS POLARIZED PLUG To reduce the risk of electric shock, this vacuum cleaner has a polarized plug (one blade is wider than the other). As a safety feature, this plug will fit in...
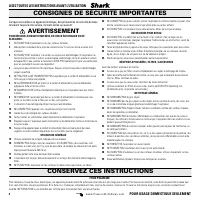
4 w w w . P o w e r e d L i f t A w a y . c o m POUR USAGE DOMESTIQUE SEULEMENT LISEZ TOUTES LES INSTRUCTIONS AVANT L’UTILISATION CONSERVEZ CES INSTRUCTIONS FICHE POLARISÉE Pour réduire le risque de chocs électriques, cet appareil possède une fiche polarisée (une lame est plus large que l’autre). Pa...
8 0 0 . 7 9 8 . 7 3 9 8 5 PARA USO DOMÉSTICO SOLAMENTE LEA COMPLETAMENTE LAS INSTRUCCIONES ANTES DE UTILIZARLO CONSERVE ESTAS INSTRUCCIONES ENCHUFE POLARIZADO Para reducir el riesgo de una descarga eléctrica, esta aspiradora posee un enchufe polarizado (una pata es más ancha que la otra). Como medid...
Shark Manuals
-
 Shark NV356E
User Manual
Shark NV356E
User Manual
-
 Shark BU3521
User Manual
Shark BU3521
User Manual
-
Shark BU3521
Manual
-
 Shark S8201
User Manual
Shark S8201
User Manual
-
 Shark FA222
Manual
Shark FA222
Manual
-
 Shark S5003D
User Manual
Shark S5003D
User Manual
-
 Shark NV141
User Manual
Shark NV141
User Manual
-
 Shark S7201
User Manual
Shark S7201
User Manual
-
Shark S7201
Manual
-
 Shark RV2410WD
User Manual
Shark RV2410WD
User Manual
-
 Shark ZD201
User Manual
Shark ZD201
User Manual
-
Shark ZD201
Manual
-
 Shark AZ913ANZ
User Manual
Shark AZ913ANZ
User Manual
-
 Shark LA322
User Manual
Shark LA322
User Manual
-
 Shark HZ251
User Manual
Shark HZ251
User Manual
-
 Shark RV2001
User Manual
Shark RV2001
User Manual
-
Shark RV2001
Manual
-
 Shark SV1115
Manual
Shark SV1115
Manual
-
 Shark WD101
User Manual
Shark WD101
User Manual
-
 Shark HP200
User Manual
Shark HP200
User Manual