Sanus VST4-B1 - Manuals
Sanus VST4-B1 TV Bracket – User Manual in PDF format online.
Manuals:
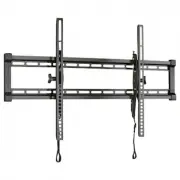
User Manual Sanus VST4-B1


Summary
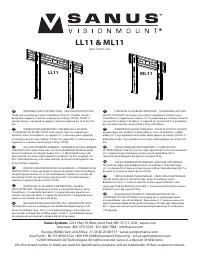
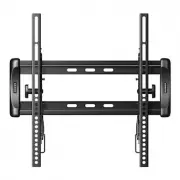
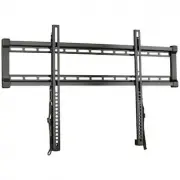
2 IMPORTANT SAFETY INSTRUCTIONS – SAVE THESE INSTRUCTIONS – PLEASE READ ENTIRE MANUAL PRIOR TO USE Before getting started, let’s make sure this mount is perfect for you! 2 What is your wall made of? 3 Do you have all of the tools needed? 4 Ready to begin? Please read through these instructions compl...
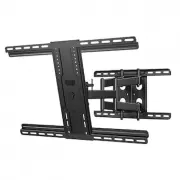
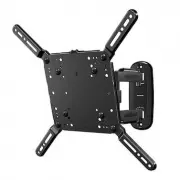
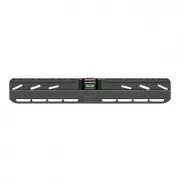
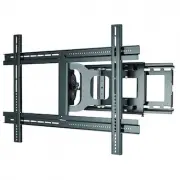
3 STEP 1 Attach Bracket to TV WARNING: This product contains small items that could be a choking hazard if swallowed. Before starting assembly, verify all parts are included and undamaged. If any parts are missing or damaged, do not return the damaged item to your dealer; contact Customer Service. N...
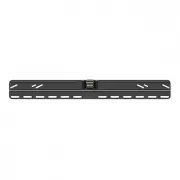
6 1-4 Attach Extensions (200 x 200 mm ONLY) 1-3 Measure Your TV Hole Pattern If mounting to a TV with a 200 x 200 mm (7 ⅞ x 7 ⅞ in.) hole pattern, add the extension plates 02 to the TV bracket 01 using the extension plate screws 03 and nuts 04 . NOTE: Nuts 04 are poly-locks and will need to be forci...
Sanus TV Brackets Manuals
-
 Sanus HTB3B1
User Manual
Sanus HTB3B1
User Manual
-
 Sanus LL11-B1
User Manual
Sanus LL11-B1
User Manual
-
Sanus LL11-B1
Manual
-
 Sanus LLF122-B1
User Manual
Sanus LLF122-B1
User Manual
-
 Sanus LLL1-B1
User Manual
Sanus LLL1-B1
User Manual
-
 Sanus LLT1-B1
User Manual
Sanus LLT1-B1
User Manual
-
 Sanus LMF115-B1
User Manual
Sanus LMF115-B1
User Manual
-
 Sanus LML1-B1
User Manual
Sanus LML1-B1
User Manual
-
 Sanus LMT1-B1
User Manual
Sanus LMT1-B1
User Manual
-
 Sanus LSF110-B1
User Manual
Sanus LSF110-B1
User Manual
-
 Sanus MLF13B1
User Manual
Sanus MLF13B1
User Manual
-
 Sanus MLL11B1
User Manual
Sanus MLL11B1
User Manual
-
 Sanus MLT14B1
User Manual
Sanus MLT14B1
User Manual
-
 Sanus VIWLF128-B2
User Manual
Sanus VIWLF128-B2
User Manual
-
 Sanus VLF728-B2
User Manual
Sanus VLF728-B2
User Manual
-
 Sanus VLL5-B1
User Manual
Sanus VLL5-B1
User Manual
-
 Sanus VLT16-B1
User Manual
Sanus VLT16-B1
User Manual
-
 Sanus VLT5-B1
User Manual
Sanus VLT5-B1
User Manual
-
 Sanus VLT7-B2
User Manual
Sanus VLT7-B2
User Manual
-
 Sanus VMF720-B2
User Manual
Sanus VMF720-B2
User Manual