Sanus VMT5-B1 - Manuals
Sanus VMT5-B1 TV Bracket – User Manual in PDF format online.
Manuals:
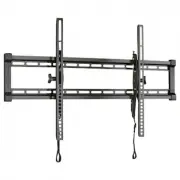
User Manual Sanus VMT5-B1


Summary
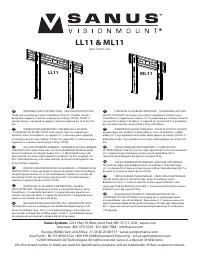
2 IMPORTANT SAFETY INSTRUCTIONS – SAVE THESE INSTRUCTIONS – PLEASE READ ENTIRE MANUAL PRIOR TO USE Does your TV weigh more than 75 lb (34 kg) including accessories? No — Perfect! Yes — This mount is NOT compatible. Visit MountFinder.Sanus.com or call 1-800-359-5520 (UK: 0800-056-2853) to fi nd a comp...
3 M4x30 mm M5x30 mm M6x35 mm M8x35 mm Spacer STEP 1 Attach Bracket to TV 04 x4 06 x4 09 x4 07 x4 08 x4 03 x4 05 x4 NOTE: Not all hardware included will be used. WARNING: This product contains small items that could be a choking hazard if swallowed. Before starting assembly, verify all parts are incl...
5 1-3 Attach TV Brackets Spacer, screw and washer Center the TV brackets 01 and 02 over your TV hole pattern as shown - making sure the brackets are level. NOTE: The adjustment knobs on TV brackets 01 and 02 should be oriented to the outside edges. Install using the spacer, screw and washer combinat...
Sanus TV Brackets Manuals
-
 Sanus HTB3B1
User Manual
Sanus HTB3B1
User Manual
-
 Sanus LL11-B1
User Manual
Sanus LL11-B1
User Manual
-
Sanus LL11-B1
Manual
-
 Sanus LLF122-B1
User Manual
Sanus LLF122-B1
User Manual
-
 Sanus LLL1-B1
User Manual
Sanus LLL1-B1
User Manual
-
 Sanus LLT1-B1
User Manual
Sanus LLT1-B1
User Manual
-
 Sanus LMF115-B1
User Manual
Sanus LMF115-B1
User Manual
-
 Sanus LML1-B1
User Manual
Sanus LML1-B1
User Manual
-
 Sanus LMT1-B1
User Manual
Sanus LMT1-B1
User Manual
-
 Sanus LSF110-B1
User Manual
Sanus LSF110-B1
User Manual
-
 Sanus MLF13B1
User Manual
Sanus MLF13B1
User Manual
-
 Sanus MLL11B1
User Manual
Sanus MLL11B1
User Manual
-
 Sanus MLT14B1
User Manual
Sanus MLT14B1
User Manual
-
 Sanus VIWLF128-B2
User Manual
Sanus VIWLF128-B2
User Manual
-
 Sanus VLF728-B2
User Manual
Sanus VLF728-B2
User Manual
-
 Sanus VLL5-B1
User Manual
Sanus VLL5-B1
User Manual
-
 Sanus VLT16-B1
User Manual
Sanus VLT16-B1
User Manual
-
 Sanus VLT5-B1
User Manual
Sanus VLT5-B1
User Manual
-
 Sanus VLT7-B2
User Manual
Sanus VLT7-B2
User Manual
-
 Sanus VMF720-B2
User Manual
Sanus VMF720-B2
User Manual