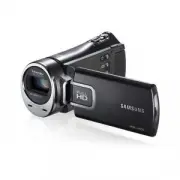
Page 2 - key features of your DVD camcorder
ii _ English key features of your DVD camcorder 3 1/2 inch DVD disc camcorder DVD-VIDEO recording with 3 1/2 inch (8cm) DVD-RW/+RW/-R/+R DL (Dual Layer) discs. 2.7” wide (16:9) LCD screen (112K pixels) The 2.7” wide (16:9) LCD screen provides excellent viewing clarity with improved resolution. The 1...
Page 3 - iii; safety warnings; What the icons and signs in this user manual mean:; precautions; Caution
English _ iii safety warnings What the icons and signs in this user manual mean: WARNING Means that death or serious personal injury is a risk. CAUTION Means that there is a potential risk for personal injury or material damage. CAUTION To reduce the risk of fire, explosion, electric shock, or perso...
Page 4 - iv; important information on use; BEFORE USING THIS CAMCORDER
iv _ English important information on use BEFORE USING THIS CAMCORDER • This DVD camcorder records video in MPEG2 format in the DVD camcorder mode, MPEG4 format in the digital camera mode and at Standard Resolution (SD-VIDEO). • Please note that this DVD camcorder is not compatible with other digita...
Page 5 - ABOUT THIS USER MANUAL; NOTES REGARDING A TRADEMARK
English _ v ABOUT THIS USER MANUAL • This user manual covers models VP-DX100( i )/DX100H/DX102/DX103( i )/DX104/DX105( i ). Please note that models with “i” have “Analogue In” function. VP-DX103( i )/DX104/DX105( i ) have two storage media, Disc and Card. Although the external appearances of VP-DX10...
Page 6 - IMPORTANT NOTE; precautions when using
vi _ English IMPORTANT NOTE • Handle the liquid crystal display (LCD) with care: - The LCD is a very delicate display device: Do not press its surface with force, hit it or prick it with a sharp object. - If you push the LCD surface, unevenness in display may occur. If unevenness does not disappear,...
Page 8 - contents
02 _ English contents INTRODUCTION TO BASIC FEATURES GETTING TO KNOW YOUR DVD CAMCORDER PREPARATION 13 DVD CAMCORDER MODE: BEFORE RECORDING 30 06 09 What is included with your DVD camcorder 10 Front and right view 11 Left side and bottom view 12 Rear and top view 13 Remote control (VP-DX102/DX104/DX...
Page 10 - DIGITAL CAMERA MODE
04 _ English contents DIGITAL CAMERA MODE (VP-DX103( i )/DX104/DX105( i ) ONLY) 52 USING THE MENU ITEMS 62 PRINTING PHOTO IMAGES (VP-DX103( i )/DX104/DX105( i ) ONLY) 83 52 Inserting and ejecting a memory card 55 Recordable time and number of images 56 Recording movie images 57 Taking photo images 5...
Page 12 - introduction to basic features; When recording movie images on a DVD disc
INSERT BATTERY PACK 06 _ English This chapter introduces the basic features of your DVD camcorder. See the reference pages below for more information. introduction to basic features Step 1 : Preparation When recording movie images on a DVD disc Select the proper disc for use. • DVD+RW, DVD+R DL and ...
Page 13 - Finalise; Step 4: Viewing on DVD devices
���� English _ 07 You must finalise the disc in advance to view the movie images recorded on a DVD camcorder on other DVD devices. (Finalise is the function that allows a disc recorded on the DVD camcorder to be playable on DVD devices such as DVD players.) Finalise • Selecting an image to play back...
Page 15 - WHAT IS INCLUDED WITH YOUR DVD CAMCORDER; getting to know your DVD camcorder
English _ 09 WHAT IS INCLUDED WITH YOUR DVD CAMCORDER Your new DVD camcorder comes with the following accessories. If any of these items is missing from your box, call Samsung’s Customer Care Centre. ✪ The exact appearance of each item may vary by model. The contents may vary depending on the sale...
Page 16 - FRONT AND RIGHT VIEW
���� 10 _ English FRONT AND RIGHT VIEW Lens open/close switch Lens Remote sensor (VP-DX102/DX104/DX105( i ) only) Light (VP-DX102/DX105( i ) only) Internal microphone Grip belt hook Grip belt Swivel handle Disc cover getting to know your DVD camcorder CLOSE OPEN (AD68-02550G) VP-DX...
Page 17 - LEFT AND BOTTOM VIEW
English _ 11 LEFT AND BOTTOM VIEW Display ( ) button EASY Q button Built-in speaker FINALIZE button BATT. (battery release) switch Storage mode switch (DISC/CARD) (VP-DX103( i )/DX104/DX105( i ) only) Battery pack LCD screen Recording start/stop button Joystick (up/down/right/lef...
Page 18 - REAR AND TOP VIEW
12 _ English REAR AND TOP VIEW Viewfinder Zoom (W/T) lever/ Volume control PHOTO button (VP-DX103( i )/DX104/DX105( i ) only) Focus adjustment knob MODE button / Mode indicator (Record ( )/Play ( ) mode) Recording start/stop button ACCESS/CHG indicator OPEN switch AV jack USB jac...
Page 19 - preparation
English _ 13 REMOTE CONTROL (VP-DX102/DX104/DX105( i ) only) START/STOP button DISPLAY button Skip ( / ) button Stop ( ) button Play/Pause ( ) button MENU button Control ( / / / / )buttons PHOTO button Zoom (W/T) button Search ( / ) button Slow playback ( ) button The buttons o...
Page 20 - INSTALLING THE BUTTON-TYPE BATTERY
1 2 3 14 _ English INSTALLING THE BUTTON-TYPE BATTERY Installation for the internal clock (battery release) switch 1. Open the LCD screen, then slide the BATT . (battery release) switch in the arrow direction to remove the battery pack. 2. Remove the battery cover. 3. Replace the button-type battery...
Page 21 - HOLDING THE DVD CAMCORDER
140 ° English _ 15 HOLDING THE DVD CAMCORDER Attaching a grip belt Insert your right hand from the bottom of the DVD camcorder up to the base of your thumb. Put your hand in a position where you can easily operate the Recording start/stop button, PHOTO button, and the Zoom lever. Adjust the leng...
Page 24 - Charging the battery pack; Charging indicator
���� 18 _ English Charging the battery pack • Use IA-BP80W battery pack only. • The battery pack may be charged a little at the time of purchase. 1. Slide the POWER switch downwards to turn off the power. 2. Open the LCD screen and attach the battery pack to the DVD camcorder. page 16 3. Open the ...
Page 26 - Using the DVD camcorder with the AC power adaptor
20 _ English Using the DVD camcorder with the AC power adaptor It is recommended that you use the AC power adaptor to power the DVD camcorder from a household AC outlet when you perform settings on it, finalise a disc, play back, or edit images, or use it indoors. page 18 Be sure to use the prov...
Page 29 - DVD camcorder play mode
English _ 23 DVD camcorder play mode Movie play mode Operating status (Play/Pause) Warning indicators and messages Time code (elapsed time) Storage media (disc) Battery info (remaining battery level) Disc Format (-RW Video/VR mode only) Quality AV In (VP-DX100i/DX103i/DX105i only) ...
Page 30 - Digital camera record mode
24 _ English Digital camera record mode Record mode Operating mode (STBY (standby) or ● (recording)) Warning indicators and messages Time counter (movie recording time) Remaining time Storage media (memory card) Battery info (remaining battery level) The total number of recordable ph...
Page 32 - Switching the information display mode; USING THE JOYSTICK
1 2 3 4 5 26 _ English USING THE DISPLAY ( ) BUTTON Switching the information display mode You can switch between the on-screen information display modes: Slide the POWER switch downwards to turn on the power, and then press the Display ( ) button. Each press of the button toggles the OSD (On Screen...
Page 33 - USING THE VIEWFINDER
English _ 27 USING THE LCD SCREEN Adjusting the LCD screen 1. Open up the LCD screen 90° with your finger. 2. Rotate it to the best angle to record or play. WARNING Do not lift the DVD camcorder by holding the LCD screen. • Over-rotation may cause damage to the inside of the hinge that connects the ...
Page 36 - DVD camcorder mode: before recording; Selecting the desired storage
1 ���� ���� ���� 3 4 30 _ English DVD camcorder mode: before recording SELECTING THE STORAGE MEDIA (VP-DX103( i )/DX104/DX105( i ) only) You can record movie and photo images on the desired storage media (a DVD disc or a memory card) so you should select the desired storage media before starting rec...
Page 37 - When using a new disc: formatting a new disc
English _ 31 • Move the grip belt so it does not interfere with inserting or ejecting the disc. • The disc cover can be opened when the device is connected to an AC power adaptor or the battery pack, even if the power is off. Caution This product utilises a laser. Use of controls or adjustments or p...
Page 38 - Removing a disc; RECORDABLE TIME
32 _ English Removing a disc 1. Slide the OPEN switch in the direction of the arrow. • The disc cover will partially open. 2. Gently open the cover the rest of the way by hand. 3. Remove the disc. • While pushing down the centre portion of the disc spindle, pick up the disc by the edges to remove. 4...
Page 39 - RECORDING MOVIE IMAGES
English _ 33 DVD camcorder mode: recording/playback RECORDING MOVIE IMAGES • You should set the Storage mode switch to DISC before recording on a disc. (VP-DX103( i )/DX104/DX105( i ) only) page 30 • You can record movie images using the remote control. (VP-DX102/DX104/DX105( i ) only) page 13 •...
Page 42 - CAPTURING STILL IMAGES DURING MOVIE IMAGE PLAYBACK(VP-DX103
36 _ English CAPTURING STILL IMAGES DURING MOVIE IMAGE PLAYBACK(VP-DX103 ( i ) /DX104/DX105 ( i ) only) • This function works only in the Play mode. page 21 • If you press the PHOTO button during playback, it stops playing and saves one image of the current movie scene that is paused to the memory...
Page 43 - ZOOMING; To zoom in
English _ 37 ZOOMING Use the zoom function for close-up or wide-angle recording. This DVD camcorder allows you to record using optical 34x power zoom and 1200x digital zoom. • Zoom lever is on the top of the camcorder. • You can also use zoom function by moving the Joystick (W/T) up or down. To zoom...
Page 44 - PLAYING MOVIE IMAGES
38 _ English PLAYING MOVIE IMAGES • This function works only in the Play mode. page 21 • You can switch to the Play mode by using the MODE button. • You can find a desired movie image quickly using thumbnail index views. • Use the playback-related buttons on the remote control. (VP-DX102/DX104/DX1...
Page 46 - DVD camcorder mode: editing movie image; DELETING IMAGES
40 _ English DVD camcorder mode: editing movie image DELETING IMAGES ( ( )) • This function works only in the Play mode. • You can delete undesired movie images recorded on the disc. • This function works only on a DVD-RW disc(VR mode). • An image that has been deleted cannot be recovered. 1. Slide ...
Page 47 - DELETING A SECTION OF A MOVIE IMAGE (PARTIAL DELETE)
English _ 41 DELETING A SECTION OF A MOVIE IMAGE (PARTIAL DELETE) ( ( )) • This function works only in the Play mode. page 21 • Set the Storage mode switch to DISC . (VP-DX103( i )/DX104/DX105( i ) only) page 30 • A movie image can be partially deleted. 1. Press the MENU button, then move the Jo...
Page 48 - PLAYLIST
42 _ English PLAYLIST ( ( )) What’s a Playlist? • You can create a playlist on the same disc by gathering your favourite scenes from the recorded movie images. When creating or deleting a playlist, the original movie image will not be erased. Adding or deleting movie images from a playlist does not ...
Page 49 - Creating a playlist
English _ 43 Creating a playlist • This function works only in Play mode. • Set the Storage mode switch to DISC . (VP-DX103( i )/DX104/DX105( i ) only) page 30 • You can create a playlist by gathering your favourites from the recorded movie images. • You can create only one playlist. 1. Move the J...
Page 50 - Arranging the order of movie images within a playlist
44 _ English Arranging the order of movie images within a playlist • This function works only in Play mode. • Set the Storage mode switch to DISC . (VP-DX103( i )/DX104/DX105( i ) only) page 30 • You can arrange movie images within a playlist by moving them to desired position. 1. Move the Joystic...
Page 51 - Deleting movie images from a playlist
English _ 45 Deleting movie images from a playlist • This function works only in Play mode. • Set the Storage mode switch to DISC . (VP-DX103( i )/DX104/DX105( i ) only) page 30 • You can delete undesired movie images within a playlist. 1. Move the Joystick to select the playlist( ) tab in the thu...
Page 52 - Deleting a section of movie image within a playlist
46 _ English Deleting a section of movie image within a playlist • This function works only in Play mode. • Set the Storage mode switch to DISC . (VP-DX103( i )/DX104/DX105( i ) only) page 30 • You can delete a section of a movie image within a playlist. 1. Press the MENU button, then move the Joy...
Page 53 - DISC FINALISE; DVD camcorder mode: disc manage
English _ 47 DISC FINALISE ( ( -R +R DL )) • This function works only in the Record mode page 21 • To play the contents of a DVD-RW/-R/+R DL on other DVD players/recorders/drives, you must finalise the disc. When finalising, there should be enough power in the batteries. If the AC power adaptor is...
Page 54 - Playing back on a PC with a DVD drive; Playing back a finalised disc on a DVD player / recorder
➟ ➟ PC DVD -R DVD +R DL DVD -RW Finalise ➟ ➟ DVD player/recorder DVD -R DVD +R DL DVD -RW Finalise 48 _ English Playing back on a PC with a DVD drive The DVD disc can be played on a PC with a DVD-running media (DVD drive). 1. Turn on your PC. 2. Insert a finalised disc into the DVD drive of the PC. ...
Page 55 - DISC UNFINALISE
English _ 49 DISC UNFINALISE ( ( )) • This function works only in the Record mode. page 21 • If a DVD-RW disc had been finalised in the VR mode or Video mode, you can unfinalise the disc for further recording. When unfinalising, there should be enough power in the batteries. If the AC power adapto...
Page 56 - DISC FORMAT
50 _ English DISC FORMAT ( ( +RW )) • This function works only in the Record mode. page 21 • You can format a recorded disc for re-use. By formatting, all existing data will be deleted. 1. Slide the POWER switch downwards to turn on the power. page 21 2. Set the Storage mode switch to DISC . (VP...
Page 57 - DISC INFORMATION
English _ 51 DISC INFORMATION ( ( +RW -R +R DL )) • This function works only in the DVD camcorder record mode. page 21 • It shows you disc information such as the disc name, disc type, disc format, etc. NOTICE : Make sure that you insert a disc. page 30 1. Slide the POWER switch downwards to tur...
Page 58 - digital camera mode; INSERTING AND EJECTING A MEMORY CARD
52 _ English digital camera mode (VP-DX103( i )/DX104/DX105( i ) only) INSERTING AND EJECTING A MEMORY CARD • This DVD camcorder has multi card-slot for access to SD (Secure Digital) and MMC (MultiMediaCard) cards. - Some cards are not compatible depending on the memory card manufacturer and memory ...
Page 61 - RECORDABLE TIME AND NUMBER OF IMAGES
English _ 55 RECORDABLE TIME AND NUMBER OF IMAGES Recordable time for movie images Storage Memory card Capacity 128MB 256MB 512MB 1GB 2GB Movie image Approx. 8 min Approx. 16 min Approx. 32 min Approx. 64 min Approx. 120 min Recordable number of photo images Storage Memory card Capacity Photo Qualit...
Page 63 - TAKING PHOTO IMAGES
English _ 57 TAKING PHOTO IMAGES • You should set the Storage mode switch to CARD before recording on a memory card. • You can take photo images using the remote control. page 13 (VP-DX104/DX105( i ) only) 1. Slide the POWER switch downwards to turn the DVD camcorder on. • Set the Storage mode swi...
Page 64 - To return to the thumbnail index view, move the
58 _ English PLAYING MOVIE IMAGES • This function works only in the Play mode. page 21 • You can switch to the Play mode by pressing the MODE button. • You can find a desired movie image quickly using thumbnail index views. • Use the playback-related buttons on the remote control. page 13 (VP-DX...
Page 65 - VIEWING PHOTO IMAGES; To view the previous image, move the; Set the slide show function for continuous display.
English _ 59 VIEWING PHOTO IMAGES • This function works only in the Play mode. page 21 • You can play back and view photo images recorded on the memory card. 1. Slide the POWER switch downwards to turn on the power and open the LCD screen. • Set the Storage mode switch to CARD . page 30 • Adjust...
Page 66 - PROTECTION FROM ACCIDENTAL ERASURE
60 _ English PROTECTION FROM ACCIDENTAL ERASURE • This function works only in the Play mode. page 21 • You can protect important images from accidental erasure. • If you execute formatting, all files including protected files will be erased. 1. Slide the POWER switch downwards to turn on the power...
Page 68 - using the menu items; HANDLING MENUS
62 _ English using the menu items HANDLING MENUS ✪ Follow the instruction below to use each of the menu items listed on this page. For example: setting the Focus Using the MENU button 1. Slide the POWER switch downwards to turn on the power. • Set the appropriate storage media. (VP-DX103(i)/DX104/DX...
Page 69 - MENU ITEMS; Recording menu items
English _ 63 MENU ITEMS • Accessible items in menu vary depending on the operating mode. • For operation details, see the corresponding page. Recording menu items Operating mode DISC CARD (VP-DX103( i )/DX104/ DX105( i ) only) Default value Page Scene Mode(AE) X Auto 65 White Balance Auto 66 E...
Page 71 - RECORDING MENU ITEMS
English _ 65 RECORDING MENU ITEMS You can set up the menu items for recording. Scene Mode(AE) This DVD camcorder automatically sets the shutter speed and aperture according to the subject brightness for optimum recording: You can also specify one of six modes depending on conditions, recording envir...
Page 72 - White Balance
66 _ English White Balance This DVD camcorder automatically adjusts the colour of subject. Change the white balance setting depending on the recording conditions. Settings Contents On-screen display Auto This option is generally used to control the white balance automatically. None Daylight This con...
Page 73 - Exposure
English _ 67 • A subject can be shot under various types of lighting conditions indoors (natural, fluorescent, candlelight, etc.). Because the colour temperature is different depending on the light source, the subject tint will differ depending on the white balance settings. Use this function for a ...
Page 75 - Digital Effect
English _ 69 Digital Effect The digital effect enables you to give a creative look to your recording. Select the appropriate digital effect for the type of picture that you wish to record and the effect you wish to create. There are 10 different digital effect options. Settings Contents On-screen di...
Page 76 - Focus
70 _ English Focus The DVD camcorder usually focusses on a subject automatically (auto focus). When the DVD camcorder is turned on, auto focus will always be set. You can also manually focus a subject depending on the recording conditions. Settings Contents On-screen display Auto In most situations,...
Page 77 - Shutter
English _ 71 • “ Focus ” function will alternate between manual focus and auto focus. With auto focus, no indication will appear on the screen. • If you are inexperienced in the use of DVD camcorders, we recommend that you use auto focus. • This function will be set to “ Auto ” in the EASY.Q mode. S...
Page 78 - Quality
72 _ English • We recommend using a tripod when recording with a slow shutter speed. • If you manually change the shutter speed value when “ Scene Mode(AE) ” function is selected, manual changes are applied with priority. • The image may not seem smooth when a high speed is set. • This function will...
Page 81 - Fader; Guideline
English _ 75 Fader You can give your recording a professional look by using special effects such as fade in at the beginning of a sequence or fade out at the end of a sequence. Settings Contents On-screen display Off Disables the function. None On Fader is executed. Fade in Press the Recording start...
Page 84 - SETTING MENU ITEMS
78 _ English PLAYBACK MENU ITEM Card Manage (VP-DX103( i )/DX104/DX105( i ) only) • You can manage a memory card for recording in the digital camera mode. Settings Contents On-screen display Format Delete all files and options on the memory card including protected files. None Card Info Shows the ca...
Page 85 - LCD Brightness
English _ 79 Date/Time You can set the date and time to display on the LCD screen. • Before you use the “ Date/Time ” function, you must set the date and time. page 29 Settings Contents On-screen display Off Current date and time information is not displayed. None Date Displays the current date. 0...
Page 87 - TV Display
English _ 81 Remote (VP-DX102/DX104/DX105( i ) only) This function allows you to enable or disable the remote control for use with the DVD camcorder. Settings Contents On-screen display Off Disables the function. - The ( ) indicator appears when you use the remote control. None On You can control th...
Page 88 - Česky; ไทย; Demo
82 _ English Default Set You can initialise the DVD camcorder settings to the factory defaults. Initialising the DVD camcorder settings to the factory defaults does not affect recorded images. Menu Colour You can select the desired menu colour to display the menu. “ Midnight Blue ” “ Lovely Pink ”...
Page 89 - printing photo images; DPOF PRINT SETTING
English _ 83 printing photo images (VP-DX103( i )/DX104/DX105( i ) only) You can print photo images by inserting the DPOF setting card to the DPOF-compatible printer or connecting the DVD camcorder to the PictBridge printer. DPOF PRINT SETTING • This function works only in the Play mode. page 21 •...
Page 90 - DIRECT PRINTING WITH A PICTBRIDGE
84 _ English printing photo images (VP-DX103( i )/DX104/DX105( i ) only) DIRECT PRINTING WITH A PICTBRIDGE • If your printer is compatible with PictBridge, photo images can be printed easily by connecting the camcorder to the printer directly with the USB cable. DPOF cannot be set while PictBridge i...
Page 92 - connecting to AV devices; CONNECTING TO A TV
86 _ English connecting to AV devices You can view the recorded movie and photo images(VP-DX103( i )/DX104/DX105( i ) only) on a large screen by connecting the DVD camcorder to a TV. CONNECTING TO A TV • To play back your recordings, the television must be PAL compatible. page 103 • We recommend t...
Page 94 - DUBBING IMAGES ON A VCR OR DVD/HDD RECORDER
88 _ English DUBBING IMAGES ON A VCR OR DVD/HDD RECORDER You can dub images played back on this DVD camcorder onto other video devices, such as VCRs or DVD/HDD recorders. Use the provided AV cable to connect the DVD camcorder to another video device as shown in the following figure: 1. Slide the POW...
Page 95 - USING THE VOICE PLUS
English _ 89 USING THE VOICE PLUS • The Voice Plus function works only in the DVD camcorder play mode. page 38 • This function enables you to narrate over a pre-recorded disc via the DVD camcorder’s microphone. • When you want to copy a DVD onto other AV devices (DVD recorder, VCR), you can dub yo...
Page 96 - RECORDING (COPYING) A TV PROGRAMME OR EXTERNAL CONTENTS ONTO A DISC
90 _ English RECORDING (COPYING) A TV PROGRAMME OR EXTERNAL CONTENTS ONTO A DISC (VP-DX100i/DX103i/DX105i ONLY) • The Recording (Copying) function works only in the DVD camcorder play mode. page 21 • Connect your DVD camcorder to a VCR or a TV using the AV jack to record a TV programme or copy a v...
Page 97 - connecting to a PC; SYSTEM REQUIREMENTS
English _ 91 connecting to a PC ( VP-DX103( i ) /DX104/DX105( i ) only ) This chapter explains how to connect the camcorder to a PC using the USB cable for various functions. ✪ When connecting a USB cable to a PC, refer to the software installation instructions and PC specifications below. SYSTEM RE...
Page 98 - INSTALLING DV Media PRO
92 _ English INSTALLING DV Media PRO When you install the DV Media PRO software on your Windows computer, you can enjoy the following operations by connecting your DVD camcorder to your computer via a USB cable. - View Movie Recordings and Photos on PC: DV Driver, DirectX9.0, Video Codec - PC cam/US...
Page 100 - CONNECTING THE USB CABLE; Disconnecting the USB cable
94 _ English CONNECTING THE USB CABLE To copy the movie files and photo files to your PC, connect your DVD camcorder to the PC with a USB cable. 1. Set the “ USB Connect ” to “ Mass Storage. ” page 81 2. Connect the DVD camcorder to the PC with a USB cable. • Do not apply excessive force when inse...
Page 101 - VIEWING THE CONTENTS OF STORAGE MEDIA
English _ 95 VIEWING THE CONTENTS OF STORAGE MEDIA • You can transfer or copy the files saved on the memory card into PC using USB cable. 1. Slide the POWER switch downwards to turn on the power, then set the Storage mode switch to CARD . pages 21, 30 • Removable disk supports only the memory card...
Page 102 - Structure of folders and files on the storage media; Image format
96 _ English connecting to a PC (VP-DX103( i ) /DX104/DX105( i ) only) Structure of folders and files on the storage media • The folder and file structure for the memory card is as follows: • Do not arbitrarily change or remove the folder or file name. It may not be playable. • The file naming follo...
Page 103 - TRANSFERRING FILES FROM THE DVD CAMCORDER TO YOUR PC
English _ 97 TRANSFERRING FILES FROM THE DVD CAMCORDER TO YOUR PC You can copy the movie and photo images to your PC and play them back. 1. Execute the procedure in “Viewing the contents of storage media.” pages 95~96 • The folders in the storage media appear. 2. Create a new folder, enter the fol...
Page 104 - USING THE PC CAM FUNCTION
98 _ English USING THE PC CAM FUNCTION • This function works only in the DVD camcorder record mode. page 21 • To use the PC Cam function, the DV Driver, Video Codec and DirectX 9.0 programmes must be installed in the PC. • You can use this DVD camcorder as a PC camera. • When you connect to a Web ...
Page 105 - maintenance & additional information
English _ 99 MAINTENANCE Your DVD camcorder is a product of superior design and craftsmanship and should be treated with care. The suggestions below will help you fulfil any guarantee obligations and allow you to enjoy this product for many years. • For safekeeping of the DVD camcorder, turn off the...
Page 106 - Cleaning and handling the Disc
100 _ English Cleaning and handling the Disc • Take care not to touch the recording side (the rainbow- coloured side) of the disc with your fingers. Discs contaminated by fingerprints or foreign substances may not play properly. • Use a soft cloth to clean the disc. • Clean lightly from the centre o...
Page 108 - Disc-type description
102 _ English Disc-type description Disc Type DVD- R ( 3 1/2˝ ) DVD+R DL (3 1/2˝ ) DVD-RW (3 1/2˝ ) DVD+RW (3 1/2 “) Mode – – VR (Video Recording) Video – Capacity 1.4G 2.6G 1.4G 1.4G 1.4G Formatting a new disc page 31 Auto Auto Recording pages 33~37 Deleting page 40 X X ...
Page 109 - USING YOUR DVD CAMCORDER ABROAD
English _ 103 Discs must be finalised before it can be played on standard DVD players/recorders. Refer to page 8 for finalised disc compatibility. You can play back DVD+RW discs on DVD players/recorders without finalising them. When formatting a recorded disc, the data recorded on the disc is ...
Page 110 - TROUBLESHOOTING; Warning indicators and messages; troubleshooting
104 _ English TROUBLESHOOTING Before contacting a Samsung authorised service centre, perform the following simple checks. They may save you the time and expense of an unnecessary call. Warning indicators and messages Overall Message Icon Informs that... Action Low Battery The battery pack is almost ...
Page 113 - Symptoms and solutions
English _ 107 ✪ If you encounter any problem using your camcorder, check the following before requesting service. If these instructions do not solve your problem, contact your nearest Samsung authorised service centre. Symptoms and solutions Power Symptom Explanation/Solution The power turns off aut...
Page 118 - Menu
112 _ English troubleshooting Overall operations Symptom Explanation/Solution The date and time are incorrect. • Has the camcorder been left unused for a long period of time? The backup memory battery(button type battery) may be discharged. Replace with a new battery. page 14 Menu Symptom Explanat...
Page 119 - specifications
English _ 113 specifications MODEL NAME: VP-DX100( i )/DX100H/DX102/DX103( i )/DX104/DX105( i ) System Video signal PAL Picture compression format MPEG-2 (Disc), MPEG-4 (Card) Image device CCD (Charge-coupled device) 800K pixels Lens F1.6 34x (Optical), 1200x (Digital) Electronic zoom lens Focal len...
Page 124 - contact SAMSUNG world wide
If you have any questions or comments relating to Samsung products, please contact the SAMSUNG customer care centre. contact SAMSUNG world wide Region Country Customer Care Centre Web Site North America CANADA 1-800-SAMSUNG (726-7864) www.samsung.com/ca MEXICO 01-800-SAMSUNG (726-7864) www.samsung.c...


 Samsung HMX-F900
Manual
Samsung HMX-F900
Manual
 Samsung VP-M110
Manual
Samsung VP-M110
Manual
 Samsung HMX-H105BP
Manual
Samsung HMX-H105BP
Manual
 Samsung VP-L870
Manual
Samsung VP-L870
Manual
 Samsung VP-D355(i)
Manual
Samsung VP-D355(i)
Manual
 Samsung VP-W80
Manual
Samsung VP-W80
Manual
 Samsung HMX-H400BP, HMX-H405BP, HMX-H430BP, HMX-H440BP
Manual
Samsung HMX-H400BP, HMX-H405BP, HMX-H430BP, HMX-H440BP
Manual
 Samsung HMX-W300(BP,RP,YP), HMX-W350(BP,RP,YP)
Manual
Samsung HMX-W300(BP,RP,YP), HMX-W350(BP,RP,YP)
Manual