Samsung ME179KFETSR - Manuals
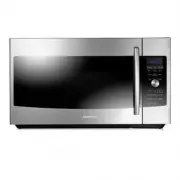
Manual Samsung ME179KFETSR


Summary
2_ safety information safety information Congratulations on your new Samsung microwave oven. This manual contains important information on the installation, use and care of your appliance. Please take time to read this manual to take full advantage of your microwave oven’s many benefits and features...
safety information _3 SAVE THESE INSTRUCTIONS IMPORTANT SAFETY SYMBOLS AND PRECAUTIONS What the icons and signs in this user manual mean: WARNING Hazards or unsafe practices that may result in severe personal injury or death. CAUTION Hazards or unsafe practices that may result in minor personal inju...
safety information _5 GROUNDING INSTRUCTIONS This appliance must be grounded. In the event of an electrical short circuit, grounding reduces the risk of electric shock by providing an escape wire for the electrical current. This appliance is equipped with a cord that includes a grounding wire and a ...
Samsung Microwaves Manuals
-
 Samsung MC455THRCBB
User Manual
Samsung MC455THRCBB
User Manual
-
 Samsung ME11A7510DS/AA
User Manual
Samsung ME11A7510DS/AA
User Manual
-
 Samsung ME11A7710DG/AA
User Manual
Samsung ME11A7710DG/AA
User Manual
-
Samsung ME11A7710DS/AA
User Manual
-
 Samsung ME16A4021AS/AA
User Manual
Samsung ME16A4021AS/AA
User Manual
-
 Samsung ME17R7021ES/AA
User Manual
Samsung ME17R7021ES/AA
User Manual
-
 Samsung ME21DB630012AA
User Manual
Samsung ME21DB630012AA
User Manual
-
 Samsung ME21DB650012AA
User Manual
Samsung ME21DB650012AA
User Manual
-
 Samsung ME21DB670012AA
User Manual
Samsung ME21DB670012AA
User Manual
-
Samsung ME21DG6300MTAA
User Manual
-
Samsung ME21DG6500MTAA
User Manual
-
Samsung ME21DG6500SRAA
User Manual
-
Samsung ME21DG6700SRAA
User Manual
-
 Samsung ME6104ST1
User Manual
Samsung ME6104ST1
User Manual
-
 Samsung ME6144ST
User Manual
Samsung ME6144ST
User Manual
-
 Samsung ME6144W
User Manual
Samsung ME6144W
User Manual
-
 Samsung MS23J5133AK
User Manual
Samsung MS23J5133AK
User Manual
-
 Samsung MS40J5133BG
User Manual
Samsung MS40J5133BG
User Manual
-
 Samsung MS40J5133BT
User Manual
Samsung MS40J5133BT
User Manual
-
 Samsung CE107M-4S
User Manual
Samsung CE107M-4S
User Manual