Samsung FE-R300SB - Manuals
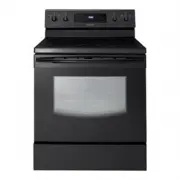
User Manual Samsung FE-R300SB


Summary
1 _ features of your new range features of your new range Enhanced convenience. Better cooking. Easy maintenance. Your new electric range has been designed to bring you these benefits and more. • Steam Quick cleaning Thanks to Steam Quick™, Samsung’s unique technology for light-duty cleaning jobs, k...
Important safety instructions _ 2 CAUTION Hazards or unsafe practices that may result in minor personal injury or property damage. CAUTION To reduce the risk of fire, explosion, electric shock, or personal injury when using your oven, follow these basic safety precautions. Do NOT attempt. Do NOT dis...
3 _ features of your new range Do not step, lean, or sit on the doors of the range. You can cause the range to tip, resulting in burns or serious injuries.Confirm that the Anti-Tip device is installed properly. Then, to verify that the Anti-Tip device is engaged, grasp the top rear edge of the range...
Manual Samsung FE-R300SB


Summary
features of your new range Enhanced convenience. Better cooking. Easy maintenance. Your new electric range has been designed to bring you these benefits and more. Steam Quick cleaning • Thanks to Steam Quick™, Samsung’s unique technology for light-duty cleaning jobs, keeping your oven Spic-and-Span ...
Important safety instructions _ 3 important safety instructions Read and follow all instructions before using your oven to prevent the risk of fire, electric shock, personal injury, or damage when using the range. This guide does not cover all possible conditions that may occur. Always contact your ...
4 _ Important safety instructions Anti-tiP deVice WArninG -To reduce the risk of tipping the range, the range must be secured by a properly installed Anti-Tip device. Refer to the installation manual for instructions. WARNING ALL RANGES CAN TIP AND CAUSE INJURIES TO PERSONS INSTALL THE ANTI-TIP DEVI...
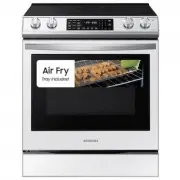
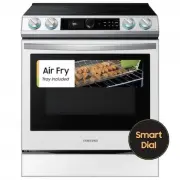
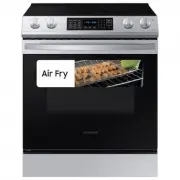
Samsung Ranges Manuals
-
 Samsung NE63A6111SS/AA
User Manual
Samsung NE63A6111SS/AA
User Manual
-
 Samsung NE63A6311SS/AA
User Manual
Samsung NE63A6311SS/AA
User Manual
-
 Samsung NE63A6511SG/AA
User Manual
Samsung NE63A6511SG/AA
User Manual
-
Samsung NE63A6511SS/AA
User Manual
-
 Samsung NE63A6711SG/AA
User Manual
Samsung NE63A6711SG/AA
User Manual
-
 Samsung NE63A6711SS/AA
User Manual
Samsung NE63A6711SS/AA
User Manual
-
 Samsung NE63A6751SG/AA
User Manual
Samsung NE63A6751SG/AA
User Manual
-
Samsung NE63A6751SS/AA
User Manual
-
 Samsung NE63B8211SS
User Manual
Samsung NE63B8211SS
User Manual
-
 Samsung NE63B8211SS/AA
User Manual
Samsung NE63B8211SS/AA
User Manual
-
 Samsung NE63B8611SG
User Manual
Samsung NE63B8611SG
User Manual
-
 Samsung NE63B8611SG/AA
User Manual
Samsung NE63B8611SG/AA
User Manual
-
 Samsung NE63B8611SS
User Manual
Samsung NE63B8611SS
User Manual
-
Samsung NE63B8611SS/AA
User Manual
-
 Samsung NE63BB851112
User Manual
Samsung NE63BB851112
User Manual
-
 Samsung NE63BB861112
User Manual
Samsung NE63BB861112
User Manual
-
 Samsung NE63BB861112AA
User Manual
Samsung NE63BB861112AA
User Manual
-
 Samsung NE63BB871112
User Manual
Samsung NE63BB871112
User Manual
-
 Samsung NE63BG8315SS
User Manual
Samsung NE63BG8315SS
User Manual
-
 Samsung NE63CB831512
User Manual
Samsung NE63CB831512
User Manual