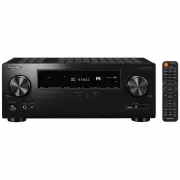
Page 3 - Front Panel
> Before Start > Part Names > Install > Initial Setup > Playback Advanced Setup | Firmware Update | Others 3 E N Part Names Front Panel 1. Í STANDBY/ON button: Turns the unit on or into standby mode. 2. DIRECT button: This switches the unit to the "Direct" mode ( Ä P27) which ...
Page 4 - Rear Panel
4 > Before Start > Part Names > Install > Initial Setup > Playback Advanced Setup | Firmware Update | Others E N Rear Panel 1. ANTENNA DAB / FM jack: Connect the supplied antenna.2. Wireless antenna: Raise for Wi-Fi connection or when using a BLUETOOTH enabled device. The diagram show...
Page 5 - Remote Controller
> Before Start > Part Names > Install > Initial Setup > Playback Advanced Setup | Firmware Update | Others 5 E N Remote Controller 1. Í button: Turns the unit on or into standby mode. 2. Input selector buttons: Switches the input to be played.3. (AV ADJUST) button: You can perform com...
Page 6 - Display
6 > Before Start > Part Names > Install > Initial Setup > Playback Advanced Setup | Firmware Update | Others E N Display 1. Lights in the following conditions. HDMI: HDMI signals are input and selected.ARC: Audio signals from the ARC compatible TV are input and selected.USB: When "...
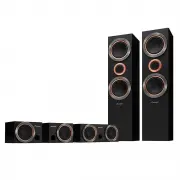
Page 7 - Connect the Speakers; Setup
7 > Before Start > Part Names > Install > Initial Setup > Playback Advanced Setup | Firmware Update | Others E N Install 1. Connect the Speakers a Speaker cable, b Subwoofer cable 3 2 1 1/2˝ (12 mm) 1 3 4 2 a b Refer to the illustration to connect the speaker system.Twist the wires of...
Page 8 - To ARC TV
8 > Before Start > Part Names > Install > Initial Setup > Playback Advanced Setup | Firmware Update | Others E N 2. Connect the TV a HDMI cable, b Digital optical cable a b DIGITAL OPTICAL OUT 1 To ARC TV For a TV that supports the ARC (Audio Return Channel) ( Ä P55) feature, use an H...
Page 9 - Connect the HDMI AV Components; GAME
9 > Before Start > Part Names > Install > Initial Setup > Playback Advanced Setup | Firmware Update | Others E N 3. Connect the HDMI AV Components a HDMI cable e.g. BD a HDMI OUT 1 a BD/DVD GAME Cable/Satellite set-top box Streaming media player This is an example of connection with a...
Page 10 - Connect the Audio Components; CD; Connecting a CD player
10 > Before Start > Part Names > Install > Initial Setup > Playback Advanced Setup | Firmware Update | Others E N 4. Connect the Audio Components a Digital coaxial cable, b Analog audio cable CD a b Turntable Connecting a CD player Use a digital coaxial cable to connect a CD player to...
Page 11 - Connect Other Cables; Antenna Hookup; Power Cord Hookup
11 > Before Start > Part Names > Install > Initial Setup > Playback Advanced Setup | Firmware Update | Others E N 5. Connect Other Cables a DAB/FM antenna, b Ethernet cable, c Power cord b c c a 1 3 2 Antenna Hookup Connect the supplied DAB/FM antenna to the ANTENNA DAB/FM terminal. M...
Page 12 - Initial Setup with Auto Start-up Wizard; Initial Setup starts automatically
12 > Before Start > Part Names > Install > Initial Setup > Playback Advanced Setup | Firmware Update | Others E N Initial Setup Initial Setup with Auto Start-up Wizard 1 3 4 2 TV's remote controller Initial Setup starts automatically 1. Switch the input on the TV to that assigned to t...
Page 13 - Network Connection
13 > Before Start > Part Names > Install > Initial Setup > Playback Advanced Setup | Firmware Update | Others E N 1. Full Auto MCACC Place the supplied speaker setup microphone in the listening position, measure the test tones emitted by the speakers, then the unit automatically sets ...
Page 14 - Audio Return Channel
14 > Before Start > Part Names > Install > Initial Setup > Playback Advanced Setup | Firmware Update | Others E N button on the remote controller and press ENTER, then follow the on-screen instructions. Keyboard input: To switch between upper and lower case, select "A/a" on th...
Page 15 - AV Component Playback; Basic operations
15 > Before Start > Part Names > Install > Initial Setup > Playback Advanced Setup | Firmware Update | Others E N Playback AV Component Playback Basic operations Play an AV component or TV connected to this unit with an HDMI cable or other cable.1. Switch the input on the TV to that a...
Page 16 - Internet Radio; Regarding; TuneIn Radio
16 > Before Start > Part Names > Install > Initial Setup > Playback Advanced Setup | Firmware Update | Others E N Internet Radio Basic operations When this unit is connected to a network, you can listen to TuneIn or other preregistered Internet radio services.Depending on the internet...
Page 17 - Spotify; Pioneer SX-S30DAB XXX
17 > Before Start > Part Names > Install > Initial Setup > Playback Advanced Setup | Firmware Update | Others E N Spotify Wi-Fi Pioneer SX-S30DAB XXX b d e c a 1 2 3 4 Basic operations Spotify Connect play is possible by connecting this unit to the same network as a smart phone or tab...
Page 18 - Music Server; Configuring Windows Media; Windows Media; Playing
18 > Before Start > Part Names > Install > Initial Setup > Playback Advanced Setup | Firmware Update | Others E N Music Server It is possible to stream music files stored on PCs or NAS devices connected to the same network as this unit. The network servers this unit is compatible with...
Page 19 - Controlling Remote Playback from a PC
> Before Start > Part Names > Install > Initial Setup > Playback Advanced Setup | Firmware Update | Others 19 E N 0 For music files on a server, there can be up to 20,000 tracks per folder, and folders may be nested up to 16 levels deep. The following remote controller operations are ...
Page 20 - USB Storage Device; Basic play
20 > Before Start > Part Names > Install > Initial Setup > Playback Advanced Setup | Firmware Update | Others E N USB Storage Device e g h f a c b d 1 2 Basic play Play music files on a USB storage device.1. Switch the input on the TV to that assigned to the unit.2. Plug your USB stor...
Page 21 - USB Storage Device Requirements
> Before Start > Part Names > Install > Initial Setup > Playback Advanced Setup | Firmware Update | Others 21 E N USB Storage Device Requirements 0 Note that operation is not guaranteed with all USB storage devices. 0 This unit can use USB storage devices that comply with the USB mass...
Page 22 - AirPlay; iPhone
22 > Before Start > Part Names > Install > Initial Setup > Playback Advanced Setup | Firmware Update | Others E N AirPlay ® Pioneer SX-S30DAB XXX iPhone Wi-Fi 1 3 4 5 2 Basic play You can wirelessly enjoy the music files on an iPhone ® , iPod touch ® , or iPad ® connected to the same ...
Page 23 - BLUETOOTH; Pairing
23 > Before Start > Part Names > Install > Initial Setup > Playback Advanced Setup | Firmware Update | Others E N BLUETOOTH ® Playback Pairing Playing Back Pairing 1. When you press the button on the remote controller, "Now Pairing..." is displayed on this unit's display, and ...
Page 24 - Listening to the FM/DAB Radio; Listening to FM Radio; Tuning Automatically; Tuning Manually; Using RDS
24 > Before Start > Part Names > Install > Initial Setup > Playback Advanced Setup | Firmware Update | Others E N Listening to the FM/DAB Radio Listening to FM Radio Tuning Automatically 1. Press TUNER on the remote controller repeatedly to select "FM" on the display. 2. Press...
Page 25 - Listening to DAB Digital Radio
> Before Start > Part Names > Install > Initial Setup > Playback Advanced Setup | Firmware Update | Others 25 E N Easy M (Middle of the road music)Light M (Light classics)Classics (Serious classics)Other M (Other music)WeatherFinanceChildren (Children's programmes)Social (Social affai...
Page 26 - Presetting a Radio Station
26 > Before Start > Part Names > Install > Initial Setup > Playback Advanced Setup | Firmware Update | Others E N Presetting a Radio Station It allows you to register up to 40 of your favorite FM/DAB stations. Registering radio stations in advance allows you to tune into your radio st...
Page 27 - Listening Modes; Selecting Listening Modes
27 > Before Start > Part Names > Install > Initial Setup > Playback Advanced Setup | Firmware Update | Others E N Listening Modes Selecting Listening Modes You can change the listening mode during play by pressing repeatedly "AUTO/DIRECT" or "SURR".The listening mode l...
Page 29 - Tone; Level
29 > Before Start > Part Names > Install > Initial Setup > Playback Advanced Setup | Firmware Update | Others E N AV Adjust By pressing the button on the remote controller during play, you can adjust frequently used settings, such as the sound quality, using on-screen menus. Note that...
Page 31 - System Setup
31 > Before Start > Part Names > Install > Initial Setup > Playback Advanced Setup | Firmware Update | Others E N Advanced Setup System Setup The unit allows you to configure advanced settings to provide you with an even better experience.1. Switch the input on the TV to that assigned...
Page 32 - HDMI Input
32 > Before Start > Part Names > Install > Initial Setup > Playback Advanced Setup | Firmware Update | Others E N ∫ HDMI Input You can change input assignment between the input selectors and HDMI IN jacks. ∫ Digital Audio Input You can change input assignment between the input selecto...
Page 33 - Speaker; Configuration
33 > Before Start > Part Names > Install > Initial Setup > Playback Advanced Setup | Firmware Update | Others E N Speaker You can make changes to the connection environment of the speakers and change the volume level. Settings are automatically configured if you use Full Auto MCACC. T...
Page 34 - Distance
34 > Before Start > Part Names > Install > Initial Setup > Playback Advanced Setup | Firmware Update | Others E N ∫ Distance Set the distance from each speaker to the listening position. 0 Default values vary depending on the regions. 0 Distance units can be switched by pressing MODE ...
Page 35 - Audio Adjust; Dolby; Source; Input Volume Absorber
35 > Before Start > Part Names > Install > Initial Setup > Playback Advanced Setup | Firmware Update | Others E N Audio Adjust ∫ Dual Mono/Mono ∫ Dolby ∫ Volume Source ∫ Input Volume Absorber Adjust the volume level difference between the devices connected to the unit. Select the inpu...
Page 37 - Hardware; HDMI
37 > Before Start > Part Names > Install > Initial Setup > Playback Advanced Setup | Firmware Update | Others E N Hardware ∫ HDMI HDMI CEC Setting to "On" enables the input selection link and other link functions with HDMI connected CEC compliant device."On": Use this ...
Page 38 - Power Management
38 > Before Start > Part Names > Install > Initial Setup > Playback Advanced Setup | Firmware Update | Others E N ∫ Power Management Audio TV Out You can enjoy audio through the speakers of the TV while this unit is on."On": Use this function"Off (Default Value)": Do n...
Page 39 - Miscellaneous; Tuner
39 > Before Start > Part Names > Install > Initial Setup > Playback Advanced Setup | Firmware Update | Others E N 0 Wait for a while if "Network Standby" and "Bluetooth Wakeup" cannot be selected. It will appear when the network feature is started. Miscellaneous ∫ Tune...
Page 40 - Lock
40 > Before Start > Part Names > Install > Initial Setup > Playback Advanced Setup | Firmware Update | Others E N ∫ Initial Setup You can make the Initial Setup from the System Setup menu. 0 Wait for a while if "Initial Setup" cannot be selected. It will appear when the networ...
Page 41 - MCACC; Full Auto MCACC; EQ Adjust
41 > Before Start > Part Names > Install > Initial Setup > Playback Advanced Setup | Firmware Update | Others E N MCACC Setup the speakers automatically or make desired changes to the equalizer. You can also check the values set currently for each speaker setting.1. Switch the input o...
Page 42 - MCACC Data Check; Speaker Setting
42 > Before Start > Part Names > Install > Initial Setup > Playback Advanced Setup | Firmware Update | Others E N in "AV Adjust" - "MCACC" - "Manual EQ Select" ( Ä P29). 0 The result may not be as expected depending on the input source and listening mode settin...
Page 43 - Network
43 > Before Start > Part Names > Install > Initial Setup > Playback Advanced Setup | Firmware Update | Others E N Network/Bluetooth Make settings related to network connections and BLUETOOTH.1. Switch the input on the TV to that assigned to the unit.2. Press on the remote controller t...
Page 45 - Bluetooth
45 > Before Start > Part Names > Install > Initial Setup > Playback Advanced Setup | Firmware Update | Others E N Bluetooth 0 Wait for a while if "Bluetooth" cannot be selected. It will appear when the BLUETOOTH function is started up. Bluetooth Select whether or not to use th...
Page 46 - Firmware Update; Update function of this unit
46 > Before Start > Part Names > Install > Initial Setup > Playback Advanced Setup | Firmware Update | Others E N Firmware Update Firmware Update Update function of this unit This unit has functionality to update the firmware (the system software) over a network or by the USB port. Th...
Page 47 - Updating via USB
47 > Before Start > Part Names > Install > Initial Setup > Playback Advanced Setup | Firmware Update | Others E N 0 If "Firmware Update" is grayed out and cannot be selected, wait for a while until it starts up. 0 You will not be able to select "Update via NET" if ther...
Page 49 - Troubleshooting; Before starting the procedure; Power; Audio
49 > Before Start > Part Names > Install > Initial Setup > Playback Advanced Setup | Firmware Update | Others E N Others Troubleshooting Before starting the procedure Problems may be solved by simply turning the power on/off or disconnecting/connecting the power cord, which is easier ...
Page 51 - Linked operation; BLUETOOTH function; Network function
51 > Before Start > Part Names > Install > Initial Setup > Playback Advanced Setup | Firmware Update | Others E N ∫ Linked operation There is no linked operation with CEC compliant devices, such as a TV 0 In the Home of the unit, set "System Setup" - "Hardware" - "...
Page 52 - USB storage device; Wireless LAN Network
52 > Before Start > Part Names > Install > Initial Setup > Playback Advanced Setup | Firmware Update | Others E N Playback stops while listening to music files on the network server 0 Make sure the network server is compatible with this unit. 0 When the PC is serving as the network se...
Page 54 - General Specifications
54 > Before Start > Part Names > Install > Initial Setup > Playback Advanced Setup | Firmware Update | Others E N General Specifications Amplifier (Audio) section Rated Output Power (IEC) 2 ch k 85 W at 4 ohms, 1 kHz, 1 ch driven of 1% THD Input Sensitivity and Impedance (1 kHz 85 W/4...
Page 55 - About HDMI; Compatible Functions; Supported Audio Formats
55 > Before Start > Part Names > Install > Initial Setup > Playback Advanced Setup | Firmware Update | Others E N About HDMI Compatible Functions HDMI (High Definition Multimedia Interface) is a digital interface standard for connecting TVs, projectors, Blu-ray Disc/DVD players, set-t...
Page 56 - License and Trademark Information; BLACKFIRE
56 > Before Start > Part Names > Install > Initial Setup > Playback Advanced Setup | Firmware Update | Others E N License and Trademark Information Manufactured under license from Dolby Laboratories. Dolby, Dolby Audio, Pro Logic, and the double-D symbol are trademarks of Dolby Labora...


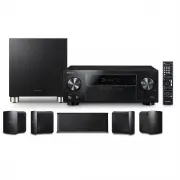 Pioneer HTP074
User Manual
Pioneer HTP074
User Manual
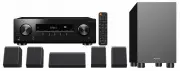 Pioneer HTP076
User Manual
Pioneer HTP076
User Manual
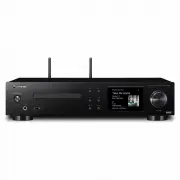 Pioneer NC50DAB
User Manual
Pioneer NC50DAB
User Manual
 Pioneer SRS55TB
User Manual
Pioneer SRS55TB
User Manual
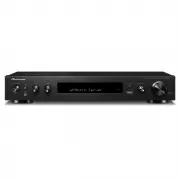
 Pioneer SX10AE
User Manual
Pioneer SX10AE
User Manual
 Pioneer VSX330
User Manual
Pioneer VSX330
User Manual
 Pioneer VSX524
User Manual
Pioneer VSX524
User Manual
 Pioneer VSX531
User Manual
Pioneer VSX531
User Manual
 Pioneer VSX534
User Manual
Pioneer VSX534
User Manual
 Pioneer VSX824
User Manual
Pioneer VSX824
User Manual
 Pioneer VSX-830
User Manual
Pioneer VSX-830
User Manual
 Pioneer VSX834
User Manual
Pioneer VSX834
User Manual
 Pioneer VSX934
User Manual
Pioneer VSX934
User Manual