Panasonic TH-L32XV6A - Manuals
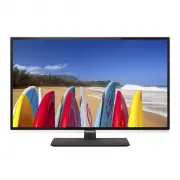
User Manual Panasonic TH-L32XV6A


Summary
2 Important Notice Panasonic does not guarantee operation and performance of peripheral devices made by other manufacturers; and we disclaim any liability or damage arising from operation and/or performance from usage of such other maker’s peripheral devices. The recording and playback of content on...
3 Important information If the TV is not positioned in a sufficiently stable location, it can be potentially hazardous due to falling. Many injuries, particularly to children, can be avoided by taking simple precautions such as: • Using cabinets or stands recommended by the manufacturer of the TV. •...
5 Accessories Remote Control (p. 11) ● N2QAYB000817 Batteries (2) ● R6 (p. 11) Pedestal (see below) Mains lead (p. 7) Operating Instructions with Warranty statement Fall-prevention parts (p. 6) ● Accessories may not be placed all together. Take care not to throw them away unintentionally. ● For the ...
Panasonic TVs Manuals
-
 Panasonic 32J330E
User Manual
Panasonic 32J330E
User Manual
-
 Panasonic 55LZ1000E
User Manual
Panasonic 55LZ1000E
User Manual
-
 Panasonic TH-32D400A
User Manual
Panasonic TH-32D400A
User Manual
-
 Panasonic TH-32E400A
User Manual
Panasonic TH-32E400A
User Manual
-
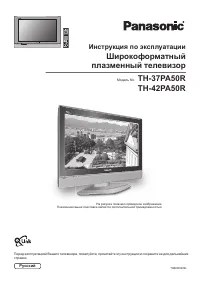 Panasonic TH-37PA50R_TH-42PA50R
User Manual
Panasonic TH-37PA50R_TH-42PA50R
User Manual
-
 Panasonic TH-40C400A
User Manual
Panasonic TH-40C400A
User Manual
-
 Panasonic TH-40D400A
User Manual
Panasonic TH-40D400A
User Manual
-
 Panasonic TH-40DS610U
User Manual
Panasonic TH-40DS610U
User Manual
-
 Panasonic TH-40E400A
User Manual
Panasonic TH-40E400A
User Manual
-
 Panasonic TH-42PWD4
Manual
Panasonic TH-42PWD4
Manual
-
 Panasonic TH-43EX600A
User Manual
Panasonic TH-43EX600A
User Manual
-
 Panasonic TH-43GX600A
User Manual
Panasonic TH-43GX600A
User Manual
-
 Panasonic TH-49D400A
User Manual
Panasonic TH-49D400A
User Manual
-
 Panasonic TH-49DX600U
User Manual
Panasonic TH-49DX600U
User Manual
-
 Panasonic TH-49EX600A
User Manual
Panasonic TH-49EX600A
User Manual
-
 Panasonic TH-49GX600A
User Manual
Panasonic TH-49GX600A
User Manual
-
 Panasonic TH-50DS610U
User Manual
Panasonic TH-50DS610U
User Manual
-
 Panasonic TH-50DX700A
User Manual
Panasonic TH-50DX700A
User Manual
-
 Panasonic TH-55CS610A
User Manual
Panasonic TH-55CS610A
User Manual
-
 Panasonic TH-55CS650A
User Manual
Panasonic TH-55CS650A
User Manual