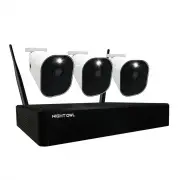
Page 2 - ii; to access Night Owl’s YouTube page.; Camera Compatibility; eras to access all features.; System Requirements; Please be sure that your PC/MAC; MAC Operating System:; MAC OS X; iOS
ii Thank you for choosing Night Owl Security By purchasing a Night Owl product, you receive a one (1) year warranty covering manufacturing DEFECTSINMATERIALANDWORKMANSHIP)NADDITIONTOWARRANTYANDTECHNICALSUPPORTBENElTSYOU have access to our vast library of free instructional How to Videos. For all Sup...
Page 3 - iii; Table of Contents
Table of Contents iii Table of Contents FCC Warnings . . . . . . . . . . . . . iv Safety Instructions . . . . . . . . . . 1 Initial Setup . . . . . . . . . . . . . 2 Step 1. Verify Your Package Contents . . . . . 2 Step 2. Download the Night Owl Protect App and Create Your Account . . . . . . . . . ...
Page 4 - FCC Warnings; FCC; • Reorient or relocate the receiving antenna.; CAUTION; iv
FCC Warnings FCC This device complies with Part 15 of the FCC Rules. Operation is subject to the following two condi-tions: (1) this device may not cause harmful interference and (2) this device must accept any interfer-ence received, including interference that may cause undesired operation. FCC Co...
Page 5 - Safety Instructions; Inserting metal into the DVR case may cause electric shock.
Safety Instructions Use the provided power adapter. $ONOTUSETHISPRODUCTWITHAPOWERSOURCETHATAPPLIESMORETHANTHESPECIlEDVOLTAGE Never insert metal into the DVR case or its openings. Inserting metal into the DVR case may cause electric shock. Do not operate in wet or dusty areas. Avoid placing the DVR i...
Page 6 - Initial Setup; Verify Your Package Contents
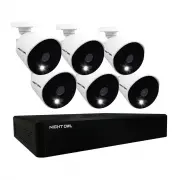
2 Initial Setup Night Owl strongly recommends that you complete the following sections in the order that they are listed to quickly and easily set up your system: • Step 1. Verify Your Package Contents • Step 2. Download the Night Owl Protect App and Create Your Account • Step 3. Connect Your System...
Page 7 - DVR Component Description; Connect your BNC wired cameras to one of these ports.; HDMI; : Connect your TV or monitor to this HDMI port using an HDMI; USB Ports; : Connect your DVR to the Internet using an Ethernet cable.; Power Input; : Connect the DVR power adapter to this port to power the DVR.
FRONT VIEW REAR VIEW 1 2 3 4 5 DVR Component Description 1. Video In: Connect your BNC wired cameras to one of these ports. NOTE: The DVR automatically detects the camera. Before turning the DVR on, make sure the cameras are connected to the DVR and a power source. 2. HDMI (Recommended) : Connect yo...
Page 8 - Mouse Description
4 Mouse Description Live Viewing: Double-click the left button on any camera view in split-screen mode to bring it to full screen display. Double-click again to return to split-screen mode. Right-click to show the Tool Bar at the bottom of the screen. Left click on the Tool Bar or Menu to access the...
Page 9 - Night Owl; recommends that you create an account via the
5 Step 2. Download the Night Owl Protect App and Create Your Account IMPORTANT: Night Owl STRONGLY recommends that you create an account via the Night Owl Protect App. This app is the preferred method for password resets since you cannot reset your password from the DVR. You can choose not to use th...
Page 10 - Connect Your System
6 Step 3. Connect Your System 8 Connect the red female power leads of the video / power cables to the male power splitter ends. POWER SPLITTER CONNECTORS POWER CABLE CONNECTORS 1 Plug one end of the included HDMI cable into the HDMI port on the back of the DVR. HDMI 9 Connect the power splitter to t...
Page 11 - Set Up Your DVR; Disconnected from the Internet; Connected to the Internet (Strongly Recommended Method); on the Your Firmware is up to Date screen.; Continue
7 Step 4. Set Up Your DVR IMPORTANT: Night Owl STRONGLY recommends that you have the DVR connected to the Internet for initial setup. This connection allows the DVR to easily download THELATESTlRMWAREANDRUNTHROUGHTHE3ET5P7IZARDQUICKLY9OUCANDIS - connect your DVR from the Internet after your system i...
Page 12 - ETYOUR4IME:ONEANDCLICK; ELECTYOURMONITORRESOLUTIONANDTHENCLICK; ATTHE$ATA0RIVACYSCREEN
8 4. 3ETYOUR4IME:ONEANDCLICK Continue . If your recorder is connected to the Internet, Sync Time should be automatically selected and will work to keep your system’s date and time up to date automatically. 5. 3ELECTYOURMONITORRESOLUTIONANDTHENCLICK Continue . 6. #LICK Agree & Continue ATTHE$ATA0...
Page 13 - and login using your Username and Password.; encouraged that you do that now
9 7. )FYOUHAVEALREADYCREATEDANACCOUNTUSINGTHE.IGHT/WL0ROTECT!PPCLICK Already have an account and login using your Username and Password. If you have not set up an account, it is STRONGLY encouraged that you do that now following Step 2 – Download the Night Owl Protect App and Create Your Account abo...
Page 14 - Format a USB Flash Drive or External Hard Drive
10 9. 6ERIFYTHATYOUCANSEEYOURCAMERASANDCLICK Continue . 10. #LICK Complete Setup 9OUR$62GOESTOTHE,IVE6IEWSCREEN0ROCEEDTO Step 5 - Install the Cameras . Disconnected from the Internet IMPORTANT: Night Owl STRONGLY RECOMMENDS connecting the DVR to the Internet for this initial setup. Please note the f...
Page 15 - ELECTYOURPREFERREDLANGUAGEANDCLICK; CLICK
11 4. 3ELECTYOURPREFERREDLANGUAGEANDCLICK Continue . 5. Select your Time Zone and then use the scroll to select the current date and time. Then CLICK Continue . 6. 3ELECTYOURMONITORRESOLUTIONANDTHENCLICK Continue . 7. #LICK Agree & Continue ATTHE$ATA0RIVACYSCREEN 8. Go to www.no-protect.com to r...
Page 16 - !LTERNATIVELYYOUCANCLICK; Connect; to connect to the
12 10. Create a local password: – The default username is “admin”. – Create a password (any alphanumeric combo with a minimum of 6 - 20 characters; MUST include a number, a lowercase letter, and an uppercase letter). – Click Continue . 11. #LICK I still do not want to connect !LTERNATIVELYYOUCANCLIC...
Page 17 - Start; to complete the camera compatibility test.; Go to
13 12. #LICK Start to complete the camera compatibility test. 13. 6ERIFYTHATYOUCANSEEYOURCAMERASANDCLICK Continue . 14. #LICK Complete Setup . 15. Go to https://support.nightowlsp.com/ and type “ VDP2 ” (see the support label on your $62TOCONlRM INTHESEARCHlELDTOACCESSTHELATESTlRMWARE&OLLOWTHEIN...
Page 18 - WORKBEFORElNALINSTALLATION; Plan Your Installation; Electrical Interference:; Do NOT place the cameras near high voltage wires or other; Install the Cameras; the surface where you plan to mount the camera.
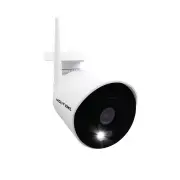
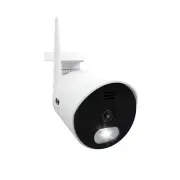
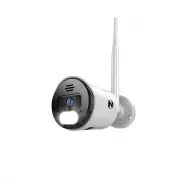
14 Step 5. Install the Cameras IMPORTANT: Before you begin this step, if you have not already done so, ensure all cameras WORKBEFORElNALINSTALLATION Plan Your Installation When planning your installation, keep the following pointers in mind: Distance: The further the camera is from the DVR or monito...
Page 19 - Add Additional Cameras; Step 3 – Connect Your System; Congratulations; You are ready to start using your system! Refer to the
15 3. )NSERTTHESCREWANCHORS,INEUPTHECAMERABASEHOLESWITHTHESCREWANCHORSINSERTTHESCREWSTHROUGHTHEBASEANDTIGHTENTOSECURETHECAMERAINPLACE%NSUREYOU feed the camera wire through the indent in the base as indicated by the green star in the following illustration. Add Additional Cameras You can add addition...
Page 20 - DVR Status Recording Icon:; Facial Detection Icon:; Live View
Live View (All Channels) Live View is the default screen you see when viewing all channels on your DVR. You can customize the Live View by selecting a Quad, Eight, or Nine channel configuration. In Quad and Nine view mode, double clicking on a channel displays the camera image in full screen; double...
Page 21 - Right-Click Menu From Live View; !CCESSTHEMAINMENUTOCONlGUREORADJUSTSETTINGS
Right-Click Menu From Live View A B C D E F G J K I H A B C D E F G H J K I Main Menu: !CCESSTHEMAINMENUTOCONlGUREORADJUSTSETTINGS Lock Screen: Manually locks or unlocks the screen. Once the screen is locked, you need to enter your username and password to gain access. Startup Wizard: Launches the S...
Page 22 - The minimum Delay Time is 5 seconds.; Light Menu
While your system may not include spotlight enabled cameras, your VDP2 DVR is compatible with our spotlight cameras. Use this menu to enable or disable the spotlight or adjust the timing for any con-nected cameras that are spotlight enabled. A B C D E F G On - All Bubble: Turns on the spotlight for ...
Page 23 - Facial Capture Menu
With Facial Capture enabled, detected faces appear on the right side of the Live View screen. 19 Facial Capture Menu
Page 24 - Event Playback; The recording MUST be exported.
Access the playback menu by selecting the Play Icon on the Right-click menu. Step 1: From the CHANNEL list, select the channel(s) you want to search for recorded events. Step 2: Use the calendar under DATE to select the date(s) that have events from the selected channel(s). Dates marked in blue have...
Page 25 - by Snapshot lists facial capture events.
G F H Video Screen: Video recordings are played here when you click Play from the Playback toolbar. If you have selected more than one camera, the Video screen appears in a Multiview format. You can view a particular camera in full screen by double-clicking on the camera’s screen. To return to the M...
Page 27 - Formatting a USB Flash Drive or External Hard Drive; WARNING; DO NOT connect the DVR’s hard disk drive to your PC or Mac.; Format for Windows OS; Press and hold the; Format; ANDCLICK; Backing Up / Exporting Videos
IMPORTANT: Before you can back up or export recorded videos stored on the DVR Hard Disk $RIVEYOUMUSTlRSTFORMATYOUR53"mASHDRIVEOR%XTERNAL(ARD$RIVE($$ to FAT32/ExFat as detailed in the Formatting a USB or External Hard Drive section below. As your DVR accumulates recordings, it eventually becomes ...
Page 28 - Format for Mac; Select; Applications > Utilities; and launch; Disk Utility; in
Format for Mac 1. )NSERTTHE53"mASHDRIVEORCONNECTTHEEXTERNAL($$INTOYOUR-AC 2. Select Applications > Utilities and launch Disk Utility . 3. 3ELECTTHE53"mASHDRIVEOREXTERNAL($$INTHESIDEBARIN$ISK5TILITYANDCLICK Erase in THE$ISK5TILITY"AR 4. #REATEANAMECLICKONTHE Format DROPDOWNMENUANDCHOOS...
Page 29 - Video Backup
1 2 To export a Recording, once you have selected a specific date, switch to Export Recording Mode by clicking the Export File icon. A list of all recordings shows in the navigation panel. You can play the video before exporting. To play the video before exporting, double click the video segment you...
Page 31 - “Start”; to begin the
A B C D E F G Recording: Recording Options: Motion Detection (MD), Manual, General, Alarm/MD, and All. Channel: The channel with recordings to export. Start Time: Date/Time to search for recordings. End Time: Date/Time to end the search for recordings. Remove: Delete the recording from the search. A...
Page 32 - Menu Screen; Adjust the camera settings for each connected camera.; Main Menu
Access the main menu by selecting the Menu Icon on the Right-click menu. Within the menu tabs, you can access settings for all aspects of your security system. Menu Screen A A B C D E F General Menu: Access Display and Network submenus and manage the settings for those categories. Cameras Menu: Adju...
Page 33 - Display; deselect the box and/or boxes next to the view you want removed.; General Menu
The general menu will allow you to access display and network settings for your DVR system. Display A B C D E F G H Slide Show: By default, checking the box for Slide Show activates all views. To remove a view, deselect the box and/or boxes next to the view you want removed. Slide Show Time: Adjust ...
Page 34 - Network; understand the changes being made to the DVR.
Find network values and optimize connectivity based on your Internet connection. In most cases the values should populate automatically once your DVR is connected to the Internet. The values in this section should only be adjusted if you are an advanced user andhave extensive experience in device ne...
Page 35 - Cameras Menu; Advanced
From this menu, you can quickly adjust your camera settings such as the resolution, FPS (Frames per Second), channel name and image settings. B A C D E F G H I J A B C D E F G H I J Channel: Select a channel to edit. Video Compression: Set the video compression format to optimize transmission bandwi...
Page 36 - Adjustments
A B C D E F G H I Channel Names: Set display options for each channel. Time Display: Time displayed on the channel view. Channel Title: Display channel name on the channel view. Record Status: Display record status on the channel view. Alarm Status: Display alarm status on the channel view. Channel:...
Page 37 - “Privacy Zone”; Click on the; “Set”; Setting Privacy Zones; follow the steps below:
5 1 6 7 2 3 4 You can adjust the covered area by clicking and dragging across the area with the mouse. To adjust the size of the area, hover the mouse pointer over the inner side of the edges of the rectangle. When the mouse’s onscreen pointer changes shapes, click and drag to adjust the size. Right...
Page 38 - Record Menu; Event Settings
A B C Channel Name: Select a channel to configure. Selection of the Type of Motion Trigger: • Motion Detection Enable: When checked, the motion detection feature is enabled on the selected channel. By default, all channels have motion detection enabled. • PIR: Toggle between ON and OFF for passive i...
Page 39 - camera range to begin recording.; Motion Detection Area:; allows you to configure areas that detect motion. The “Red; Facial Detection Area:; Clicking; allows you to configure areas that detect faces. The “Red; Notification Interval:; Event Settings Advanced
A B C D E F Sensitivity: Adjusts the level of motion detection. A lower setting requires more movement in the camera range to begin recording. Motion Detection Area: Clicking “Set” allows you to configure areas that detect motion. The “Red Boxes” denote the areas that detect motion. When finished, r...
Page 40 - “Apply”; on the menu screen to save the settings.; Do Not Disturb Schedule
1 2 3 4 Select the day you want to configure. Configure up to four-time spans for which you would like to receive push notifications. Checking the box next to the set time frame activates the push notification schedule. Continue editing by selecting different days from the drop-down menu. Click “OK,...
Page 41 - “Save”; to apply the settings and exit the menu.; Setting the Motion Detection Area
1 2 3 4 Click on a square in one corner of the area you don’t want to be detected. Click and drag the mouse over the area you want to block. Release the mouse and verify you have selected your desired area. Right click the mouse and select “Save” to apply the settings and exit the menu. )FTHEREISANA...
Page 42 - Scheduling; this is an approximation.
A B C D E F G Channel Name: Select the channel to edit recording settings. Record Length: Enter the duration of time to record when motion is detected, between 1 and 120 minutes. When using Continuous Recording, the video length will be the time scheduled. Max Pre-Record: Input the amount of time yo...
Page 43 - View Recording Times:; Shows recordings that are on your HDD.; View Type and Capacity:; Normal, restart the DVR. If the status does not return to; Normal; after restarting, you may need to; HDD; Device Menu
In the Device menu, you can see how much available space you have on your Hard Disk Drive (HDD), deselect automatic overwrite and reformat the HDD, which is how you manually delete recordings and free up space. A B C D Select: If multiple drives are installed, choose the HDD you would like to custom...
Page 44 - General; System Menu
A B C D E F G H I J System Time: Manually set the date and time of your DVR. Date Format: Choose the display format for the date. You can select Month/Day/Year, Year/Month/Day or Day/Month/Year. Date Separator: Choose the format of the date display. Time Format: Select between a 12 Hour or 24 Hour d...
Page 45 - DST
A A B C Week Day - Date: Indicate whether you would like this feature to be applied the week of or an exact date. Start Time: Select the date and time to apply the DST offset. End Time: Select the date and time to remove the DST offset. Server Address: Select the server that the DVR will use. A A B ...
Page 46 - Info
A B C D E F G H I Hardware Version: The DVR’s hardware version. Firmware Version: The DVR’s current software version. Device Name: The DVR’s name. Model: The DVR’s model number. UID: The DVR’s unique identifier. Protect Account: Allows the user to login with their Night Owl Protect credentials. Ente...
Page 47 - Log
A B C D E Event Type: Select the type of event log that you would like to Search. Each choice corresponds to an action or event that was triggered and noted within the system. For example, System Logs are recorded when the DVR time is synced with NTP (if enabled) or if the system is turned on or off...
Page 48 - Set the frequency of reboots.; Auto Delete Old Files:; which the HDD automatically deletes old recordings.; Advanced Menu; Maintain
The Load Default menu allows you to select the settings you would like to restore to default. A B C D E Reboot: Set the frequency of reboots. Auto Delete Old Files: Set whether you would like the DVR to automatically delete old files. This option is like the Overwrite option, however this allows you...
Page 49 - Events
Configure notification settings for other triggered events not related to motion detection such as disk error, disk full, and/or video loss. These events will be added to the Alarm Status window. A B C D Event Type: Choose the type of event notification that you would like to appear on the Alarm Sta...
Page 50 - “Check”; button to manually check for updated firmware versions. If; “OK”; on the pop-up window to download and install the new version.; Auto Upgrade
1 2 3 4 Upgrade from USB: Upgrade the DVR firmware from a USB flash drive. To upgrade DVR firmware, insert a USB flash drive containing the DVR upgrade file into the USB port on the back of your DVR. Then select the correct file from the “Upgrade File” drop-down menu and select “Upgrade.” Auto Upgra...
Page 51 - Facial Capture and Recognition:; or vehicles are detected.; Glossary
DDNS: Dynamic Domain Naming System. Method for automatically updating hostnames, addresses, URL’s or other information on a given name server. DHCP: Dynamic Host Configuration Protocol. A network protocol that allows a server to automatically assign a device and IP address. Facial Capture and Recogn...
Page 52 - Exclusions; Warranty
NIGHT OWL, LLC (“Night Owl”) provides the following warranty to the original retail purchaser only (the “Purchaser”) with respect to this product (the “Product”): For a period of one (1) year after the date of sale, the Product shall be free from manufacturing defects in material and workmanship. Pr...
Page 53 - Disclaimer
Disclaimer Certain uses, publication and/or distribution of video/audio recordings from security cameras and/or audio devices are prohibited or restricted by federal, state and local laws. When enabling and/or using audio recording features with your hidden security camera, be sure to comply with th...
Page 54 - Troubleshooting
Error Possible Causes Solutions System is not receiving power or is not powering up. Cable from power adapter is loose or is unplugged. 1. Confirm that all cables are connected correctly. 2. Confirm that the power adapter is securely connected to the back of the unit. Cables are connected, but syste...
Page 55 - Check the camera video cable
Error Possible Causes Solutions There is no picture on selected channels / camera picture is not being displayed. Camera cables are loose or have become disconnected. 1. Check the camera video cable and connections. 2. Disconnect and reconnect the cable at the system and at the camera. 3. Try moving...
Page 56 - User Information; General DVR Information; The UID is located on the support sticker on the top of your device.
User Information Be sure to write down all the important information below and place it in a secure location. General DVR Information Username: _______________________________________________________________________ Password: ________________________________________________________________________ M...
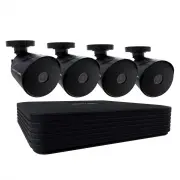


 Night Owl BTD21LSA-88-B
User Manual
Night Owl BTD21LSA-88-B
User Manual
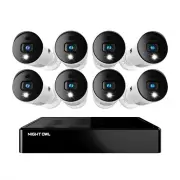
 Night Owl BTN82L-88-B
User Manual
Night Owl BTN82L-88-B
User Manual
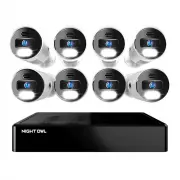
 Night Owl BTWN81L-8-B
User Manual
Night Owl BTWN81L-8-B
User Manual
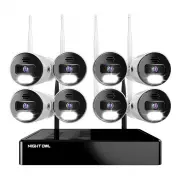
 Night Owl BWNIP2-32B1-B
User Manual
Night Owl BWNIP2-32B1-B
User Manual
 Night Owl CAM-2PK-DP2LSA
User Manual
Night Owl CAM-2PK-DP2LSA
User Manual
 Night Owl CAM-2PK-DP8LSA
User Manual
Night Owl CAM-2PK-DP8LSA
User Manual
 Night Owl CAM-2PK-FTD4
User Manual
Night Owl CAM-2PK-FTD4
User Manual
 Night Owl CAM-WNIP2LBU
User Manual
Night Owl CAM-WNIP2LBU
User Manual
 Night Owl CAM-WNIP2LWA
User Manual
Night Owl CAM-WNIP2LWA
User Manual
 Night Owl CAM-WNIP8LBU
User Manual
Night Owl CAM-WNIP8LBU
User Manual
 Night Owl D2P1L-166-V2
User Manual
Night Owl D2P1L-166-V2
User Manual
 Night Owl FTD4-82-4L
User Manual
Night Owl FTD4-82-4L
User Manual