Page 2 - Thank you for choosing Night Owl Security Products!; For all of our Support Videos, click; Night Owl’s DP2 Series Camera Compatibility:
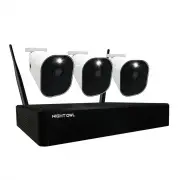
2 Night Owl’s DP2 Series DVRs are compatible with most analog cameras (400-900TVL), Night Owl’s Analog HD (AHD) and HD Analog (HDA) cameras. Check NightOwlSP.com for all camera models that are compatible with the DVR’s features. Compatible cameras include: CM-DP2L-BUCM-TA2L-BU Thank you for choosing...
Page 3 - Table of Contents
3 Table of Contents FCC Warning..........................................................................................................Safety Instructions.................................................................................................Specifications....................................
Page 5 - FCC Warnings; FCC; • Consult the dealer or an experienced radio/TV technician for help.; FCC Compliance Statement
5 FCC Warnings FCC This device complies with Part 15 of the FCC Rules. Operation is subject to the following two conditions: (1) this device may not cause harmful interference and (2) this device must accept any interference received, including interference that may cause undesired operation. • Reor...
Page 6 - Safety Instructions
6 Safety Instructions USE THE PROVIDED POWER ADAPTER. Do not use this product with a power source that applies more than the specified voltage. NEVER INSERT METAL INTO THE DVR CASE OR ITS OPENINGS. Inserting metal into the DVR case may cause electric shock. DO NOT OPERATE IN WET OR DUSTY AREAS. Avoi...
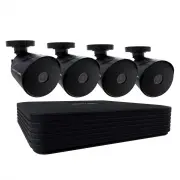
Page 7 - Specifications; System Requirements; Please be sure that your PC / MAC; • PC Operating System: Windows; Package Contents
7 Specifications System Requirements Please be sure that your PC / MAC ® complies with the following specifications: • PC Operating System: Windows ® 10 and above • MAC Operating System: MAC OS X ® 10.9 and above Please be sure that your mobile device complies with the following specifications: • An...
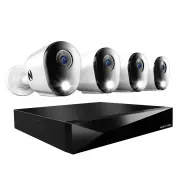
Page 8 - Video In –; DVR Diagram
8 FRONT VIEW REAR VIEW Video In – Allows for the connection of BNC wired cameras. NOTE: The DVR automatically detects the camera. Before turning the DVR on, make sure the cameras are connected to the DVR and a power source. HDMI (Recommended) – Connects to the HDMI port of a TV or Monitor using an H...
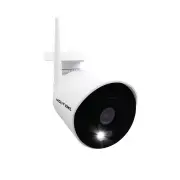
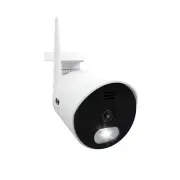
Page 9 - CAMERA; Connect all cameras locally before final placement; Camera Diagram
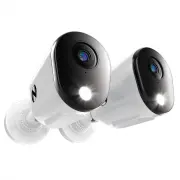
9 Built-In Spotlight 2MP Resolution Wide Viewing Angle 90º Night Vision up to 100 ft. 3-Axis Mounting Bracket (Vandal-Proof Wire Camera Protection) Video/Power Cables CAMERA MOUSE Live Viewing: Double-click the left button on any camera view in split-screen mode to bring it to full screen display.Do...
Page 10 - Connecting Your System
10 Connecting Your System 8 Connect the red female power leads of the video / power cables to the male power splitter ends. POWER SPLITTER CONNECTORS POWER CABLE CONNECTORS 1 Plug one end of the included HDMI cable into the HDMI port on the back of the DVR. HDMI 9 Connect the power splitter to the c...
Page 11 - Downloading Night Owl Protect; Setup is the same for Smartphone and Tablet.
11 Downloading Night Owl Protect NOTE: Setup is the same for Smartphone and Tablet. Create and verify your Night Owl Protect account. Use the Night Owl Protect login credentials to log into the DVR in Chapter 3 Step B. If you’re a First Time User, download Night Owl Protect from the App Store or Goo...
Page 12 - Startup Wizard; The DVR is automatically added to; Connected to the Internet
12 Startup Wizard Connected DVRs automatically search for the latest firmware version. If you are NOT going to connect your DVR to the Internet, follow the onscreen prompts for updating the firmware and registering the device. Skip to “Don’t Want to Connect the DVR to the Internet.” If you have NOT ...
Page 13 - • The DVR must be registered to receive Technical Phone Support.; Don’t Want to Connect the DVR to the Internet
13 Create Local Password 1. Default username is “admin” 2. Create a password (any alphanumeric combo with a minimum of 8 characters; MUST include a number, a lowercase, and uppercase letter). 3. Click “Continue” to go to the Login Screen. Once the DVR is added to the App, complete the Startup Wizard...
Page 14 - Live View
14 4.1 Live View The Live View screen is where you view your cameras and gain access to the Tool Bar and Menu . When you log into the system, the display is in full screen mode. Right click the mouse to displaythe Tool Bar (bottom of screen) and Function Panel (right side of screen). Left click on t...
Page 15 - Tool Bar and Function Panel Overview
15 Show/Hide Menu Full Screen Channel Display Layout Playback Device Status Event List Information Device Time and HDD Capacity Anti-theft Notification Human Detection Event Face Detection Event Opens and closes the Menu Closes the Tool Bar and Function Panel Select the Live View configuration: Acce...
Page 16 - . Left click on the; Tool Bar; to access the; Playback Panel; A B; Video Playback
16 The Playback Panel allows you to view recorded events. Right click on the Live View to access the Tool Bar . Left click on the Tool Bar to access the Playback Panel . Step 1: From the CHANNEL list, select the channel(s) you want to search for recordings. Step 2: Use the calendar under DATE to sel...
Page 17 - Formatting a USB Flash Drive and External HDD; release both; Find your Flash Drive or external HDD on the left side of the; File Explorer; WARNING: Formatting erases ALL data on the USB or HDD; DO NOT; connect the DVR’s hard disk drive to your PC or Mac!; Video Backup
17 6.1 Formatting a USB Flash Drive and External HDD 6.1.1 Formatting for Windows OS Backup your recordings on a USB Flash Drive or External HDD. Before inserting a USB Flash Drive or connecting an External HDD to the DVR, it must be formatted to FAT32/ExFat Insert an empty Flash Drive or connect to...
Page 18 - Disk Utility
18 In the “File System” field select FAT32 and click “Start.”Don’t unplug the Flash Drive or external HDD until formatting is complete. Locate “Format” on the dropdown list and click it. The Format Menu opens. Plug the USB Flash Drive or connect the extenal HDD into your Mac.Go to Applications>Ut...
Page 19 - Click “Erase” in the Disk Utility Toolbar.
19 Click the USB Flash Drive or external HDD in the sidebar in Disk Utility. Click “Erase” in the Disk Utility Toolbar. Create a name and click on the Format dropdown menu and choose either MS-DOS (FAT32) or ExFAT. Click “Erase.” 3 6 4 5
Page 21 - DVR and Channel Status
21 7.1 Status & Operation 7.1.1 Device Status 7.1.2 Channel Status The icons below keep you up to date on the DVR and its Channel’s statuses. Network Status: General Icons: Key lock USB Flash Drive / device connected Timer record on Overwrite on Sequence mode on USB backup in progress USB backup...
Page 22 - - Coaxial Connection; Main Menu
22 8.1 Camera 8.1.1 Connection Left click “Camera” on the Main Menu to access submenus to adjust camera settings. Channel Title - Channel Name Interface - Coaxial Connection Main Menu 1 1 2 2
Page 26 - By default, the DVR is set to record the full screen (No red grid); Backup and Exporting Recordings; See Section 6:; , to learn how to format the Flash Drive.; Backup Task Queue; with the current; Status
26 By default, the DVR is set to record the full screen (No red grid) Set to not record any event Only right section of the screen will record Set to record full screen (default value) RECORDING SENSITIVITY - Adjust the motion sensitivity needed to trigger a recording (Higher sensitivity = more reco...
Page 29 - WAN; is used to connect the DVR to the Internet for remote access.
29 8.6 Network Network Type: DHCP Network configuration mode that gathers the network values automatically from the DHCP server. If unchecked, this value can be set manually. IP: Network address of the connected DVR. Gateway: The connection between two networks. This should always be the IP address ...
Page 30 - Remote Connection
30 8.7 Remote Connection Login: Allows the user to login with their Night Owl Protect credentials. The user will have to enter local Admin password first to confirm ownership. If the user is already logged into the DVR with their Night Owl Protect account, the DVR will display the user’s username in...
Page 32 - CALL SCREEN DURATION -; QUAD SCREEN DURATION -; Select the duration time in seconds (
32 8.9 Display CHANNEL TITLE - Select to display the channel title on the Live View. EVENT STATUS - Select to display the Event Icons on the Live View. AUTO KEY LOCK(S) - Set the display’s time-out, after which the Key Lock is activated. (NEVER / 30 sec / 60 sec / 120 sec) HDD DISPLAY MODE - Select ...
Page 34 - LOCAL TAB; Here
34 8.10.2 Upgrade LOCAL TAB In this menu, you can choose to upgrade your DVR ( LOCAL ) or the connected cameras ( CAMERA ). Current Version : Display current DVR firmware version Online Version : Display latest DVR firmware version in the OTA Server if there is a new version available. Click Refresh...
Page 35 - CAMERA TAB
35 Save the upgrade files obtained from your installer or distributor in a compatible USB flash drive andinsert it into the USB port. Choose to browse to where the firmware file is saved and choose the file to upgrade. Then, choose SELECT to confirm and return to the upgrade page. Repeat Step2 as ma...
Page 38 - Meaning; System Halt; Icon; Description
38 To manually logout of your DVR, follow the steps below: Click on MENU -> POWER CONTROL . Click to logout or click on icon. Click to show the power functions. Options include Halt, Reboot, or System Logout. 8.11 Power Control Meaning System Halt System Reboot System Logout Icon Description Clic...
Page 39 - APPENDIX A
39 APPENDIX A Right click MENU on the bottom left corner of the Tool Bar to display the main menu and submenu lists: *For selected models only CONNECTIONDEVICE IMAGE DETECTIONIMAGE SIZEQUALITYFPS (Frames Per Second)RECORDING BYPUSHLIGHTRECORDING AREARECORDING SENSITIVITY BACKUP WAN REMOTE CONNECTION...
Page 41 - APPENDIX B: Advanced Config
41 APPENDIX B: Advanced Config STOP: Please do not adjust the Advanced Configuration Settings unless you are familiar with and understand the changes you are making. PRIVACY MASK You can cover certain areas on the camera image with privacy masks. Up to 4 areas could be added. Select one of the 4 mas...
Page 42 - Glossary
42 DP2: 1080p (2MP) HD Hi-Definition Analog System with Human Detection Technology and Built-in Motion-Activated Spotlights. DDNS: Dynamic Domain Naming System. Method for automatically updating hostnames, addresses, URL’s or other information on a given name server. DHCP: Dynamic Host Configuration...
Page 43 - Exclusions; Warranty
43 NIGHT OWL, LLC (“Night Owl”) provides the following warranty to the original retail purchaser only (the “Purchaser”) with respect to this product (the “Product”): For a period of one (1) year after the date of sale, the Product shall be free from manufacturing defects in material and workmanship....
Page 44 - Disclaimer
44 Disclaimer Certain uses, publication and/or distribution of video/audio recordings from security cameras and/or audio devices are prohibited or restricted by federal, state and local laws. When enabling and/or using audio recording features with your hidden security camera, be sure to comply with...
Page 45 - Troubleshooting
45 Error Possible Causes Solutions System is not receiving power or is not powering up. Cable from power adapter is loose or is unplugged. 1. Confirm that all cables are connected correctly. 2. Confirm that the power adapter is securely connected to the back of the unit. Cables are connected, but sy...
Page 46 - Check the camera video cable
46 Error Possible Causes Solutions There is no picture on selected channels / camera picture is not being displayed. Camera cables are loose or have become disconnected. 1. Check the camera video cable and connections. 2. Disconnect and reconnect the cable at the system and at the camera. 3. Try mov...
Page 47 - User Information
47 Be sure to write down all the important information below and place it in a secure location. General DVR Information Internet Login Information IP Address: Web Port: Subnet Mask: Gateway: DNS1: DNS2: User Password: Admin Password: Model Number: UID: User Information
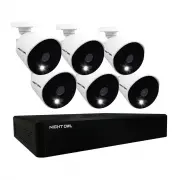


 Night Owl BTD21LSA-88-B
User Manual
Night Owl BTD21LSA-88-B
User Manual
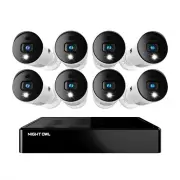
 Night Owl BTN82L-88-B
User Manual
Night Owl BTN82L-88-B
User Manual
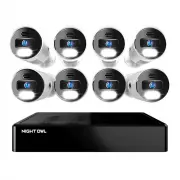
 Night Owl BTWN81L-8-B
User Manual
Night Owl BTWN81L-8-B
User Manual
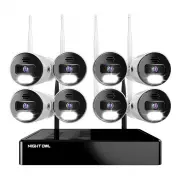
 Night Owl BWNIP2-32B1-B
User Manual
Night Owl BWNIP2-32B1-B
User Manual
 Night Owl CAM-2PK-DP2LSA
User Manual
Night Owl CAM-2PK-DP2LSA
User Manual
 Night Owl CAM-2PK-DP8LSA
User Manual
Night Owl CAM-2PK-DP8LSA
User Manual
 Night Owl CAM-2PK-FTD4
User Manual
Night Owl CAM-2PK-FTD4
User Manual
 Night Owl CAM-WNIP2LBU
User Manual
Night Owl CAM-WNIP2LBU
User Manual
 Night Owl CAM-WNIP2LWA
User Manual
Night Owl CAM-WNIP2LWA
User Manual
 Night Owl CAM-WNIP8LBU
User Manual
Night Owl CAM-WNIP8LBU
User Manual
 Night Owl FTD4-82-4L
User Manual
Night Owl FTD4-82-4L
User Manual
 Night Owl VD2P1-84-V2
User Manual
Night Owl VD2P1-84-V2
User Manual