Page 2 - Thank you for choosing Night Owl Security Products!; and enter WNIP2 into the search bar.; Night Owl’s WNIP2 Series Camera Compatibility:
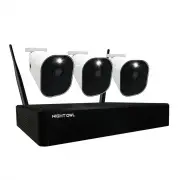
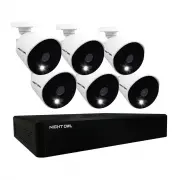
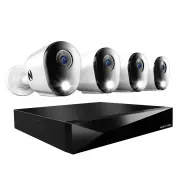
2 Night Owl’s WNIP2 Series Wi-Fi NVRs are compatible with the following camera model numbers: WNIP2 series cameras and Wi-Fi NVR are specific to the WNIP2 series and are not backward compatible with other Night Owl® Wi-Fi products. Not all features and capabilities are shared across all models so yo...
Page 3 - Table of Contents
3 Table of Contents FCC Warning....................................................................................................... Safety Instructions.............................................................................................. Specifications........................................
Page 5 - FCC Warnings; FCC; • Consult the dealer or an experienced radio/TV technician for help.; FCC Compliance Statement
5 FCC Warnings FCC This device complies with Part 15 of the FCC Rules. Operation is subject to the following two conditions: (1) this device may not cause harmful interference and (2) this device must accept any interference received, including interference that may cause undesired operation. • Reor...
Page 6 - Safety Instructions
6 Safety Instructions USE THE PROVIDED POWER ADAPTER. Do not use this product with a power source that applies more than the specified voltage. NEVER INSERT METAL INTO THE Wi-Fi NVR CASE OR ITS OPENINGS. Inserting metal into the Wi-Fi NVR case may cause electric shock. DO NOT OPERATE IN WET OR DUSTY...
Page 7 - Specifications; System Requirements; Please be sure that your PC / MAC; • PC Operating System: Windows; Package Contents
7 Specifications System Requirements Please be sure that your PC / MAC ® complies with the following specifications: • PC Operating System: Windows ® 10 and above • MAC Operating System: MAC OS X ® 10.9 and above Please be sure that your mobile device complies with the following specifications: • An...
Page 8 - HDMI Port –; Connects the Wi-Fi NVR to a TV or Monitor using an HDMI cable.; USB Ports –; Used to connect the included 12V DC power supply.; Wi-Fi NVR Antenna Mounts –; For installation of the two included Wi-Fi NVR antennas.
8 FRONT VIEW REAR VIEW HDMI Port – Connects the Wi-Fi NVR to a TV or Monitor using an HDMI cable. RJ-45 (Ethernet) Port – Used to connect the Wi-Fi NVR to your modem/router for remote viewing. Please note that your Wi-Fi NVR comes with built-in Wi-Fi for the cameras to transmit to the Wi-Fi NVR. How...
Page 9 - CAMERA; Connect and pair all cameras locally before final placement to; Camera Diagram
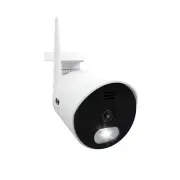
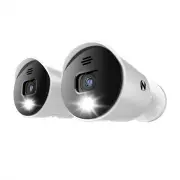
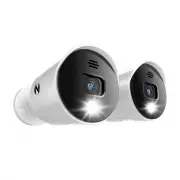
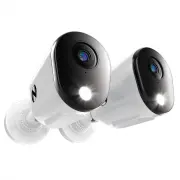
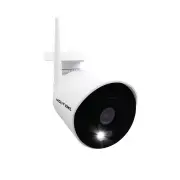
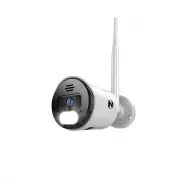
9 Motion-Activated Spotlight 2-Way Audio Enabled Human Detection Technology Facial Capture Wide Viewing Angle 80º Night Vision up to 100 ft. CAMERA MOUSE Live Viewing: Double-click the left button on any camera view in split-screen mode to bring it to full screen display.Double-click again to return...
Page 10 - Connecting Your System
10 Chapter 1: Connecting Your System 2 Connect the two included antennas to your Wi-Fi NVR. This will ensure you achieve the maximum wireless range for transmission from your wireless cameras. Plug one end of the included HDMI cable into the HDMI port on the back of the Wi-Fi NVR. HDMI 3 1 Place the...
Page 11 - Downloading Night Owl Protect; Setup is the same for Smartphone and Tablet.
11 Chapter 2: Downloading Night Owl Protect NOTE: Setup is the same for Smartphone and Tablet. Create and verify your Night Owl Protect account. Use the Night Owl Protect login credentials to log into the Wi-Fi NVR in Step 3.1a. If you're a First Time User, download Night Owl Protect from the App St...
Page 12 - Startup Wizard; The Wi-Fi NVR is automatically added; Connected to the Internet
12 Chapter 3: Startup Wizard If you are NOT connecting your Wi-Fi NVR to the Internet, follow the onscreen steps for updating firmware, device registration, and pairing cameras. Then, skip to “I Don’t Want to Connect the Wi-Fi NVR to the Internet.” When prompted, log in using the Night Owl Protect A...
Page 13 - If a Camera is not in Pairing Mode; Go to; • You cannot view your system remotely.; I Don’t Want to Connect the Wi-Fi NVR to the Internet
13 Create Local Password 1. Default username is “admin” 2. Create a password (any alphanumeric combo with a minimum of 8 characters; MUST include a number, a lowercase, and uppercase letter). 3. Click “Continue” to go to the Login Screen. Once the Wi-Fi NVR is added to the App, complete the Startup ...
Page 14 - Pairing a Replacement Wi-Fi IP Camera; Go to the Camera Menu and Select the; Add; tab on the left side of the menu.
14 Chapter 4: Pairing a Replacement Wi-Fi IP Camera If you want to replace a camera, the replacement camera needs to be paired with the Wi-Fi NVR. The Wi-Fi NVR has an independent built-in Wi-Fi network for secure, uninterrupted video transmission and recording. Pairing allows the Wi-Fi NVR to detec...
Page 15 - Within the; Wireless Add
15 Next, you will need to reset the replacement camera. Lift the rubber piece labeled SD/Reset. Using the included reset pin, press and hold the reset button until you hear a voice prompt indicating the camera is resetting. 4 5 6 Reset Pin NOTE: The reset process may take up to 3 minutes. Within the...
Page 16 - Mounting the Cameras; HOW OBSTACLES AFFECT YOUR SIGNAL STRENGTH; Electrical interference will degrade the quality of the signal.; Avoid direct exposure to weather.
16 Chapter 5: Mounting the Cameras Camera distance from Wi-Fi NVR. Your Wi-Fi IP cameras will reach up to 300 ft. wirelessly. Therefore, proper placement of the Wi-Fi NVR in your home will help ensure you achieve maximum coverage. HOW OBSTACLES AFFECT YOUR SIGNAL STRENGTH Do NOT place near high volt...
Page 17 - Insert the screw anchors.; Follow these instructions to correctly install your cameras.
17 Locate a camera and choose a location where you would like to mount the camera. Insert the screw anchors. Indicate screw positions by marking three holes on the surface where you plan to mount the camera, using the holes in the camera base as a guide. Using a drill bit slightly smaller than the i...
Page 18 - Live View; Displays the date and time of your camera.; Motion Detection Icon:; Shows the camera name.; System Exception Icon:
18 Chapter 6: Live View This section will discuss the Live View status icons and how to control and manage your Wi-Fi NVR using the channel toolbar and mouse menu. After you have completed the Startup Wizard for your Wi-Fi NVR, you will see the Live View screen. Live View is the default display mode...
Page 20 - Go to the Night Owl Protect Web Page using the following link:
20 6.3 Login/Forget Password 6.4 Forget Password: Recorder is Online 6.5 Forget Password: Recorder is Offline Anytime you want to adjust system settings, you are required to log in with your username and password unless you have selected "Manually Logout" on the Login Menu. Click "Forget...
Page 21 - Video Playback; Allows you to search by date.
21 Chapter 7: Video Playback 1 8 9 2 3 4 5 6 7 10 Video Image: Shows an image of the cameras that have video for the search parameters entered. Calendar: Allows you to search by date. Camera: Allows you to search certain cameras. Search: Activates the search based on the criteria established above a...
Page 22 - Playback a Video Recording
22 7.2 Playback a Video Recording Right click on the Live View screen to bring up the Tool Bar . Left click to access the Playback panel. Follow the steps below to watch a Playback: Select a recording from the Playback list. Double click on the selected recording or left click on File Playback . NOT...
Page 23 - Formatting a USB Flash Drive and External HDD; release both; Find your Flash Drive or external HDD on the left side of the; File Explorer; WARNING: Formatting erases ALL data on the USB or HDD; DO NOT; connect the Wi-Fi NVR’s hard disk drive to your PC or Mac!; Backup and Export Videos
23 8.1 Formatting a USB Flash Drive and External HDD 8.1.1 Formatting for Windows OS Backup your recordings on a USB Flash Drive or External HDD. Before inserting a USB Flash Drive or connecting an External HDD to the Wi-Fi NVR, it must be formatted to FAT32/ExFat Insert an empty Flash Drive or conn...
Page 24 - Disk Utility
24 In the “File System” field select FAT32 and click “Start.”Don’t unplug the Flash Drive or external HDD until formatting is complete. Locate “Format” on the dropdown list and click it. The Format Menu opens. Plug the USB Flash Drive or connect the extenal HDD into your Mac.Go to Applications>Ut...
Page 25 - Click “Erase” in the Disk Utility Toolbar.
25 Click the USB Flash Drive or external HDD in the sidebar in Disk Utility. Click “Erase” in the Disk Utility Toolbar. Create a name and click on the Format dropdown menu and choose either MS-DOS (FAT32) or ExFAT. Click “Erase.” 3 6 4 5
Page 28 - Menus and Settings; Click
28 Chapter 9: Menus and Settings Some menu screens will allow you to copy similar settings to multiple channels. Choose the channel you would like to copy information from in the first drop-down box (Copy), then select the channel you would like to copy the information to from the second drop-down b...
Page 29 - Menu; Allows access to Network, DDNS and Time Setup settings.
29 Menu The main menu lets you access many of your Wi-Fi NVR’s great features. You can customize camera names, keep track of recent events, create recording schedules, configure advanced motion detection settings, check up on the hard drive’s condition and change other settings. 1 2 3 4 5 6 General:...
Page 30 - unchecked this value can be set manually.
30 9.1 General Menu The general menu will allow you to access display and network settings for your Wi-Fi NVR system. 9.1.1 Network ADVANCED Find network values and optimize connectivity based on your Internet connection. In most cases the values should populate automatically once your Wi-Fi NVR is ...
Page 32 - Daylight Savings Time:
32 9.1.3 Time Setup Date Format: Choose the display format for the date. You can select Month/Day/Year, Year/Month/Day or Day/Month/Year. Time Zone: Select the correct time zone for your location. Sync Time: Enables or Disables NTP (Network Time Protocol) services. Time Format: Select either a 12Hou...
Page 35 - admin; By default, password field should be empty.
35 9.2.2 (a) Edit Protocol: Shows the protocol of the camera. IP Address: Network address of the connected camera. MAC Address: The unique identifier assigned to the network interface of the camera for communications at the data link layer. Port: Allows access to your camera with your computer throu...
Page 40 - Allow The Device To Downgrade:; when using a USB or Network to perform an update.
40 9.2.5 IPC Upgrade Table: Shows the IP and firmware version of all connected cameras. Firmware From: Allows you to choose the source of the firmware upgrade (Network or USB). Network is preferred. Start: Begins the process of updating the firmware of the selected camera. Allow The Device To Downgr...
Page 41 - Notification Schedule:
41 9.3 Record The Record menu will allow access to the Record Settings and Export Recordings submenus. From thesesubmenus, it will be possible to manage the settings for those categories. 9.2.5 IPC Upgrade 9.3.1 Event Settings Camera: Select the camera for which you want to adjust event settings. Re...
Page 43 - To export a recording:
43 9.3.3 Export Recordings Search and playback all recorded video from this menu. Choose your desired date and times from the options below, then click Play to view recorded video. Right-click to exit back to the menu screen. Camera: Select which camera(s) to search for recordings. Record Mode: Sele...
Page 44 - recommended before replacement.
44 9.4 Hard Drive Hard Disk List: List of all the hard drives, including their characteristics, installed on the Wi-Fi NVR. Overwrite: Old footage is automatically recorded over when the HDD becomes full. Overwrite is selected by default. Format: Reformats the HDD, erasing all stored recordings. If ...
Page 45 - Choose between English, Spanish and French.; Slide Show Interval:; You can select between 1 and 300 seconds per channel.
45 9.5 System The System menu allows access to the System Settings, including Wi-Fi NVR Wi-Fi Settings, User Management, Device Info, Log, and Camera Speed submenus. From these submenus, you can manage the settings for those categories of the Wi-Fi NVR. Language: Choose between English, Spanish and ...
Page 46 - Refreshes the Cameras listed in the Connection Information.
46 9.5.2 Wi-Fi Setup ESSID: The Wi-Fi name of the Wi-Fi NVR. Connect Information: Lists all of the MAC addresses for connected cameras and their signal strength. WiFi Channel: Selector for Wi-Fi channel, in a 2.4 GHz bands, Wi-Fi can transmit between 1-11 channels. Auto Adapt Channel: Manually chang...
Page 48 - Search
48 9.5.4 Log 9.5.5 Camera Speed Event Type: Select the type of event log you would like to Search for. Each choice corresponds to an action or event that was triggered and noted within the system. From Time: The date and time to start the search. Till Time: The date and time to finish the search. Se...
Page 51 - Glossary; information like a URL on a given name server.
51 Glossary DDNS: Dynamic Domain Naming System. Method for automatically updating hostnames, address or other information like a URL on a given name server. DHCP: Dynamic Host Configuration Protocol. A network protocol that allows a server to automatically assign a device and IP address. IP: Interne...
Page 52 - Exclusions
52 NIGHT OWL, LLC (“Night Owl”) provides the following warranty to the original retail purchaser only (the “Purchaser”) with respect to this product (the “Product”): For a period of one (1) year after the date of sale, the Product shall be free from manufacturing defects in material and workmanship....
Page 53 - Disclaimer
53 Disclaimer Certain uses, publication and/or distribution of video/audio recordings from security cameras and/or audio devices are prohibited or restricted by federal, state and local laws. When enabling and/or using audio recording features with your hidden security camera, be sure to comply with...
Page 54 - Troubleshooting; Error
54 Troubleshooting If a problem occurs, you may be able to easily correct it yourself. The following table describes some common issues and their most likely solutions. Please refer to the table before calling technical support. Error Possible Causes Solutions System is not receiving power or is not...
Page 55 - Audio channels are disable.; Volume; The system beeps at startup.
55 Error Possible Causes Solutions The image on the Wi-Fi NVR appears, but does not have sound. Audio channels are disable. Right click in Live View and ensure Volume is enabled. A “whirring” noise is coming from the system. Fan is active. The noise means the exhaust fan is working normal. The syste...
Page 56 - User Information; Component Model Number:; General Wi-Fi NVR Information
56 User Information Be sure to write down all the important information below and place it in a secure location. Admin Password: Mac Address: Web Port: IP Address: Subnet Mask: Gateway: Preferred DNS: User Password: Component Model Number: General Wi-Fi NVR Information Internet Login Information NOT...


 Night Owl BTD21LSA-88-B
User Manual
Night Owl BTD21LSA-88-B
User Manual
 Night Owl BTN82L-88-B
User Manual
Night Owl BTN82L-88-B
User Manual
 Night Owl BTWN81L-8-B
User Manual
Night Owl BTWN81L-8-B
User Manual
 Night Owl BWNIP2-32B1-B
User Manual
Night Owl BWNIP2-32B1-B
User Manual
 Night Owl CAM-2PK-DP2LSA
User Manual
Night Owl CAM-2PK-DP2LSA
User Manual
 Night Owl CAM-2PK-DP8LSA
User Manual
Night Owl CAM-2PK-DP8LSA
User Manual
 Night Owl CAM-2PK-FTD4
User Manual
Night Owl CAM-2PK-FTD4
User Manual
 Night Owl CAM-WNIP2LBU
User Manual
Night Owl CAM-WNIP2LBU
User Manual
 Night Owl CAM-WNIP8LBU
User Manual
Night Owl CAM-WNIP8LBU
User Manual
 Night Owl D2P1L-166-V2
User Manual
Night Owl D2P1L-166-V2
User Manual
 Night Owl FTD4-82-4L
User Manual
Night Owl FTD4-82-4L
User Manual
 Night Owl VD2P1-84-V2
User Manual
Night Owl VD2P1-84-V2
User Manual