Page 2 - Caring for the environment; Saving energy; Disposing of your old appliance
Caring for the environment 2 Saving energy The following tips can help you saveenergy and money as well as care forthe environment: - Operate the coffee machine in Eco mode (default setting). - Select dimmer lighting or abstain from using lighting when theappliance is switched on. - Switch off the l...
Page 3 - Contents
Contents 3 Caring for the environment ......................................................................................... 2 Saving energy .................................................................................................................. 2 Warning and Safety instructions ..........
Page 4 - Making two portions
Contents 4 Making drinks ................................................................................................................ 33 Coffee............................................................................................................................... 33 Coffee drinks made wit...
Page 5 - System lock; Networking
Contents 5 Timer ................................................................................................................................ 48 Switch on at ............................................................................................................... 49 Switch off at ............
Page 7 - Warning and Safety instructions
Warning and Safety instructions 7 This coffee machine complies with all the stipulated safetyrequirements. Inappropriate use can, however, lead to personalinjury and material damage. Read the operating instructions carefully before using the coffeemachine. They contain important information on the i...
Page 8 - Correct application
Warning and Safety instructions 8 Correct application This coffee machine is intended for home use. It must only be used as a domestic appliance to make espresso, cappuccino, latte macchiato, tea etc. Any other use is not permitted. This coffee machine is not intended for outdoor use. This c...
Page 9 - Technical safety
Warning and Safety instructions 9 Danger of suffocation! Whilst playing, children may become entangled in packaging material (such as plastic wrapping) or pull thepackaging material over their head, presenting the risk of suffocation.Keep packaging material away from children. Technical safety A...
Page 11 - Correct use
Warning and Safety instructions 11 Correct use Danger of burning and scalding on the dispensing spouts. The liquids and steam dispensed are very hot.Keep well away from the area underneath the spouts when hotliquids and steam are being dispensed.Do not touch hot components.Hot liquid or steam coul...
Page 12 - Accessories and spare parts
Warning and Safety instructions 12 Do not use any caramelised ready ground coffee. The sugar in the coffee will stick to and block the brew unit of the coffee machine. Thecleaning tablets for degreasing the brew unit will not remove this typeof deposit. If decaffeinated coffee beans are used aft...
Page 13 - Cleaning and care
Warning and Safety instructions 13 Cleaning and care Clean the coffee machine and the milk flask daily, particularly before using for the first time. All parts of the milk system need to be cleaned thoroughly and regularly. Milk contains bacteria which proliferate rapidly withinadequate cleaning...
Page 14 - Guide to the machine; Appliance front
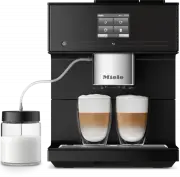
Guide to the machine 14 Appliance front a On/Off button b “Back” sensor c Touch display d Cup heating e Water container f Bean system with 3 bean containers g Park position for milk tube h Grinder setting i Ground coffee drawer with integrated coffee scoop j Brew unit k Height-adjustable centr...
Page 15 - Rear of machine; Cover
Guide to the machine 15 Rear of machine a Cover b Descaling cartridge holder c Adapter d Miele descaling cartridge
Page 16 - Central spout in detail
Guide to the machine 16 Central spout in detail a Dispensing spouts for coffee andmilk b Cup sensor c Hot-water spout d Stainless steel cover Milk flask and milk siphon a Milk flask b Milk siphon c Milk pipe The milk container a Connecting piece b Lid c Sealing ring d Stainless steel tube e Glass Co...
Page 17 - Symbols in the display; Symbol; OK
Guide to the machine 17 Symbols in the display The following symbols may also appear in the display in addition to the text: Symbol Explanation This symbol indicates the “Settings” menu and the“Language” menu option. Some settings, e.g. display brightness and buzzer/keypadvolume, are selected us...
Page 19 - Touch display; Profiles; Operation; orange
Operation 19 Touch display The delicate touch display can bescratched by pointed or sharpobjects, e.g. pens.Only touch the display with yourfingers. If your fingers are cold, the touchdisplay may not react. Profiles Drinks The display is split into three sections.The menu name is displayed in the to...
Page 20 - Entering numbers; Entering letters
Operation 20 Entering numbers Use the numerical keypad to enternumbers, e.g. if you want to set a timerduration. The numerical keypad willappear automatically in the relevantmenus. Touch the numbers you want. Once you have entered an acceptedvalue, the OK field will light up green. Confirm with ...
Page 22 - Unpacking and installing; Unpacking the coffee machine
Unpacking and installing *INSTALLATION* 22 Unpacking the coffee machine Unpack the coffee machine. Remove any protective foil and notesfrom the machine. Tip: Please retain the original packaging so that you can pack the appliancesecurely, should you need to transport itin the future.The drip tra...
Page 23 - - The coffee machine must be set up on
Unpacking and installing *INSTALLATION* 23 - The coffee machine must be set up on a level surface. The surface must bewater resistant. - The appliance door must be opened completely to remove the brew unit. Place the coffee machine in thelocation in which you intend to use it. Clean the applianc...
Page 24 - Before using for the first time; Setting the language; Setting the date; Setting the time of day; Setting the clock display; Fitting the descaling cartridge
Before using for the first time 24 When you connect the coffee machineto the mains power, Miele will appear briefly in the display.When you switch the coffee machine onfor the first time, Miele will again appear briefly in the display.The following settings are retrieved: - Language and country- Dat...
Page 25 - Set the water hardness level; Set up the bean system
Before using for the first time 25 Pull the cartridge holder forwards and insert the descaling cartridge . Push the cartridge upwards as far asit will go. Push the holder back into position. Put the cover back on. The next time the coffee machine isswitched off, the descaling cartridge w...
Page 26 - Fill the bean container; Type A; Allocate type of beans
Before using for the first time 26 If you select No , the assistant for setting up the bean system will not beshown again. Fill the bean container Tip: Open one bean container lid at a time to prevent mixing of bean typeswhen filling the bean system. Take one of the lids off. Fill the first type...
Page 27 - Bean system; one portion at; Renaming type of beans
Bean system 27 Coffee or Espresso can be made fromwhole roasted coffee beans which arefreshly ground for each portion.Your coffee machine has a bean systemwith three bean containers which canbe filled with different types of beans oreven just one type. You can allocatebean types to individual coffee...
Page 28 - Changing bean type allocation
Bean system 28 If you rename the bean containers,please note the following: - Choose concise names (max. 8 characters). - If you are using the same type of beans in two or three bean containersat the same time (for instancebecause you only use one type ofbean), make sure you name them inthe same way...
Page 29 - Filling the water container; Risk to health due to; every day; Risk of damage due to incorrect
Filling the water container 29 Risk to health due to contaminated water.Bacteria can develop in water whichhas been sitting in the watercontainer for too long and is a risk toyour health.Change the water in the watercontainer every day . Risk of damage due to incorrect operation.Unsuitable liqui...
Page 30 - Switching on and off; Touch the On/Off sensor control; will appear briefly in the display.
Switching on and off 30 Switching the coffee machineon Touch the On/Off sensor control . Miele will appear briefly in the display. The appliance heats up and rinses thepipework. Hot water will run out of thecentral spout.You can now make drinks. If the coffee machine is already atoperating temp...
Page 31 - Central spout with cup rim sensor; cannot; Central spout positions
Central spout with cup rim sensor 31 The central spout with cup rim sensorfeatures automatic spout adjustment.Thanks to this spout adjustmentfunction, the central spout moves downautomatically at the start of a drinkpreparation process and the cup rimsensor stops it at the optimum heightfor the cups...
Page 32 - Cup heating; Switching cup heating on or off
Cup heating 32 Danger of overheating due to insufficient ventilation.If the coffee machine is notsufficiently ventilated, the appliancecan overheat.Ensure that there is sufficientventilation around the coffeemachine, e.g. do not cover cups onthe cup heating surface with a teatowel. Cups should alw...
Page 33 - Making drinks; Coffee
Making drinks 33 Coffee Danger of burning and scalding on the dispensing spouts.The liquids and steam dispensed arevery hot and can cause scalding.Keep well away from the areaunderneath the spouts when hotliquids and steam are beingdispensed.Do not touch hot components. Coffee drinks made with and...
Page 34 - Rinse the milk pipework manually; Using the milk container; Milk is; not; cooled in the milk
Making drinks 34 As soon as you select a drink containingmilk, the machine will start to heat up.The milk will be drawn up into thecentral spout where it is heated bysteam and also frothed for drinksrequiring milk froth.You can prepare hot milk and milk frothusing cow’s milk or alternative plant-bas...
Page 35 - The milk pipework is easier to
Making drinks 35 Place the milk container next to thecoffee machine. Connect the milk pipework to the milkcontainer lid. Connect the milk container to thecoffee machine by attaching the milkpipework to the aperture in thecentral spout. Tip: The milk pipework is easier to connect to the apertur...
Page 37 - Cancelling Coffee pot; one
Making drinks 37 Two portions of the drink will bedispensed. Coffee pot: making several cups ofcoffee one after the other You can make several cups of coffee oneafter the other automatically with the Coffee pot function (max. 1 litre), e.g. to fill a coffee pot. Up to eight cups can bemade in this w...
Page 38 - Tea
Making drinks 38 In order to not overfill the brew unit,place a maximum of 2 level scoops of coffee in the ground coffee chute. Turn the handle clockwise to fill thebrew unit with the ground coffee andto close the ground coffee chute. Close the appliance door. Use ground coffee? appears on the d...
Page 39 - Switching the TeaTimer on and off; Making tea; Cancelling tea preparation
Making drinks 39 The TeaTimer can be started twiceconsecutively.If you have started a TeaTimer, while thebrewing time is counting down you cancontinue to use the coffee machine asnormal. An audible tone will sound afterthe brewing time has elapsed. If you have switched off audible tones,you will not...
Page 40 - Dispensing hot water; Cancelling a drink
Making drinks 40 Tea pot: making several cups of tea,one after the other You can make several cups of tea oneafter the other automatically with the Teapot function (max. 1 litre), e.g. to fill a tea pot. Up to eight cups can be madein this way.Start in the Drinks menu. Place the tea or tea bag in ...
Page 41 - Parameters; Changing drink parameters; Quantity of coffee; too low; Brewing temperature
Parameters 41 You can individually adjust the followingparameters for each drink: - Quantity of coffee- Brewing temperature- Pre-brewing- Bean type Changing drink parameters The Drinks menu is displayed. Select Process . Touch Change drink . Select a drink. Now you can adjust the portion size...
Page 42 - Degree of grinding; too coarse; Adjusting the degree of grinding
Degree of grinding 42 The degree of grinding determines thecontact time between the ground coffeeand the water, known as the extractiontime. Only when the ideal degree ofgrinding is selected can the machinedispense a perfect cup of coffee with afine, hazelnut brown crema. Identifying the ideal degre...
Page 43 - Portion size
Portion size 43 The flavour of the coffee produceddepends not only on the type of coffee,but also on the amount of water used.You can programme the amount ofwater for all coffee drinks, tea and hotwater to suit the size of your cups andto suit the type of coffee you are using.This does not alter the...
Page 44 - Resetting drinks; Resetting a drink
Resetting drinks 44 You can reset portion sizes andparameters back to their factory defaultsettings for individual drinks or for alldrinks.The Drinks menu is displayed. Touch Process . Resetting a drink Touch Reset drink . Select a drink. Reset drink to default settings? will appear in the di...
Page 45 - Creating a profile; Changing profile; Changing a name
Profiles 45 In addition to the Miele drinks menu(Miele profile), you can create up to10 individual profiles to cater fordifferent tastes and preferences. The name of the current profile isshown in the top left of the display. Creating a profile The Drinks menu is displayed. Touch Profiles . Tou...
Page 46 - Deleting a profile; Creating a drink in a profile; Making a drink from a profile
Profiles 46 Change the name as required. Touch Save to confirm. The changed profile name is saved. Deleting a profile The Drinks menu is displayed. Touch Profiles . Touch Process . Touch Delete profile . Touch the profile you want. Confirm with OK . The profile will be deleted. Creat...
Page 47 - Expert mode
Expert mode 47 In Expert mode you can change theportion size while the drink is beingmade. The setting will not be saved and will only apply for the current drink. Expert mode is not available if youhave selected DoubleShot or two portions . Switching Expert mode on andoff The Drinks menu is dis...
Page 48 - Opening the “Settings” menu; Language; Clock display; Timer
Settings 48 You can use the “Settings” menu tocustomise the coffee machine to suityour requirements. Some settings which can be found inthe Settings menu are described in their separate sections in theoperating instructions. Opening the “Settings” menu The Drinks menu is displayed. Touch . To...
Page 49 - Eco mode
Settings 49 - switches off after a particular length of time if none of the sensors has beentouched or a drink has not been made( Switch off after ; available with Timer 1 only). You can allocate the timer functions toindividual days of the week. For Switch on at and Switch off at , the timer must b...
Page 50 - Lighting
Settings 50 Lighting You have the following options: - The machine is switched on: set the brightness. - The machine is switched off: set the brightness and set the time thelighting should switch off. When the coffee machine is switchedon, it remains lit up for a certain lengthof time after the last...
Page 51 - Display brightness; Evaporate; Factory default
Settings 51 Activating and deactivating the systemlock When the system lock is activated, thetimer settings for Switch on at are deactivated. The coffee system will not switch on at the time set. Temporarily deactivating the systemlock If you touch the On/Off sensor control, will appear. ...
Page 52 - Appliance settings; The following will; - The number of drinks dispensed; Network configuration
Settings 52 Appliance settings The following will not be reset: - The number of drinks dispensed and the appliance status (no. ofportions until appliance needsdescaling, ... brew unit needsdegreasing) - Language- Time and date- Profiles and their associated drinks (the allocation of bean types todri...
Page 53 - Setting up the network again; Switching remote control on or off
Networking 53 Your coffee machine is WiFi enabledand can be operated via the Miele appusing a mobile device, e.g. smartphoneor tablet. Please ensure you adhere to thewarning and safety instructions inthese operating instructions evenwhen you are operating the coffeemachine via the Miele app. Energy ...
Page 54 - MobileStart; Switching MobileStart on and off; RemoteUpdate; Activating /deactivating
Networking 54 MobileStart With MobileStart you can start making a drink, for example, via the Miele app. Danger of burning and scalding on the dispensing spouts.If liquids or steam are dispensedwhile the machine is unsupervised,persons may burn themselves if theyplace body parts under the centrals...
Page 55 - Running a RemoteUpdate; - You will only receive a message when
Networking 55 Running a RemoteUpdate Information about the content andscope of an update is provided in theMiele app. A message will appear in your coffeemachine display if a software update isavailable.You can install the update immediatelyor postpone this until later. When thecoffee machine is swi...
Page 56 - Risk to health due to inadequate cleaning; Overview of cleaning intervals
Cleaning and care 56 Risk to health due to inadequate cleaning Heat and moisture inside the coffee machine can cause coffee residues tobecome mouldy and/or milk residues to go off and pose a risk to health.Carefully clean the coffee machine regularly. Overview of cleaning intervals Recommended fre...
Page 58 - Unsuitable cleaning agents
Cleaning and care 58 Unsuitable cleaning agents Contact with unsuitable cleaningagents can alter or discolour allsurfaces. All surfaces are susceptibleto scratching. Scratches on glass canin some circumstances lead tobreakage.Remove all cleaning agent residuesimmediately. Make sure you removeany spi...
Page 59 - before; Cleaning the drip tray cover
Cleaning and care 59 Remove the lid , the drip tray cover and the lower panel . Clean the lower panel by hand onlyusing warm water and a littlewashing-up liquid.All other parts are dishwasher-safe. Clean all parts by hand. Tip: To give the drip tray, waste container, lid and drip tray c...
Page 60 - Cleaning the water container
Cleaning and care 60 Cleaning the water container Clean the water container every day. Remove the water container. Clean the water container by handwith warm water and a little washing-up liquid. Dry the water container. Tip: To give the water container an extra thorough clean, clean it in the...
Page 61 - once; Cleaning the central spout
Cleaning and care 61 Push the water container back intothe machine. Cleaning the central spout Clean all parts of the central spout withintegrated Cappuccinatore at least once a week . The Drinks menu is displayed. Removing and dismantling the centralspout If the central spout is in the uppermost...
Page 62 - Inserting the central spout; Cleaning the steam jet
Cleaning and care 62 Tip: With the exception of the stainless steel cover, all parts of the central spoutshould be cleaned in the dishwasherfrom time to time to give them athorough clean. This will remove coffeedeposits and milk residues effectively. Clean the surfaces of the centralspout with a d...
Page 63 - Cleaning the milk siphon
Cleaning and care 63 Press the two latches together (seearrows). The cup rim sensor is released. Clean the cup rim sensor by handwith warm water and a little washing-up liquid. Dry the cup rim sensor. Refitting: Press the cup rim sensor from belowinto the holder on the central spout. Cleanin...
Page 64 - Cleaning the bean system
Cleaning and care 64 Cleaning the milk pipeworkmanually or using themaintenance programme Risk to health due to inadequate cleaningMilk naturally contains bacteria. Heatand moisture inside the coffeemachine can cause these bacteria tomultiply, e.g. milk residues can go offand pose a risk to health...
Page 65 - by hand
Cleaning and care 65 Coffee beans contain oils which candeposit themselves on the walls of thebean containers and hinder the flow ofthe beans. Therefore, clean the beancontainers regularly with a soft cloth.If required, you can clean the lids of thebean containers by hand with warm water and a littl...
Page 66 - Cleaning the casing; Opening the “Maintenance” menu; Rinsing the appliance
Cleaning and care 66 Remove the ground coffee drawer. Fit the attachment to the suction tubeon your vacuum cleaner to vacuumout the ground coffee chute. Remove the vacuum cleanerattachment. Refit the ground coffee drawer. Close the appliance door. Cleaning the casing If soiling is allowed ...
Page 67 - Rinsing the milk pipework; Cleaning the milk pipework; Preparing the cleaning solution:
Cleaning and care 67 You may also be prompted to insert theend of the milk pipework into the driptray cover. Rinsing the milk pipework The milk pipework can become blockedby milk residues. The milk pipeworkshould therefore be rinsed regularly. If adrink has been made using milk, theprompt to place t...
Page 68 - Carrying out the cleaning process:; Message on display
Cleaning and care 68 Carrying out the cleaning process: Place the container next to the coffeemachine and hang the milk pipeworkin the solution. Make sure the milkpipework is placed sufficiently far intothe cleaning solution. Confirm with OK . Follow the further instructions givenin the displ...
Page 70 - Use a vacuum cleaner to remove; turn the handle to the right; Descaling the machine
Cleaning and care 70 Clean the inside of the coffeemachine. Make sure that the areashighlighted in the illustration arecleaned especially well. Tip: Use a vacuum cleaner to remove dry ground coffee residues.The following appears in the display: Fit the brew unit with a tablet in it. Drop a clea...
Page 71 - Preparing the descaling solution
Cleaning and care 71 If a descaling cartridge is not fitted, an empty cartridge is fitted or an expired cartridge is fitted, the machine needs tobe descaled regularly using the Descale the machine maintenance programme. The appliance will guide you through thedescaling process. Various messageswill ...
Page 72 - Carrying out descaling
Cleaning and care 72 Add 1 descaling tablet to the water container. Follow the instructions for thedescaling agent mixing ratio carefully.It is important to fill the watercontainer with the correct amount ofwater. Otherwise, the descalingprocess will be cancelledprematurely. Carrying out descalin...
Page 73 - Automatic descaling
Automatic descaling 73 Risk of damage from spilt descalingsolution.Sensitive surfaces and/or naturalfloors can suffer damage.Wipe up any spillages of descalingsolution.When handling a cartridge which hasalready been filled with water, ensurethat the descaling solution does notcome into contact with ...
Page 74 - The Miele descaling cartridge; cartridge is fitted or an; expired; maintenance programme. To
Automatic descaling 74 The Miele descaling cartridge Only use the Miele descalingcartridge for the automatic descalingprogramme.Please note that the Miele descalingcartridge has a lifespan of approx.one year after it has been placed inthe machine and filled with water forthe first time. Critical for...
Page 75 - Removing the descaling cartridge
Automatic descaling 75 Slide the cover at the back of thecoffee machine downwards. Pull the cartridge holder forwards. Insert the cartridge and push it upwards as far as it will go. Push the cartridge holder back intoposition. Put the cover back on. Follow the instructions in the d...
Page 76 - Pull the cartridge holder; will be not; maintenance programme.
Automatic descaling 76 Pull the cartridge holder forwards. There is already a descaling cartridgefitted. Remove the cartridge . Seal the descaling cartridge with thecap. The cap is located on the cartridge.Release it by snapping it off. Dispose of the spent cartridge withyour household...
Page 77 - Cancelling automatic descaling
Automatic descaling 77 Start time for automaticdescaling (Descaling timer) You can set the daily start time forautomatic descaling as you wish. Thecoffee machine must be switched off forthe duration of the activation phase(approx. 30 minutes).The default start time for automaticdescaling is 04:00. S...
Page 78 - Problem solving guide; Messages in the display; Problem
Problem solving guide 78 Many malfunctions and faults that can occur in daily operation can be easilyremedied. You can save time and money in many cases, as you do not need to callthe Miele Customer Service Department.Information to help you rectify faults yourself can be found at www.miele.com/serv...
Page 79 - The brew unit cannot be positioned correctly.; appears in the display, put
Problem solving guide 79 Problem Cause and remedy F73 or Check the brew unit The brew unit cannot be positioned correctly. Switch the coffee machine off with the On/Off button . Remove the brew unit and clean it. Push the coffee ejector of the brew unit into thecorrect position. Do not fi...
Page 80 - Confirm with
Problem solving guide 80 Problem Cause and remedy F233 The cup rim sensor is not inserted or is incorrectlyinserted.The stainless steel cover of the central spout was notfitted properly, e.g. is tilting forwards slightly.If the central spout is moving upwards and the cup rimsensor is bumped, e.g. wi...
Page 81 - Unusual performance of the coffee machine
Problem solving guide 81 Unusual performance of the coffee machine Problem Cause and remedy The lighting remains offafter the coffee machinehas been switched on. The lighting has been switched off. Switch the lighting on (see “Settings - Lighting”). The lighting is faulty. Call Service. The disp...
Page 82 - setting has been; appears in the
Problem solving guide 82 Problem Cause and remedy The coffee machinedoes not switch itselfon, although the Switch on at setting has been activated for the timer. The system lock has been activated. Deactivate the system lock. A day of the week has not been selected and/or thetimer has not been act...
Page 83 - Switch the coffee machine back on.; Descale the coffee machine.; The fill level sensors in the bean containers are dirty.
Problem solving guide 83 Problem Cause and remedy Fill and refit the watercontainer appears after switching on eventhough the container isfilled and fitted in themachine. The appliancedoes not rinse. The descaling cartridge is not fitted. The coffeemachine needs descaling. Switch the coffee machin...
Page 84 - The central spout has a blockage.
Problem solving guide 84 Problem Cause and remedy The waste container isoverflowing even thoughthe drip tray and wastecontainer have beenemptied following eachreminder. The drip tray has probably been removed without thewaste container being emptied.Removing the drip tray resets the internal counter...
Page 85 - Check the temperature of the milk.
Problem solving guide 85 Problem Cause and remedy The milk sputters whenit is dispensed. Hissingnoises can be heardwhen milk is beingheated up or frothed.Although the milk shouldbe frothed, only hot milkcomes out of the centralspout. The milk temperature is too high. Good milk froth canonly be achie...
Page 86 - Faults with automatic descaling
Problem solving guide 86 Faults with automatic descaling Problem Cause and remedy After switching on, amessage appearsinforming you thatautomatic descalingcould not be carried out. If you have made drinks with milk, the milk pipe mustbe pushed into the drip tray cover and when themachine is switched...
Page 87 - Unsatisfactory results
Problem solving guide 87 Unsatisfactory results Problem Cause and remedy The coffee is not hotenough. The cup has not been pre-heated.The smaller the cup and the thicker its sides, themore important it is to pre-heat it. Pre-heat the cups, e.g. using the cup heating(depending on model). The brewin...
Page 88 - Try other types of coffee bean which are less oily.
Problem solving guide 88 Problem Cause and remedy The coffee tastes weak.The coffee grounds inthe waste container aresludgy and grainy. Insufficient coffee beans are getting into the grinderand less coffee is being brewed. Have you used a darkroast?This type of coffee bean is often more oily. These ...
Page 89 - Service; Contact in the event of a fault
Service 89 Information to help you rectify faultsyourself and about Miele spare partscan be found at www.miele.com/service. Contact in the event of a fault In the event of any faults which youcannot remedy yourself, please contactyour Miele dealer or the MieleCustomer Service Department. You can boo...
Page 90 - Transporting the machine; Evaporation
Transporting the machine 90 If you are not going to use the coffeemachine for an extended period of time,e.g. whilst on holiday, or if it needs to bemoved, a number of procedures willneed be carried out to ensure its safety. - Empty and clean the coffee bean container - Empty and clean the water con...
Page 91 - Remove the brew unit.; Packaging
Transporting the machine 91 Vacuuming out the groundcoffee chute using theattachment and cleaning theinterior To ensure coffee residues are removedthoroughly, you should vacuum out theground coffee chute before transportingand clean out the interior of themachine carefully. Attach the vacuum clean...
Page 92 - Accessories
Accessories 92 These products and other usefulaccessories can be ordered via theMiele webshop, from Miele (see backcover for contact details) or from yourMiele dealer. - Microfibre cloth for removing finger marks and lightsoiling - Cleaning agent for milk pipework for cleaning the milk system - Clea...
Page 93 - Electrical connection; Risk of fire from overheating.
Electrical connection 93 The coffee machine is supplied with amains cable with moulded plug readyfor connection to a suitable earthedsocket.The socket must be easily accessibleafter the coffee machine has beeninstalled. If the socket is not easilyaccessible, ensure that a suitablemeans of disconnect...
Page 94 - Dimensions
Dimensions *INSTALLATION* 94 a = 311 mm b = 420 mm c = 445 mm
Page 95 - Technical data
Technical data 95 Electricity consumption in standby: < 0.4 W Electricity consumption innetworked standby: < 0.9 W Pump pressure: Max. 15 bar Through-flow heater: 1 stainless steel thermo block Dimensions (W x H x D): 311 x 420 x 445 mm Net weight: 14.2 kg Mains connection cable length: 120 cm...
Page 96 - EU Conformity declaration
EU Conformity declaration 96 Miele hereby declares that this coffeemachine complies with Directive2014/53/EU. The complete text of the EU declarationof conformity is available from one ofthe following internet addresses: - Products, Download from www.miele.ie - For service, information, operating in...
Page 97 - UK Conformity declaration
UK Conformity declaration 97 Miele hereby declares that this coffeemachine complies with UK RadioEquipment Regulations 2017, asamended. The complete text of the UK declarationof conformity is available from one ofthe following internet addresses: - Products, Download from www.miele.co.uk - For servi...
Page 98 - This; Statement of Compliance; confirms this Miele product fully complies with the; Paul Wright
UK Conformity declaration 98 This Statement of Compliance confirms this Miele product fully complies with the Product Security and Telecommunications Infrastructure (Security Requirementsfor Relevant Connectable Products) Regulations 2023. 1) Household Appliance – 2) Manufactured by: Miele & Cie...
Page 99 - United Kingdom
United Kingdom Miele Co. Ltd., Fairacres, Marcham Road, Abingdon, Oxon, OX14 1TWTel: 0330 160 6600, Internet: www.miele.co.uk, E-mail: [email protected] Miele Ireland Ltd.2024 Bianconi AvenueCitywest Business CampusDublin 24Tel: (01) 461 07 10Fax: (01) 461 07 97E-mail: [email protected]Internet: www...


 Miele APCL 043
User Manual
Miele APCL 043
User Manual
 Miele APWM 065
Installation Manual
Miele APWM 065
Installation Manual
 Miele APWM 070
Installation Manual
Miele APWM 070
Installation Manual
 Miele SC
Installation Manual
Miele SC
Installation Manual
 Miele PR
Installation Manual
Miele PR
Installation Manual
 Miele APCL 047
User Manual
Miele APCL 047
User Manual
 Miele PLW 8505
Installation Manual
Miele PLW 8505
Installation Manual
![Miele PT 7186 Vario [EL]](https://manualsarea.com/img/product/thumbs/180/69/3e/693e1219f5c0d53fde982888bd54a3ec.webp) Miele PT 7186 Vario [EL]
User Manual
Miele PT 7186 Vario [EL]
User Manual
 Miele CM/1
User Manual
Miele CM/1
User Manual
![Miele PLW 8617 [EL/S TH]](https://manualsarea.com/img/product/thumbs/180/fe/90/fe9010c5f8c3c4aada5d83b417c78507.webp) Miele PLW 8617 [EL/S TH]
Installation Manual
Miele PLW 8617 [EL/S TH]
Installation Manual
![Miele PWM 908 [EL DP MAR 3 AC 400-480V 50-60Hz]](https://manualsarea.com/img/product/thumbs/180/20/e5/20e5e929bcb336fc6b2f128d9c857a3d.webp) Miele PWM 908 [EL DP MAR 3 AC 400-480V 50-60Hz]
User Manual
Miele PWM 908 [EL DP MAR 3 AC 400-480V 50-60Hz]
User Manual
![Miele PWM 906 [EL DP MAR 3 AC 400-480V 50-60Hz]](https://manualsarea.com/img/product/thumbs/180/57/c8/57c81dd8d0abe05852b709a3fa9b80db.webp) Miele PWM 906 [EL DP MAR 3 AC 400-480V 50-60Hz]
Installation Manual
Miele PWM 906 [EL DP MAR 3 AC 400-480V 50-60Hz]
Installation Manual
![Miele PWM 906 [EL DP MAR 2N AC 400V 50-60Hz]](https://manualsarea.com/img/product/thumbs/180/ce/23/ce232ceeda728532882a2a2f56bf2abc.webp) Miele PWM 906 [EL DP MAR 2N AC 400V 50-60Hz]
User Manual
Miele PWM 906 [EL DP MAR 2N AC 400V 50-60Hz]
User Manual
![Miele PLW 8617 [EL TH]](https://manualsarea.com/img/product/thumbs/180/e8/4a/e84a63b24dca64279b26bca714985678.webp) Miele PLW 8617 [EL TH]
User Manual
Miele PLW 8617 [EL TH]
User Manual
![Miele PDR 908 [EL MAR 3N AC 400V 50-60Hz]](https://manualsarea.com/img/product/thumbs/180/05/b7/05b705998b251f92b271e908423e1ecb.webp) Miele PDR 908 [EL MAR 3N AC 400V 50-60Hz]
Installation Manual
Miele PDR 908 [EL MAR 3N AC 400V 50-60Hz]
Installation Manual
![Miele PLW 8615 [EL CT]](https://manualsarea.com/img/product/thumbs/180/70/ff/70ff37b9174e78db8d00ddce8cf08ee3.webp) Miele PLW 8615 [EL CT]
Installation Manual
Miele PLW 8615 [EL CT]
Installation Manual
![Miele PLW 8616 [EL/S]](https://manualsarea.com/img/product/thumbs/180/37/f4/37f4255dee3c9942a13241f3ccd5fe93.webp) Miele PLW 8616 [EL/S]
Installation Manual
Miele PLW 8616 [EL/S]
Installation Manual
![Miele PWM 916 [EL DV DD SOM]](https://manualsarea.com/img/product/thumbs/180/21/65/21657a907bb735f3acf5a7bdbbc78c8a.webp) Miele PWM 916 [EL DV DD SOM]
Manual
Miele PWM 916 [EL DV DD SOM]
Manual
![Miele PFD 104 SCVi XXL [120V]](https://manualsarea.com/img/product/thumbs/180/0a/20/0a20c04430aaa9be6a985688f5bb5580.webp) Miele PFD 104 SCVi XXL [120V]
Installation Manual
Miele PFD 104 SCVi XXL [120V]
Installation Manual
![Miele PDR 507 HP [MAR]](https://manualsarea.com/img/product/thumbs/180/58/9e/589e9ba94b88174fa0cdb27b4bbaac5b.webp) Miele PDR 507 HP [MAR]
User Manual
Miele PDR 507 HP [MAR]
User Manual