Miele CM 7750 CoffeeSelect - Quick Guide
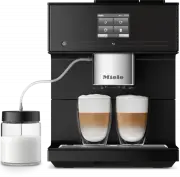
A Quick Guide to using and maintaining a modern smart coffee machine, this document covers essential operational aspects like setup, drink customization, and routine care–including touchscreen navigation, expert settings, and troubleshooting common usage issues. The content also highlights key features such as programmable profiles, milk frothing, and factory reset procedures, emphasizing both functionality and practical upkeep for seamless daily use.


Quick Start Guide
Coffee machine
These short instructions are
not
a substitute for the operating instructions supplied
with the machine. It is essential to familiarise yourself with the coffee machine be-
fore using it for the first time. Please read the operating instructions carefully and
pay particular attention to the warning and safety notes.
en - GB
M.-Nr. 11 675 600
TIPS FOR USE
SETTINGS
CLEANING AND C
ARE
Cleaning and care
Tips for use
Settings
Changing settings
ĺ
Touch the
button.
ĺ
Select
Settings
.
ĺ
Select the option you want and change
the setting as required.
ĺ
Touch
OK
to save the setting.
Tip:
touching
takes you back to the
previous menu level.
Option
Available settings
Notes
Language
deutsch, english and other languages
If you select the wrong language by mistake, you can easily find the
Language
option by following the
flag symbol
.
Time of day
Show (Off / On / Night dimming)
Clock format (12 h / 24 h)
Your choice of display will affect the energy consumption of your coffee machine.
Date
Timer
Timer 1 (Switch on at, Switch off at,
Switch off after)
Timer 2 (Switch on at, Switch off at)
TeaTimer (On / Off)
Descaling timer
For
Switch on at
and
Switch off at
the timer must be
activated
and
at least
one day of the week must be
allocated.
Expert mode
On / Off
Eco mode
On / Off
Lighting
Brightness
(Machine switched on or switched off)
Switch off after
Bean types
Type A, B and C (Change name, Change allo-
cation)
Info
System lock
On / Off
When the system lock is activated, the
Switch on at
option for the timer cannot be selected.
Water hardness
soft, medium, hard, very hard
Brightness
Volume
Buzzers / Keypad tones
Cup heating
On / Off
Spout adjustment
On / Off
The height of the central spout
cannot
be adjusted manually.
Miele@home
Setup
Further functions can be taken advantage of if the coffee machine is connected to a WiFi network, and
is signed into the Miele@mobile app (see operating instructions).
Service
Evaporate
Demo mode
The
Evaporate
function removes water from the system and should be used if the coffee machine is not
going to be used for a long period of time or has to be moved.
Demo mode is intended for use in showrooms or at exhibitions. Do not activate this function for domes-
tic use.
Factory defaults
Appliance settings
Network configuration
Language, Time, Date, Number of drinks and Profiles cannot be reset.
Bean system
You can change the names for the types of
coffee bean and/or reallocate the types of
bean under
Settings | Type of beans
.
If you do not allocate a type of bean, you
will be asked what type of bean you want
to use for the coffee as you make it.
Renaming the type of beans
The 3 bean containers are shown in the
display as follows and are pre-named.
If you are using the same type of beans in
two or three bean containers at the same
time (for instance because you only use
one type of bean), make sure you name
them in exactly the same way.
ĺ
Select
Change name
.
ĺ
Enter the name you want (max. 8 charac-
ters) and then touch
Save
.
Allocating types of beans
ĺ
Select
Change allocation
.
If you have set up one or more Profiles and
at least one coffee drink, first select the
Profile.
ĺ
Change the allocation as required and
then touch
OK
.
Tip:
If you touch
all
, you will have highlight-
ed all coffee drinks and you will not be able
to deselect the ones you do not want.
Drink parameters
You can set the quantity of coffee, the
brewing temperature and pre-brewing for
each drink individually.
ĺ
Select
Process
from the drinks menu us-
ing the
arrow sensor.
ĺ
Touch
Change drink
and select a drink.
ĺ
Touch
Drink parameters
.
ĺ
Select
Quantity of coffee
,
Brew tempera-
ture
,
Pre-brewing
or
Type of beans
.
ĺ
Select the setting you want and
touch
OK
.
ĺ
Touch
OK
again to save your changed
settings.
Portion size
You can adjust the portion size for all cof-
fee drinks, hot water, all types of tea and
drinks with milk.
ĺ
Place the cup you want under the central
spout or hot water spout.
ĺ
Select
Process
using the
arrow sensor.
ĺ
Touch
Change drink
and select a drink.
ĺ
Touch
Portion size
.
The drink will be made and
Save
will ap-
pear in the display as soon as the minimum
dispensing amount is reached.
ĺ
When the cup is filled to the level you
want, touch
Save
.
If you want to change the portion size for
coffee drinks made with milk or hot water,
the ingredients which make up the drink
will be saved one after the other while the
drink is being made.
Profiles
You can set up profiles and individual
drinks to cater for different tastes and pref-
erences.
Creating a profile
ĺ
Select
Profiles
followed by
Create profile
.
ĺ
Enter the name you want (max. 8 charac-
ters) and then touch
Save
.
Processing a profile
When you have created at least one profile
you can choose from the following options
under
Process
:
– Change name
– Delete profile
– Change profile
Creating and processing drinks in a pro-
file
ĺ
Touch
Create drink
and select a drink.
ĺ
Change the portion size or drink param-
eters.
ĺ
Enter a name for the new drink (maxi-
mum 8 characters) and touch
Save
.
When you have created at least one drink
you can choose from the following options
under
Process drink
:
– Change drink
(portion size, drink parameters and
name)
– Delete drink
Expert mode
In Expert mode you can change the por-
tion size while the drink is being made. To
do this Expert mode must be switched on
(
Settings
|
Expert mode
)
.
The portion size can only be changed
during the individual preparation stages.
The setting will
not
be saved and will only
apply for the current drink.
ĺ
Touch the bar and adjust the indicator
(small triangle) as you wish.
Cleaning the central spout
If the central spout is in the uppermost po-
sition it cannot be dismantled. The cen-
tral spout must be moved into the mainte-
nance position to do this.
ĺ
Press the
button for 3 seconds.
ĺ
Carefully pull the stainless steel cover off
and then pull the dispensing unit off.
ĺ
Twist the upper section with the hold-
er for the milk pipework
and pull it off.
Then pull the Y-shaped piece
off. Re-
move the dispensing spouts
.
ĺ
Clean all parts thoroughly. Clean the sur-
faces of the central spout with a damp
cloth.
ĺ
Fit the dispensing unit back together.
ĺ
Push the dispensing unit back into the
central spout and replace the stainless
steel cover.
ĺ
Touch
OK
.
Degreasing the brew unit
You need
1
Miele cleaning tablet to de-
grease the brew unit. The process takes
approx. 12 minutes.
The message
Degrease the brew unit
will
appear in the display.
ĺ
Touch
OK
.
The maintenance programme will then
start.
ĺ
Follow the instructions in the display.
Only clean the brew unit
by hand
with
warm water.
Do not use any cleaning
agents
.
ĺ
Open the appliance door.
ĺ
Release the brew unit. Press and hold
the button under the brew unit handle
and, whilst doing so, turn the handle to
the left.
ĺ
Carefully pull the brew unit out of the
coffee machine.
When you have removed the brew unit,
do not change the position of the han-
dle on the brew unit.
ĺ
Clean the brew unit
by hand
under
warm running water.
ĺ
Wipe any remaining coffee off the filters
(see arrows).
ĺ
Dry the funnel in the brew unit.
ĺ
Carefully clean the inside of the coffee
machine.
The following message will appear in the
display:
Fit the brew unit with a tablet in it.
ĺ
Push the brew unit back into the coffee
machine.
ĺ
Lock the brew unit. Press and hold the
button under the brew unit handle and,
whilst doing so, turn the handle to the
right.
ĺ
Close the appliance door.
ĺ
Follow the further instructions given in
the display.
The cleaning process is finished at the end
of the rinsing cycle.
“Descaling the appliance” main-
tenance programme
Risk of damage from spilt descaling
solution.
Sensitive surfaces and/or natural floors
can suffer damage.
Wipe up any spillages of descaling
agent immediately.
You need
1
descaling tablet for the des-
caling process. The process takes ap-
prox. 12 minutes.
The
Descale the appliance
message ap-
pears in the display.
ĺ
Touch
OK
.
The maintenance programme will then
start.
ĺ
Follow the instructions in the display.
ĺ
Fill the water container to the descaling
symbol
with lukewarm water.
ĺ
Place
1
descaling tablet in the water.
ĺ
Push the water container back into the
machine.
ĺ
Follow the further instructions given in
the display.
ĺ
When
Rinse the water container and fill with
fresh water to the descaling symbol
ap-
pears in the display:
ĺ
Remove the water container and rinse it
thoroughly with clean water. Fill the wa-
ter container to the descaling symbol
with fresh tap water.
The descaling process is complete when
rinsing has finished.
Stop
Dispensing
Cancel
Type A
Type B
Type C
"Loading the manual" means you need to wait until the file loads and becomes available for online reading. Some manuals are very large, and the time they take to appear depends on your internet speed.
Was this manual helpful?
About this manual
- Brand
- Miele
- Model
- CM 7750 CoffeeSelect
- Document type
- Quick Guide
- Language(s)
- English
- Pages
- 2
- File size
- 1.4 MB
- Format
Other Manuals for Miele CM 7750 CoffeeSelect
Ask a question
Related manuals
Popular Miele Other
 Miele WWD380 WCS PWash&Steam&9kg User Manual
 Miele W 1614 Manual
 Miele G 5266 SCVi SFP Active Plus User Manual
 Miele Classic C1 Turbo Team PowerLine - SBAN0 User Manual
![Miele PDR 307 [EL]](https://manualsarea.com/img/product/thumbs/48/ba/fd/bafde84806e8abc8b420f34eaf8fcd6e.webp) Miele PDR 307 [EL] User Manual
Miele PDR 307 [EL] User Manual Miele F 1911 Vi Manual
![Miele PDR 908 [EL MAR 3N AC 400V 50-60Hz]](https://manualsarea.com/img/product/thumbs/48/05/b7/05b705998b251f92b271e908423e1ecb.webp) Miele PDR 908 [EL MAR 3N AC 400V 50-60Hz] Installation Manual
Miele PDR 908 [EL MAR 3N AC 400V 50-60Hz] Installation Manual Miele K 9757 iD Manual
More Miele Other models
 Miele CM 5510 Silence User Manual
 Miele CM 6160 MilkPerfection Quick Guide
 Miele CM 6360 MilkPerfection Quick Guide
 Miele CM 6560 MilkPerfection User Manual
 Miele CM 7550 CoffeePassion Quick Guide
 Miele CM 7750 125 Edition Quick Guide
 Miele Compact C2 User Manual
 Miele Compact C2 Cat & Dog User Manual
 Miele Compact C2 Flex User Manual
 Miele Complete C2 Cat & Dog User Manual
 Miele Complete C2 Powerline User Manual
 Miele Complete C3 User Manual