Page 2 - SPECIFICATIONS; Applicable battery cartridge, battery adapter and charger; SAFETY WARNINGS; General power tool safety warnings; Save all warnings and instruc-
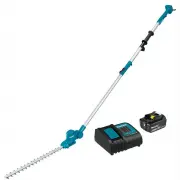
2 ENGLISH ENGLISH (Original instructions) SPECIFICATIONS Model: XNU05 Blade length 460 mm (18-1/8") Strokes per minute 3,600 /min Cutting blade angle 135° (up 60°, down 75°) Overall length 1,889 - 2,511 mm (74-1/2" - 99") Rated voltage D.C. 18 V Net weight 3.0 - 3.3 kg (6.6 - 7.3 lbs) • ...
Page 4 - Cordless Pole Hedge Trimmer
4 ENGLISH Cordless Pole Hedge Trimmer Safety Warnings 1. Keep all parts of the body away from the blade. Do not remove cut material or hold material to be cut when blades are moving. Blades continue to move after the switch is turned off. A moment of inattention while operating the hedge trimmer may...
Page 5 - SAVE THESE INSTRUCTIONS.
5 ENGLISH 6. Only use the tool for its intended purpose. Do not use the tool for any other purpose. 7. Switch off the tool and remove the battery cartridge before: • cleaning or when clearing a blockage, • checking, carrying out maintenance or working on the tool, • adjusting the working position of...
Page 6 - Symbols; Important safety instructions for
6 ENGLISH WARNING: Use of this product can create dust containing chemicals which may cause respiratory or other illnesses. Some examples of these chemicals are compounds found in pesti- cides, insecticides, fertilizers and herbicides.Your risk from these exposures varies, depending on how often you...
Page 7 - PARTS DESCRIPTION; FUNCTIONAL DESCRIPTION; Installing or removing battery cartridge; Indicating the remaining battery
7 ENGLISH PARTS DESCRIPTION 1 3 5 6 7 8 10 9 4 2 1 Head 2 Angle adjustment button 3 Lock-lever 4 Thumb nut 5 Front grip 6 Rear grip 7 Battery cartridge 8 Switch trigger 9 Lock-off button 10 Shear blades - - - - FUNCTIONAL DESCRIPTION CAUTION: Always be sure that the tool is switched off and the batt...
Page 8 - Tool / battery protection system; Adjusting the cutting angle
8 ENGLISH Indicator lamps Remaining capacity Lighted Off Blinking 75% to 100% 50% to 75% 25% to 50% 0% to 25% Charge the battery. The battery may have malfunctioned. NOTE: Depending on the conditions of use and the ambient temperature, the indication may differ slightly from the actual capacity. NOT...
Page 9 - Adjusting the pipe length; ASSEMBLY; Installing or removing the shear
9 ENGLISH Adjusting the pipe length CAUTION: Always be sure that the tool is switched off before adjusting the pipe length. CAUTION: When adjusting the pipe length, be sure to attach the blade cover before adjusting the pipe length. CAUTION: When adjusting the pipe length, be careful not to pinch yo...
Page 11 - Installing or removing the chip
11 ENGLISH 10. Attach the shear blades to the tool, and then tighten 3 screws with the screwdriver. 1 ► 1. Screw 11. Remove the screw inserted into the hole on the shear blades in step 9, and then tighten it to fix the shear blades. NOTICE: If the shear blades do not operate prop- erly, the blades a...
Page 12 - OPERATION; Operating the tool
12 ENGLISH NOTICE: Never try to remove the chip receiver by an excessive force with its claws locked in the grooves of the shear blades. OPERATION Operating the tool WARNING: Do not use the tool near any electrical power lines. Contacting with power lines or using the tool near power lines may cause...
Page 13 - MAINTENANCE; Cleaning the tool
13 ENGLISH To cut a hedge side evenly, cut from the bottom to top. 15 m (50 ft) When trimming to make a round shape (trimming boxwood or rho- dodendron, etc.), trim from the root to the top for a beautiful finish. 15 m (50 ft) If the chip receiver is attached to the shear blades, it gathers discarde...
Page 14 - TROUBLESHOOTING; OPTIONAL; MAKITA LIMITED WARRANTY
14 ENGLISH TROUBLESHOOTING Before asking for repairs, conduct your own inspection first. If you find a problem that is not explained in the manual, do not attempt to dismantle the tool. Instead, ask Makita Authorized Service Centers, always using Makita replace - ment parts for repairs. State of abn...
Page 15 - ESPECIFICACIONES; ADVERTENCIAS DE; Advertencias generales de; Conserve todas las advertencias
15 ESPAÑOL ESPAÑOL (Instrucciones originales) ESPECIFICACIONES Modelo: XNU05 Longitud de la cuchilla 460 mm (18-1/8″) Carreras por minuto 3 600 cpm Ángulo de la cuchilla de corte 135° (hacia arriba 60°, hacia abajo 75°) Longitud total 1 889 mm - 2 511 mm (74-1/2″ - 99″) Tensión nominal c.c. 18 V Pes...
Page 18 - Instrucciones adicionales de seguridad
18 ESPAÑOL Instrucciones adicionales de seguridad Preparación 1. ESTE CORTASETOS PUEDE OCASIONAR LESIONES GRAVES. Lea atentamente las instrucciones para el correcto manejo, pre- paración, mantenimiento, puesta en marcha y parada de la herramienta. Familiarícese con todos los controles y con el uso a...
Page 19 - GUARDE ESTAS
19 ESPAÑOL 14. No fuerce la herramienta. Esto permitirá hacer mejor el trabajo con un menor riesgo de lesiones a la velocidad para la que fue diseñada. 15. No utilice la herramienta bajo la lluvia o en luga- res mojados ni en condiciones de mucha hume- dad. El motor eléctrico no es a prueba de agua....
Page 20 - Símbolos; Instrucciones importantes de; GUARDE ESTAS INSTRUCCIONES.
20 ESPAÑOL Símbolos A continuación se muestran los símbolos utilizados para la herramienta. volts o voltios corriente directa o continua velocidad sin carga revoluciones o alternaciones por minuto, frecuencia de rotación Instrucciones importantes de seguridad para el cartucho de batería 1. Antes de ...
Page 21 - DESCRIPCIÓN DE LAS PIEZAS; DESCRIPCIÓN DEL; Instalación o extracción del; Indicación de la capacidad restante
21 ESPAÑOL DESCRIPCIÓN DE LAS PIEZAS 1 3 5 6 7 8 10 9 4 2 1 Cabeza 2 Botón de ajuste del ángulo 3 Palanca de bloqueo 4 Tuerca de mariposa 5 Empuñadura delantera 6 Empuñadura trasera 7 Cartucho de batería 8 Gatillo interruptor 9 Botón de desbloqueo 10 Cuchillas de cizalla - - - - DESCRIPCIÓN DEL FUNC...
Page 22 - Sistema de protección para la
22 ESPAÑOL Luces indicadoras Capacidad restante Iluminadas Apagadas Parpadeando 75% a 100% 50% a 75% 25% a 50% 0% a 25% Cargar la batería. La batería pudo haber funcionado mal. NOTA: Dependiendo de las condiciones de uso y la temperatura ambiente, la indicación podrá diferir ligeramente de la capaci...
Page 23 - Ajuste de la longitud del tubo; Ajuste de la posición de la; MONTAJE; Instalación o extracción de las
23 ESPAÑOL El ángulo de la cabeza puede ajustarse en 10 pasos. Para cambiar el ángulo de la cabeza, siga los pasos a continuación. 1. Sostenga la cabeza y el cuerpo de la herramienta como se muestra en la figura. 1 2 ► 1. Cabeza 2. Botón de ajuste del ángulo 2. Ajuste el ángulo de la cabeza mientras...
Page 26 - OPERACIÓN; Operación de la herramienta
26 ESPAÑOL 3. Presione las palancas del colector de residuos, y luego enganche las partes salientes del otro lado a la ranura de las cuchillas de cizalla. 1 ► 1. Palanca Para extraer el colector de residuos, presione las palan- cas para liberar las partes salientes. 1 ► 1. Palanca AVISO: Nunca inten...
Page 28 - MANTENIMIENTO; Limpieza de la herramienta
28 ESPAÑOL MANTENIMIENTO PRECAUCIÓN: Asegúrese siempre de que la herramienta esté apagada y el cartucho de batería extraído antes de intentar realizar una inspección o mantenimiento. PRECAUCIÓN: Cuando inspeccione o dé mantenimiento a la herramienta, deje siempre la herramienta en el suelo. El ensam...
Page 29 - RESOLUCIÓN DE PROBLEMAS; ACCESORIOS OPCIONALES; GARANTÍA LIMITADA DE MAKITA; Ésta Garantía no aplica para México
29 ESPAÑOL RESOLUCIÓN DE PROBLEMAS Antes de solicitar alguna reparación, primero realice una inspección por su cuenta. Si detecta algún problema que no esté explicado en el manual, no intente desensamblar la herramienta. En vez de esto, solicite la reparación a un centro de servicio autorizado de Ma...
Page 32 - Makita Corporation
Makita Corporation 3-11-8, Sumiyoshi-cho, Anjo, Aichi 446-8502 Japan www.makita.com 885881-948 XNU05-1 EN, ESMX 20210126