Page 2 - SPECIFICATIONS
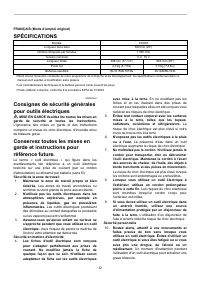
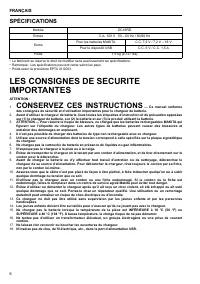
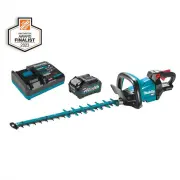
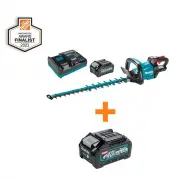
2 ENGLISH (Original instructions) SPECIFICATIONS Model XHU02 Blade length 560 mm (22") Strokes per minute 1,350 /min Rated voltage D.C.18 V Overall length 948 mm (37-1/4") 963 mm (38") Net weight 3.0 kg (6.7 lbs) 3.3 kg (7.4 lbs) Standard battery cartridges BL1815/BL1815N BL1830/BL1840 •...
Page 5 - SAVE THESE INSTRUCTIONS.; FUNCTIONAL DESCRIPTION
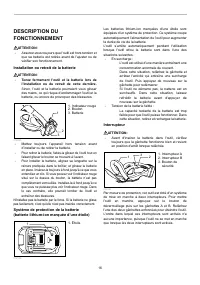
5 A battery short can cause a large current flow, overheating, possible burns and even a breakdown. 6. Do not store the tool and battery cartridge in locations where the temperature may reach or exceed 50 ゚ C (122 ゚ F). 7. Do not incinerate the battery cartridge even if it is severely damaged or is ...
Page 7 - OPERATION
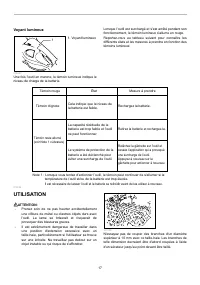
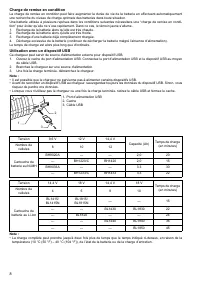
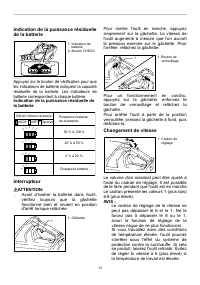
7 Indication lamp 1 012480 Running the tool allows the indication lamp to show the battery cartridge capacity status. When the tool is also overloaded and has stopped during operation, the lamp lights up in red. Refer to the following table for the status and action to be taken for the indication la...
Page 9 - MAINTENANCE
9 Press the chip receiver on the shear blades so that its slits overlap with the nuts on the shear blades. 1 1 2 2 3 3 012520 At this time, the chip receiver needs to be installed so that its hooks fit into grooves in the shear blade unit. 12 009293 To remove the chip receiver, press its lever on bo...
Page 11 - OPTIONAL ACCESSORIES
11 1 012446 Install the under cover on the tool and tighten the four screws firmly. Storage The hook hole in the tool bottom is convenient for hanging the tool from a nail or screw on the wall. 012453 Remove the battery cartridge and put the blade cover on the shear blades so that the blades are not...
Page 12 - SPÉCIFICATIONS
12 FRANÇAIS (Mode d’emploi original) SPÉCIFICATIONS Modèle XHU02 Longueur de la lame 560 mm (22") Nombre d'impacts par minutes 1 350 /min Tension nominale C.C. 18 V Longueur totale 948 mm (37-1/4") 963 mm (38") Poids net 3,0 kg (6,7 lbs) 3,3 kg (7,4 lbs) Batteries standard BL1815/BL1815N...
Page 15 - Symboles
15 AVERTISSEMENT: NE VOUS LAISSEZ PAS tromper (au fil d'une utilisation répétée) par un sentiment d'aisance ou de familiarité avec le produit en négligeant les consignes de sécurité qui accompagnent le produit. L'utilisation non sécuritaire ou incorrecte de cet outil comporte un risque de blessure g...
Page 17 - UTILISATION
17 Voyant lumineux 1 012480 Une fois l’outil en marche, le témoin lumineux indique le niveau de charge de la batterie. Lorsque l’outil est surchargé et s'est arrêté pendant son fonctionnement, le témoin lumineux s'allume en rouge. Reportez-vous au tableau suivant pour connaître les différents états ...
Page 19 - ENTRETIEN
19 1 1 2 2 3 3 012520 Le capteur de débris doit alors être installé de manière à ce que ses crochets s'insèrent dans les rainures des lames de cisaillement. 12 009293 Pour enlever le capteur de débris, appuyez sur les leviers qui se trouvent de chaque côté, de manière à débloquer les crochets. ATTEN...
Page 21 - ACCESSOIRES EN OPTION
21 1 1 2 012452 Installez la lame, serrez les quatre vis puis placez la rondelle retirée dans la position d'origine. 1 012446 Installez le couvercle inférieur sur l’outil puis serrez bien les quatre vis. Entreposage Le trou en dessous de l’outil est utile pour le suspendre sur un clou ou une vis fix...
Page 23 - ESPECIFICACIONES
23 ESPAÑOL (Instrucciones originales) ESPECIFICACIONES Modelo XHU02 Longitud de la cuchilla 560 mm (22") Carreras por minuto 1 350 cpm Tensión nominal 18 V c.c. Longitud total 948 mm (37-1/4") 963 mm (38") Peso neto 3,0 kg (6,7 lbs) 3,3 kg (7,4 lbs) Cartuchos de batería estándar BL1815/B...
Page 26 - Símbolos
26 ADVERTENCIA: NO DEJE que la comodidad o familiaridad con el producto (a base de utilizarlo repetidamente) sustituya la estricta observancia de las normas de seguridad para dicho producto. El MAL USO o el no seguir las normas de seguridad establecidas en este manual de instrucciones puede ocasiona...
Page 28 - OPERACIÓN
28 1 2 3 012491 Para su seguridad, esta herramienta cuenta con un sistema interruptor doble. Para encender la herramienta, presione el botón de desbloqueo junto con los gatillos A y B. Suelte uno de los dos interruptores presionados para apagarla. La secuencia de activación entre los interruptores e...
Page 30 - MANTENIMIENTO
30 • Asegúrese siempre de quitar la cubierta de la cuchilla antes de instalar el recolector de residuos y astillas. • El recolector de residuos recibe las hojas cortadas y ahorra la labor de tener que recolectarlas para su eliminación posterior. Puede instalarse en cualquier lado de la herramienta. ...
Page 32 - ACCESORIOS OPCIONALES
32 1 2 3 012482 Coloque la esponja que retiró en la misma posición en la que se encontraba. Asegúrese que las fundas incluidas con las nuevas cuchillas de cizalla estén colocadas en las clavijas de la cuchilla. Coloque las nuevas cuchillas de cizalla en la herramienta de tal manera que las clavijas ...
Page 36 - Makita Corporation
36 Makita Corporation 3-11-8, Sumiyoshi-cho, Anjo, Aichi 446-8502 Japan www.makita.com 885312A947 XHU02-1
Page 39 - ENGLISH; IMPORTANT SAFETY INSTRUCTIONS
3 ENGLISH SPECIFICATIONS • Manufacturer reserves the right to change specifications without notice. • Note: Specifications may differ from country to country. • Weight according to EPTA-Procedure 01/2003. IMPORTANT SAFETY INSTRUCTIONS CAUTION: 1. SAVE THESE INSTRUCTIONS — This manual contains import...
Page 42 - FRANÇAIS; LES CONSIGNES DE SECURITE; CONSERVEZ CES INSTRUCTIONS
6 FRANÇAIS SPÉCIFICATIONS • Le fabricant se réserve le droit de modifier sans avertissement les spécifications. • Remarque : Les spécifications peuvent varier selon les pays. • Poids selon la procédure EPTA 01/2003. LES CONSIGNES DE SECURITE IMPORTANTES ATTENTION : 1. CONSERVEZ CES INSTRUCTIONS — Ce...
Page 45 - ESPAÑOL; INSTRUCCIONES DE SEGURIDAD; GUARDE ESTAS INSTRUCCIONES
9 ESPAÑOL ESPECIFICACIONES • El fabricante se reserva el derecho a cambiar las especificaciones sin aviso. • Nota: Las especificaciones podrán cambiar de un país a otro.• Peso de acuerdo con el procedimiento EPTA 01/2003. INSTRUCCIONES DE SEGURIDAD IMPORTANTES PRECAUCION: 1. GUARDE ESTAS INSTRUCCION...
Page 49 - Cordless Blower
1 INSTRUCTION MANUAL MANUEL D'INSTRUCTION MANUAL DE INSTRUCCIONES IMPORTANT: Read Before Using. IMPORTANT: Lire avant usage. IMPORTANTE: Leer antes de usar. Cordless Blower SOUFFLEUR SANS FIL Sopladora Inalámbrica XBU02 015474
Page 50 - WARNING
2 ENGLISH (Original instructions) SPECIFICATIONS Model XBU02 Air volume (max.) 13.4 m 3 /min (473 cu.ft./min) Capacities Air speed 54 m/s (120 MPH) (without long nozzle) 585 mm (23") Overall length (with long nozzle) 830, 880, 930 mm (32-3/4", 34-3/4", 36-5/8") Rated voltage D.C. 36 ...
Page 52 - SAVE THESE; Tips for maintaining maximum; FUNCTIONAL; Installing or removing battery
4 may result in loss of your eyesight. 5. Do not short the battery cartridge: (1) Do not touch the terminals with any conductive material. (2) Avoid storing battery cartridge in a container with other metal objects such as nails, coins, etc. (3) Do not expose battery cartridge to water or rain. A ba...
Page 53 - Tool / battery protection system; Overload protection; Remaining battery capacity; Remaining battery capacity indication
5 NOTE: • The tool does not work with only one battery cartridge. Tool / battery protection system The tool is equipped with a tool/battery protection system. This system automatically cuts off power to the motor to extend tool and battery life. The tool will automatically stop during operation if t...
Page 54 - Speed change; ASSEMBLY; Installing the long nozzle; Blowing
6 For continuous operation, pull the switch trigger, push in the lock button and then release the switch trigger. To stop the tool from the locked position, pull the switch trigger fully, then release it. Speed change 1 015477 The maximum air volume can be adjusted just by turning the adjusting dial...
Page 55 - Cleaning; OPTIONAL
7 CAUTION: • Do not place the blower on the ground while it is switched on. Sand or dust may enter from suction inlet, and they may result in personal injury. Hold the blower firmly with a hand and perform the blowing operation by moving it around slowly. When blowing around a building, a big stone ...
Page 57 - AVERTISSEMENT
9 FRANÇAIS (Mode d’emploi original) SPÉCIFICATIONS Modèle XBU02 Volume d’air (max.) 13,4 m 3 /min (473 pi cu./min) Capacités Vitesse de l'air 54 m/s (120 mi/h) (sans l’embout allongé) 585 mm (23") Longueur totale (avec l’embout allongé) 830, 880, 930 mm (32-3/4", 34-3/4", 36-5/8") Te...
Page 59 - Les symboles utilisés pour l'outil sont; CONSIGNES DE; Conseils pour obtenir la durée de
11 AVERTISSEMENT: NE VOUS LAISSEZ PAS tromper (au fil d'une utilisation répétée) par un sentiment d'aisance ou de familiarité avec le produit en négligeant les consignes de sécurité qui accompagnent le produit. L'utilisation non sécuritaire ou incorrecte de cet outil comporte un risque de blessure g...
Page 60 - Tenez fermement l'outil et la batterie; Système de protection de l’outil/de; Protection contre les surcharges; Protection contre les décharges accélérées
12 DESCRIPTION DU FONCTIONNEMENT ATTENTION: • Assurez-vous toujours que l'outil est hors tension et que sa batterie est retirée avant de l'ajuster ou de vérifier son fonctionnement. Installation ou retrait de la batterie 2 3 3 1 2 015475 ATTENTION: • Mettez toujours l'appareil hors tension avant d'i...
Page 61 - Indication de la puissance résiduelle de
13 Indication de la puissance résiduelle de la batterie 1 2 1 015476 Appuyez sur le bouton de vérification pour que les indicateurs de batterie indiquent la capacité résiduelle de la batterie. Les indicateurs de batterie correspondent à chaque batterie. Indication de la puissance résiduelle de la ba...
Page 62 - ASSEMBLAGE; Installation de l'embout allongé; Soufflage
14 ASSEMBLAGE ATTENTION: • Assurez-vous toujours que l'outil est hors tension et que sa batterie est retirée avant d'effectuer tout travail dessus. Installation de l'embout allongé 1 2 2 015480 Pour installer l'embout allongé : 1. Alignez la petite saillie sur le boîtier avec la rainure de l'embout ...
Page 63 - Nettoyage; ACCESSOIRES EN
15 Nettoyage 015483 Essuyez régulièrement l’extérieur du souffleur avec un chiffon imprégné d’eau savonneuse. Pour maintenir la SÉCURITÉ et la FIABILITÉ du produit, les réparations, tout autre travail d'entretien ou de réglage doivent être effectués dans un centre de service Makita agréé ou un centr...
Page 64 - ADVERTENCIA
16 ESPAÑOL (Instrucciones originales) ESPECIFICACIONES Modelo XBU02 Volumen de aire (máx.) 13,4 m 3 /min (473 ft 3 /min) Capacidades Velocidad del aire 54 m/s (120 MPH) (sin la boquilla grande) 585 mm (23") Longitud total (con la boquilla grande) 830, 880, 930 mm (32-3/4", 34-3/4", 36-5/...
Page 66 - A continuación se muestran los símbolos; INSTRUCCIONES; Consejos para alargar al máximo la
18 ADVERTENCIA: NO DEJE que la comodidad o familiaridad con el producto (a base de utilizarlo repetidamente) sustituya la estricta observancia de las normas de seguridad para dicho producto. El MAL USO o el no seguir las normas de seguridad establecidas en este manual de instrucciones puede ocasiona...
Page 67 - Instalación o desmontaje del
19 DESCRIPCIÓN DEL FUNCIONAMIENTO PRECAUCIÓN: • Asegúrese siempre de que la herramienta esté apagada y el cartucho de batería extraído antes de realizar cualquier ajuste o comprobación en la herramienta. Instalación o desmontaje del cartucho de batería 2 3 3 1 2 015475 PRECAUCIÓN: • Apague siempre l...
Page 68 - Indicador de la capacidad restante de la
20 Indicador de la capacidad restante de la batería 1 2 1 015476 Presione el botón de revisión para que los indicadores de la batería muestren la capacidad restante de las baterías. Los indicadores de la batería corresponden a cada batería. Indicador de la capacidad restante de la batería Estado ind...
Page 69 - ENSAMBLE; Instalación de la boquilla larga; Soplado
21 ENSAMBLE PRECAUCIÓN: • Asegúrese siempre de que la herramienta esté apagada y el cartucho de batería extraído antes de realizar cualquier trabajo en la misma. Instalación de la boquilla larga 1 2 2 015480 Instalación de la boquilla larga: 1. Alinee la protuberancia pequeña en la carcasa con la ra...
Page 70 - Limpieza; ACCESORIOS
22 Limpieza 015483 De vez en vez, limpie el exterior de la herramienta usando un paño húmedo y agua enjabonada. Para mantener la SEGURIDAD y FIABILIDAD del producto, las reparaciones, y cualquier otra tarea de mantenimiento o ajuste deberán ser realizadas en Centros de Servicio Autorizados por Makit...