Makita MU04Z - Manuals

User Manual Makita MU04Z


Summary
2 ENGLISH ENGLISH (Original instructions) SPECIFICATIONS MU04 with shear blade for grass shear installed Model: MU04 Cutting width 160 mm (6-5/16") Strokes per minute 2,500/min Dimensions (L x W x H) 347 mm x 177 mm x 131 mm (13-5/8" x 7" x 5-1/8") Rated voltage D.C. 10.8 V - 12 V ma...
3 ENGLISH 3. Prevent unintentional starting. Ensure the switch is in the off-position before connecting to power source and/ or battery pack, picking up or carrying the tool. Carrying power tools with your finger on the switch or energising power tools that have the switch on invites accidents. 4. R...
4 ENGLISH 11. Do not force appliance - It will do the job better and with less likelihood of a risk of injury at the rate for which it was designed. 12. Do not overreach - Keep proper footing and balance at all times. 13. Stay alert - Watch what you are doing. Use common sense. Do not operate applia...
Makita Brush Cutters Manuals
-
 Makita DUM604ZX
User Manual
Makita DUM604ZX
User Manual
-
 Makita GAU02Z
User Manual
Makita GAU02Z
User Manual
-
 Makita GHU01M1
User Manual
Makita GHU01M1
User Manual
-
 Makita GHU01Z
User Manual
Makita GHU01Z
User Manual
-
 Makita GHU02M1
User Manual
Makita GHU02M1
User Manual
-
 Makita GHU02M1-BL4040
User Manual
Makita GHU02M1-BL4040
User Manual
-
 Makita GHU02Z
User Manual
Makita GHU02Z
User Manual
-
 Makita GHU03M1
User Manual
Makita GHU03M1
User Manual
-
 Makita GHU03Z
User Manual
Makita GHU03Z
User Manual
-
 Makita GHU04M1
User Manual
Makita GHU04M1
User Manual
-
 Makita GHU04Z
User Manual
Makita GHU04Z
User Manual
-
 Makita GHU05M1
User Manual
Makita GHU05M1
User Manual
-
 Makita GHU05Z
User Manual
Makita GHU05Z
User Manual
-
 Makita GRU02M1
User Manual
Makita GRU02M1
User Manual
-
 Makita GRU02Z
User Manual
Makita GRU02Z
User Manual
-
 Makita GRU05PM
User Manual
Makita GRU05PM
User Manual
-
 Makita UH004G
User Manual
Makita UH004G
User Manual
-
 Makita UH005G
User Manual
Makita UH005G
User Manual
-
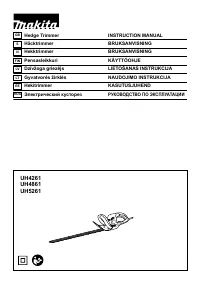 Makita UH4261
User Manual
Makita UH4261
User Manual
-
Makita UH4861
User Manual