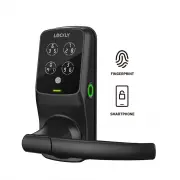
Lockly PGD 728W MB - Manuals
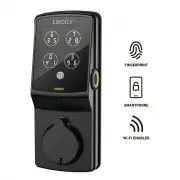
User Manual Lockly PGD 728W MB


Summary
33 Table of Contents TABLE OF CONTENTS 2.1 Product Overview - Exterior2.2 Product Overview - Interior2.3 Understanding Your New Lock2.4 Reset Button2.5 Keypad Display Switch2.6 Rebooting Your Lock 2.7 Low Battery 2.8 Changing The Battery Section 1 - Product Highlights Section 2 - Product Overview Se...
2.3 Understanding Your New Lock SECTION 2.3 After the installation of your new Lockly, understanding some key functions of operating your smart lock is important. The following guides will walk you through resetting a lock, adding/ deleting Access Codes , adding/deleting fingerprints , configuring y...
2.4 Reset Button SECTION 2.4 ~ 2.5 2.5 Keypad Display Switch The exterior keypad screen can be locked and turned off by using the ON/OFF switch at the back panel (interior) of the smart lock. When it is switched off, people who are outside cannot enter any access codes to unlock the door. 5 OFF ON R...
Lockly Electronic Deadbolts Manuals
-
 Lockly PGD 628F MB
User Manual
Lockly PGD 628F MB
User Manual
-
 Lockly PGD 628F SN
User Manual
Lockly PGD 628F SN
User Manual
-
 Lockly PGD 628F VB
User Manual
Lockly PGD 628F VB
User Manual
-
 Lockly PGD 628W MB
User Manual
Lockly PGD 628W MB
User Manual
-
 Lockly PGD 628W SN
User Manual
Lockly PGD 628W SN
User Manual
-
 Lockly PGD 728F MB
User Manual
Lockly PGD 728F MB
User Manual
-
 Lockly PGD 728F SN
User Manual
Lockly PGD 728F SN
User Manual
-
 Lockly PGD 728F VB
User Manual
Lockly PGD 728F VB
User Manual
-
 Lockly PGD 728W SN
User Manual
Lockly PGD 728W SN
User Manual
-
 Lockly PGD 728W VB
User Manual
Lockly PGD 728W VB
User Manual
-
 Lockly PGD798MB
User Manual
Lockly PGD798MB
User Manual
-
 Lockly PGD798SN
User Manual
Lockly PGD798SN
User Manual
-
 Lockly PGD7SSN
User Manual
Lockly PGD7SSN
User Manual