Page 2 - TABLE OF CONTENTS
2 TABLE OF CONTENTS TABLE OF CONTENTS 3 IMPORTANT SAFETY INSTRUCTIONS 8 PRODUCT OVERVIEW 8 Parts9 Accessories 10 OPERATION 10 Control Panel Overview11 Getting Started11 Changing Oven Settings 11 Settings11 Lockout12 Date & Time12 Clock Themes 12 Sabbath Mode13 Wi-Fi13 Remote Start13 Brightness13...
Page 3 - IMPORTANT SAFETY INSTRUCTIONS; WARNING; SAFETY PRECAUTIONS; DO NOT TOUCH HEATING ELEMENTS OR INTERIOR SURFACES OF OVEN.
3 IMPORTANT SAFETY INSTRUCTIONS ENGLISH IMPORTANT SAFETY INSTRUCTIONS Read and follow all instructions before using your oven to prevent the risk of fire, electric shock, personal injury, or damage when using the oven. This guide does not cover all possible conditions that may occur. Always contact ...
Page 4 - FLAMMABLE MATERIALS
4 IMPORTANT SAFETY INSTRUCTIONS WARNING • NEVER use your appliance for warming or heating the room. • DO NOT use water on grease fires. Should an oven fire occur, leave the oven door closed and turn the oven off. If the fire continues, throw baking soda on the fire or use a fire extinguisher. • Use ...
Page 5 - ELECTRICAL SAFETY; SAFETY DURING USE
5 IMPORTANT SAFETY INSTRUCTIONS ENGLISH ELECTRICAL SAFETY • Protective Liners . Do not use aluminum foil or any other material to line the oven bottoms. Improper installation of these liners may result in a risk of electric shock or fire. • Do Not allow aluminum foil or the meat probe to contact hea...
Page 6 - CHILD SAFETY; SAFETY WHEN CLEANING; COOK MEAT AND POULTRY THOROUGHLY
6 IMPORTANT SAFETY INSTRUCTIONS CHILD SAFETY WARNING • Children should be kept away from the oven. • Accessory parts will become hot when the broiler is in use. CAUTION • Children should not be left alone or unattended in an area where the appliance is in use. Children should never be allowed to sit...
Page 8 - PRODUCT OVERVIEW; Parts
8 PRODUCT OVERVIEW PRODUCT OVERVIEW Parts Make sure to understand the name and function of each part. Control panel Steam feeder tank Broiler pan & grid Standard racks Gliding racks (2) Oven door Gasket Rating label, model and serial number plateSpacer (2) - One on each side NOTE • The model and...
Page 9 - Accessories
9 PRODUCT OVERVIEW ENGLISH Accessories Make sure that all parts are included after purchasing this product. Accessories for Cooking Grid Heavy duty standard rack Broiler pan Gliding rack (2) Meat probe Accessories for Installation 4X14 6 wood screws for mounting (2 needed for installation and 4 extr...
Page 10 - OPERATION; Control Panel Overview; Display Icons
10 OPERATION OPERATION Control Panel Overview 1 2 3 4 1 Oven Mode Knob2 Temp Knob 3 LCD Display On/Off4 LCD Touchscreen for Oven Display Icons 1 2 3 4 5 6 7 8 *Icons appear in display when activated. 1 Timer Icon Touch to set a timer 2 Lamp Icon Touch to turn light on/off 3 Oven Cooling Icon Appears...
Page 11 - Getting Started; Settings; Lockout
11 OPERATION ENGLISH Getting Started After turning on the range for the first time, adjust the settings to suit your preferences. 1 Touch POWER on the LCD display. 2 After the startup animation, select the desired language and touch NEXT. 3 Scroll the fields up or down to set the correct date, and t...
Page 12 - Clock Themes
12 OPERATION Unlock 1 Touch any part of screen while Lockout is on. 2 A popup screen appears. Touch Unlock for 3 seconds. 3 The lock icon disappears from the top of the display. Date & Time The date and time show in the LCD display when the oven is not in use. Setting Date 1 Touch Settings at th...
Page 13 - Remote Start
13 OPERATION ENGLISH Wi-Fi Connect the appliance to a home Wi-Fi network to use Remote Start and other smart functions. See the Smart Functions section for more details. Setting Up Wi-Fi 1 Touch Settings at the center bottom of the Main screen, and touch Wi-Fi in the first Settings screen. 2 Follow ...
Page 14 - Language Selection
14 OPERATION Language Selection Set the display language to English, Spanish, or French. Selecting a Language 1 Touch Settings at the center bottom of the Main screen, swipe to the second Settings screen, and touch Language Selection. 2 Select the desired language. 3 Touch OK. Volume Adjust the volu...
Page 16 - Timer; Using the Oven; Before Using the Oven; Removing and Replacing Standard; CAUTION
16 OPERATION Timer The oven timers don't affect oven operation or cooking time. Use them as extra kitchen timers. Once the time runs out, the oven chimes and "Timer 1 or 2 finished" appears in the display. Setting the Timer 1 Touch either clock icon at the bottom of the display. 2 Scroll thr...
Page 17 - Rack and Pan Placement; Oven Vent
17 OPERATION ENGLISH Rack and Pan Placement If cooking on two racks:Place standard oven racks in positions B and D.Place the cookware as shown below. If baking with more than one pan, place the pans so that each one has at least 1” to 1 ½” of air space around them. A B C D E Multiple Rack Baking Sta...
Page 18 - Bake
18 OPERATION Bake Use BAKE to prepare foods such as pastries, breads and casseroles. The oven can be programmed to bake at any temperature from 170°F (80°C) to 550°F (285°C). The default temperature is 350°F (175°C). Setting the BAKE mode 1 Turn the Oven Mode knob to select the Bake mode. 2 Set the ...
Page 19 - Convection Modes
19 OPERATION ENGLISH Convection Modes Convection Bake and Convection Roast use a fan to circulate heat evenly within the oven. This improves heat distribution and allows for even cooking and excellent results whether cooking on one rack or multiple racks.The convection modes on the oven can be progr...
Page 20 - Tips for Convection Roasting
20 OPERATION Tips for Convection Roasting Use a broiler pan and grid when preparing meats for Convection roast, RapidHeat Roast and Broil. The broiler pan catches grease spills and the grid helps prevent grease splatters. 1 Place the oven rack in position A or B. See the Rack and Pan Placement. 2 Pl...
Page 21 - Broil
21 OPERATION ENGLISH Broil Broiling uses an intense, radiant heat to cook food. Both the inner and outer broil elements heat during full broiling. Only the inner broil element heats during center broiling. The element(s) cycle on and off at intervals to maintain the oven temperature. The meat probe ...
Page 22 - Recommended Broiling Guide
22 OPERATION Smoking Due to the intense heat associated with broiling, it is normal to experience smoke during the cooking process. This smoke is a natural by-product of searing and should not cause you to worry. If you are experiencing more smoke than you are comfortable with, use the following tip...
Page 24 - Broiling Tips; Warm
24 OPERATION Broiling Tips Beef • Steaks and chops should always be allowed to rest for 5 minutes before being cut into and eaten. This allows the heat to distribute evenly through the food and creates a more tender and juicy result. • Pieces of meat that are thicker than two inches should be remove...
Page 25 - Proof
25 OPERATION ENGLISH Proof The Proof feature maintains a warm environment for rising yeast-leavened products before baking. NOTE For best results, cover the dough with a cloth or with plastic wrap. (The plastic may need to be anchored underneath the container so the oven fan does not blow it off.) S...
Page 28 - My Recipe
28 OPERATION My Recipe For frequently used cooking menus, you can combine up to three different temperatures and cooking modes into one hot key. Creating My Recipe • When combining two or more cooking modes, a cooking time or probe temperature must be set before selecting an additional cooking mode....
Page 29 - Auto Cook Guide
29 OPERATION ENGLISH Auto Cook Guide • Preheat oven first for most items. • Preheat for 5 minutes when broiling. • If using probe, insert after preheating. NOTE • When cooking thin cuts of meat, insert the probe into the thickest part of the meat. If the probe is inserted incorrectly, the oven could...
Page 30 - Gourmet Steam Guide
30 OPERATION Category Menu Accessories/Cookware Shelf Position Cooking time in min. Pizza Frozen Thin Crust Directly on rack 3 10~20 On pizza pan 3 10~20 On pizza stone 3 10~20 Frozen Rising Crust Directly on rack 3 10~20 On pizza pan 3 10~20 On pizza stone 3 10~20 From Scratch/Homemade Directly on ...
Page 31 - Steam Function
31 OPERATION ENGLISH Steam Function Steam cooking uses the moist heat of steam to cook food. This is an ideal cooking method for delicate food items such as seafood, which can lose nutrients when boiled.The oven provides 3 methods of steam cooking: Gourmet Steam, SousVide and Steam Combi. CAUTION • ...
Page 33 - Sous Vide
33 OPERATION ENGLISH Sous Vide Sous vide cooking uses steam to cook foods “low and slow.” Use it to cook meat, fish, seafood, poultry or vegetables. Food must be vacuum packced in pouches.It is not necessary to preheat the oven when using sous vide. Refer to the cooking guide for recommended sous vi...
Page 34 - SMART FUNCTIONS; LG ThinQ Application; LG ThinQ Application Features; Models with QR Code
34 SMART FUNCTIONS SMART FUNCTIONS LG ThinQ Application This feature is only available on models with Wi-Fi.The LG ThinQ application allows you to communicate with the appliance using a smartphone. LG ThinQ Application Features • SpeedClean™ − Allows you to set SpeedClean™ alerts, read the instructi...
Page 35 - Smart DiagnosisTM Feature; Using LG ThinQ to Diagnose Issues
35 SMART FUNCTIONS ENGLISH NOTE • If the appliance cannot be connected due to problems with the wireless signal transmission, unplug the appliance and wait about a minute before trying again. • If the firewall on your wireless router is enabled, disable the firewall or add an exception to it. • The ...
Page 36 - Using Audible Diagnosis to Diagnose
36 SMART FUNCTIONS Using Audible Diagnosis to Diagnose Issues Follow the instructions below to use the audible diagnosis method. • Launch the LG ThinQ application and select the Smart Diagnosis feature in the menu. Follow the instructions for audible diagnosis provided in the LG ThinQ application. 1...
Page 37 - FCC Notice
37 SMART FUNCTIONS ENGLISH FCC Notice The following notice covers the transmitter module contained in this product. This equipment has been tested and found to comply with the limits for a Class B digital device, pursuant to Part 15 of the FCC Rules. These limits are designed to provide reasonable p...
Page 38 - MAINTENANCE; Self Clean; Before Starting Self Clean
38 MAINTENANCE MAINTENANCE Self Clean The Self Clean cycle uses extremely hot temperatures to clean the oven cavity. While running the Self Clean cycle, you may notice smoking or an odor. This is normal, especially if the oven is heavily soiled.During the Self Clean cycle, the kitchen should be well...
Page 39 - Setting Self Clean; During Self Clean
39 MAINTENANCE ENGLISH Setting Self Clean The Self- Clean function has cycle times of 3, 4, or 5 hours. Self Clean Soil Guide Soil Level Cycle Setting Lightly soiled oven cavity 3 Hour Self Clean Moderately soiled oven cavity 4 Hour Self Clean Heavily soiled oven cavity 5 Hour Self Clean 1 Remove al...
Page 40 - Hard Water Scale
40 MAINTENANCE Steam Feeder Tank The steam feeder tank is used during the steam cooking functions. Use filtered, softened water if possible. NOTE • After using the steam function, the steam feeder tank should be drained. To avoid bacteria or odors, clean and dry the steam feeder tank after every use...
Page 41 - When to use SpeedCleanTM; SpeedCleanTM
41 MAINTENANCE ENGLISH BENEFITS OF SpeedClean™ • Helps loosen light soils before hand-cleaning • SpeedClean™ only uses water; no chemical cleaners • Makes for a better Self Clean experience − Delays the need for a Self Clean cycle − Minimizes smoke and odors − Can allow shorter Self Clean time When ...
Page 42 - Cleaning Tips; SpeedCleanTM Instruction Guide
42 MAINTENANCE Cleaning Tips • Allow the oven to cool to room temperature before using the SpeedClean™ cycle. • A plastic spatula can be used as a scraper to scrape off any chunks or debris before and during oven cleaning. • Using the rough side of a non-scratch scouring pad may help to take off bur...
Page 43 - Cleaning the Exterior; Painted Surfaces
43 MAINTENANCE ENGLISH 8 Clean the oven cavity immediately after the SpeedClean™ cycle by scrubbing with a wet, non-scratch scouring sponge or pad. (The scouring side will not scratch the finish.) Some water may spill into the bottom vents while cleaning, but it will be captured in a pan under the o...
Page 44 - Oven Door; Broiler Pan and Grid
44 MAINTENANCE Oven Door • Use soapy water to thoroughly clean the oven door. Rinse well. DO NOT immerse the door in water. • You may use a glass cleaner on the outside glass of the oven door. DO NOT spray water or glass cleaner on the door vents. • DO NOT use oven cleaners, cleaning powders, or har...
Page 45 - Changing the Oven Light; Removing and Replacing the; Removing the Oven Door
45 MAINTENANCE ENGLISH Changing the Oven Light The oven light is a standard 25-watt halogen bulb. WARNING • Make sure that the oven and bulb are cool. • Disconnect the electrical power to the oven at the main fuse or circuit breaker panel. Failure to do so can result in severe personal injury, death...
Page 46 - Replacing the Door
46 MAINTENANCE Replacing the Door 1 Firmly grasp both sides of the door at the top. 2 With the door at the same angle as the removal position, seat the indentation of the hinge cams into the bottom edge of the hinge slots. The notch in the hinge cams must be fully seated into the bottom edge of the ...
Page 47 - TROUBLESHOOTING; FAQs
47 TROUBLESHOOTING ENGLISH TROUBLESHOOTING FAQs My new oven doesn’t cook like my old one. Is there something wrong with the temperature settings? No, Your oven has been factory tested and calibrated. For the first few uses, follow your recipe times and temperatures carefully. If you still think your...
Page 49 - Before Calling for Service
49 TROUBLESHOOTING ENGLISH Before Calling for Service Before you call for service, review this list. It may save you time and expense. The list includes common occurrences that are not the result of defective workmanship or materials in this appliance. Symptoms Possible Causes / Solutions Oven contr...
Page 54 - MEMO
Page 55 - Customer Information Center; USA
Customer Information Center For inquires or comments, call: 1-855-790-6655 USA Printed in Korea


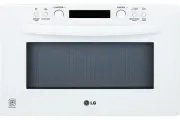 LG MA3281GW
User Manual
LG MA3281GW
User Manual
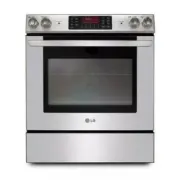
 LG WCES6428F
User Manual
LG WCES6428F
User Manual
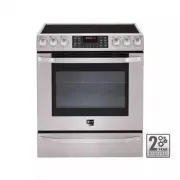
 LG WDEP9427F
User Manual
LG WDEP9427F
User Manual
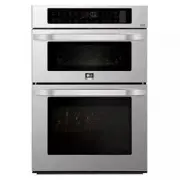
 LG WDES9428F
User Manual
LG WDES9428F
User Manual
 LG WSES4728F
User Manual
LG WSES4728F
User Manual
 LG LSE3090ST
User Manual
LG LSE3090ST
User Manual
 LG LSES302ST
User Manual
LG LSES302ST
User Manual
 LG LSWC307ST
User Manual
LG LSWC307ST
User Manual
 LG LSWD300BD
User Manual
LG LSWD300BD
User Manual
 LG LSWD305ST
User Manual
LG LSWD305ST
User Manual
 LG LSWD306ST
User Manual
LG LSWD306ST
User Manual
 LG LSWD307ST
User Manual
LG LSWD307ST
User Manual
 LG LSWD309BD
User Manual
LG LSWD309BD
User Manual
 LG LSWS300BD
User Manual
LG LSWS300BD
User Manual
 LG LSWS305ST
User Manual
LG LSWS305ST
User Manual
 LG LSWS306ST
User Manual
LG LSWS306ST
User Manual