Page 3 - IMPORTANT SAFETY INSTRUCTIONS
- 3 - WARNING! READ ALL INSTRUCTIONS IN THIS GUIDE BEFORE ASSEMBLING OR USING YOUR VACUUM CLEANER. To reduce the risk of fire, electrical shock, injury to persons or damage when using your vacuum cleaner, follow all safety precautions listed below. IMPORTANT SAFETY INSTRUCTIONS • Use your vacuum onl...
Page 4 - SAVE THESE INSTRUCTIONS; NOTICE
- 4 - IMPORTANT SAFETY INSTRUCTIONS SAVE THESE INSTRUCTIONS Household use only. toxic materials. • Do not pick up hard or sharp objects such as glass, nail, screws or coins that could damage the vacuum cleaner. • To avoid excessive heat and damage to unit or batteries, do not operate the vacuum whil...
Page 5 - KENMORE VACUUM CLEANER WARRANTY
- 5 - KENMORE VACUUM CLEANER WARRANTY KENMORE LIMITED WARRANTY FOR ONE YEAR from the date of sale this product is warranted against defects inmaterial or workmanship. WITH PROOF OF SALE a defective product will be replaced free of charge. The Kenmore brand is used under license. Direct all claims fo...
Page 7 - PARTS AND FEATURES
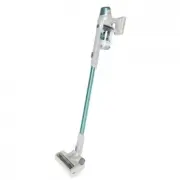
- 7 - PARTS AND FEATURES Hand Vacuum 2-in-1 Combination Tool Screw (2) Motorized Nozzle Charging Adapter Wand Wall Mountable Bracket
Page 9 - ASSEMBLY INSTRUCTIONS
- 9 - 1. Insert the hand vacuum into the top of the wand until you hear a click. Before assembling the vacuum cleaner, check the PACKING LIST (Page 2). Use this list to verify that you have received all the components of your new Kenmore CSV Go Cordless Stick Vac. ASSEMBLY INSTRUCTIONS 2. Insert the...
Page 10 - WARNING; CHARGING
- 10 - 1. Insert the charging adapter plug into the charging port on the side of the hand vacuum base. 2. Plug the adapter into a wall outlet. The battery indicator will begin to pulse blue. WARNING Before charging make sure the unit is turned OFF. CHARGING NOTE: The unit can be charged while it is ...
Page 13 - EMPTYING DUST CUP AND CLEANING FILTER; Dust Cup Emptying
2. Close dust cup lid until you hear a click. WARNING: Do not operate vacuum cleaner without filters in place.1. With one hand grasped around the handle, press the filter release button to separate the dust cup and filters from the hand vacuum. VACUUM MAINTENANCE AND CARE CAUTION To reduce the risk ...
Page 15 - CAUTION; CLEANING THE MOTORIZED NOZZLE & BLOCKAGES
Brush Roll Manual Cleaning 1. Make sure the vacuum cleaner is turned off. Remove the wand and the hand vacuum from the motorized nozzle and set aside. 2. Turn the nozzle over to access the brush roll. As shown below, press and push the tab on the left hand side of the nozzle to the left and hold it....
Page 18 - TROUBLESHOOTING
- 18 - TROUBLESHOOTING Brush roll in the motorized nozzle is not turning. The dust cup is installed incorrectly. Reinstall the dust cup correctly as instructed on page 14. The hand vacuum and the wand are not connected into place. Reinstall the hand vacuum and the wand correctly as instructed on pag...
Page 20 - INSTRUCCIONES DE SEGURIDAD IMPORTANTES
- 2 - ¡ADVERTENCIA! LEA TODAS LAS INSTRUCCIONES DE ESTA GUÍA ANTES DE ENSAMBLAR O USAR SU ASPIRADORA. Para reducir el riesgo de incendio, descarga eléctrica, lesiones a personas o daños al usar su aspiradora, siga todas las precauciones de seguridad indicadas a continuación. INSTRUCCIONES DE SEGURID...
Page 21 - AVISO
- 3 - INSTRUCCIONES DE SEGURIDAD IMPORTANTES • Mantenga la aspiradora moviéndose sobre la superficie alfombrada en todo momento para así evitar que las fibras de la alfombra se dañen. • No aspire líquidos.• No usar en un espacio confinado donde pueda haber presentes vapores de pintura, diluyente, su...
Page 22 - GUARDE ESTAS INSTRUCCIONES
- 4 - GUARDE ESTAS INSTRUCCIONES Exclusivamente para uso doméstico. basura doméstica corriente. Consulte a su autoridad de eliminación local para obtener información sobre la disponibilidad de opciones de reciclaje o eliminación. INSTRUCCIONES DE SEGURIDAD IMPORTANTES
Page 23 - GARANTÍA DE LA ASPIRADORA KENMORE
- 5 - GARANTÍA DE LA ASPIRADORA KENMORE GARANTÍA LIMITADA KENMORE DURANTE UN AÑO a contar de la fecha de venta, este producto está garantizado contra defectos en sus materiales o fabricación cuando se ensambla, opera y mantiene siguiendo todas las instrucciones proporcionadas. Un producto defectuoso...
Page 25 - PIEZAS Y CARACTERÍSTICAS
- 7 - PIEZAS Y CARACTERÍSTICAS Aspiradora de mano Herramienta combinada 2 en 1 Tornillo (2) Boquilla motorizada Adaptador de carga Vara Soporte de montaje para pared
Page 26 - Herramientas combinadas; Tapones de sujeción de fricción
- 8 - La boquilla motorizada y la herramienta combinada pueden insertarse o en la aspiradora de mano o en la vara. Escuchará un clic si la boquilla motorizada se inserta correctamente. Herramientas combinadas El cepillo combinado puede usarse como herramienta para grietas o como cepillo para quitar ...
Page 27 - INSTRUCCIONES DE MONTAJE
- 9 - 1. Inserte la aspiradora de mano en la parte superior de la vara hasta que escuche un clic. Antes de ensamblar la aspiradora, revise la LISTA DE EMPAQUE (Página 2). Use esta lista para asegurarse de haber recibido todos los componentes de su nueva aspiradora inalámbrica de vara Kenmore CSV Go....
Page 28 - ADVERTENCIA; CARGA
- 10 - 1. Inserte el conector del cargador al puerto de carga del costado de la base de la aspiradora de mano. 2. Enchufe el adaptador a una toma de pared. El indicador de la batería comenzará a pulsar de color azul. ADVERTENCIA Antes de cargarla, asegúrese de que la unidad esté apagada. CARGA NOTA:...
Page 31 - Vaciado del contenedor de polvo
2. Cierre la tapa del contenedor de polvo hasta que escuche un clic. ADVERTENCIA: No use la aspiradora sin los filtros instalados.1. Con una mano sobre la manilla, presione el botón de liberación del filtro para separar al contenedor de polvo y filtros de la aspiradora. MANTENIMIENTO Y CUIDADO DE LA...
Page 33 - LIMPIEZA DE LA BOQUILLA MOTORIZADA Y BLOQUEOS
Limpieza manual del cepillo de rodillo 1. Asegúrese de que la aspiradora esté apagada. Retire la varilla y la aspiradora de mano de la boquilla motorizada y déjela a un lado. 2. Gire la boquilla para obtener acceso al cepillo de rodillo. Como se indica a continuación, presione y empuje la pestaña de...
Page 36 - RESOLUCIÓN DE PROBLEMAS
- 18 - RESOLUCIÓN DE PROBLEMAS Los desechos se acumulan en los contactos metálicos que conectan el contenedor de polvo y el cuerpo principal de la aspiradora de mano. Quite los sedimentos y reinstale siguiendo las instrucciones de la página 14. El contenedor de polvo está instalado incorrectamente. ...