Page 2 - Warnings, Cautions and Others; IMPORTANT FOR LASER PRODUCTS
G-1 Warnings, Cautions and Others IMPORTANT for the U.K. DO NOT cut off the mains plug from this equipment. If the plug fitted is not suitable for the power points in your homeor the cable is too short to reach a power point, thenobtain an appropriate safety approved extension lead orconsult your de...
Page 3 - Front View
G-2 SAFETY INSTRUCTIONS “SOME DOS AND DON’TS ON THE SAFE USE OF EQUIPMENT” This equipment has been designed and manufactured to meet international safety standards, but like any electrical equip-ment, care must be taken if you are to obtain the best results and safety is to be assured. Do read the o...
Page 4 - Introduction; About This Manual; • The manual mainly explains operations using the; Precautions; Installation
1 Introduction About This Manual This manual is organized as follows: • The manual mainly explains operations using the buttons on the remote control.You can use the buttons both on the remotecontrol and on the main unit for the sameoperations if they have the same or similar names(or marks), unless...
Page 5 - Contents
2 Contents Location of the Buttons ............................................... 3 Main Unit .......................................................................... 3Remote Control ................................................................. 5 Getting Started .................................
Page 6 - Top view; Become familiar with the buttons on your unit.; Main Unit; Location of the Buttons
3 MICRO COMPONENT SYSTEM STANDBY w q e r t Top view Front view TIMER/SNOOZE MULTI CONTROL ONE TOUCH REC AHB PRO VOLUME AUX TAPE CD TUNER BAND COMPACT DIGITAL AUDIO P H O N E S 4 ¢ 7 OPEN 9 7 p 1 2 5 6 8 4 3 Become familiar with the buttons on your unit. Main Unit Location of the Buttons EN01-15_UX-H...
Page 7 - BASS
4 Main unit 1 PHONES jack (11) 2 Disc cover 3 TIMER/SNOOZE button (10, 22 – 24) 4 ONE TOUCH REC (recording) button (20, 21) 5 (standby/on) button (11, 23) 6 Source buttons• AUX, @ # TAPE, BAND TUNER, and # / 8 CD Pressing one of these buttons also turns on theunit. 7 MULTI CONTROL buttons• 4 (revers...
Page 8 - Remote Control; See the pages in parentheses for details.
5 Remote Control See the pages in parentheses for details. 1 Number buttons 2 BASS button (11) 3 Multi control buttons• UP, 4 (reverse skip), 7 (stop), ¢ (forward skip), and DOWN 4 SET button (13) 5 Source buttons• 3 / 8 CD, 2 3 TAPE, TUNER, and AUX Pressing one of these buttons also turns on theuni...
Page 9 - Getting Started; Supplied Accessories; FM antenna; Extend the FM antenna.; About the supplied FM antenna; To connect an outdoor FM antenna; Continued
6 Getting Started Supplied Accessories Make sure that you have all the following items.The number in parentheses indicates the quantity ofeach piece supplied.• AM loop antenna (1)• FM antenna (1)• AC power cord (1)• Remote control (1)• Batteries (2) If anything is missing, consult your dealerimmedia...
Page 10 - For better reception of both FM and AM (MW); Connecting Speakers; to; Release your finger from the clamp.
7 1 Connect the AM loop antenna to theAM LOOP terminals as illustrated. 2 Turn the AM loop antenna until youhave the best reception. To connect an outdoor AM (MW) antenna When reception is poor, connect a single vinyl-coveredwire to the AM EXT terminal and extend ithorizontally. The AM loop antenna ...
Page 11 - To remove the speaker grille,; insert your fingers at; To attach the speaker grille,; follow the illustration; Connecting Other Equipment; To connect an audio equipment; The speaker grilles are removable.; To connect the AC power cord; For playing other equipment through this unit,; A C I N
8 Speaker grille To remove the speaker grille, insert your fingers at the top of the speaker grille, pull towards you. Thenpull the bottom towards you. To attach the speaker grille, follow the illustration above. Connecting Other Equipment To connect an audio equipment You can connect audio equipmen...
Page 12 - When using the unit in your car
9 Putting the Batteries into the RemoteControl Insert the batteries—R6(SUM-3)/AA(15F)—into theremote control, by matching the polarity (+ and –) onthe batteries with the + and – markings on the batterycompartment.When the remote control can no longer operate theunit, replace both batteries at the sa...
Page 13 - Common Operations; Setting the Clock; To check the clock time during play; • Each time you press the button, the; • When you unplug the power cord or if a power failure; To change the clock
10 Common Operations Setting the Clock Before operating the unit any further, first set the unit’sclock. When you plug in the power cord, the CLOCK indicator and “0:00” start flashing on the display.You can set the clock whether the unit is on or off.• There is a time limit in doing the following st...
Page 14 - On the remote control ONLY:; Press; Reinforcing the Bass Sound; To cancel the effect,; Turning On the Power; To switch off the power supply completely,; Adjusting the Volume; For private listening
11 Adjusting the Tone (Bass/Treble) You can adjust the bass level (low frequency range)and the treble level (high frequency range) within arange of –5 to +5.When shipped, the bass level set to “BASS 0” and thetreble level set to “TREBLE +1.”• This function only affects the playback sound, and does n...
Page 15 - Tuning in to a Station; STEREO; When you press; To change the FM reception mode; To restore the stereo effect,; MONO; Presetting Stations; You can preset 30 FM and 15 AM (MW) stations
12 Tuning in to a Station 1 Press TUNER (or BANDTUNER on the unit) to selectthe band. The unit automatically turns on andtunes in to the previously receivedstation—either FM or AM (MW).• Each time you press the button, the band alternates between FM and AM(MW). 2 Press and hold ¢ or 4 for more than ...
Page 16 - To preset stations manually—Manual presetting; Tuning in to a Preset Station; Receiving FM Stations with RDS; RDS; Enhanced Other Networks:; More about RDS
13 To preset stations manually—Manual presetting You need to preset stations separately for the FM andAM (MW) bands.• There is a time limit in doing the following steps. If the setting is canceled before you finish, start overfrom step 2 . On the remote control ONLY: 1 Tune in to the station you wan...
Page 17 - PS; Changing the RDS Information; • If no PS, PTY, or RT signals are sent by a station; To search for a program using the PTY codes; Press PTY SEARCH once again.; To stop searching any time during the process,
14 DISPLAY PS (Program Service) PTY (Program Type) RT (Radio Text) Station frequency (or preset channel no.) Changing the RDS Information You can see RDS information on the display whilelistening to an FM station. On the remote control ONLY: Press DISPLAY (orange-colored). • Each time you press the ...
Page 18 - NEWS
15 Switching Temporarily to a ProgramType of Your Choice The Enhanced Other Networks function allows the unitto switch temporarily to a broadcast program of yourchoice (TA, NEWS, and INFO) from a differentstation.• The function only works when you are listening to a preset FM RDS stations providing ...
Page 19 - Playing Back Discs; General notes; Playing Back the Entire Disc—Normal Play; • If the disc cannot be read correctly (because it is; • If no disc is inserted; • If the loaded disc has more than 15 tracks
16 Playing Back Discs This unit has been designed to play back the followingdiscs—CD, CD-R, and CD-RW. When playing a CD-R or CD-RW User-edited CD-Rs (CD-Recordable) and CD-RWs(CD-ReWritable) can be played only if they arealready “finalized.”• Usually you can play back your original CD-Rs or CD-RWs ...
Page 20 - Basic Disc Operations; To stop playing for a moment; To locate a particular point in a track; You can program up to 20 tracks.; If you try to program a 21st track; To exit from Program Play,; PROGRAM
17 Basic Disc Operations While playing a disc, you can do the followingoperations. To stop playing for a moment During play, press 3 / 8 CD. While pausing, the elapsed playing timeflashes on the display. To resume playing, press 3 / 8 CD again. To go to another track Before or during play, press ¢ o...
Page 21 - Repeating Tracks—Repeat Play; ALL; Playing at Random—Random Play; RANDOM; Canceled
18 To skip the current track, press ¢ . • You cannot go back to the previous track by pressing 4 . To stop playing, press 7 . To exit from Random Play, press RANDOM before or after playing.Random Play is canceled and Normal Playresumes.• The RANDOM indicator goes off. Repeating Tracks—Repeat Play Yo...
Page 22 - Playing Back Tapes; Playing Back a Tape; If no cassette is inserted when you press; To remove the cassette,; To play both sides—Reverse Mode
19 Playing Back Tapes You can play back type I tapes. Playing Back a Tape 1 Press ) for cassette deck on the unit. The cassette holder opens. 2 Put a cassette in with the exposed partof the tape down. 3 Close the cassette holder cover gently. 4 Press 2 3 TAPE. The unit automatically turns on andthe ...
Page 23 - Recording; • If no cassette is inserted when you press REC; • If a protected tape is inserted when you press REC; To stop while recording,; To record on both sides—Reverse Mode; To protect your recording; At the start and end of cassette tapes; Recording on a Tape
20 Recording 2 Close the cassette holder gently andcheck the recording direction for thetape. • If the tape direction is not correct, press 2 3 TAPE twice then 7 to change the tape direction. • If you want to record on both sides of a tape, see “To record on both sides—Reverse Mode.” 3 Start playing...
Page 24 - Disc Direct Recording; One Track Recording; Repeat steps
21 Disc Direct Recording Everything on the disc goes onto the tape in the order itis on the disc, or according to the order you have set inProgram Play. On the unit ONLY: 1 Put a recordable cassette in with theexposed part of the tape down. 2 Load a disc. • If the current playing source is not the C...
Page 25 - Using the Timers; Using Daily Timer and Recording Timer; How the timer actually works; OFF; On the remote control:
22 Using the Timers There are four timers available—Daily Timer,Recording Timer, Snooze Timer, and Sleep Timer.Before using the timers, you need to set the unit’sclock (see page 10). Using Daily Timer and Recording Timer You can set the timer whether the unit is on or off. How the timer actually wor...
Page 26 - Select the volume level.; Adjust the clock if you need.; To deactivate the timer temporarily,; • If the unit is turned on when the timer on-time comes
23 4 Select the timer (DailyTimer or Recording Timer)with the source to play. On the remote control: Press UP or DOWN to select the timer, then pressCLOCK/TIMER. On the unit: Press ¢ or 4 to select the timer, then press TIMER/SNOOZE. • Each time you press UP ( ¢ ) or DOWN ( 4 ), the timer mode and t...
Page 27 - Using Sleep Timer; How the Sleep Timer actually works; To check the remaining time until the shut-off time,; Using Snooze Timer
24 Using Sleep Timer With the Sleep Timer, you can fall asleep to music. Youcan set the Sleep Timer when the unit is turned on. How the Sleep Timer actually works The unit automatically turns off after the specified timelength passes. On the remote control ONLY: 1 Press SLEEP. The time length until ...
Page 28 - Maintenance; Handling cassette tapes; To clean the heads, capstans, and pinch rollers; Cleaning the unit; • Stains on the unit; Handling discs; To clean the disc
25 Maintenance To get the best performance from the unit, keep your discs, tapes, and mechanism clean. Handling cassette tapes • If the tape is loose in its cassette, take up the slack by inserting apencil in one of the reels androtating. • If the tape is loose, it may get stretched, cut, or caught ...
Page 29 - Troubleshooting; Symptom
26 Troubleshooting If you are having a problem with your unit, check this list for a possible solution before calling for service.If you cannot solve the problem from the hints given here, or the unit has been physically damaged, call a qualifiedperson, such as your dealer, for service. Symptom No s...
Page 30 - Additional Information; Description of the PTY codes:
27 Additional Information NEWS : News. AFFAIRS : Topical program expanding or enlargingupon the news—debate, or analysis. INFO : Program the purpose of which is to impartadvice in the widest sense. SPORT : Program concerned with any aspect ofsports. EDUCATE : Educational programs. DRAMA : All radio ...
Page 31 - Specifications; Immeasurable
28 Specifications Amplifier Output Power: 20 W (10 W + 10 W) at 4 Ω (10% THD) Audio input sensitivity/Impedance (at 1 kHz) AUX: 500 mV/48.75 k Ω Speakers/Impedance: 4 Ω Tuner FM tuning range: 87.50 MHz – 108.00 MHz AM tuning range: MW: 522 kHz – 1 629 kHz CD player Dynamic range: 85 dB Signal-to-noi...


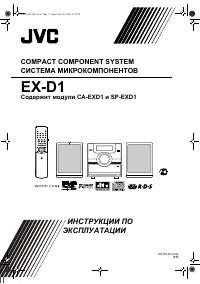 JVC EX-D1
Manual
JVC EX-D1
Manual
 JVC NX-F3
Manual
JVC NX-F3
Manual
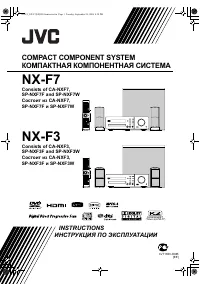 JVC NX-F7
Manual
JVC NX-F7
Manual
 JVC NX-PN7
Manual
JVC NX-PN7
Manual
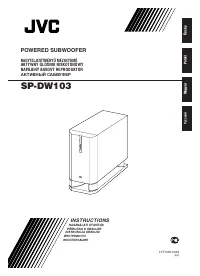 JVC SP-DW103
Manual
JVC SP-DW103
Manual
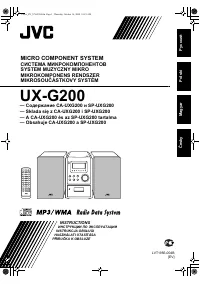 JVC UX-G200
User Manual
JVC UX-G200
User Manual
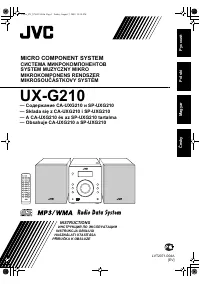 JVC UX-G210
User Manual
JVC UX-G210
User Manual
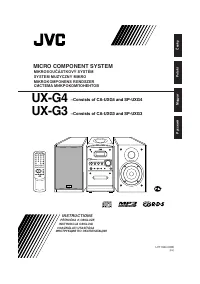 JVC UX-G3
User Manual
JVC UX-G3
User Manual
 JVC UX-GD6M
Manual
JVC UX-GD6M
Manual
 JVC UX-LP5
Manual
JVC UX-LP5
Manual
 JVC UX-L30R
Manual
JVC UX-L30R
Manual
 JVC UX-J60
Manual
JVC UX-J60
Manual
 JVC UX-J50
Manual
JVC UX-J50
Manual
 JVC UX-H35
Manual
JVC UX-H35
Manual
 JVC UX-H33
Manual
JVC UX-H33
Manual
 JVC UX-G60
Manual
JVC UX-G60
Manual
 JVC UX-G48
Manual
JVC UX-G48
Manual