Page 2 - Safety warnings
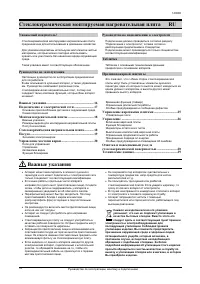
2 Dear customer! This electric integrated gas hotplate cooker is manufactured for household use. Our appliances are packed in the environmentally friendly materials which may be recycled, deposited or destroyed without any hazard to the environment. Such packaging materials are also labeled accordin...
Page 3 - TECHNICAL INSTRUCTIONS AND INSTALLATION; Important warnings; Unattended cooking on a hob with fat or oil can be dangerous and
3 TECHNICAL INSTRUCTIONS AND INSTALLATION Important warnings • Installation of the appliance (installation class:3) into a kitchen worktop and its connection to the power mains and the gas supply may only be performed by an adequately qualified technician. • When the appliance is in use, additional ...
Page 4 - INSTALLATION; Range hoods and exaust fans shall; Gas inlet is located at the rear right 25mm from the edge.
4 INSTALLATION Important warnings This appliance must be installed by an authorised person in accordance with this instruction manual, AS/NZS 5601 – Gas installations (installation and pipe sizing), local gas fitting regulations, local electrical regulations, local water regulations, local health re...
Page 5 - Do not install the appliance without the foam gasket!; Installation procedure; CONNECTING THE APPLIANCE TO THE POWER MAINS
5 A (mm) 585 B (mm) 510 C (mm) 560 D (mm) 480 E (mm) 40 F (mm) 5 G (mm) 50 Installing the foam gasket Before inserting the appliance into the opening in the kitchen worktop, the supplied foam gasket must be attached to the lower side of the glass ceramic (glass) cooking hob (see fi gure above). Do n...
Page 6 - should be connected to the; The following can be used for connection:; CONNECTING THE COOKING HOB TO THE GAS SUPPLY
6 consistent with the voltage in your home circuit. • The rating plate with basic information is attached on the lower side of the hob. • The appliance is manufactured for use with the power supply voltage 220-240 V ~. • In order to make a fixed connection to the mains, insert an all-pole circuit br...
Page 7 - Connection; After connecting the gas hob, check the joints for any leaks.; . These pipes must be
7 Connection • When connecting the appliance to the gas supply, follow the regulations of the local gas distributor. • On the lower side, the cooking hob is fitted with a gas connection plug with a ISO7-1 R1/2 thread. • Also supplied with the appliance is an adapter for liquid gas, a taper male, and...
Page 8 - Adjustment elements; Minimum thermal load regulation valve; TECHNICAL INFORMATION; BURNERS; Semirapid
8 Adaptation to a different type of gas • The procedure or adaptation of the cooker to another type of gas does not require removal of the appliance from the worktop. • Before adapting, disconnect the appliance from the power mains and close the gas supply valve. • Replace the existing nozzles for n...
Page 9 - NOZZLE TABLE; Burner; emitted into the room.; Cookware
9 NOZZLE TABLE Burner A SR MW Rated heat output (MJ/h) 3,60 6,30 11,88 Reduced Rate (MJ/h) 1,62 2,52 5,40 Ø INJECTOR (mm) Universal LPG 0,50 0,65 0,85 Ø BY-PASS (mm) Universal LPG 0,27 0,34 0,55 Natural gas REG. REG. REG. Important warnings • The gas burners are fitted a candle as flame failure devi...
Page 10 - Hob control elements; User’s instructions
10 INSTRUCTIONS FOR USE AND MAINTENANCE OPERATION Hob control elements Gas valve closed Ignition Maximum power Minimum power Ignition and operation of the burners User’s instructions This appliance must be used for the purpose it was designed for, i.e. domestic cooking. Any other use is considered t...
Page 11 - CLEANING AND MAINTENANCE; Remove any soiling immediately.; Stainless steel surfaces; Do not clean the pan support in a dishwasher.; Burners; Do not clean any parts of the burner in a dishwasher.
11 CLEANING AND MAINTENANCE Do not use a steam cleaning appliance to clean this appliance. The steam could reach the electrical components and cause a short circuit. The appliance should be cleaned regularly, preferably after each use, after cooling down. To avoid water marks and limescale depos...
Page 13 - PROBLEM SOLVING GUIDE; Important; carry out any repairs.; Problem; Wrong gas power setting. Have an expert check he gas
13 PROBLEM SOLVING GUIDE Important ▪ During the warranty period, only a service center authorized by the manufacturer may carry out any repairs. ▪ Before making any repairs, make sure the appliance is disconnected from the power mains either by removing the fuse or by disconnecting the power plug fr...